
How to Create a Policy Using the Wizard - Agent Operations - Advanced Options
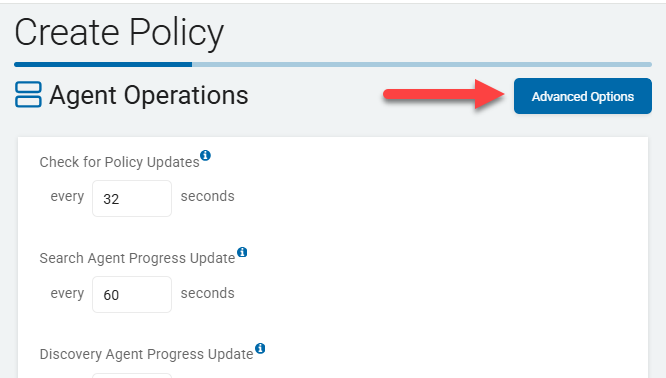
After completing the Agent Operations page of the Create Policy wizard, click the Next button to proceed to the Agent Operations - Advanced Options page to input more detailed options.
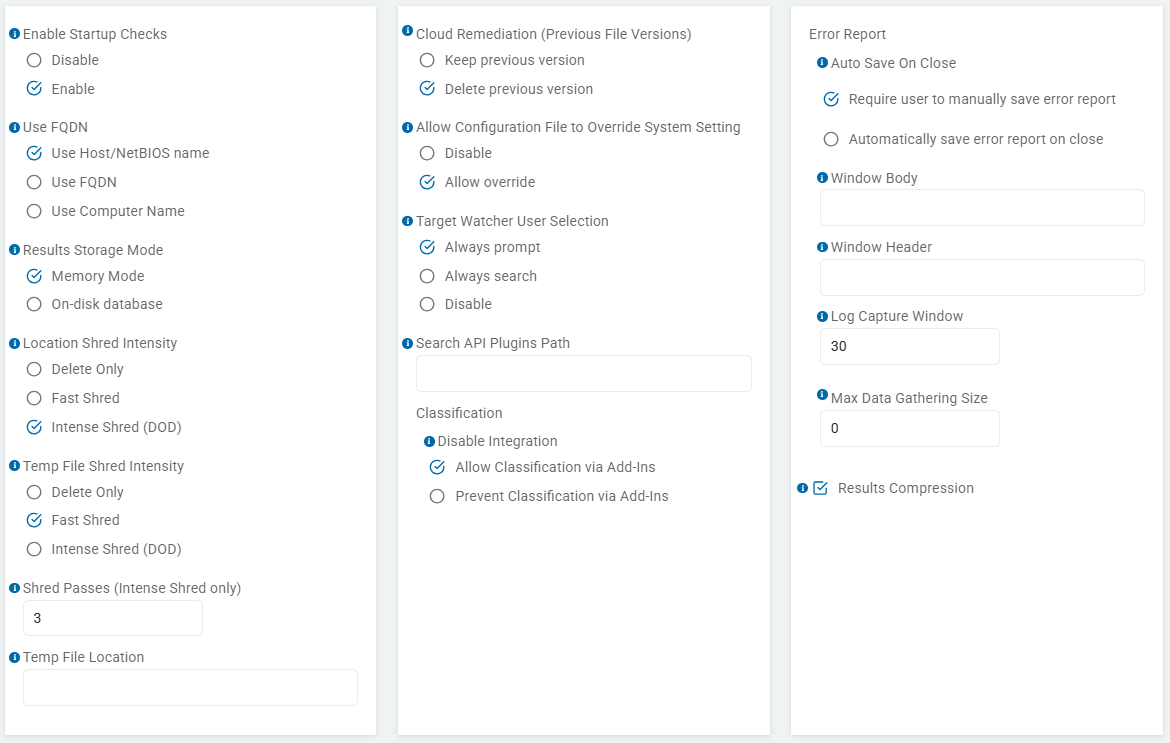
Agent Operations - Advanced Options
Use the topics below to help you complete the Agent Operations - Advanced Options page.
- Select the blue Advanced Options button to access these settings.
The settings here control the computer name format to report to the Spirion console, how a file is deleted, location of temporary files and how they are deleted, the number of passes to use when Shredding files, the configuration file used to override system settings, whether to save error reports when the dialog is closed, whether to compress data for Agent communication, and more. How to report an error report dialog is configured on this page.
Enable Startup Checks
The “Enable Startup Checks” setting (found under Agent Operations > Advanced Options) is a health and synchronization mechanism that triggers the moment the Spirion Agent service or application starts up on an endpoint.
What it does
A newly installed Agent checks-in immediately using the configured URL in the Agent registry. Note: There is an expected delay if the Services/Ingress URL is not defined immediately.
This setting forces the Agent to perform a specific "check-in" with the SDP Console immediately upon launch before it attempts to perform any other tasks.
- Enabled (checked): Default. As soon as the computer boots up (if the Agent is a service) or as soon as a user opens the Spirion application, the Agent immediately reaches out to the SDP Console. It checks for new policies, updated search schedules, or changes to its configuration.
- Disabled (unchecked): The Agent waits until its next scheduled "Polling Interval" (for example, 60 minutes after startup) before checking for updates.
Why it exists
This setting is used for Deployment Speed and Immediate Compliance:
- Fast Policy Propagation: If you have just sent out a "Critical/Urgent" scan policy, you don't want to wait an hour for an agent to check in. If a user reboots their machine or launches the app, "Enable Startup Check" ensures they get the new instructions immediately.
- Health Validation: It acts as an immediate "I'm alive" signal. Administrators can see which machines have recently come online by looking at the "Last Seen" timestamp in the console, which is updated by the startup check.
- Correcting Configuration Drift: If an Agent's local settings have become corrupted or were tampered with, the startup check enables the console to "push down" the correct policy settings right away, ensuring the agent is always operating under the latest governance rules.
- License Verification: The startup check often includes a license seat validation, ensuring the endpoint is still authorized to run the software.
How it works in the architecture
- Sequential Logic: The Startup Check is typically the first item on the Agent's "To-Do" list. It prioritizes the handshake with the console over starting a scheduled scan.
- Communication: It uses the same HTTPS heartbeat mechanism as the standard "Check for Policy Updates" but ignores the timer-based interval in favor of the "Startup" event.
- Internal Key: This is often associated with the
Initialization\Configuration\CheckForUpdatesOnStartupsetting.
Recommendation
- For Desktop/Laptop Users: Enable this setting. Users frequently shut down or sleep their machines. You want the agent to grab any new security tasks the moment they start their workday.
- For Server/Data Center Environments: Consider disabling this setting or staggering it if you have thousands of servers rebooting simultaneously (for example, after a patch Tuesday). This prevents a "thundering herd" effect where every server hits the SDP Console at the exact same second.
- Troubleshooting Tip: If you change an agent's group or tag in the console and it doesn't seem to be updating, simply restarting the Spirion service on that machine (with "Enable Startup Check" on) is the fastest way to force the update.
Summary
- The “Enable Startup Check” setting is an Immediate Synchronization Trigger. It ensures that the Spirion Agent is never out of sync with the Console's instructions for more than a few seconds after the software starts, providing the most up-to-date protection and management possible.
Use FQDN
The "Use FQDN" setting (found under Agent Operations > Advanced Options) offers 3 identification modes. These modes determine how the Agent identifies itself to the Spirion Sensitive Data Platform console and how it records the "Location" of the data it finds.
What it does
Choosing the right option is critical for ensuring that your reports are accurate and that you don't end up with "duplicate" or "merged" endpoints in your console.
- Use Host/NetBIOS Name
- The Agent identifies itself using the short "hostname" (e.g.,
LAPTOP-JSITH). It does not include any domain information. - Behavior: This is the traditional Windows naming convention. It relies on the local computer name as defined in the system settings.
- Use Case: Use this for small, flat networks with a single domain where you are certain that no two computers will ever have the same name.
- Risk: If you have a
FILESERVERin your New York office and anotherFILESERVERin your London office, Spirion may treat them as the same machine, merging their scan results into one confusing record.
- The Agent identifies itself using the short "hostname" (e.g.,
- Use FQDN (Fully Qualified Domain Name)
- The Agent identifies itself using the complete network path, including the host and the DNS suffix (for example,
LAPTOP-JSITH.finance.us.corporate.com). - Behavior: It queries DNS to provide a globally unique string for that specific machine.
- Use Case: This is the Recommended "Best Practice" for enterprise environments. It is essential for organizations with multiple sub-domains, international sites, or complex cloud/hybrid networks.
- Benefit: It guarantees that every endpoint in the Console is unique. It also helps with SSL/TLS certificate validation, as certificates are usually issued to the FQDN.
- In complex enterprise environments, using the FQDN is often a requirement for several reasons:
- Remediation Reliability: Some remediation actions (like Shred or Quarantine) may fail if the agent tries to resolve a location using a NetBIOS name that the network cannot route correctly.
- Multi-Domain Environments: If you have multiple domains with overlapping computer names (for example, a SERVER01 in both domain-a.com and domain-b.com), using the FQDN prevents the console from merging results from two different physical machines into a single record.
- DNS Resolution: In environments where NetBIOS/WINS is disabled for security reasons, the FQDN is the only reliable way for the console and Agents to communicate about specific network paths.
- The Agent identifies itself using the complete network path, including the host and the DNS suffix (for example,
- Use Computer Name
- The Agent pulls the identity directly from the Windows
COMPUTERNAMEenvironment variable. - Behavior: While this is often identical to the "Host Name," it is a direct OS-level call. In some specific Windows configurations (like those using legacy WINS or specific clustering), the "Computer Name" and "Host Name" can actually differ.
- Use Case: Use this in legacy Windows environments or specific troubleshooting scenarios where the DNS Hostname is being altered by a VPN or a proxy, but the underlying Windows Computer Name remains static.
- For Mac Agents: It forces the Agent to identify itself using the "friendly" name set in System Preferences > Sharing (e.g., "Jason's MacBook Pro"). This is distinct from the Host name (the network name) or the FQDN (the domain name).
- User-Friendly Identification: In environments with many Mac endpoints, the network hostnames are often automatically generated strings (like mac-12345.local), which are difficult for administrators to recognize. Using the "Computer Name" allows the console to display names that are more recognizable to the IT support team.
- Asset Matching: If your organization tracks Apple assets by their "Friendly Name" in an MDM (like Jamf), enabling this setting ensures that the names in the Spirion Console match the names in your asset management system.
- Benefit: It provides a "physical" identity for the machine that is less likely to change if the machine moves between different network segments (WIFI vs. Ethernet).
- The Agent pulls the identity directly from the Windows
Comparison Table
Feature | Use Host/NetBIOS | Use FQDN | Use Computer Name |
|---|---|---|---|
Example |
|
|
|
Uniqueness | Low (can overlap) | High (Unique) | Low |
Network Type | Small/Simple | Large/Complex | Legacy/Static |
Primary Advantage | Clean/Short names | No identity collisions | Direct OS identity |
How it works in the architecture
- Registration Identity: When the Agent first registers with the SDP Console, it sends its identity string. If "Use FQDN" is on, that identity is recorded as the full string.
- Internal Key: This is often mapped to
Console\UseFQDNorSettings\Locations\Remote\UseFQDN. - Resolution Order: The Agent asks the OS for the
DNS_HOSTNAME_FULLY_QUALIFIEDattribute rather than the simpleCOMPUTERNAMEenvironment variable.
Recommendations
For almost all modern SDP deployments, you should select Use FQDN.
As your organization grows or migrates to the cloud, having a "Flat" naming convention (Host/Computer Name) almost always leads to data collisions in your reports. Using the FQDN ensures that when you see a "Confidential" file on SERVER-01, you know exactly which SERVER-01 in your global infrastructure it belongs to.
Results Storage Mode
The “Results Storage Mode” setting (found under Agent Operations - Advanced Options) determines where the Agent stores its findings and search metadata while a scan is in progress and before those results are successfully transmitted to the console.
This setting is a critical part of Spirion's "Postgres-based Agent Queueing" architecture for Windows Agents.
What it does
It determines the mechanism and location used by the Agent to track findings (matches), search history, and task status. This is essentially the "holding area" for data that the Agent has found but the Console has not yet acknowledged.
Here is a breakdown of what the “on-disk database” and “memory mode” options do:
- On-disk database
- Default setting. Recommended.
- The Agent writes search results to a local temporary database (typically the local PostgreSQL instance introduced in version 13.6) as they are found.
- How it works: As the Agent identifies sensitive data, it writes the match details, file paths, and "Search History" (hashes of scanned files) to this local file.
- Key Benefits:
- Resiliency: If the network connection to the SDP Console is lost, if the laptop lid is closed, or if the machine reboots, the results are preserved. The Agent resumes "shipping" the results once the connection is restored.
- Search History: This mode allows for "Incremental Scanning." The Agent can remember which files it scanned previously and skip them if they haven't changed, significantly speeding up subsequent scans.
- Scale: It can handle millions of findings without consuming excessive system RAM, as the data is "paged" to the disk.
- Best For: Standard workstations, laptops, and servers where data integrity and scan speed (via history) are priorities.
- Memory mode
- The Agent stores all scan findings and metadata exclusively in the system's RAM (volatile memory). No database file is ever created on the hard drive.
- How it works: The findings exist only as long as the Spirion process is running. The Agent attempts to stream these findings to the console in real-time.
- Key Benefits:
- Zero Footprint: This is used for high-security or forensic requirements where "Data at Rest" is prohibited. No trace of the PII findings is left on the local disk.
- VDI Compatibility: Ideal for non-persistent Virtual Desktop Infrastructure (VDI) where the local disk is wiped upon logout anyway.
- Key Risks:
- Data Loss: If the
spirion.exeprocess crashes, the network drops, or the power goes out, all results from that scan session are lost. - Resource Heavy: If a scan finds an enormous amount of sensitive data (for example, millions of credit card numbers in a database dump), the Agent may consume all available system RAM, potentially causing the system to hang or the Agent to crash.
- Data Loss: If the
- Best For: Ephemeral virtual machines, temporary lab environments, or "Zero-Footprint" security mandates.
Comparison Summary
Feature | On-disk database | Memory mode |
|---|---|---|
Storage Location | Local Disk ( | System RAM |
Network Interruption | Results are saved and sent later. | Results are lost. |
Search History | Supported (Faster repeat scans). | Not supported (Must re-scan everything). |
Reliability | High | Low (Process/Network dependent) |
Disk I/O | Moderate | Zero |
Why this setting matters
This setting governs the Reliability and Privacy of your scan data:
- Resilience: In a "Local Database" mode, Spirion can handle "dirty" networks (Wi-Fi dropping, VPNs disconnecting). The Agent doesn't care if the console is offline; it just keeps writing to its local storage until it can talk to the console again.
- Performance: Writing to a local database is often faster than waiting for a network acknowledgement for every single match found, which enables the search engine to run at full speed.
- Audit Trail: The storage mode determines if there is a local "Search History." This prevents the Agent from re-scanning the same 1 GB file every single day if nothing has changed, by checking its local database for the file's hash and last-scanned timestamp.
How it works in the architecture
- Windows Agents: Use this to manage the transition of data from the Worker (which finds the PII) to the Shipper (which sends the PII).
- Mac/Linux Agents: These typically default to a localized SQLite database and do not participate in the distributed Postgres queueing model used by Windows, so this setting may behave differently or be ignored on non-Windows platforms.
Recommendations
- Best Practice: Leave it at the default (Local Database). This provides the best balance of performance and data integrity.
- Troubleshooting Tip: If you see "Results not appearing in console" but the Agent says the scan is finished, the issue is often in the Results Storage. You can check the local
spirion.dbor theshipper_queuetable to see if results are "stuck" locally because they cannot reach the Ingress server. - Disk Space Warning: If you are scanning millions of files and finding millions of matches, the local results database can grow to several gigabytes. Ensure the endpoint has enough disk space to "buffer" these results before they are shipped.
Summary
The “Results Storage Mode” is the "Waiting Room" for your data findings. It determines whether the Agent stores those findings in a permanent local file (safe and resilient) or keeps them in temporary memory (fast but risky).
Location Shred Intensity
The “Location Shred Intensity” setting (found under Agent Operations > Advanced Options) defines the technical method used when an agent is commanded to "Shred" a file.
What it does
Unlike a standard "Delete," which just removes a file's pointer from the file system, Shredding is a forensic-grade destruction process designed to prevent data recovery.
- Delete Only
- This is the equivalent of a standard OS "Delete" (Shift + Delete). It removes the file's entry from the File Allocation Table (FAT) or Master File Table (MFT), marking the space as "Available" for new data.
- How it works: The actual 1s and 0s of the sensitive data remain on the physical disk until they are naturally overwritten by another file.
- Pros: It is nearly instantaneous, regardless of file size.
- Cons: Low Security. Forensic tools (like Recuva or EnCase) can easily recover the sensitive data as long as it hasn't been overwritten. Use this only if you simply want to "clean up" and are not worried about advanced data recovery.
- Fast Shred
- This performs a single-pass overwrite of the file’s data before deleting it.
- How it works: The Agent overwrites the entire contents of the file with random data or zeros one time, then deletes the file pointer.
- Pros: It provides a much higher level of security than a simple delete while maintaining relatively fast performance. It prevents all "standard" software-based data recovery tools from finding the original PII.
- Cons: Extremely sophisticated laboratory-grade forensic techniques (like magnetic force microscopy) might theoretically still detect traces of the original data, though this is rare.
- Intense Shred (DOD)
- This performs a multi-pass overwrite based on the Department of Defense (DoD) 5220.22-M standard.
- How it works: The Agent overwrites the file data three or more times using specific patterns (for example, first with zeros, then with ones, then with random characters). After these multiple passes, the file is finally deleted.
- Pros: Maximum Security. This is designed to meet strict federal and military compliance requirements. It ensures that data cannot be recovered even by advanced forensic laboratories.
- Cons: High Performance Impact. Because the Agent has to write to the same physical disk space three times, it takes 3x longer than a Fast Shred. If you are shredding thousands of large files, this can significantly slow down the endpoint's disk performance.
Comparison Summary
Option | Method | Security Level | Performance |
|---|---|---|---|
Delete Only | Mark as deleted | Low | Instant |
Fast Shred | 1-Pass Overwrite | Medium/High | Fast |
Intense Shred (DOD) | 3+ Pass Overwrite | Maximum (Military) | Slow |
Recommendations
- Standard Corporate Policy: Use Fast Shred. It offers the best balance of security and performance, effectively stopping 99% of data recovery attempts without frustrating the end-user with slow disk speeds.
- High-Compliance (Gov/Health/Finance): Use Intense Shred (DOD). If you are subject to audits that require "DoD-compliant destruction," this is the only option that will satisfy the auditor.
- SSD Warning: Be aware that on modern Solid State Drives (SSDs), traditional multi-pass shredding (DOD) is often less effective due to "wear leveling" logic in the drive controller. For SSDs, a single-pass "Fast Shred" is generally sufficient and recommended.
Temp File Shred Intensity
The “Temp File Shred Intensity” setting (found under Agent Operations > Advanced Options) governs how the Agent cleans up after itself.
What it does
When Spirion scans certain file types (like ZIP archives, PST files, or attachments), it often has to "explode" or extract them into a temporary directory on the local hard drive to inspect the contents. Since these temporary files contain the raw, sensitive data the agent is looking for, they must be destroyed securely once the scan of that item is complete.
- Delete Only
- Performs a standard operating system delete on the temporary files created during the scan.
- Mechanism: It unlinks the file from the file system. The data remains on the disk in "unallocated space" until the OS overwrites it with something else.
- Performance: Fastest. There is zero overhead for the agent.
- Risk: High Risk. If a scan is interrupted or a forensic tool is used on the machine, the "temporary" copies of the sensitive data could be recovered, creating a data leak caused by the security tool itself.
- Fast Shred
- Performs a single-pass overwrite of the temporary files with random data before deleting them.
- Mechanism: As soon as the agent finishes inspecting an extracted file, it overwrites that file's blocks on the disk once and then deletes the file.
- Performance: Moderate. It adds a small amount of disk I/O to every file scanned that requires extraction.
- Recommendation: This is the standard "Best Practice" for Spirion. It ensures that temporary fragments of PII are not left behind in the
C:\Windows\TemporAppDatafolders, satisfying most privacy audits without significantly slowing down the scan.
- Intense Shred (DOD)
- Follows the DoD 5220.22-M standard (typically 3 passes) to overwrite temporary files multiple times before deletion.
- Mechanism: The agent writes over the temp file three separate times with different bit patterns (0s, 1s, and random).
- Performance: Slowest. This can significantly increase the total duration of a scan, especially if the scan involves many compressed files (ZIP, RAR) or large email archives (PST/OST), as every single extracted component must be overwritten three times.
- Use Case: Mandatory for ultra-high security environments (military, intelligence, or specific air-gapped systems) where the policy dictates that no sensitive data can exist on a disk—even temporarily—without multi-pass destruction.
Key Difference: "Location" vs. "Temp File" Shredding
It is important to distinguish this from the "Location Shred Intensity" setting:
- Location Shredding happens when a user or admin clicks "Shred" on a result they found. It is an intentional remediation action.
- Temp File Shredding happens automatically in the background during every scan. It is an "operational hygiene" setting.
Summary Table
Option | Security | Impact on Scan Speed | Recommendation |
|---|---|---|---|
Delete Only | Low | None | Not recommended for PII scans. |
Fast Shred | High | Minimal | Default / Best Practice. |
Intense Shred (DOD) | Maximum | Significant | Use only for strict DOD compliance. |
Important Note for SSDs: On modern Solid State Drives, "Intense Shred" creates excessive "write wear" on the drive and is often redundant because of how SSD controllers handle data. Fast Shred is almost always the better choice for modern hardware.
Shred Passes (Intense Shred only)
The “Shred Passes (Intense Shred only)” setting (found under Agent Operations > Advanced Options) is a granular security configuration that defines exactly how many times the Agent overwrites a file when the "Intense Shred (DOD)" method in other settings is selected.
What it does
This setting acts as a "multiplier" for the Intense Shred (DOD) operation. While a standard "Fast Shred" always performs a single pass, the "Intense" mode allows an administrator to specify a higher number of overwrite cycles to meet specific forensic destruction standards.
- The Default (typically 3 or 7): Most security standards, including the classic DoD 5220.22-M, require 3 passes (all zeros, all ones, then a random character). Some higher-security "Gutmann" style wipes require 7 passes.
- The Process: If this is set to 3, the Spirion Agent will write random data to the file's physical location on the disk, then write a different pattern, then write a final pattern, and only then delete the file pointer.
Why it exists
This setting is strictly for Compliance and Forensic Prevention:
- Meeting "Military Grade" Standards: Different government and industry regulations require a specific number of "wipes" to consider data "sanitized." This setting allows a Spirion admin to match the product's behavior to their organization's written security policy.
- Defeating Hardware-Level Recovery: In the era of magnetic spinning hard drives (HDDs), it was theoretically possible to use specialized laboratory equipment to detect "ghost" traces of data if it was only overwritten once. Multiple passes (3, 7, or more) were designed to "scramble" the magnetic substrate so thoroughly that even a lab could not recover it.
- Auditor Satisfaction: During a SOC2, HIPAA, or PCI-DSS audit, an auditor may ask: "How many passes does your shredding tool perform?" This setting provides a definitive, configurable answer.
How it works in the architecture
- Dependency: This setting is only active if the "Location Shred Intensity" or "Temp File Shred Intensity" is set to Intense Shred (DOD). If you have "Fast Shred" selected, this number is ignored.
- Disk I/O Impact: The impact is linear. If you set this to 7 passes, the "Shred" operation will take roughly 7 times longer than a standard delete and will generate 7 times the disk write activity.
- Internal Key: This is often mapped to
Settings\Application\Shred\Passes.
Recommendations
- For Modern SSDs (Solid State Drives): Set to 1 or 3 (or use Fast Shred instead). Modern SSDs use "wear leveling" and "over-provisioning." Writing 7 times to the same "logical" address does not necessarily overwrite the same "physical" cells. Multi-pass shredding on an SSD provides diminishing returns and simply wears out the drive faster.
- For Legacy HDDs (Spinning Disks): Set to 3. This is the "sweet spot" for most compliance frameworks. It provides excellent forensic protection without making the shredding process take an eternity.
- Avoid High Numbers (for example, 35): Some legacy "Gutmann" methods suggest 35 passes. Do not do this in a modern enterprise environment. It provides zero additional security on modern hardware and will cause the Spirion Agent to appear "frozen" while it spends hours overwriting a single large file.
Summary
The “Shred Passes” setting is a Security Intensity Dial. It tells the agent exactly how many layers of "digital noise" to write over sensitive data, ensuring that once a file is shredded, it is forensically unrecoverable according to the organization's specific compliance requirements.
Temp File Location
The “Temp File Location” setting (found under Agent Operations > Advanced Options) enables an administrator to define the specific directory on the endpoint's hard drive where the Spirion Agent performs its "extraction" and "analysis" work.
What it does
When Spirion scans complex files—such as ZIP archives, RAR files, PST/OST email databases, or large PDF portfolios—it cannot always search them in their compressed state.
The Agent must extract the individual components (files, emails, attachments) into a temporary workspace to inspect them for sensitive data.
- Default Behavior: If left blank, the Agent typically uses the system's default temporary folder (for example,
C:\Windows\Tempor the user's%LOCALAPPDATA%\Temp). - Custom Path: By entering a path (for example,
C:\Spirion_Work), you force the Agent to use that specific folder for all its intermediate processing.
Why it exists
This setting is used for Security Isolation, Performance, and Troubleshooting:
- Security Hardening (Air-Gapping): Some organizations have strict policies against sensitive data ever entering the standard "Temp" folders, which are often indexed by search tools or accessible to other applications. Setting a custom location allows you to apply strict NTFS Permissions (ACLs) to that folder so only the Spirion Service can read/write to it.
- Performance Optimization: If a machine has a very fast SSD (Solid State Drive) and a slower secondary HDD, you want to ensure the "Temp File Location" is on the SSD. The "extraction" phase is the most disk-intensive part of a scan; putting the temp folder on the fastest available disk can cut scan times in half.
- Preventing "Disk Full" Errors: If you are scanning a 50 GB email archive, the Agent might need 50 GB of temporary space to extract all the attachments. If the
C:drive is nearly full, the scan will fail. You can use this setting to point the Agent to a larger secondary drive (e.g.,D:\SpirionTemp). - Antivirus (AV) Exclusions: Antivirus programs often heavily monitor the default Windows Temp folders. This can cause "contention" where the AV and Spirion both try to open the same file at the same time, leading to crashes or extreme slowness. By using a custom location, you can easily tell your AV to exclude that specific folder from real-time scanning.
How it works in the architecture
- Lifecycle: The Agent creates the folder (if it doesn't exist), writes the extracted files, scans them, and then—depending on your Temp File Shred Intensity—destroys them.
- Cleanup: Under normal operation, the folder should be empty after the scan finishes.
- Internal Key: This is often mapped to
Settings\Application\Paths\TempPath.
Recommendations
- Best Practice for Servers: Always set a custom path. Do not use the default system temp. Create a dedicated folder like
C:\ProgramData\Spirion\Tempand ensure your Antivirus/EDR tool is configured to ignore that directory. - For Virtual Desktop Infrastructure (VDI): Ensure the Temp File Location is not on a network-mapped drive. Writing temp files over the network is extremely slow and can saturate your network bandwidth.
- Cleanup Check: If you notice your disk space disappearing after a Spirion scan, it usually means a scan was "Hard Killed" (crashed or forced closed) before it could clean up this folder. You can manually delete the contents of this custom temp location if no scan is currently running.
Summary
The “Temp File Location” is the Agent’s "Workbench." It is the physical space on the disk where the "heavy lifting" of data extraction happens. Configuring it correctly ensures the scan is securely isolated, high-performing, and compatible with other security software on the machine.
Cloud Remediation (Previous File Versions)
The “Cloud Remediation (Previous File Versions)” setting (found under Agent Operations > Advanced Options) is a specific governance control for cloud storage environments like OneDrive for Business, SharePoint Online, and Google Drive.
What it does
The “Cloud Remediation (Previous File Versions)” setting specifically manages the "digital trail" left behind in cloud repositories like OneDrive, SharePoint, and Google Drive when a file is modified or deleted.
Here is what the two specific options do:
- Keep Previous Versions
- When a remediation action (like Shred, Quarantine, or Redact) is performed on a file, Spirion only affects the current, active version of that file. All historical snapshots saved by the cloud provider remain untouched.
- The Result: If a user or administrator looks at the "Version History" in the cloud interface (e.g., SharePoint's "Version History" pane), they will still see and be able to "Restore" older copies of the document.
- Use Case: Use this if your primary goal is user productivity and you want to avoid accidental data loss. If a user makes a mistake and Spirion remediates the file, they can still go back in time to retrieve their work (though the PII will still exist in those old versions).
- Risk: Higher Compliance Risk. Sensitive data remains "at rest" in your cloud environment. An auditor using forensic tools or a user with "Restore" permissions can still access the PII that you thought you had removed.
- Delete Previous Versions
- When a remediation action is performed, Spirion uses the cloud API to identify every historical version of that file and delete them along with the current version.
- The Result: The file and its entire history are "scrubbed" from the cloud. The "Version History" link for that file is either empty, or the file itself is completely removed from the repository.
- Use Case: This is the Recommended "Best Practice" for Compliance. It is essential to meet GDPR (Right to Erasure) or PCI-DSS requirements, ensuring that no "fragments" of sensitive data remain anywhere in the cloud's storage layers.
- Risk: Irreversible Data Loss. If you choose to "Shred" a file with this option enabled, you are not just deleting a file; you are deleting the history of that file. There is no "Undo" button in the cloud once these versions are purged via the API.
Comparison Summary
Feature | Keep Previous Versions | Delete Previous Versions |
|---|---|---|
Data Security | Lower (PII stays in history) | Maximum (PII is wiped) |
User Impact | Low (can restore old work) | High (history is gone forever) |
Compliance Alignment | Basic | High (GDPR/PCI/HIPAA) |
API Calls | Fewer/Faster | More/Slower (must iterate history) |
Recommendations
If you are operating in a highly regulated environment, you should select Delete Previous Versions. However, to mitigate the risk of angry users losing their work, it is often better to use Quarantine instead of Shred.
- When you Quarantine with "Delete Previous Versions" enabled, Spirion moves the live file to a safe location and wipes the history, but at least the latest version of the document is preserved for the security team to review.
- Shredding with "Delete Previous Versions" is the "Nuclear Option"—it should only be used when you are absolutely certain that the data has no business value.
Allow Configuration File to Override System Setting
The setting “Allow Configuration File to Override System Setting” (found under Agent Operations > Advanced Options) manages the hierarchy of authority between the SDP Console and the local configuration files on an endpoint.
This setting determines which "source of truth" the agent listens to if there is a conflict between the policy sent from the web console and the settings manually edited in the agent's local XML or registry files.
- Disable
- This forces the Agent to strictly follow the Console Policy. Any manual changes made to the local configuration on the machine (for example, editing the
spirion.xmlor local registry keys) will be ignored or overwritten by the settings defined in the SDP Console. - Behavior: The Console is the absolute authority. If the Console says "Shred Intensity = Fast," but a local admin tries to change the local config to "Delete Only," the Agent will still perform a "Fast Shred."
- Use Case: This is the Recommended "Best Practice" for enterprise deployments. It ensures centralized governance and prevents "Configuration Drift."
- Benefit: It prevents local users (or even local IT staff) from accidentally or intentionally weakening the security posture of the Spirion Agent. It ensures that every machine in a specific Group is running with the exact same security parameters.
- This forces the Agent to strictly follow the Console Policy. Any manual changes made to the local configuration on the machine (for example, editing the
- Allow Override
- This enables the Agent to prioritize local configuration settings over the global policy sent from the Console.
- Behavior: If a specific setting is defined in the local Agent configuration (for example, via a command-line install script or a manual edit to the config file), the Agent uses that local value instead of what the Console policy says.
- Use Cases: This is primarily used for Troubleshooting, Pilot Groups, or Edge Cases:
- Low-Bandwidth Sites: You might want a specific office to have a different "Check-in Interval" than the rest of the company.
- Unique Hardware: A specific server might need a different "Temp File Location" than the standard policy allows.
- Testing: A developer might need to override a "Max File Size" setting to test a specific large file without changing the policy for the entire department.
- Risk: High Management Overhead. If you enable overrides, you can no longer be 100% certain of your security posture by just looking at the Console. You would have to inspect individual machines to see what their "actual" running configuration is.
Comparison Summary
Option | Authority | Management Style | Security Posture |
|---|---|---|---|
Disable | SDP Console | Centralized / Global | Strongest (Locked) |
Allow Override | Local Agent File | Decentralized / Individual | Flexible (Variable) |
Recommendations
- For 99% of production environments, set this to Disable.
- The power of the Spirion Sensitive Data Platform lies in its ability to enforce a single, audited security policy across thousands of endpoints simultaneously. Allowing local overrides breaks that "Single Pane of Glass" visibility and makes it much harder to prove to an auditor that your PII scanning is consistent across the organization.
- Only use Allow Override during a controlled troubleshooting session or a very specific technical deployment where a "one-size-fits-all" policy is physically impossible to implement.
Target Watcher User Selection*
*This is a Sensitive Data Watcher (File and Email Watcher) setting only.
The “Target Watcher User Selection” setting (found under Agent Operations > Advanced Options) controls how the Agent interacts with an end-user when it detects that a new "Removable Media" device (like a USB thumb drive or external hard drive) has been plugged into their computer.
This is part of Spirion’s Target Watcher (formerly known as Device Watcher) functionality, which ensures that sensitive data doesn't "leak" onto or off of the network via portable storage.
- Always Prompt
- When a user plugs in a USB drive, a pop-up window appears on their screen asking them if they would like to scan the new device for sensitive data.
- Behavior: The scan is optional and depends on the user's input. The user can click "Yes" to start a scan or "No/Cancel" to ignore it.
- Use Case: Use this for user-awareness programs or environments where you want to encourage a "security-first" culture without being overly restrictive. It reminds users that PII shouldn't be on portable drives without forcing a potentially long scan on them during a meeting.
- Always Search
- As soon as a USB drive or external disk is detected, the Spirion Agent automatically starts a scan of that device in the background. No user interaction is required, and the user is typically not given a choice to skip it.
- Behavior: The scan is mandatory. This is the most aggressive security posture. Depending on other policy settings, the Agent may even prevent the user from opening files on that drive until the scan is complete.
- Use Case: Essential for High-Security / Zero-Trust environments (Government, Financial, or R&D). It ensures that no sensitive data can be brought into or taken out of the building via a "sneakernet" without being logged and audited by the SDP Console.
- Disable
- The Agent completely ignores the arrival of new removable media. No prompt is shown, and no automatic scan is triggered.
- Behavior: The "Watcher" service remains idle for that event. The drive is scanned only if it is part of a manually started scan or a regularly scheduled full-system scan.
- Use Case: Use this for Servers or Fixed Workstations where USB ports are already disabled via Group Policy (GPO) or where you don't want to interrupt users (for example, a call center where speed is prioritized over immediate device scanning).
Comparison Summary
Option | User Experience | Security Level | Impact on Productivity |
|---|---|---|---|
Always Prompt | Interactive (Choice) | Medium | Low (User decides) |
Always Search | Automated (Forced) | High | High (Can slow down device access) |
Disable | Silent (Ignored) | Low | None |
Recommendations
- For Corporate Laptops: Always Prompt is usually the best balance. It educates the user and provides a layer of defense without the "helpdesk noise" that comes with forced scans of large external drives.
- For Regulated Data Environments: Always Search is the only way to ensure compliance. If a user tries to walk out with 10,000 credit card numbers on a thumb drive, "Always Search" will catch it and report it to the console immediately.
- Performance Note: If you choose "Always Search," ensure your policy is configured to only look for specific, high-value data types (like SSNs or CCs) to keep the scan time short, as scanning a 1TB external drive "on-plug" can frustrate users.
Summary
The “Target Watcher User Selection” setting defines the "Bouncer" behavior for your USB ports. It determines whether the Agent asks for permission, takes immediate action, or stays out of the way when a new storage device enters the environment.
Search API Plugins Path
The “Search API Plugins path” setting (found under Agent Operations > Advanced Options) specifies a dedicated directory on the endpoint where the Spirion Agent looks for custom-built "plugins" or "modules" that extend its native searching capabilities.
- Agents version 13.5 and later
What it does
By default, the Spirion Agent has built-in logic to search standard locations (File System, Registry, Emails) and common file types (Office, PDF, Text).
The Search API Plugins path enables the Agent to load external libraries (typically .dll files) that tell it how to interact with non-standard data sources or proprietary file formats that are not supported "out of the box."
- Default Behavior: If left blank, the Agent only uses its internal, hard-coded search logic and any standard plugins located in its installation directory.
- Custom Path: If you provide a path (e.g.,
C:\Program Files\Spirion\CustomPlugins), the Agent will scan that folder at startup and load any valid Spirion Search API-compliant plugins it finds.
Why it exists
This setting is used for Extensibility and Enterprise Customization:
- Proprietary File Types: If your organization uses a niche or custom-built database or document management system that Spirion doesn't natively support, your developers can use the Spirion SDK/Search API to write a plugin. This setting tells the Agent where to find that code.
- Custom Data Connectors: Some organizations build their own "connectors" to search internal HR portals, proprietary CRM systems, or legacy mainframe data dumps. These connectors are deployed as plugins to this specific path.
- Third-Party Integrations: Sometimes third-party security vendors provide plugins to allow Spirion to "ingest" or "hook into" their data streams.
- Version Control: By pointing to a specific path, a System Administrator can deploy new versions of a plugin to a folder via SCCM or Group Policy without having to reinstall the entire Spirion Agent.
How it works in the architecture
- Plugin Loading: The Spirion Agent (specifically the
spirion.exeor service process) initializes these plugins during its boot-up sequence. - Search Integration: Once loaded, the "Target" or "File Type" handled by the plugin appears as a valid search location within the Spirion scan engine.
- Security: Plugins must be compiled against the specific version of the Spirion Search API to be recognized. The Agent will typically ignore any files in this path that do not meet its signature or API requirements.
Recommendations
- For 99% of Users: Leave this field blank. Unless you have a custom development project or a specialized "Professional Services" engagement with Spirion to build a custom connector, you do not need this setting.
- For Developers: Ensure the path you choose has Strict Permissions. Since the Spirion Agent often runs with high-level system privileges, you must ensure that a standard user cannot drop a malicious
.dllinto this folder, as the Agent might attempt to execute it. - Troubleshooting: If you are using a custom plugin and it isn't working, check the Agent Logs. The logs typically indicate if a plugin in the specified path failed to load due to a version mismatch or a missing dependency.
Summary
The “Search API Plugins path” is the "External Brain" for the Spirion Agent. It allows the software to grow beyond its standard capabilities by loading custom-coded instructions for searching unique, proprietary, or highly specialized data environments.
Disable Integration
The “Disable Integration” setting (found under Agent Operations > Advanced Options) is a specific toggle used to turn off the Spirion Agent's ability to communicate or interact with third-party security software or external system hooks.
What it does
When "Prevent Classification via Add-Ins" is selected this setting instructs the Spirion Agent to run in "Isolation Mode." The Agent does not attempt to load, initialize, or send data to any integrated third-party modules that would normally be triggered during a scan or remediation event.
- Allow Classification via Add-Ins
- This is the "Integration On" mode. It allows the Spirion Agent to load and use the third-party classification libraries (Add-ins) found on the local machine.
- Behavior: When Spirion finishes scanning a file and finds sensitive data, it will trigger the classification add-in to apply a visual marking or metadata tag to that file.
- Use Case: Use this if you are using Spirion as a "Classification Engine." For example, if your corporate goal is for every file containing a Social Security Number to be automatically labeled "Highly Confidential" in your Titus or MIP system, you must select this option.
- Requirement: For this to work, the third-party classification software must be correctly installed and licensed on the endpoint alongside the Spirion Agent.
- Prevent Classification via Add-Ins
- This specifically "silences" the Spirion Agent’s ability to interact with classification add-ins.
- Behavior: Spirion will still scan the files and report the findings (PII) to the SDP Console, but it will not attempt to change the file's label or trigger any classification workflows. It effectively treats the classification software as if it isn't there.
- With the value "Prevent Classification via Add-ins," the integration add-in usage is described below:
- Shell: Icon overlays are visible. Classification context menu and properties tab are viewable but disabled for editing.
- Adobe: Classification dialog is viewable but items are disabled. There is no OK button to save changes.
- Outlook: Classification pane is displayed. Ribbon button is disabled.
- Office: Classification pane is displayed. Ribbon button is disabled.
- Why use this?
- Performance: Triggering a classification add-in for every single file found can add significant "overhead" to a scan, making it run much slower.
- Conflict Resolution: Sometimes classification add-ins are "chatty" and pop-up windows asking the user for confirmation. If you are running a silent background scan, you want to prevent these pop-ups from interrupting the user.
- Testing: If you want to see what data is out there before you start automatically labeling everything, you can use this mode to gather "Read-Only" intelligence.
Why it exists
This setting is primarily used for Stability, Conflict Resolution, and Performance:
- Preventing "Software Wars": Sometimes, two security products on the same machine try to "hook" into the same file at the same time. For example, if Spirion tries to "Redact" a file while a Data Loss Prevention (DLP) agent is trying to "Encrypt" it, the machine might crash (BSOD) or the file might become corrupted. "Disable Integration" stops Spirion from reaching out to that other agent.
- Troubleshooting Performance Issues: If scans are running extremely slowly or the CPU is spiking to 100%, support engineers often use this setting to determine if the slowness is caused by Spirion itself or by the overhead of Spirion trying to talk to another security tool on the endpoint.
- Legacy Environments: In older environments with deprecated versions of classification tools (like Boldon James or Titus), the integration "hooks" might no longer be compatible. Disabling integration allows Spirion to keep working even if the third-party tool is broken or outdated.
- Air-Gapped / Minimalist Scans: If you are performing a "quick and dirty" scan and don't care about updating file metadata or informing a DLP console, disabling integration makes the Spirion Agent more lightweight and faster.
How it works in the architecture
- Hooking: Many security tools use "In-Process Hooks." When "Disable Integration" is active, Spirion skips the code block that attempts to find and load these external
.dllfiles. - Classification: This is most commonly used to disable the integration with Data Classification tools. If disabled, Spirion will still find the PII, but it won't be able to "tell" the classification tool to change the file's label to "Confidential."
- Internal Key: This is often mapped to
Settings\Application\Integrations\DisableAll.
Recommendations
- For "Enforcement" Policies: Select Allow Classification via Add-ins. This ensures that the discovery of PII immediately leads to the protection of the file through proper labeling.
- For "Discovery-Only" Policies: Select Prevent Classification via Add-ins. If your goal is simply to build a report of where PII exists without altering the files themselves, this is the safer and faster option.
- Troubleshooting Tip: If you have "Allow" selected but labels aren't changing, the issue is usually that the Spirion Agent is running as "System," while the Classification Add-in requires a "Logged-in User" session to function. In these cases, you may need to adjust your Agent Operational Mode to run as the User.
Summary
The “Disable Integration” setting is a "Safety Switch." It tells the Spirion Agent to "stay in its own lane" and stop trying to collaborate with other security software on the machine. It is a powerful troubleshooting tool but should be used sparingly in production.
Auto Save On Close
The “Auto Save on Close” setting (found under Agent Operations - Advanced Options) governs how the Spirion Agent handles the "results" or "error logs" when a scan is finished and the application is closed.
This is particularly relevant for the Interactive Agent (where a user might see the Spirion interface) and for ensuring that diagnostic data isn't lost if a scan encounters issues.
- Require user to manually save error report
- If a scan finishes with errors (for example, "Access Denied" on certain files or "File Too Large" skips), the Agent waits for the user to take action.
- Behavior: When the user tries to close the Spirion application, they will receive a prompt or a notification asking if they want to save the log of errors to a file. If the user clicks "No" or simply closes the window without saving, that specific diagnostic information is discarded from the local machine.
- Use Case: Use this for managed workstations where you don't want to clutter the hard drive with log files unless an IT person is actively sitting at the machine troubleshooting a specific issue.
- Risk: If a user ignores the prompt, the technical details of why a scan failed (the "Error Report") are lost forever, making it harder for the Spirion Admin to troubleshoot remotely from the console.
- Automatically save error report on close
- This is a "hands-off" diagnostic setting. When the Spirion Agent process terminates or the scan window is closed, it immediately writes the error report to a predefined local directory without asking the user for permission.
- Behavior: The Agent silently exports an XML or text-based report of every error encountered during the scan. This usually goes to the
\ProgramData\Spirionor\AppDatafolder. - This is the Recommended "Best Practice" for enterprise deployments and remote troubleshooting.
- Benefit: If a scan on a remote server or a laptop fails, the Spirion Admin can ask the user to "send the log file" located in the temp folder, or use an automated tool (like SCCM) to pull those logs. Since the save happened automatically, the admin doesn't have to rely on the user remembering to click "Save."
- Behavior: The Agent silently exports an XML or text-based report of every error encountered during the scan. This usually goes to the
Comparison Summary
Option | User Interaction | Reliability of Logs | Best For |
|---|---|---|---|
Require Manual Save | High (Prompted) | Low (User might skip) | Privacy-conscious / Manual Testing |
Automatically Save | Zero (Silent) | High (Always captured) | Enterprise Support / Production |
Recommendations
- For Production Environments: Set this to Automatically save error report on close. In a large-scale deployment, you cannot expect users to manually save logs. Having these reports automatically generated is essential for your Support and QA teams to identify why certain files (like locked databases or encrypted archives) are being skipped across the fleet.
- Disk Space Note: These error reports are generally very small (text-only). However, if you are scanning millions of files with massive "Access Denied" issues, these logs can grow over time. It is a good idea to occasionally clear the
C:\ProgramData\Spirionfolder or point the Agent to a custom "Temp File Location" that is cleared periodically.
Summary
The “Auto Save on Close” setting is your Diagnostic Insurance Policy. It determines whether the "lessons learned" during a failed or partial scan are saved for an admin to review or if they disappear the moment the Agent stops running.
Window Body
The “Window Body” setting (found under Agent Operations - Advanced Options) is a customization tool used to inject proprietary text or internal instructions into the main interface of the Spirion Agent.
What it does
When the Spirion Agent is running in Interactive Mode (meaning the user can see the scanning window on their desktop), this setting enables an administrator to define a custom message that appears in the large, central area (the "body") of the Agent's main window.
- Default Behavior: If left blank, the Agent displays its standard, branded interface showing the scan status, progress bars, and found items.
- Custom Text: If you enter a string of text (for example, "This scan is required by the Corporate Security Policy. Please do not close this window until complete."), that text is displayed prominently to the end-user.
Why it exists
This setting is used for User Education, Legal Compliance, and Internal Support:
- Instructional Guidance: You can provide the user with clear steps on what to do if PII is found. Example: "If you see 'Credit Card Numbers' in the results, please use the 'Shred' button immediately."
- Policy Reminders: Many organizations use this space to display a legal disclaimer or a reminder of the "Acceptable Use Policy" (AUP) so users understand why their private files are being scanned.
- Support Information: You can include helpdesk contact info directly in the UI. Example: "For issues with this scan, contact the IT Helpdesk at x5555 or visit http://helpdesk.internal."
- Branding/Trust: In some environments, users are suspicious of "pop-up windows." By adding a custom message that mentions the company name or the specific security initiative, you reduce the likelihood of the user "Hard Killing" the process out of fear that it is malware.
How it works in the architecture
- UI Rendering: The text is pulled from the Policy XML sent by the SDP Console and rendered dynamically by the
spirion.exeprocess when it initializes the GUI. - Plain Text Only: Generally, this field supports plain text. It does not typically support complex HTML or rich media, as it is designed for high-performance rendering.
- Internal Key: This is often mapped to
Settings\Application\UI\WindowBodyText.
Recommendations
- For "Silent" Scans: Ignore this setting. If your Agent is configured to run hidden in the background (as a service), the user will never see this text, so there is no point in configuring it.
- For "User-Facing" Scans: Keep it Concise. Users tend to ignore large blocks of text. A 2-3 sentence explanation of what is happening and who to call for help is the most effective use of this space.
- Standard Template: A good template to use is:
"Company Name is performing a scheduled security scan to protect your sensitive data. Please allow this process to finish. If you have questions, contact the Security Team at [Email/Phone]."
Summary
- The “Window Body” setting is your "Internal Billboard."
- The setting enables you to transform the Spirion Agent from a "black box" utility into a branded, communicative tool that guides your employees through the data discovery and remediation process.
Window Header
The “Window Header” setting (found under Agent Operations - Advanced Options) allows an administrator to customize the Title Bar text of the Spirion Agent’s application window.
What it does
When the Spirion Agent is running in Interactive Mode (where the GUI is visible to the end-user), this setting overrides the default window title.
- Default Behavior: If left blank, the window typically displays the standard product name, such as "Spirion" or "Spirion Sensitive Data Manager."
- Custom Text: If you enter a custom string (for example, "Acme Corp Security Scanner"), that text appears at the very top of the application window in the title bar.
Why it exists
This setting is primarily used for Internal Branding and User Trust:
- Corporate Branding: Organizations often prefer to brand internal tools with their own name to make the software feel like an official part of the corporate IT suite.
- Reducing Help Desk Calls: Users are often wary of unrecognized applications running on their desktops. If a window pops up saying "Spirion," a user might think it's malware and call the help desk. If it says "[Company Name] Privacy Discovery Tool," they are much more likely to trust it.
- Project Identification: If you are running a specific initiative, such as a "2024 PII Cleanup," you can put that in the header so users know exactly which project the scan is associated with.
How it works in the architecture
- UI Application: The text is delivered via the Policy from the SDP Console to the Agent. When the Agent's graphical user interface (
spirion.exe) launches, it sets the window title property to this specific string. - Visibility: Like the "Window Body" setting, this is only relevant if the agent is not running in "Silent" or "Service" mode. If the scan is hidden, the header will never be seen.
- Internal Key: This is often mapped to
Settings\Application\UI\WindowTitleText.
Recommendations
- Best Practice: Always include your company name or a recognizable internal project name.
- Example: Use something like "Global Security Office - Data Protection Scan" or "Acme IT: Sensitive Data Discovery."
- Pairing: This setting works best when paired with the "Window Body" setting. While the Header identifies the tool, the Body provides the instructions. Together, they create a professional, "official" experience for the employee.
Summary
- The “Window Header” is the "Name Tag" for the Spirion Agent. It tells the user exactly who "owns" the application that is running on their machine, helping to build trust and ensure the scan is allowed to complete without user interference.
Log Capture Window
The “Log Capture Window” setting (found under Agent Operations - Advanced Options) is a diagnostic tool used to control the visibility and availability of a real-time technical log window within the Agent’s graphical interface.
What it does
When enabled, this setting opens a dedicated pane or window within the Spirion Agent that displays a "live feed" of the Agent’s internal operations. This is essentially a real-time view of the spirion.log file.
- Default Behavior (Disabled): The Agent runs cleanly, showing only the progress bar and findings. Technical background logs (like API handshakes, file-access attempts, and engine status) are hidden from the user and only written to a background file.
- Enabled: A window appears that shows a scrolling text feed of everything the Agent is doing "under the hood."
What is displayed in this window?
The Log Capture Window typically reveals the following information:
- File I/O: Which specific file the engine is currently opening or "hooking."
- Thread Activity: When worker threads are started, paused, or completed.
- API Communications: Connection attempts to the SDP Console (Ingress) or Cloud Storage providers.
- Errors/Warnings: Real-time feedback if a file is locked, an archive is encrypted, or a network path is unreachable.
Why it exists
This setting is used almost exclusively for Troubleshooting and Quality Assurance (QA):
- Immediate Debugging: If a scan is hanging or "stuck" at 99%, an admin can enable this window to see exactly which file is causing the delay without having to dig through hidden
\ProgramDatafolders to find a text log. - Verifying Policy Application: It allows a technician to see the moment a policy is received and if any settings were rejected or overridden.
- Real-time Performance Monitoring: Developers and engineers use it to watch how the Agent handles memory or CPU spikes during specific phases of a search.
How it works in the architecture
- Output Redirection: It redirects the standard logging output (which usually goes to
spirion.log) to a UI element in thespirion.exeprocess. - Verbosity: The amount of data shown in this window is usually tied to the Logging Level setting (for example, Info, Debug, or Trace). If the Log Level is set to "Trace," the Log Capture Window scrolls very rapidly with extremely granular detail.
Recommendations
- For Production: Always Disable.
- User Confusion: End-users will be overwhelmed or frightened by a scrolling window of technical code and file paths.
- Performance: Rendering a high-velocity scrolling text window consumes CPU and memory resources that should be dedicated to the scanning engine itself.
- For Troubleshooting: Only enable this when a support engineer is actively working on a machine or when you are testing a new custom plugin in a lab environment.
- The "Silent" Alternative: If you need logs from a production machine, it is better to leave this window disabled and instead use the "Gather Data" or "Remote Log Retrieval" features in the SDP Console to pull the log files silently.
Summary
The “Log Capture Window” is the "X-Ray Vision" for the Spirion Agent. It pulls the hidden technical heartbeat of the software into the foreground so that administrators and engineers can see exactly why a scan is behaving a certain way in real-time.
Max Data Gathering Size
The “Max Data Gathering Size” setting (found under Agent Operations - Advanced Options) acts as a "safety valve" or "cap" on the total amount of diagnostic and log data the Agent is allowed to collect and upload to the console during a Gather Data task.
What it does
When an administrator triggers a "Gather Data" command from the SDP Console (used to collect logs, configuration files, and environment details for troubleshooting), the Agent bundles these files into a compressed package. This setting defines the maximum file size (typically in MB) that this package is allowed to reach.
- Default Behavior: There is usually a hard-coded default (often 50 MB or 100 MB). If the logs and diagnostic files exceed this size, the Agent will truncate the data or fail the upload to prevent overwhelming the network or the console.
- Custom Limit: If you set this to a specific value (for example, 250MB), the Agent continues to collect logs and system information until it hits that limit.
Why it exists
This setting is crucial for Bandwidth Management and Storage Protection:
- Preventing Network Congestion: In large enterprises with thousands of Agents, if 100 machines all try to upload 500 MB log packages at the same time, it could saturate the network or crash the Ingress server.
- Console Database Health: Every "Gather Data" package is stored in the Spirion environment (either in the database or attached storage). A cap prevents the storage from being filled up by massive "Debug" logs.
- Handling "Log Bloat": If a machine has a serious error and is writing thousands of lines of "Trace" logs per minute, the log file could grow to gigabytes. This setting ensures the Agent doesn't try to upload a 5 GB text file that would be impossible to open or analyze.
How it works in the architecture
- The Bundling Process: When the command is received, the Agent identifies the
spirion.log,spirion.xml, system information, and any crash dumps. - The Check: Before initiating the "Shipping" phase to the console, the Agent calculates the size of the bundle. If it exceeds the Max Data Gathering Size, the Agent either:
- Stop adding files to the bundle.
- Discard the oldest log entries to shrink the file.
- Report an error to the console stating the "Gather Data" task was aborted due to size constraints.
Recommendations
- For Standard Operations: Leave at the default. The default size is usually sufficient for 95% of support cases involving standard "Info" level logs.
- For Deep Troubleshooting: If Spirion Support asks for "Trace" or "Debug" logs, you likely must increase this limit. Trace logs are extremely verbose, and the 50 MB cap will be met within just a few minutes of scanning.
- Security Note: Be aware that "Gather Data" packages contain system information. While they don't typically contain the PII found during a scan, they do contain paths and configurations. Ensure your limit isn't so high that you are accidentally shipping massive amounts of unnecessary metadata across your network.
Summary
The “Max Data Gathering Size” is the "Postage Limit" for your diagnostic packages. It ensures that when you ask an Agent to "report its status," it doesn't send a package so large that it clogs your network or crashes your management console.
Results Compression
The “Results Compression” setting (found under Agent Operations - Advanced Options) determines whether the Spirion Agent compresses (zips) the scan results and match metadata before sending them over the network to the console.
What it does
When the Agent's Shipper process prepares to transmit findings (PII matches, file paths, and metadata) to the Ingress server, it checks this setting.
- Enabled (Checked/On): The Agent uses a compression algorithm (typically GZIP) to shrink the data package. A large block of text-based results (like 10,000 credit card numbers and their associated file paths) can often be compressed by 90% or more.
- Disabled (Unchecked/Off): The results are sent as "Plain Text" (JSON or XML) in their original size.
Why it exists
This setting is a balancing act between Network Bandwidth and Endpoint CPU Usage:
- Bandwidth Conservation (Primary Benefit): In large enterprises with tens of thousands of agents, sending uncompressed results can saturate network links, especially for remote workers on slow VPNs or satellite connections. Compression ensures the "payload" is as small as possible.
- Reducing Ingress Load: Smaller data packages are faster for the Ingress server to receive and buffer, which helps prevent "bottlenecks" at the console level during peak scanning periods (like Monday mornings).
- Handling "High-Match" Scans: If a scan finds a database dump with millions of matches, the resulting data file could be hundreds of megabytes. Without compression, this could take minutes to upload; with compression, it takes seconds.
The Trade-off: CPU Overhead
- Compression costs CPU cycles. The Agent must use the endpoint's processor to perform the mathematical compression of the data before it can be sent.
- On very old or extremely low-powered machines (like some legacy IoT devices or overburdened servers), enabling compression might cause a brief spike in CPU usage right at the end of a scan.
How it works in the architecture
- The Shipper Queue: The results are pulled from the local results database (or memory), compressed into a "blob," and then sent via an HTTPS POST request to the Ingress URL.
- The Ingress Server: The Spirion Ingress server is designed to automatically detect if a package is compressed, decompress it in real-time, and then pass the "clean" data to the storage engine.
Recommendations
- Best Practice: Always Enable Results Compression. In 99% of modern environments, the CPU "cost" of compression is negligible (milliseconds of work), while the network savings are massive.
- When to Disable: You should only disable this for Debugging/Troubleshooting purposes. If you are using a network sniffer (like Wireshark) to see exactly what the Agent is sending to the console, disabling compression makes the traffic human readable.
- Cloud Deployments: If your SDP Console is hosted in the Cloud (SaaS), compression is essential to reduce data egress costs and improve the speed of result reporting.
Summary
The “Results Compression” setting is the "Data Shrinker" for your PII findings. It makes the "package" sent from the Agent to the Console much smaller, protecting your network from congestion while only costing a tiny amount of processing power on the endpoint.