How to Create a Single Tenant App for OneDrive and Exchange Online Searches
Spirion now supports creating a single tenant app for the search of OneDrive and Exchange Targets in Sensitive Data Platform.
Overview
Spirion now supports creating an app for the search of Microsoft OneDrive and Exchange.
This enables Spirion Administrators to manage searching two locations with a single Entra App.
High-Level Steps
Before You Start
- An Entra Administrator is needed to create the tenant app
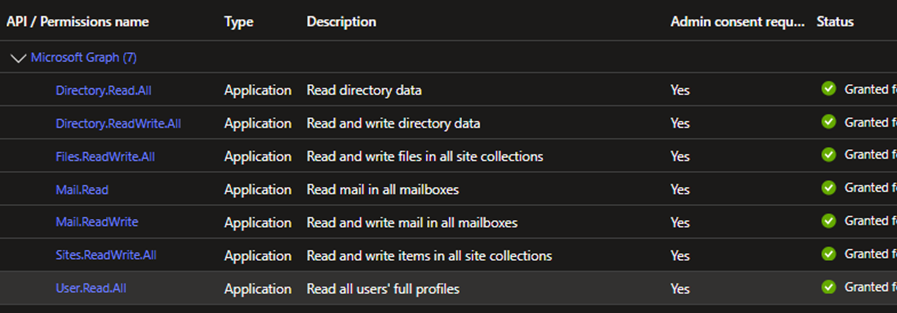
- The API permissions below are needed to scan BOTH OneDrive and Exchange Online.
- All of these permissions are REQUIRED for Spirion Sensitive Data Platform agents to function properly. An explanation of these permissions can be found here.
- Directory.Read.All
- Directory.ReadWrite.All
- Files.ReadWrite.All
- Mail.Read
- Mail.ReadWrite
- Sites.ReadWrite.All
- User.Read.All
- For instructions on how to create searches after authenticating Microsoft OneDrive and Exchange see How to Search OneDrive for Business.
- Be sure to record both the Application ID and the Directory ID while creating the Azure App as they will be used in a later step.
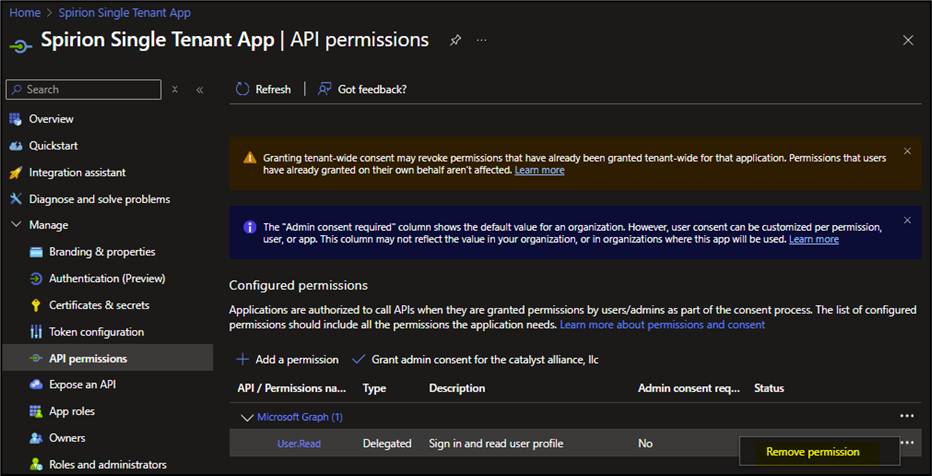
- Be sure to remove the User.Read permissions from the Azure app.
How to Create the Azure App
Use the following steps to create your Azure app:
- Log into: https://entra.microsoft.com/
- NOTE: An administrator must perform all the steps below to create the single tenant app with the permissions required (for example, the permissions Spirion Sensitive Data Platform requires must have admin consent as shown in the steps below).
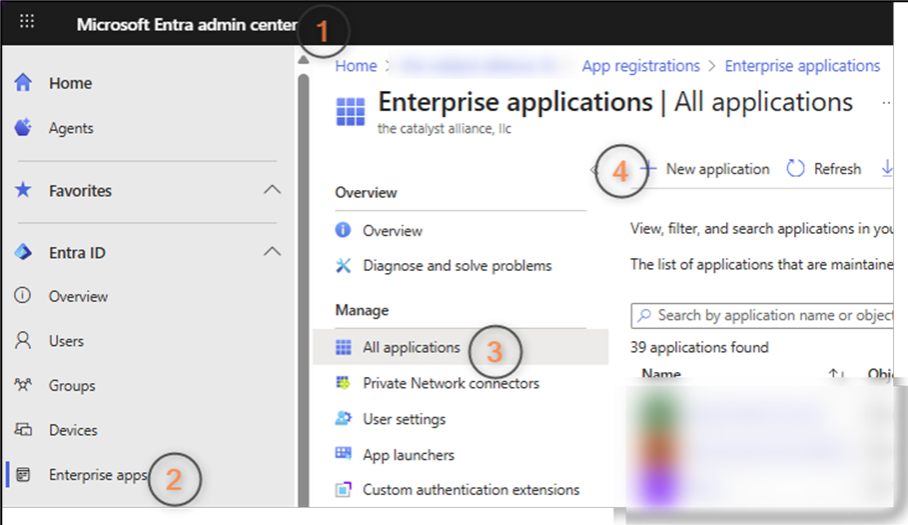
- In the Microsoft Entra admin center, from the left-side navigation menu select Enterprise apps, then All Applications under "Manage" on the right, and then click + New Application.
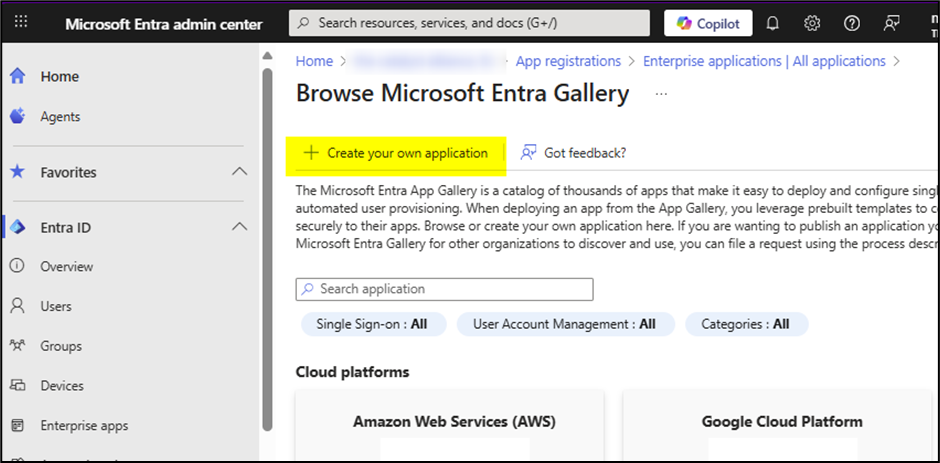
- The Browse Microsoft Entra Gallery page opens.
- Select the + Create your own application link in the top-middle of the page.
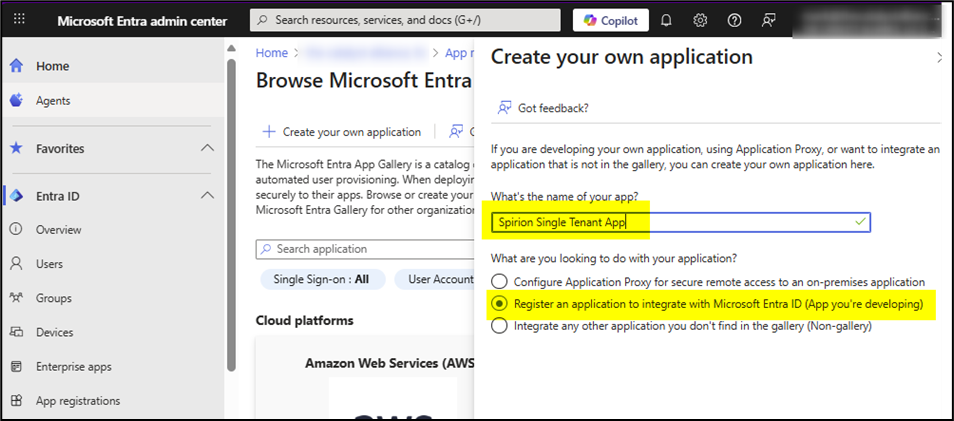
- In the field "What's the name of your app?" enter your application name and select the radio button Register an application to integrate with Entra ID (App you're developing).
- Click the Create button at the bottom of the page.
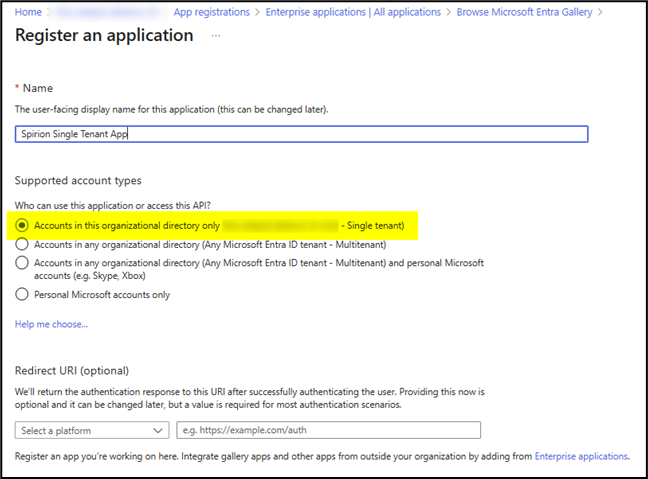
- The "Register an application" page opens.
- Select the radio button Accounts in this organizational directory only
- Click the Register button.
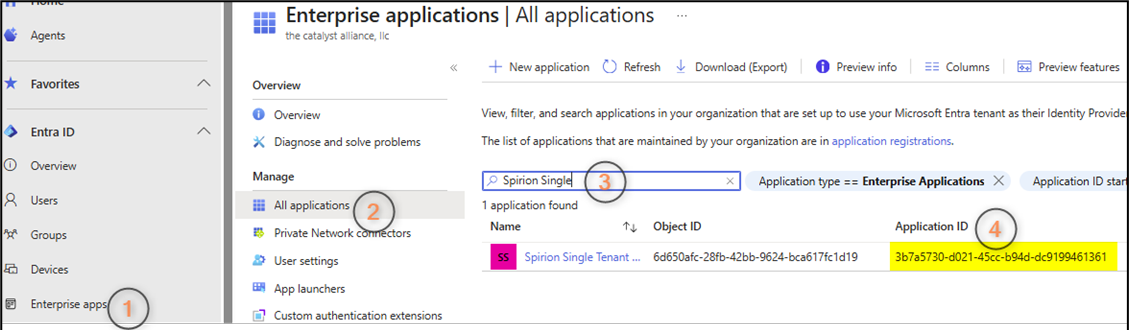
- From the left side navigation select the Enterprise apps entry.
- Select "All applications" under the "Manage" heading.
- In the search field on the right search for the app you just created.
- The app details appear in the window below the search field.
- Note the application ID in the Application ID table column at far right, as this is required later.
- Under the Name column click your app name, which is linked.
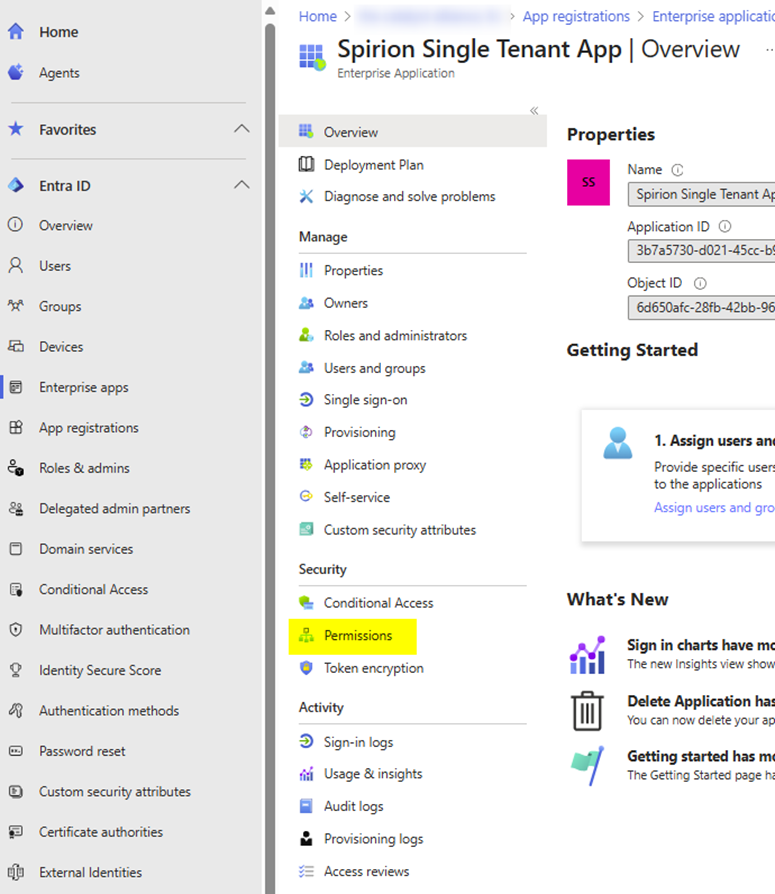
- The Azure app page opens.
- Under the "Security" heading click “Permissions.”
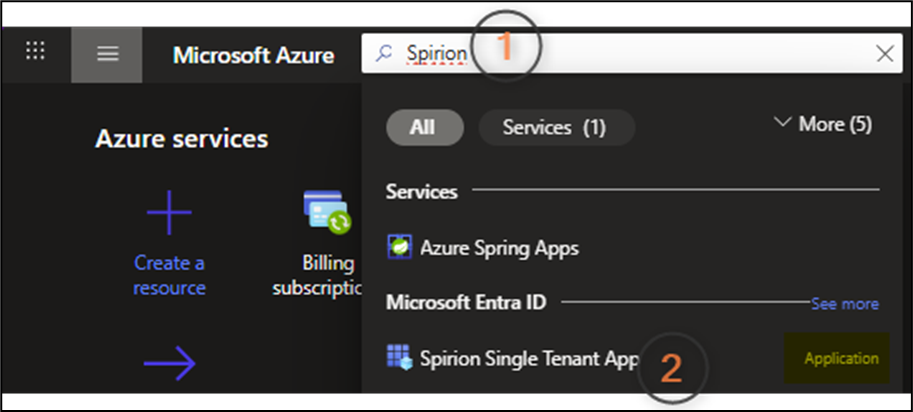
- Sign-in to portal.azure.com to assign permissions to your Azure app.
- Search for the app name that was created in previous steps.
- Choose the app that is labeled “Application”
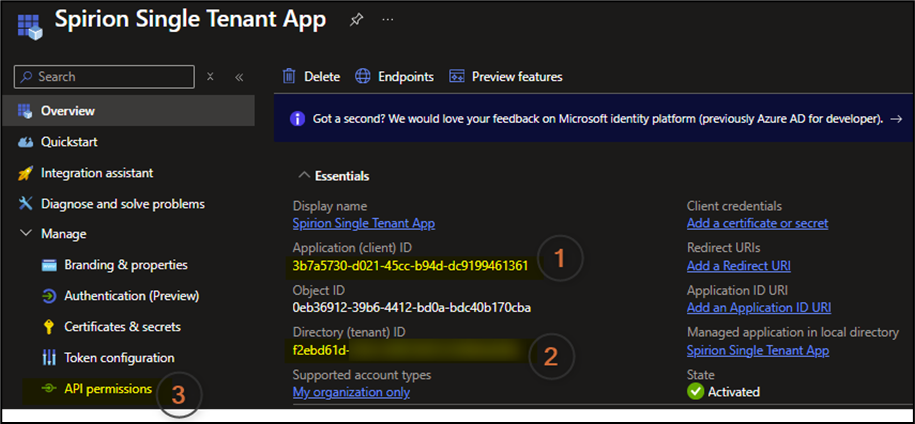
- Note the Application ID, and Directory ID: these are required later in this procedure.
- Select “API Permissions”
- Note that User.Read permissions are pre-assigned. Remove this permission.
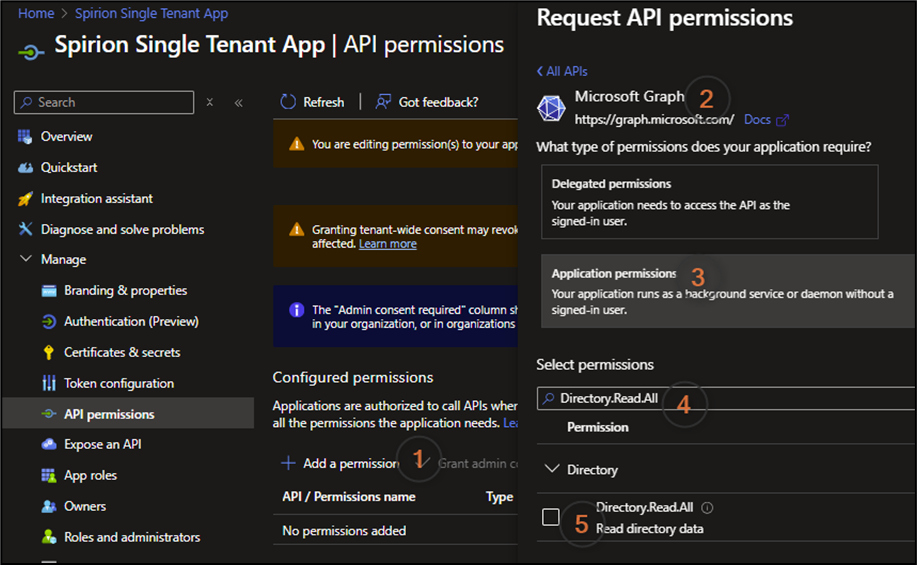
- Select the following action path: Add a permission > Microsoft Graph > Application permissions > Search for permission on the list below > Select each permission after searching > Add Permission
- NOTE: The list below are all of the “application” permissions that are needed to scan BOTH OneDrive and Exchange Online. It is assumed that all of these are required for Sensitive Data Platform agents to function properly when searching these targets. Explanations of these permissions are published by Microsoft here
- Directory.Read.All
- Directory.ReadWrite.All
- Files.ReadWrite.All
- Mail.Read
- Mail.ReadWrite
- Sites.ReadWrite.All
- User.Read.All
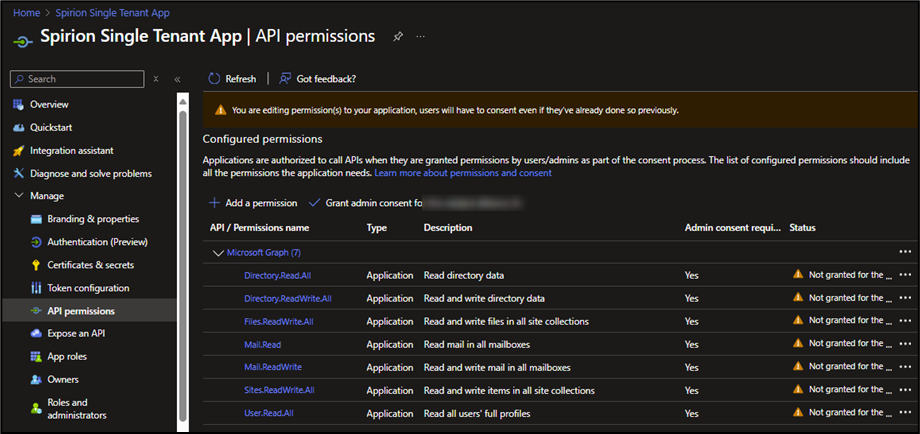
- After you’ve added all the permissions, your app resembles the screenshot below. Under the Status column, the status for all permissions should be “Not granted for the…..”
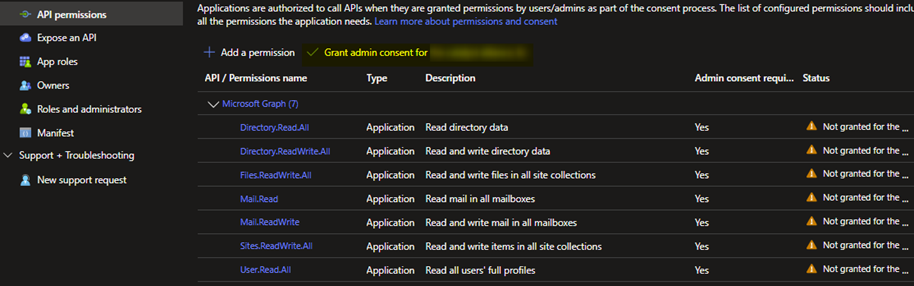
- Select “Grant Admin Consent” > Select Yes.
- The status for each permission, displayed in the Status column, changes to “Granted…”
- To understand what granting admin consent does, see the explanation published by Microsoft - Link
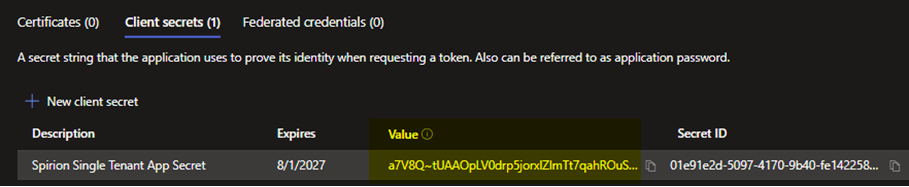
- Create a Client Secret:
- Under Manage on the left side navigation menu, select “Certificates & secrets.”
- Next select Client Secrets > + New client secret.
- In the Description field, enter the client secret name.
- Enter a custom start and end date that creates a two year duration.
- Click the Add button at the bottom of the screen.
- Copy the value under the "Value" column shown in the second screenshot below.