
How to Create a Tag
This topic describes how to create a new Tag from the Tag Management page.
In addition to the information below, to see examples of Tags as well as details about the available Conditional Tag settings and operators, see Tag Examples.
Tag Types
There are 3 types of Tags you can create (add):
- IP Range Tag
- This tag type is not commonly used
- Manual Tag
- This tag type is commonly used
- Conditional Tag
- This tag type is commonly used and the most powerful of all 3 tag types
How to Add an IP Range Tag
Use the following steps to create an IP Range tag:
- From the left-side navigation menu, navigate to the Tag Management page. Select "Data Asset Inventory > Tag Management."
- In the top right of the screen, click the blue Add Tag button.
- In the Create New Tag pop-up window, complete the following:
- Tag Name: Enter the tag name.
- Select IP Range from the Tag Type drop-down list.
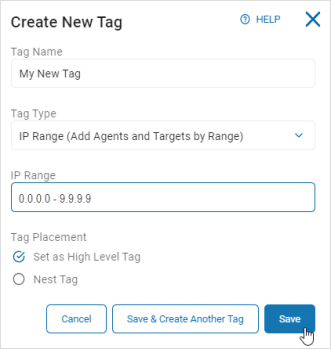
- IP Range: Enter the IP range.
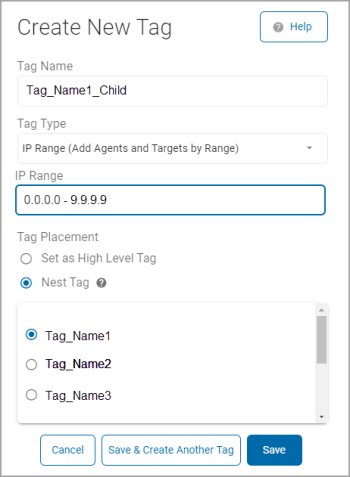
- Tag Placement:
- Set as High Level Tag: Select this option to set the new tag as high-level (parent) tag under which child tags can be nested.
- Nest Tag: Select a high-level (parent) tag to nest this new tag under as a child tag.
- Click Save to save the tag, Save & Create Another Tag to save this tag and create another, or Cancel to discard.
How to Add a Manual Tag
Use the following steps to create a Manual tag:
- From the left-side navigation menu, navigate to the Tag Management page. Select "Data Asset Inventory > Tag Management."
- In the top right of the screen, click the blue Add Tag button.
- In the Create New Tag pop-up window, complete the following:
- Tag Name: Enter the tag name.
- Select Manual from the Tag Type drop-down list.
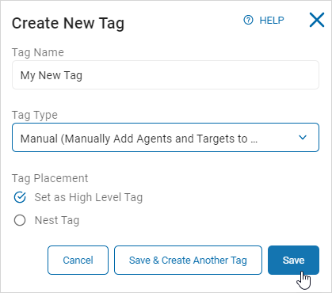
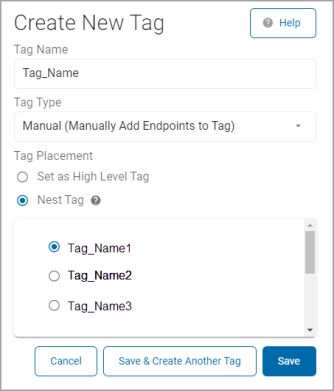
- In the Tag Placement section, select an option:
- Set as High Level Tag: Select this option to set the new tag as high-level (parent) tag under which child tags can be nested.
- Nest Tag: Select a high-level (parent) tag to nest this new tag under as a child tag.
- Click Save to create the tag, Save & Create Another Tag to save this tag and create another, or Cancel to discard.
How to Add a Conditional Tag
In addition to the information below, to see examples of Tags as well as details about the available Conditional Tag settings and operators, see Tag Examples.
Use the following steps to create a Conditional tag:
- From the left-side navigation menu, navigate to the Tag Management page. Select "Data Asset Inventory > Tag Management."
- In the top right of the screen, click the blue Add Tag button.
- In the Create New Tag pop-up window, complete the following:
- Tag Name: Enter a name in the Tag Name box.
- Select Conditional from the Tag Type drop-down list.
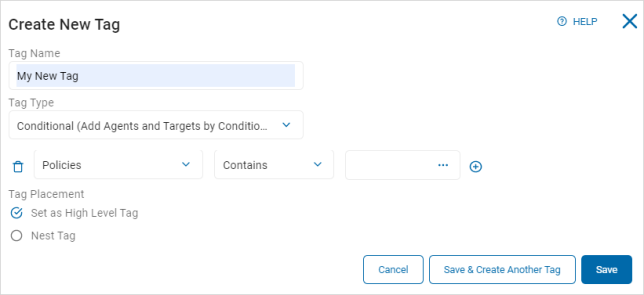
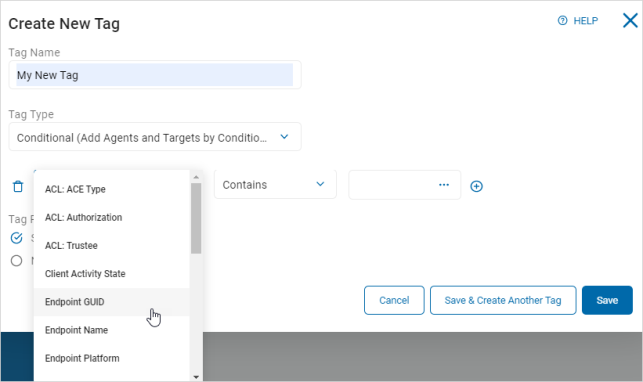
- Select an option from the Action Type (left) drop-down list.
- Select an option from the Operator (center) drop-down list.
The values available depend on the selection in the Action Type drop-down list.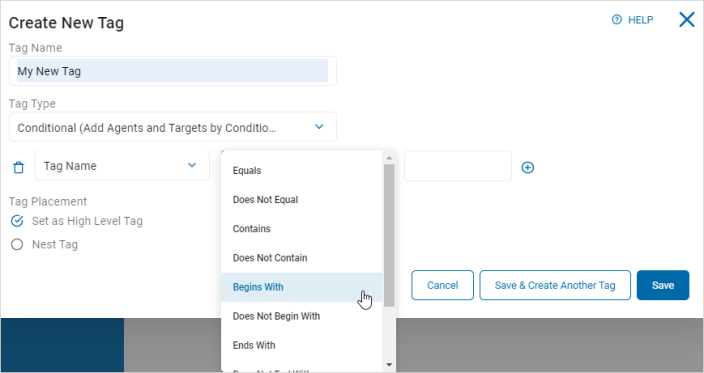
- Enter or choose a value in the Value Input (right) box.
The values available depend on the selection in the Action Type drop-down list.
- To add or remove conditions:
- Click the Add (plus) icon to add an additional group or value
- Click the Remove icon (trash can) to delete a group or value
- In the Tag Placement section, select an option:
- Set as High Level Tag: Select this option to set the new Tag as high-level (parent) Tag under which child Tags can be nested.
- Nest Tag: Select a high-level (parent) Tag to nest this new Tag under as a child Tag.
- Click Save to save the Tag, Save & Create Another Tag to save and create another tag, Cancel to discard.
- To see examples of Tags as well as details about the available Conditional Tag settings and operators, see Tag Examples.