How to Use Scans Settings - Remediation Section
How to Use Remediation Settings
To use Remediation settings, use the following steps:
- From the left side navigation menu, click Settings > Application Settings > Scans Settings.
- The "Scans Settings" page opens.
- Click the down arrow to expand the Remediation section.
- Complete the fields in the settings below.
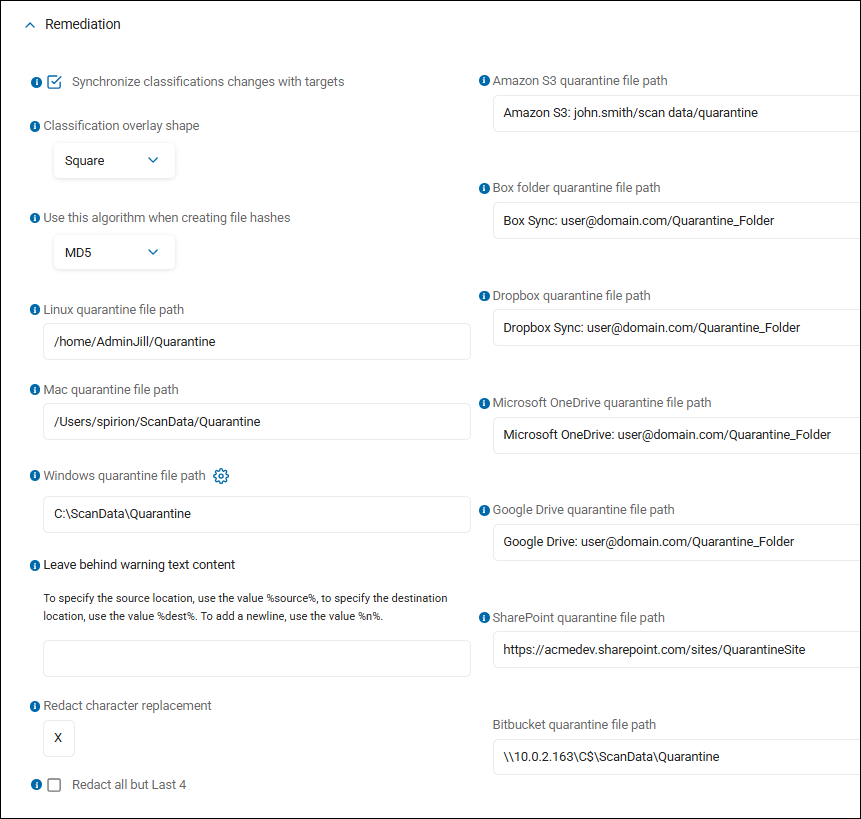
Synchronize Classification Changes With Targets
This setting controls whether classification tags assigned in Spirion are written back to the target systems or kept solely in the Console.
What it Does
When a user or automated playbook changes a file's classification (e.g., marking a document as Confidential, Public, PII, or applying a protection tag) within the Spirion Console:
- When Checked (Enabled): Spirion pushes and synchronizes those classification updates directly to the underlying files on the target storage locations or endpoints. It writes the classification into the file's native metadata (e.g., Microsoft Office document properties, EXIF metadata, NTFS Alternate Data Streams, or cloud/SharePoint metadata columns).
- When Unchecked (Disabled): Classification changes exist only inside the Spirion Console database. The target files, file metadata, and storage locations remain untouched.
When it Should Be Enabled
You should enable this setting when:
- Persistent Data Classification: You want classification tags to travel with the file itself so that even if the file is moved, copied, or emailed, its sensitivity level remains embedded in its metadata.
- Third-Party Security Tool Integration: You use downstream security controls—such as Data Loss Prevention (DLP) gateways, CASBs, or Encryption systems—that rely on reading file metadata/tags created by Spirion to enforce access or transfer rules.
- Target System Visibility: You need target platforms (like SharePoint document libraries or endpoint file systems) to visually reflect classification labels or metadata directly to end users.
- Automated Remediation Workflows: Your organization runs scheduled remediation playbooks where Console-driven classification decisions must automatically update target assets.
When it Should Be Left Disabled (or Used with Caution)
You should leave this setting disabled if:
- Audit & Monitoring Only: You only want to analyze, discover, and report on sensitive data internally within the Spirion Console without modifying target files.
- Read-Only / Regulatory Compliance Targets: You are scanning immutable storage, archive shares, or systems where modifying file metadata or file timestamps (
Last Modified) is restricted or undesirable. - Storage & Network Performance: You are running bulk operations across millions of files where writing metadata back to targets would introduce heavy I/O overhead, trigger storage backup delta re-indexing, or increase network traffic.
How Does File Metadata Classification Work across Different Target Types like SharePoint and NTFS File Shares
File metadata classification works differently depending on the underlying target system architecture.
When a security platform (such as Spirion SDP or a Data Loss Prevention system) synchronizes classification changes back to Targets, it adapts its write mechanisms to match the native capabilities of each storage platform.
1. NTFS File Shares & Local Windows Endpoints
On Windows NTFS file systems, classification metadata can be stored natively without altering the primary file content.
How It Works:
- NTFS Alternate Data Streams (ADS): NTFS allows multiple data streams to be attached to a single file identifier. The main content (e.g.,
report.docx) resides in the unnamed data stream, while classification metadata is written into a hidden secondary stream (e.g.,report.docx:SpirionClassificationor custom security attributes). - Embedded Office XML Properties: For Microsoft Office files (
.docx,.xlsx,.pptx) and PDFs, classification values can also be written directly into the document’s internal custom XML properties or header metadata.
Characteristics & Behavior:
- File Integrity: ADS writes do not alter the main file contents or break application compatibility—files open normally in Microsoft Word, Excel, etc.
- Portability:
- If a file is moved within an NTFS volume or between NTFS shares, ADS metadata travels with it intact.
- If a file is copied to non-NTFS storage (e.g., exFAT, Linux ext4 shares without Samba ADS support, or uploaded via a web browser), ADS metadata is stripped unless embedded XML document properties were used.
- Access Control: Reading or writing ADS metadata requires standard Windows file system modify/write permissions on the target share.
2. SharePoint & SharePoint Online
SharePoint does not use file-system streams; instead, it manages content as list items with structured column metadata in its underlying database, alongside native Office document property parsing.
How It Works:
- Document Library Column Metadata: Classification is stored directly as enterprise keywords, custom metadata columns (for example,
Sensitivity,ClassificationLevel), or managed metadata terms attached to the document library item. - Office Property Promotion/Demotion: SharePoint automatically reads custom XML properties inside uploaded Office documents and promotes them into SharePoint library columns. Conversely, if a column value is updated in SharePoint, SharePoint updates the document's internal metadata (demotion).
- Microsoft Purview/MIP Integration: Synchronization can trigger Microsoft Information Protection (MIP) sensitivity labels attached to the file in SharePoint Online via Graph APIs.
Characteristics & Behavior:
- Visibility: Classification tags appear directly in the SharePoint web UI alongside file names, making sensitivity visible to end users.
- Versioning & Auditing: Writing classification updates via SharePoint APIs (REST/CSOM/Graph) creates a new minor or major version of the document if library versioning is turned on, updating the
Modified ByandModified Dateattributes. - Search & Policy Enforcement: SharePoint Search indexes custom column metadata, enabling native DLP policies, conditional access rules, or search filters based on classification tags.
3. Comparison Across Target Types
Feature/ Target | NTFS File Shares | SharePoint / SharePoint Online | Cloud Storage (AWS S3/Azure Blob) |
|---|---|---|---|
Storage Location | NTFS Alternate Data Streams (ADS) or Embedded XML | Document Library Columns & MIP Labels | Object Metadata Keys / Blob Index Tags |
User Visibility | Hidden (requires PowerShell or security agent to inspect ADS) | High (displayed in SharePoint columns and UI badges) | Visible in Cloud Console / API metadata |
Portability | High across NTFS; lost if moved to non-NTFS filesystems | High within Microsoft 365 ecosystem | High within cloud vendor environment |
Side Effects of Write | May update file | Creates a new file version in SharePoint library | Updates object metadata version/ETag |
Permissions Needed | Write/Modify NTFS file permissions | Edit List Item / Document permissions in SharePoint |
|
Summary & Best Practice
- Use SharePoint classification sync when you need user-facing visibility, enterprise governance, and integration with Microsoft 365 DLP.
- Use NTFS classification sync when protecting static file shares where downstream endpoint/network security agents inspect local files for sensitivity attributes.
Classification Overlay Shape:
This setting determines the geometric shape used for color-coded classification indicators when custom icon graphics are not present or enabled.
What it Does
When files or scan results are assigned a data classification tag (such as Confidential, Public, or Internal), each classification is assigned a specific color.
The platform displays these classification badges across the Console UI (results grid, result details, workflow tree) and on endpoint file system overlays (for example, Windows Explorer file icon overlays).
- Fallback Rendering: If Display Classification Icons is turned off, if a classification tag does not have a custom icon assigned, or if the icon file exceeds 5KB, the system falls back to displaying a simple color-coded geometric shape.
- Shape Selection: The Classification Overlay Shape drop-down controls which shape is rendered as that fallback badge indicator:
- Circle (Default) — Displays a colored circular badge overlay.
- Square — Displays a colored square badge overlay.
When it Should Be Configured
You should configure this setting under the following circumstances:
- Standardizing Visual Indicators: Your organization does not upload custom PNG/ICO icons for every classification level and wants a clean, consistent geometric shape (circle vs. square) across the Console grid and Windows Explorer file icon overlays.
- Optimizing UI Performance: You have disabled custom icons (
Display Classification Iconsset to Disabled) to speed up result grid rendering across large scan sets, but still need color-coded visual cues for users and admins. - Aligning with OS / UI Design Guidelines: You want the classification overlays on endpoint file icons to match the design language of other security tools deployed in your environment (for instance, matching circular vs. square status badges used by other endpoint software).
Use This Algorithm When Creating File Hashes:
- When using file hashes for Global Ignore Lists or adding file hashes to search locations in a policy, it is possible to specify the algorithm to be used for the hashing.
- Changing this setting after hashes have been created invalidates any existing hashes.
- The Console and all endpoints must be configured, in unison, to use the same file hashing algorithm.
- The hash algorithm can be specified for endpoints with the following policy setting: Settings\Actions\Ignore\FileHash
- Default algorithm: MD5
Quarantine Settings
Note: Global configurations can be overridden by quarantine locations set in individual Scan Playbooks.
Linux Quarantine File Path
Enter the Linux location to quarantine the files.
- Local Agent machine, all files: <path>/<Quarantine_Folder>
- Example: /home/AdminBob/Quarantine
- This entry quarantines all files to the specified Linux folder on the local Agent machine
- Mounted machine, all files: mnt/Quarantine
- This entry quarantines all files to the specified quarantine folder on the specified mounted machine
- Remote machine, all files: \\<IP_address>\<drive_letter>$\<Quarantine_Folder>
- Example: \\10.0.2.163\c$\Quarantine
- This entry quarantines all files to the specified path on the specified remote Windows machine
Note: The file path syntax for Linux and Mac is different from that of Windows. The backslash '\' character in Windows is represented as a forward slash '/' in Linux/Mac.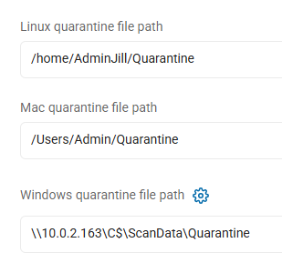
Mac Quarantine File Path
Enter the Mac location to quarantine the files.
- Local Agent machine, all files: <path>/<Quarantine_Folder>
- Example: /Users/Admin/Quarantine
- This entry quarantines all files to the specified Mac quarantine folder on the local Agent machine
- Remote machine, all files: \\<IP_address>\<drive_letter>$\<Quarantine_Folder>
- Example: \\10.0.2.163\c$\Quarantine
- This entry quarantines all files to the specified path on the specified remote Windows machine
Windows Quarantine File Path
Enter the local or remote Microsoft Windows location to quarantine the files.
- Local Agent machine, all files: <Drive_Letter>:\<Quarantine_Folder>
- Example: C:\ScanData\Quarantine
- This entry quarantines all files to the specified Windows drive (C:\ drive and folder on the local Agent machine
- Remote machine, all files: \\<IP_address>\<drive_letter>$\<Quarantine_Folder>
- Example: \\10.0.2.163\c$\Quarantine
- This entry quarantines all files to the specified path on the specified remote Windows machine
Amazon S3 Quarantine File Path
Specify the default folder to use for quarantining files discovered in an Amazon S3 cloud location.
- This setting can be a single location or a list of locations, entered one per line.
- Each item in the list must be specifically formatted to include the <path>, <user> (optional), and/or <admin> (admin account optional)
- <user> is a specified S3 user account to the specified S3 location
- <admin account> (optional) is an administrative account on S3 defined in the cloud storage configuration.
- If the admin account is not included, the path applies to all administrative accounts defined in the configuration.
- Supported Paths
- Only cloud storage paths (as they appear in results without a file name)
Examples
Examples of quarantine paths for local and cloud destinations, in valid formats, are listed below:
- Amazon S3, all files: Amazon S3: user/Quarantine_Folder
- This entry quarantines all files on this cloud provider to the specified Amazon S3 quarantine folder
- Amazon S3, admin user files only: Amazon S3: user/Quarantine_Folder,admin@domain.com
- This entry quarantines only files in the specified admin account on this cloud provider to the specified Amazon S3 quarantine folder
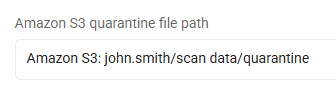
- This entry quarantines only files in the specified admin account on this cloud provider to the specified Amazon S3 quarantine folder
Box Quarantine File Path
Specify the default folder to use to quarantine files discovered in a Box cloud location.
- This setting can be a single location or a list of locations, entered one per line.
- Each item in the list must be specifically formatted to include the <path>, <user> (optional), and/or <admin> (admin account optional)
- <path> is any valid path
- <user> is a specified Box user account to the specified Box location
- <admin account> (optional) is an administrative account on Box Sync defined in the cloud storage configuration.
- If the admin account is not included, the path applies to all administrative accounts defined in the configuration.
- Supported Paths
- Only cloud storage paths (as they appear in results without a file name)
- Standard file system paths
Examples
Examples of quarantine paths for local and cloud destinations, in valid formats, are listed below:
- Local Agent machine, all files: E:\Quarantine_Folder
- This entry quarantines all files on this cloud provider to this local folder (E:\Quarantine_Folder) on the local agent
- Local Agent machine, admin user files only: E:\Quarantine_Folder,admin@domain.com
- This entry quarantines only files in the specified admin account on this cloud provider to this folder (E:\Quarantine_Folder) on the local agent
- Box, all files: Box Sync: user@domain.com/Quarantine_Folder
- This entry quarantines all files on this cloud provider to the specified Box Sync folder
- Box, admin user files only: Box Sync Admin: user@domain.com/Quarantine_Folder,admin@domain.com
- This entry quarantines only files in the specified admin account on this cloud provider to the specified Box Sync folder
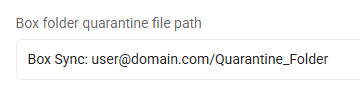
- This entry quarantines only files in the specified admin account on this cloud provider to the specified Box Sync folder
Dropbox Quarantine File Path
Specify the default folder to use to quarantine files discovered in a Dropbox cloud location.
- This setting can be a single location or a list of locations, entered one per line.
- Each item in the list must be specifically formatted to include the <path>, <user> (optional), and/or <admin> (admin account optional)
- <path> is any valid path
- <user> is a specified Dropbox user account to the specified Dropbox location
- <admin account> (optional) is an administrative account on Dropbox Sync defined in the cloud storage configuration.
- If admin account is not included, the path applies to all administrative accounts defined in the configuration.
- Supported Paths
- Only cloud storage paths (as they appear in results without a file name)
- Standard file system paths
Examples
Examples of quarantine paths for local and cloud destinations, in valid formats, are listed below:
- Local Agent machine, all files: E:\Quarantine_Folder
- This entry quarantines all files on this cloud provider to the specified drive and folder (E:\Quarantine_Folder) on the local agent
- Local Agent machine, admin user files only: E:\Quarantine_Folder,admin@domain.com
- This entry quarantines only files in the specified admin account on this cloud provider to the specified drive and folder (E:\Quarantine_Folder) on the local agent
- Dropbox, all files: Dropbox Sync: user@domain.com/Quarantine_Folder
- This entry quarantines all files on this cloud provider to the specified Dropbox Sync folder
- Dropbox, admin user files only: Dropbox Sync: user@domain.com/Quarantine_Folder,admin@domain.com
- This entry quarantines only files in the specified admin account on this cloud provider to the specified Dropbox Sync folder
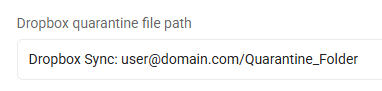
- This entry quarantines only files in the specified admin account on this cloud provider to the specified Dropbox Sync folder
Microsoft OneDrive Quarantine File Path
Specify the default folder to use to quarantine files discovered in a Microsoft OneDrive cloud location.
- This setting can be a single location or a list of locations, entered one per line.
- Each item in the list must be specifically formatted to include the <path>, <user> (optional), and/or <admin> (admin account optional)
- <path> is any valid path to the files to be quarantined
- <user> is a specified OneDrive user account to the specified OneDrive location
- <admin account> is an administrative account on OneDrive defined in the cloud storage configuration.
- If the admin account is missing, the path applies to all administrative accounts defined in the configuration.
- Supported Paths
- Cloud storage paths (as they appear in results without a file name)
- Standard file system path
Examples
Examples of quarantine paths for local and cloud destinations, in valid formats, are listed below:
- Local Agent machine, all files: E:\Quarantine_Folder
- This entry quarantines all files on this cloud provider to the specified drive and folder (E:\Quarantine_Folder) on the local agent
- Local Agent machine, admin user files only: E:\Quarantine_Folder,admin@domain.com
- This entry quarantines only those files in the specified admin account on this cloud provider to the specified drive and folder (E:\Quarantine_Folder) on the local agent
- OneDrive, all files: OneDrive For Business: user@domain.com/Quarantine_Folder
- This entry quarantines all files on this cloud provider to the specified Microsoft OneDrive for Business quarantine folder
- OneDrive, admin user files only: OneDrive For Business: user@domain.com/Quarantine_Folder,admin@domain.com
- This entry quarantines only files in the specified admin account on this cloud provider to the specified Microsoft OneDrive for Business quarantine folder
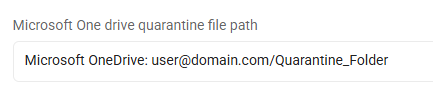
- Note: To quarantine files to Microsoft OneDrive, the entire location file path must be written in lowercase.
- This entry quarantines only files in the specified admin account on this cloud provider to the specified Microsoft OneDrive for Business quarantine folder
Google Drive Quarantine File Path
Specify the default folder to use to quarantine files discovered in a Google Drive cloud location.
- This setting can be a single location or a list of locations, entered one per line.
- Each item in the list must be specifically formatted to include the <path>, <user> (optional), and/or <admin> (admin account optional)
- <path> is any valid path
- <user> is a specified Google user account to the specified Google location
- <admin account> is an administrative account on Google Drive defined in the cloud storage configuration.
- If the admin account is missing, the path applies to all administrative accounts defined in the configuration.
- Supported Paths
- Cloud storage paths (as they appear in results without a file name)
- Standard file system path
Examples
Examples of quarantine paths for local and cloud destinations, in valid formats, are listed below:
- Local Agent machine, all files: E:\Quarantine_Folder
- This entry quarantines all files on this cloud provider to the specified drive and folder (E:\Quarantine_Folder) on the local agent
- Local Agent machine, admin user files: E:\Quarantine_Folder,admin@domain.com
- This entry quarantines only those files in the specified admin account on this cloud provider to the specified drive and folder (E:\Quarantine_Folder) on the local agent
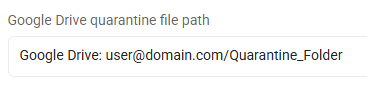
- Google Drive, all files: Google Drive: user@domain.com/Quarantine_Folder
- This entry quarantines all files on this cloud provider to the specified Google Drive quarantine folder
- Google Drive, admin user files only: Google Drive: user@domain.com/Quarantine_Folder,admin@domain.com
- This entry quarantines only those files in the specified admin account on this cloud provider to the specified Google Drive quarantine folder
- This entry quarantines only those files in the specified admin account on this cloud provider to the specified Google Drive quarantine folder
SharePoint Quarantine File Path
Enter the SharePoint location as described below to quarantine the files.
Note: Quarantining SharePoint files to a remote file server is not supported at present.
- Local Agent machine: <Drive_Letter>:\Quarantine_Folder
- Example: C:\SharePointQuarantine
- This entry quarantines all files to the specified drive (C🙂 and quarantine folder on the local Agent machine
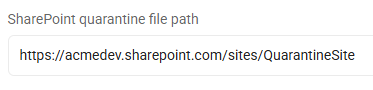
- SharePoint site: https://<SharePoint_site>/sites/QuarantineSite
- Example: https://acmedev.sharepoint.com/sites/QuarantineSite
- This entry quarantines all files to the specified SharePoint site quarantine folder on the specified remote SharePoint quarantine site
Bitbucket Quarantine File Path
Bitbucket is not currently supported.
Leave Behind Warning Text Content
This setting defines the exact text message that is placed inside a substitute text file (a "tombstone" or stub file) left in the original folder location when a file is quarantined, moved, or deleted.
What It Does
When an automated playbook or scan action remediates a sensitive file (by moving it to a secure quarantine directory or permanently deleting it from an unauthorized location), the original file is removed from its source folder.
The "Leave behind warning text content" setting configures the custom notification text written into a .txt replacement file created in that original directory. This ensures the user who originally owned or accessed the file is informed of what happened, why the file was removed, and what steps to take next.
How It Works
- Detection & Action: Spirion identifies a file containing sensitive data (for example, credit card numbers, SSNs, PHI) on an endpoint, network share, or cloud target that violates policy.
- Remediation Execution: Spirion's remediation engine executes the configured action—such as Quarantine (vaulting the file in an encrypted isolation share) or Shred/Delete.
- Stub File Creation: In the exact location where the sensitive file previously resided, Spirion generates a new text file (typically named after the original file, for example,
Customer_PII_RESTRICTED.txtorREMEDIATION_NOTICE.txt). - Message Population: Spirion populates this text file with the custom string configured in "Leave behind warning text content," often expanding dynamic variables such as date, time, file name, policy rule matched, or incident ID.
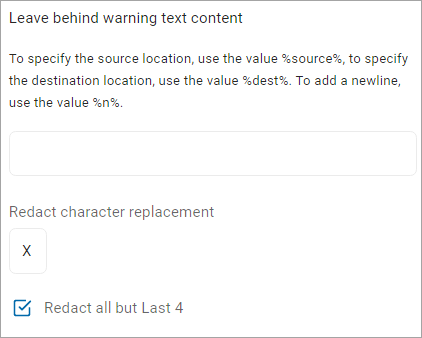
- To specify the source location, use the value %source%.
- To specify the destination location, use the value %dest%.
- To add a newline use the value %n%.
When It Should Be Enabled
You should enable and configure this setting whenever Quarantine, Move, or Delete remediation actions are active, particularly in user-facing storage environments.
Ideal Use Cases:
- Preventing "Lost File" Helpdesk Tickets: Without a leave-behind text file, users assume their files were accidentally deleted, corrupted by a system glitch, or lost due to a drive failure, leading to panic and unnecessary IT support tickets.
- Real-Time Security Awareness: It acts as an immediate learning moment for employees, reminding them not to store raw, unencrypted PII/PCI on public or unauthorized shares.
- Providing Clear Audit & Escalation Instructions: It provides the user with an Incident Reference ID and contact information so they can request file restoration through official security channels if the file was quarantined in error.
Examples
Example 1: End-User Desktop / Local Drive Quarantine
- Scenario: An employee saves an unencrypted spreadsheet containing customer credit card details (
Q3_Sales_Report.xlsx) onto their local Windows C: drive. - Action: Spirion Endpoint Watcher detects the PCI data and moves
Q3_Sales_Report.xlsxto a central quarantine vault. - Leave-Behind Text Created (
Q3_Sales_Report.xlsx_NOTICE.txt):SECURITY NOTICE: The file "Q3_Sales_Report.xlsx" was moved to a secure quarantine vault on 2026-09-03 because it contained unencrypted Payment Card Industry (PCI) data in violation of Corporate Policy SEC-201.If you require authorized access to this document or believe it was quarantined in error, please contact the Security Operations Center atsecurity@company.comand reference Incident ID: %INCIDENT_ID%.
Example 2: Public Network Share Clean-Up
- Scenario: An HR team member accidentally saves employee tax forms containing Social Security Numbers on a company-wide open file share (
\\fileserver\public\documents\). - Action: A scheduled Spirion network scan runs overnight, flags the file, and removes it from the public share.
- Leave-Behind Text Created (
REMEDIATION_NOTICE.txt):ATTENTION: A file previously stored in this folder was removed by the automated Data Protection System due to the presence of unencrypted Personally Identifiable Information (PII). Storing PII on open network drives is strictly prohibited.Please submit a ticket via the IT Service Portal if you need assistance relocating this data to an encrypted, restricted HR drive.
Redact Character Replacement
This setting specifies the character (or character set) used to overwrite sensitive data strings when a Redact (mask/scrub) action is executed on a file.
What It Does
When Spirion performs a Redact remediation action on a file containing sensitive findings (such as Credit Card Numbers, Social Security Numbers, Passwords, or Bank Accounts), it scrubs the sensitive data in-place without deleting the entire file or surrounding document text.
The "Redact Character Replacement" setting defines the masking character (for example, #, *, X, or a space) that replaces each digit or character of the identified sensitive data match.
How It Works
- Detection: Spirion's search engine identifies a specific sensitive string match (for example, a 9-digit SSN or 16-digit Primary Account Number) and notes its exact position and character length within the file.
- In-Place Character Overwrite: The remediation engine opens the document (for example,
.docx,.xlsx,.txt,.rtf) and replaces the sensitive characters with the designated replacement character, preserving the original formatting separators (like dashes or spaces) if configured. - Document Saving: The file is saved back to its original location. The surrounding text, layout, and non-sensitive information remain completely intact, while the sensitive data is rendered permanently unreadable.
When It Should Be Configured / Enabled
You should configure this setting when:
- Data Minimization without File Removal: You need to sanitize documents containing sensitive information so they can remain in active use without violating compliance rules (for example, PCI-DSS, HIPAA, GDPR).
- Establishing Organizational Scrubbing Standards: Your company's data governance policy mandates a specific masking character (for example, using
#or*to represent masked numbers across all remediated files). - Visual Clarity for Readers: Using a distinct symbol (like
#or*) ensures that anyone reading the document can immediately tell that text was intentionally redacted by security policy rather than accidentally deleted or formatted incorrectly.
Examples
Example 1: Credit Card Numbers (* Replacement)
- Configured Character:
* - Original File Content:
Paid via Visa card 4111 2222 3333 4444 on file. - Redacted File Content:
Paid via Visa card **** **** **** **** on file.
Example 2: Social Security Numbers (# Replacement)
- Configured Character:
# - Original File Content:
Employee SSN: 123-45-6789 - Redacted File Content:
Employee SSN: ###-##-####
Example 3: Passwords in Plaintext Config Files (X Replacement)
- Configured Character:
X - Original File Content:
db_password=SuperSecretPass123 - Redacted File Content:
db_password=XXXXXXXXXXXXXXXXXX
Redact all but Last 4
Note: Global quarantine configurations for cloud locations are mostly done with the admin accounts.
Note: Global configurations can be overridden by Playbook quarantine locations.
This setting modifies the behavior of the Redact (in-place masking) remediation action for numerical sensitive data types (such as Credit Card Numbers, Social Security Numbers, and Bank Account Numbers).
What It Does
Instead of overwriting every single character of a sensitive string with the designated replacement character (for example, * or #), enabling "Redact all but Last 4" instructs Spirion to redact all leading digits while leaving the final 4 characters intact and visible.
How It Works
- Detection & String Evaluation: Spirion identifies a sensitive string match (such as a 16-digit credit card number or a 9-digit SSN) in a document.
- Partial Overwrite Calculation: The remediation engine determines the full length of the match. It applies the configured Redact Character Replacement symbol (for example,
*or#) to all leading digits, preserving original separators (dashes/spaces if applicable), but skips the final 4 digits. - In-Place Preservation: The modified text is saved back into the original file. The document layout remains intact, the sensitive leading data is permanently scrubbed, and the trailing 4 digits remain available for reference.
When It Should Be Enabled
You should enable this setting when:
- PCI-DSS Compliance Alignment: PCI-DSS standards allow storing or displaying the last 4 digits of a Primary Account Number (PAN) for billing, transaction matching, and customer verification, while mandating that the full PAN remain unreadable.
- Operational & Financial Reconciliation: Finance, payroll, or customer service teams need to reconcile receipts, invoices, or employee records by matching the last 4 digits without maintaining risky full card numbers or SSNs in plaintext files.
- Reducing User Disruption: Enabling users to see the last 4 digits helps them recognize which customer or account a file refers to, preventing confusion while still eliminating full data exposure risk.
Examples
Example 1: Primary Account Number (Credit Card)
- Settings: Character Replacement =
*| Redact all but Last 4 = Enabled - Original Text:
Visa Payment: 4111 2222 3333 4444 - Redacted Result:
Visa Payment: **** **** **** 4444 - (Note: If disabled, the result would be
**** **** **** ****)
Example 2: Social Security Number (SSN)
- Settings: Character Replacement =
#| Redact all but Last 4 = Enabled - Original Text:
Tax Identifier: 123-45-6789 - Redacted Result:
Tax Identifier: ###-##-6789
Example 3: Direct Deposit Bank Account Number
- Settings: Character Replacement =
X| Redact all but Last 4 = Enabled - Original Text:
Routing: 021000021 | Account: 9876543210 - Redacted Result:
Routing: 021000021 | Account: XXXXXX3210
Microsoft Information Protection

Procedure:
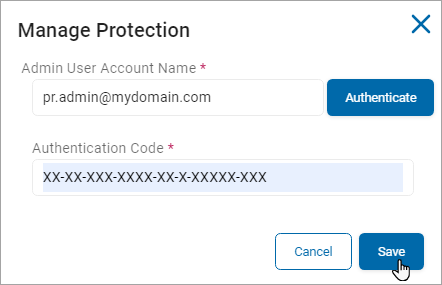
- Next to Manage Protection (Authenticated), click the blue Manage button.
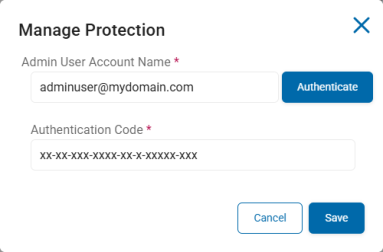
- The "Manage Protection" window opens.
- Enter your admin user account name in the Admin User Account Name field and click the blue Authenticate button.
- Authentication Code: Enter your authentication code provided from the authentication above in the box.
- Client ID: (Optional) Enter your unique client ID to be used for authentication.
- Client Secret: (Optional) Enter your unique client secret to be used for authentication.
- Tenant ID: (Optional) Enter your tenant ID to be used by the authenticating server.
- Click the Save button to save or the Cancel button to discard.
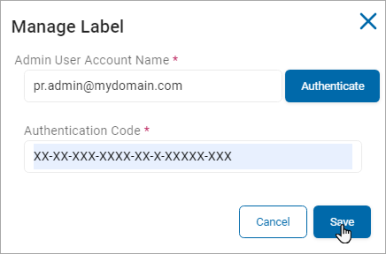
Note: If you enter value in any of the optional fields, it is mandatory to add values in the other optional fields as well. - In the Manage Label (Authenticated) section click the blue Manage button.

- The Manage Label pop-up window opens.
- Enter your admin user account name (user@domain.com) in the field Admin User Account Name and click the blue Authenticate button.
- Authentication Code: Enter your authentication code provided from the authentication above in the "Authentication Code" field.
- Client ID: Enter your unique client ID to be used for authentication.
- Client Secret: Enter your unique client secret to be used for authentication.
- Tenant ID: Enter your tenant ID to be used by the authenticating server.
- Click the blue Save button to save or the Cancel button to discard.