
How to Add a New Role
Use the following steps to add a new Role:
- From the left-side navigation menu select "Settings" at the bottom of the menu.
- Select "User Management" from the menu.
- The "User Management" page opens.
- Select the USER ROLES tab.
- In the top right of the screen, click the blue + Add Role button.
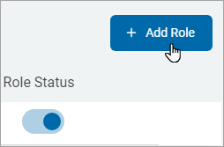
- The "Create New Role" page opens.
Note: By default, all users assigned to a custom role have access to the following Spirion Sensitive Data Platform pages (pages only): - SPIglass™ Dashboard
- Data Asset Inventory (including the SDV3 dashboard, Targets, and Tags)
- Agent Management
- Scans
- Playbooks
- Reports
- Specific Spirion Sensitive Data Platform objects, such as specific Agents, Targets, Tags, Scans, Playbooks, or Reports. These objects are accessed and/or managed by users as set by the role they are a member of (role-based access control). The objects the User Role can access can be configured after the role is created.
IMPORTANT! By default, user access to all Tags, Targets, Scans, Playbooks, and Reports is denied (excluding to those objects the user created before being assigned to their role). - On the Create New Role page, complete the following:
- Type a name in the Role Name box.
Note: User Role names must be unique.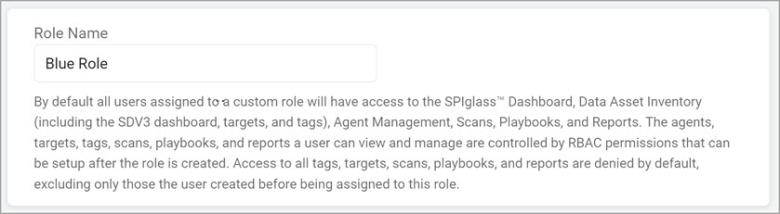
- Select the appropriate access for each Area shown - View and Manage.
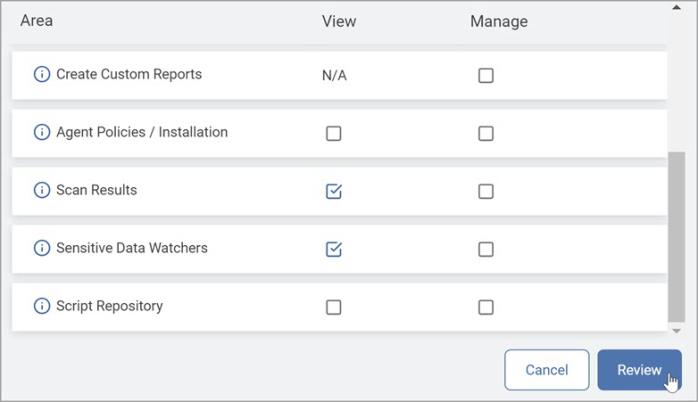
Note: Custom roles do not have access to existing scans, playbooks, or reports by default. Permissions to Read or Manage these resources are handled in the subsequent step.
- Type a name in the Role Name box.
- Click the blue Review button.
- The Verify New Role Configuration pop-up window opens.
- Review the permissions you have granted for the new role.
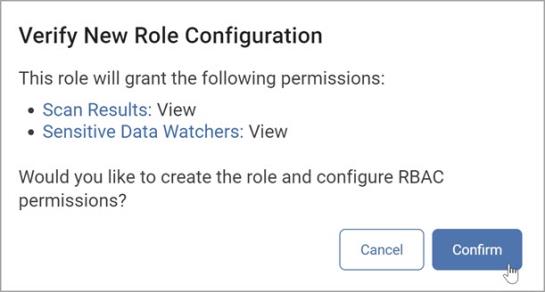
- Click the Confirm button to create the new role or click the Cancel button to discard your changes.
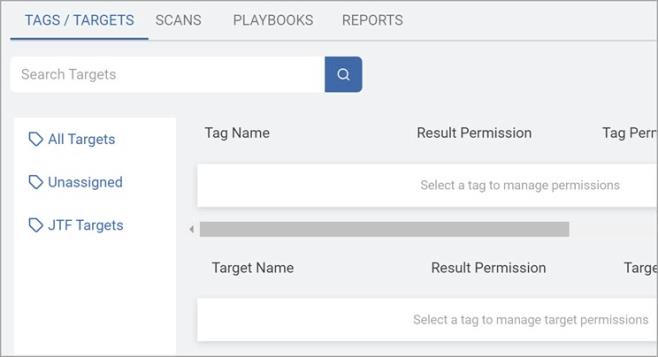
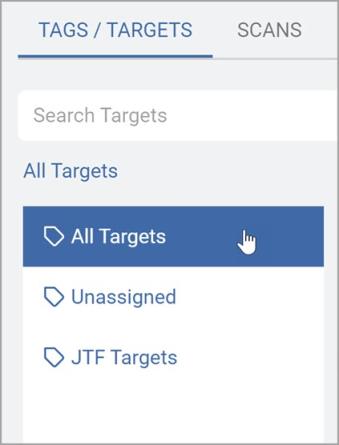
- On the TAGS / TARGETS tab, select any relevant tag groups or targets for the role.
Select either of the following options: - All Targets
- Custom tag (which is Inherited by default)
- From the kebab menu at the right of the desired Tag or Target, select Edit Permissions.
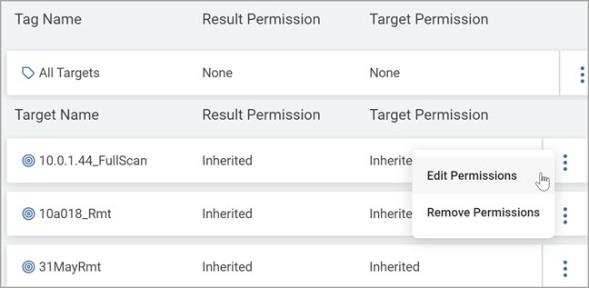
- In the Edit Tag Permissions pop-up window controls, select from the following:
- Partial or full visibility of matches against the Tag or Target.
- Whether users can add Targets or create nested Tags when working with manual Tag types.
- Enables Modify access to be assigned to edit target details
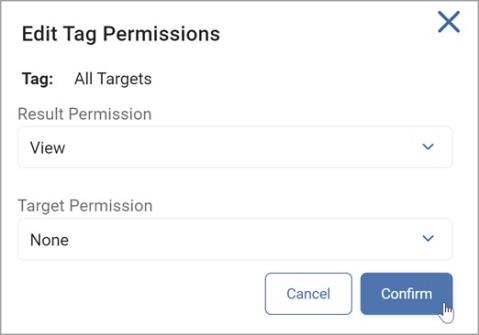
- Click the Confirm button to save the settings or the Cancel button to discard.
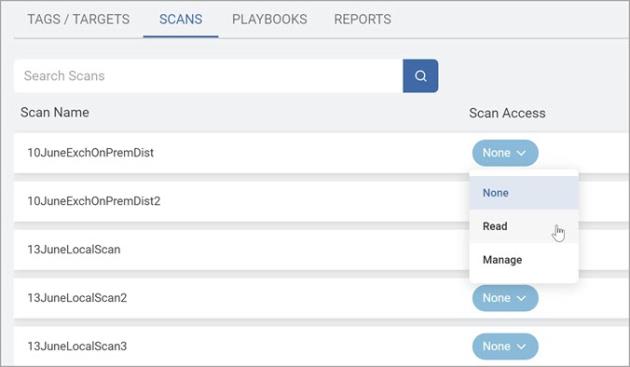
- From the top of the page select the SCANS tab.
- Select which scan(s) the role can access.
- As previously stated above, Read access enables scans to be executed from the kebab menu from the Scans table on the Scan page (Scans > All Scans).
- Select from:
- None
- Read
- Manage
- From the Playbooks tab, select which playbook(s) should be accessible to the role.
- As previously stated above, Read enables playbooks to be selected during the scan creation process (if authorized to create scans).
- Select from:
- None
- Read
- Manage
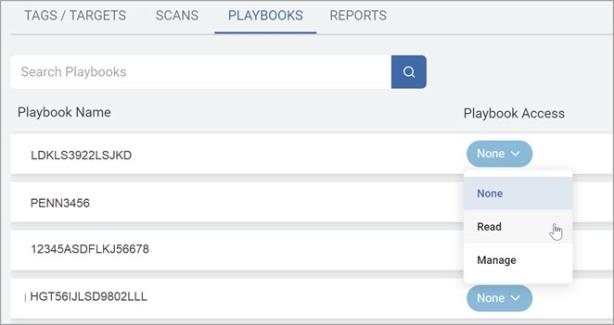
Note: The Playbook Override option controls whether a role is authorized to perform user-level remediation against the specified Target(s).
- From the Reports tab, select which report(s) should be accessible to the role.
- Select one of the following:
- None
- Read
- Manage
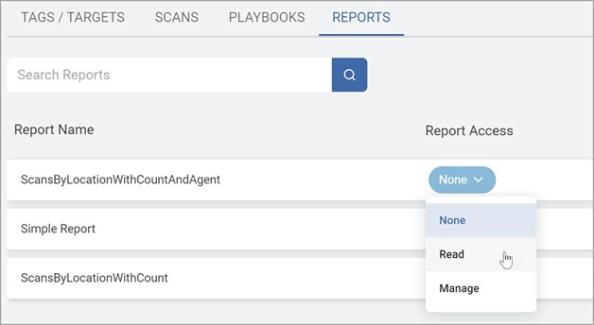
Note: Reports with Read access can be viewed in the console only and exporting is not allowed.