
Scan Options
Overview
When you set up a new scan, you are presented with a number of Basic and Advanced options to use to tailor your scan.
The options vary by the type of Target you are scanning: Cloud, Local or Remote Files & Folders, Email, Collaboration Tools, or Website.
- Several of the Target types share Basic and Advanced options.
- This document also contains email-related options and discovery team settings.
Basic Options
Note: These settings are not available for Database Targets.
Basic options apply to the following Target types:
- Cloud
- Files & Folders (Local & Remote Scans)
- Collaboration Tools
- Website
Additional Information
- For information on the target type-specific options, see the individual Target type sections in How to Create a New Sensitive Data Scan.
- The following Target types all have options specific to their type: Cloud, Files & Folders, Email, Collaboration Tools, and Website Target types all have options specific to their type.
Select Files by Extension
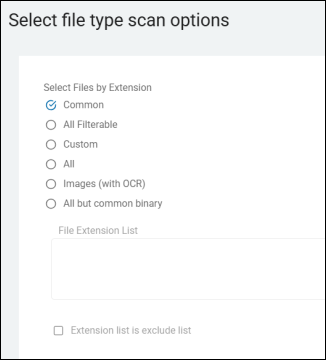
- This setting is the primary "On/Off" switch that determines whether the Agent should use (or specifically exclude) a specific list of file types for its search.
What it Does
- Enables the Filter: When this setting is checked (or set to "Include"), it tells the Agent: "Do not scan everything. Only look at the files that match the extensions I have provided in the list (for example, docx, xlsx, pdf)."
- Defines the Search Scope: This setting acts as the first layer of the "Search Filter Pipeline." Before the Agent checks for Magic Bytes or Deep Analysis, it checks this setting to see if the file qualifies based on its extension.
- Performance Control: This is the single most important setting for scan speed. By restricting the search to common document types, you prevent the Agent from wasting CPU cycles trying to open system files, driver files, or application binaries that almost never contain sensitive user data.
Two Common Modes
This 2 available modes for this setting are as follows:
- Include Mode (Standard): This is the default behavior (checkbox "Extension list is exclude list" unchecked). This options tells the Agent "Only scan files with these extensions." This is the most common configuration for workstations.
- Exclude Mode: "Scan everything except files with these extensions." This mode is typically used on specialized servers where you want to scan almost all files but need to skip massive database files (
.mdf) or log archives (.zip) that may crash the scan.
Impact of this Setting
- Speed: With this setting set to All, the Agent attempts to open every single file on the hard drive. On a standard Windows 10/11 machine, there are over 500,000 system files. Scanning all of these files can turn a 30-minute scan into a 10-hour scan.
- Resource Management: Opening a file to examine it for sensitive data requires memory and CPU cycles. By using the correct option for this setting you ensure the Agent uses only those resources on files likely to yield results.
- User Experience: If the Agent tries to scan every system file, the machine's user will likely notice their computer slowing down significantly (high disk I/O).
Available Options
- Values are entered one per line as "ext;1" to specify that the extension ("ext") should be enabled for the list
- Enter file extensions in lowercase
- File types to search:
- Common file
- Microsoft Windows
- Only search Microsoft Office, Adobe Acrobat PDF, text, web, and other common formats.
- File types include:
- .1st, .asm, .asp, .aspx, .btm, .c, .cc, .cpp, .cs, .css, .cxx, .def, .dic, .h, .hpp, .hxx, .idl, .idq, .inc, .inf, .ini, .inx, .java, .jsl, .log, .me, .rc, .reg, .rels, .snippet, .text, .txt, .url, .wtx, .xml, .xsl, .pdf, .edn, .fdf, .xdp, .xfd, .xfdf, .htm, .html, .rtf, .7z, .gz, .tar, .z, .rar, .bz, .bz2, .tgz, .tbz, .tbz2, .zip, .doc, .dot, .xls, .xla, .xlb, .xlc, .xld, .xlk, .xll, .xlm, .xlt, .xlv, .xlw, .dif, .slk, .ppt, .pot, .ppa, .pps, .pwz, .docx, .docm, .dotx, .dotm, .xlam, .xlsx, .xlsm, .xltm, .xltx, .pptm, .pptx, .potx, .potm
- macOS
- Mac Agent uses Spotlight to detect how to process files
- Common extensions include:
- Plugin name:/System/Library/Spotlight/PDF.mdimporter
- Plugin key:PDF
- UTIs:
- com.adobe.pdf
- Plugin name:/System/Library/Spotlight/RichText.mdimporter
- Plugin key:RichText
- UTIs:
- public.rtf
- public.html public.xml
- public.plain-text
- com.apple.traditional-mac-plain-text
- com.apple.rtfd com.apple.webarchive
- org.oasis-open.opendocument.text
- public.comma-separated-values-text
- public.delimited-values-text
- public.comma-separated-values-text
- public.delimited-values-text
- public.text
- public.html
- public.xml
- public.plain-text
- com.apple.traditional-mac-plain-text
- org.oasis-open.opendocument.text
- Plugin name:/System/Library/Spotlight/Office.mdimporter
- Plugin key:Office
- UTIs:
- org.openxmlformats.wordprocessingml.document
- org.openxmlformats.wordprocessingml.template
- org.openxmlformats.wordprocessingml.document.macroenabled
- org.openxmlformats.wordprocessingml.template.macroenabled
- org.openxmlformats.spreadsheetml.sheet
- org.openxmlformats.spreadsheetml.template
- org.openxmlformats.spreadsheetml.sheet.macroenabled
- org.openxmlformats.spreadsheetml.template.macroenabled
- org.openxmlformats.presentationml.presentation
- org.openxmlformats.presentationml.template.macroenabled
- org.openxmlformats.presentationml.template
- org.openxmlformats.presentationml.presentation.macroenabled
- org.openxmlformats.presentationml.slideshow
- org.openxmlformats.presentationml.slideshow.macroenabled
- com.microsoft.powerpoint.ppt
- com.microsoft.powerpoint.pot
- com.microsoft.powerpoint.pps
- com.microsoft.excel.xls
- com.microsoft.excel.xlt
- com.microsoft.excel.xla
- com.microsoft.word.doc
- com.microsoft.word.dot
- com.microsoft.excel.openxml.addin
- com.microsoft.excel.openxml.template
- com.microsoft.excel.openxml.workbook
- com.microsoft.excel.openxml.template.macro-enabled
- com.microsoft.excel.openxml.workbook.binary
- com.microsoft.excel.openxml.workbook.macro-enabled
- com.microsoft.powerpoint.openxml.presentation
- com.microsoft.powerpoint.openxml.presentation.macro-enabled
- com.microsoft.powerpoint.openxml.slideshow
- com.microsoft.powerpoint.openxml.slideshow.macro-enabled
- com.microsoft.powerpoint.openxml.template
- com.microsoft.powerpoint.openxml.template.macro-enabled
- com.microsoft.word.openxml.document
- com.microsoft.word.openxml.document.macro-enabled
- com.microsoft.word.openxml.template.macro-enabled
- org.openxmlformats.presentationml.presentation.macroenabled
- org.openxmlformats.presentationml.slideshow
- org.openxmlformats.presentationml.slideshow.macroenabled
- org.openxmlformats.presentationml.template
- org.openxmlformats.presentationml.template.macroenabled
- org.openxmlformats.spreadsheetml.sheet
- org.openxmlformats.spreadsheetml.sheet.macroenabled
- org.openxmlformats.spreadsheetml.template.macroenabled
- org.openxmlformats.wordprocessingml.document
- org.openxmlformats.wordprocessingml.document.macroenabled
- org.openxmlformats.wordprocessingml.template
- org.openxmlformats.wordprocessingml.template.macroenabled
- All Filterable
- A "smart" search mode.
- Instead of you manually typing in a list of extensions (like
doc, xls, pdf), this option tells the agent to automatically scan every file type that the Spirion engine is physically capable of opening and parsing. - What it Does
- Uses the Built-in Library: Spirion has an internal library of hundreds of file formats it knows how to "read" (e.g., all versions of Office, PDF, CSV, many image types with OCR, compressed files, etc.).
- Dynamic Identification: If the agent encounters a file and its internal engine has a "parser" for that format, it will scan it. If it’s a proprietary binary file or a system file that Spirion doesn't have a way to read, it will skip it.
- Automatic Updates: When you upgrade the Spirion agent to a newer version that adds support for new file types (like a new CAD format or a new database type), "All Filterable" will automatically begin scanning those new types without you having to update your policy.
- Why You Would Use It
- Maximum Thoroughness: This is the most "complete" search mode. It ensures that no sensitive data is missed simply because you forgot to add an obscure extension (like
.rtfor.wpd) to a manual list. - Set-and-Forget Policy: It’s great for administrators who don't want to maintain a massive, comma-separated list of extensions. You let the software decide what it's capable of searching.
- Shadow IT Discovery: It helps find sensitive data in non-standard applications that users might be using, which wouldn't be covered by a basic "Office-only" extension list.
- Maximum Thoroughness: This is the most "complete" search mode. It ensures that no sensitive data is missed simply because you forgot to add an obscure extension (like
- ⚠️ The Risks (Performance and Noise)
- Longer Scan Times: Because "All Filterable" includes hundreds of formats, the agent will attempt to open and test many more files than a standard "Office-only" search. This significantly increases the time it takes to complete a full-drive scan.
- System File "Churn": On a Windows machine, there are many files that technically look like text or XML (which are filterable) but are actually just OS configuration files. Scanning these can lead to "noise" in your results.
- Resource Consumption: This mode is much harder on the CPU and Disk I/O than a restricted extension list.
- Best Practice
- Server vs. Workstation: "All Filterable" is often used on File Servers where you really need to be sure nothing is hidden.
- Avoid on Workstations: For standard employee laptops, it is usually overkill. A targeted File Extension List (Office, PDF, Text) is typically preferred to keep the user's computer fast and responsive.
- Custom
- Selecting this option actvates the "File Extension List" box.
- The most common configuration for administrators. It switches the Agent from using "automatic" or "pre-defined" lists to using a manual, user-defined list of file extensions that you provide.
- What it Does
- Activates the "File Extension List": When you choose "Custom," the agent unlocks the text box where you type in specific extensions (e.g.,
docx, xlsx, pdf, txt). - Enforces Strict Filtering: The agent will only scan files that match the exact extensions you have typed into that list.
- Overrides Defaults: It ignores any internal "built-in" lists and focuses strictly on your instructions. If you only put
txtin the list, the agent will skip every Word document, PDF, and Spreadsheet on the computer.
- Activates the "File Extension List": When you choose "Custom," the agent unlocks the text box where you type in specific extensions (e.g.,
- Why You Would Use It
- Performance Optimization: This is the best way to keep scans fast. By limiting the search to just the "Big Three" (Office, PDF, Text), you can scan a 500GB hard drive in a fraction of the time it would take to scan "All Filterable" files.
- Targeted Audits: If you are specifically looking for database exports, you might set a Custom list of
sql, csv, bak, dmp. - Compliance Control: If your legal team only requires you to scan "Official Documents," using a Custom list ensures you aren't accidentally scanning a developer's source code or system logs that aren't part of the audit scope.
- ⚠️ SME Warning: The "Dot" Syntax
- When using the Custom option, be careful with how you enter the extensions:
- Correct:
docx, xlsx, pdf, txt(Comma-separated, no leading dots is usually the standard in the SDP console). - Check Your Version: Some older versions of the Windows agent or specific XML configurations might require the dot (
.docx), but the modern SDP console typically handles the extension without it.
- Correct:
- The "Empty List" Risk
- If you select Custom but leave the File Extension List completely blank, the behavior can be unpredictable:
- On most modern agents, a blank Custom list acts as an "Everything" filter (it will try to scan every file it finds).
- This is dangerous because it will attempt to open binary system files (
.exe,.dll,.sys), which can cause the agent to hang or the computer to become extremely slow.
- Summary
- The Custom option tells the agent: "Don't guess what I want to scan. Only search the specific file types I have typed into the list. If it's not on my list, ignore it." It is the primary tool for balancing security with system performance.
- All
- The most aggressive and least filtered search mode available.
- When this is selected, the agent ignores the "File Extension List" and attempts to open every single file it encounters on the storage device, regardless of its name or extension.
- What it Does:
- Removes the Gatekeeper: The agent no longer checks if a file is a
.docx,.pdf, or.exe. It treats every object on the disk as a candidate for a sensitive data search. - Forces Content Analysis: Because it isn't filtering by extension, the agent must use its internal engines to determine if there is readable text inside every file.
- Maximum Possible Surface Area: This mode leaves no stone unturned. It will look inside system files, driver files, application binaries, temporary files, and hidden files.
- Removes the Gatekeeper: The agent no longer checks if a file is a
- Common Scenarios:
- Deep Forensic Investigation: If you suspect a user is intentionally hiding data by removing file extensions entirely or using random, non-standard extensions (e.g.,
SecretData.123), this is the only way to find it. - Total Data Discovery: In a "Clean Slate" audit where you have no idea what kind of data exists on a server, "All" ensures that even proprietary or legacy file types are at least attempted to be read.
- Malware/Steganography Detection: Sometimes sensitive data is embedded in unusual places (like inside a
.dllor a.sysfile). "All" will catch strings of text inside these binary files.
- Deep Forensic Investigation: If you suspect a user is intentionally hiding data by removing file extensions entirely or using random, non-standard extensions (e.g.,
- ⚠️ The Risks (Extreme Performance Impact):
- Using the "All" setting is generally discouraged for standard production workstations because of the following:
- Drastic Slowdown: A scan that normally takes 30 minutes with a "Custom" list could take 12 to 24 hours with "All." The agent has to open hundreds of thousands of Windows system files that it would normally skip.
- High Resource Usage: The CPU and Disk I/O will stay at a high level for the duration of the scan, which will likely cause the end-user's computer to feel "laggy" or unresponsive.
- "Garbage" Matches (False Positives): Binary files (like
.exeor.dat) often contain random strings of characters that look like Credit Card numbers or Social Security Numbers to a computer. Scanning "All" files will significantly increase the number of false positives your team has to review. - Scan Hangs: If the agent tries to "read" a massive, active database file or a system paging file, it can cause the Spirion agent to hang or crash.
- Best Practice
- Never use "All" for a full
C:\drive scan unless it is a specific forensic requirement. - Combine with a Location Filter: If you must use "All," restrict the search to a specific, small folder (e.g.,
C:\Users\jdoe\Downloads) rather than the entire drive. - Prefer "All Filterable": In 99% of cases, the option "All Filterable" is a better choice than "All" because it still searches a wide range of files but knows to skip binary "junk" that won't contain useful data.
- Never use "All" for a full
- Note: "Images (with OCR)" is only available for the Windows endpoint and is a valid option only in a policy when the endpoint is licensed to and includes the OCR Image Search Module.
- If the OCR Image Search Module is not licensed or the OCR files are not present and "Images (with OCR)" is selected, the search defaults to the "Common" option.
- All but common binary
- Search all files except binary files such as EXE, DLL, or MP3.
- In the Spirion Sensitive Data Platform, the "All but common binary" option for the Select Files by Extension setting is a "smart" filtering mode designed to maximize discovery while maintaining system stability.
- It functions as a broad "catch-all" search, with one major safety exception: it automatically skips file types that are known to be purely machine-code or system binaries.
- What it Does
- Broad Search Scope: The agent will attempt to open and scan almost every file it finds on the disk, including non-standard extensions, temporary files, and files with no extension at all.
- Automatic Blacklist: It uses an internal list to immediately skip "common binary" files that are highly unlikely to contain human-readable sensitive data. These typically include:
- Executables & Libraries:
.exe,.dll,.sys,.ocx - Drivers & System Files:
.drv,.vxd,.bin - Compiled Code:
.pyc,.class,.o
- Executables & Libraries:
- Content Probing: For any file not on that binary blacklist, the agent will attempt to "peek" inside to see if there is any extractable text or metadata that matches your search criteria (SSNs, Credit Cards, etc.).
- Common Scenarios
- The "Shadow Data" Hunter: This is the best setting for finding sensitive data that has been saved with weird or legacy extensions (for example,
.old,.bak,.temp,.data,.out) which aren't in your standard "Custom" list. - Forensic "Lite" Audits: It provides much more coverage than "All Filterable" (which only looks for known file types) but is much safer and faster than the "All" setting.
- Balanced Security: It protects you from users who try to "hide" data by changing a filename, while still ensuring the Agent doesn't "choke" by trying to read a 2 GB Windows system kernel file.
- The "Shadow Data" Hunter: This is the best setting for finding sensitive data that has been saved with weird or legacy extensions (for example,
- ⚠️ Performance and Accuracy Trade-offs
- Increased Scan Time: While faster than "All," this mode is still significantly slower than a "Custom" list. The agent has to touch many more files on the disk to decide if they contain text.
- False Positives: Because it's "probing" non-standard files, it may occasionally find random strings of numbers in a proprietary data file that look like sensitive data but are actually just application coordinates or serial numbers.
- Resource Usage: It uses more CPU and Memory than a standard scan because it is constantly switching between different "parsers" to see if it can make sense of unknown file formats.
- Recommended Scenarios
- File Server Audits: This is an excellent choice for a Departmental File Share where you suspect there are years of "junk" files and legacy backups that might contain PII.
- Avoid on OS Drives: Using this on a
C:\drive can produce "noisy" scan results. If you use it, consider adding a Location Filter to exclude theC:\WindowsandC:\Program Filesdirectories to avoid unnecessary system file processing.
- Summary
- All but common binary tells the Agent: "Search everything you find, UNLESS it's a known system/program file. If it looks like it might have text in it, try to read it."
- It is the "Professional Grade" balance between thoroughness and system safety.
File Extension List
- This setting is a core filter setting that defines which types of files the Agent is allowed to open and scan for sensitive data.
- It acts as the "Gatekeeper" for the search engine.
- If a file's extension is not on the list (and no other inclusive settings are enabled), the Agent skips that file entirely to save time and resources.
How it Works
The list is typically a comma-separated string of file extensions (e.g., doc, docx, xls, xlsx, pdf, txt, csv).
- Positive Filtering: The agent looks at the name of every file it encounters on the hard drive. If it sees
Report.docx, it checks the list fordocx. Since it finds a match, it opens the file and searches for Social Security Numbers, Credit Card Numbers, etc. - Skipping: If the agent encounters
Music.mp3andmp3is not in the File Extension List, it ignores the file and moves to the next one without ever opening it.
What it Does
- Improves Scan Speed: By ignoring high-volume, non-text files (like
.exe,.dll,.mp4, or.zipif not configured), the agent can finish a scan significantly faster. - Reduces False Positives: Some file types (like encrypted system binaries) can occasionally trigger "junk" matches that look like sensitive data but aren't. Excluding those extensions keeps your results clean.
- Focuses Effort: It ensures the agent spends its CPU and Memory processing the files most likely to contain sensitive information, such as Office documents, PDFs, and text-based logs.
Common Scenarios
- Standard Office Search: Most organizations use a "Standard" list that includes all Microsoft Office, Adobe PDF, and common text formats.
- Targeted Developer Scans: If you are scanning a developer's machine, you might add
.java,.py,.sql, or.jsonto the list to ensure source code is inspected. - Excluding Heavy Files: If you have a server full of multi-gigabyte log files with a unique extension (e.g.,
.logbackup), leaving that extension out of the list prevents the agent from "choking" on those massive files.
⚠️ Warning: "The Extension Blind Spot"
There are two common pitfalls with this setting that can lead to missing data:
- Renamed Files: If a user renames
Passwords.xlsxtoPasswords.jpgto hide it, and.jpgis not in your File Extension List, the Spirion Agent will not scan the file by default. - Solution: Use the "Deep Scan" or "Magic Byte/File Header" analysis settings to identify files by their internal structure rather than just their name.
- Compressed Files: If you want to scan inside
.zipor.7zfiles, those extensions must be in the list, and the "Compressed Files" feature must be enabled in the policy.
Performance Tips
- If your "File Extension List" is empty or set to the asterisk character
*, the Agent attempts to open every single file on the computer. - On a modern Windows machine with 500,000+ system files, this will cause the scan to take a very long time and potentially impact the user's performance.
- Always define a specific list for production scans.
Summary
The File Extension List tells the agent: "Only talk to files that have these specific 'last names'—ignore everyone else." It is the most effective way to balance thoroughness with scan speed.
Available Options
- The values are entered one per line as ext;1 to specify that the extension "ext" should be enabled for the list.
- Extensions msut be entered in lowercase.
- To make the list a list of excluded extensions check the box next to "Extension list is exclude list".
Use Advanced File Identification
The setting “Use Advanced File Identification” is a security and accuracy feature that enables the Spirion Agent to identify a file's true type by looking at its internal header information rather than relying on its file extension.
What it Does
When this setting is enabled, the Agent "peeks" at the first few bytes of every file to determine what it actually is. This prevents users from "hiding" sensitive data by simply renaming a file (for example, by renaming the file Passwords.xlsx to Vacation.jpg).
There are 4 modes for this setting:
- Disable: When you select the "Disable" (or "None") option you are telling the Spirion Agent to trust the file extension implicitly.
- This is the "fastest but least secure" mode of operation.
- Extension-Only Filtering: The Agent looks only at the characters after the last dot (.) in a filename (for example,
.docx,.pdf,.txt). - No "Peeking": The Agent does not open the file to read the "Magic Bytes" or header information before deciding whether to scan it.
- Automatic Skipping: If a file's extension is not explicitly listed in your "File Extension List" box the Agent ignores it and immediately moves to the next file.
- Extension-Only Filtering: The Agent looks only at the characters after the last dot (.) in a filename (for example,
- The largest risk you incur if you choose to disable this setting is data obfuscation.
- Renamed Files: If a user renames a file named
CreditCards.xlsxtoCreditCards.tmp(and.tmpis not in your search list), the Agent will skip the file when scanning. The Agent cannot realize the file is an Excel spreadsheet full of sensitive data. - Mislabeled Files: Some legacy systems or specialized applications generate reports with non-standard extensions (like
.dator.out). Without Advanced File Identification, Spirion Agents cannot detect files with non-standard extensions are actually plain-text or CSV files - unless you manually enter every possible extension into the "File Extension List" box.
- Renamed Files: If a user renames a file named
- Despite the security risk, "Disable" is used in specific scenarios:
- Maximum Performance: This is the most "lightweight" way to scan. Because the Agent doesn't have to "touch" the header of every file on the disk, the scan finishes significantly faster and uses less Disk I/O.
- Low-Risk Environments: In a highly controlled environment where users cannot rename files or where you are only concerned with a specific set of known Office documents, disabling this reduces the "noise" in the scan process.
- Scanning Massive File Servers: On a server with millions of files (such as a backup repository), enabling Advanced Identification can cause the scan to take days. The Disable option enables you to "skim" the surface for known document types in a reasonable timeframe.
- E-Mail Attachment Compressed Files: This is a targeted mode that only checks email attachments to see if they are actually compressed files (like
.zip) that have been renamed to bypass email server security restrictions. - Included File Types: The Agent performs advanced identification only on files whose extensions are already in your "Search the following file types" list.
- Example: When performing a scan for text files (
.txtfile extension) your Agent discovers a file namednotes.txtthat is actually an RTF file. Spirion correctly identifies the file as an RTF file and scans it accordingly. However, if the filenotes.oldis discovered it skips the file entirely because the extension.oldis not in your list of included file types.
- Example: When performing a scan for text files (
- All Files: The Agent performs advanced identification on every file it encounters.
- Example: Even if
.oldis not in your search list, the Agent will peek atnotes.old. If the header reveals it is actually a Word document (.docx) and.docxis in your search criteria, it will be scanned.
- Example: Even if
Additional Sub-Settings
- When Identification Fails, Perform Text/Strings Extraction: This is a "catch-all" safety net. If the Agent cannot identify the file type through magic numbers, it attempts to scrape any readable text or strings from the file to search for PII.
- Skip Binary Files That Commonly Contain No Text: This is a performance optimization. When enabled, the Agent automatically ignores binary types (like
.exeor.dll) that are known to rarely contain useful sensitive data, even if advanced identification is active.
Common Scenarios
- Security & Compliance: It prevents malicious or accidental "data obfuscation" where sensitive files are hidden by changing extensions.
- Accuracy: It ensures the Agent uses the correct "parser" for the file. For example, if a PDF is mislabeled as a TXT file, the Agent uses the PDF engine to properly extract the data rather than seeing garbled binary text.
Performance Consideration
- Slower Scans: Enabling this for "All Files" is the most secure option but also the slowest.
- The agent must "touch" and read the header of every single file on the hard drive, which increases disk I/O and total scan time compared to the "Extension Only" method.
Summary
- Use Advanced File Identification tells the Agent: "Don't trust the file name. Look inside the file header to see what it really is before deciding to skip it."
Analyze Files by
- This setting is a critical performance and accuracy setting that tells the Agent how to determine a file's type before deciding whether to open and search it.
- It essentially determines how "smart" the Agent is when it encounters a file on the hard drive.
- Analyze Files By tells the Agent: "How hard should you try to verify what a file is before you decide to scan it?"
- It is the primary "throttle" for balancing Security against System Performance.
- Available options are described below.
Analyze file content
- In the Spirion Sensitive Data Platform, the “Analyze file content” option within the “Analyze Files By” setting is a fundamental "Search Depth" controller.
- This option tells the Agent to go beyond the filename and actually open the file to read every character of text inside the document.
- What it Does:
- Opens the File: The Agent uses its internal "parsers" (the code that understands how to read a Word doc, an Excel sheet, or a PDF) to extract the text strings from the file.
- Scans the "Body": It searches the actual content—paragraphs, spreadsheet cells, database rows, or text lines—for patterns that match your search criteria (like Social Security Numbers, Credit Card numbers, or custom keywords).
- Ignores Filenames (for this specific check): While other settings might look at the filename, this specific option is focused entirely on the data inside the container.
- How it Works in the "Search Pipeline":
- This setting is the "Engine" of the scan. When the Agent finds a file that satisfies your extension filters (for example, a
.docxfile), it checks this setting: - If "Analyze file content" is ENABLED: The agent opens the Word doc, reads the 50 pages of text inside, and alerts you if it finds an SSN on page 42.
- If "Analyze file content" is DISABLED: The agent looks at the file but does not open it. It will only report a match if the filename itself contains sensitive data (if that setting is also on).
- This setting is the "Engine" of the scan. When the Agent finds a file that satisfies your extension filters (for example, a
- Why You Use It:
- True Data Discovery: This is the core purpose of Spirion. Most sensitive data is hidden inside documents, not in the filenames. Without this enabled, you are not performing a real PII (Personally Identifiable Information) scan.
- Compliance (PCI, HIPAA, GDPR): To meet regulatory requirements, you must prove that you have searched the contents of your file shares and workstations.
- ⚠️ Performance & Resource Impact
- Because this setting requires the agent to "read" every byte of text, it has the following impacts:
- CPU Usage: Extracting text from compressed formats (like
.docxor.xlsx) requires CPU cycles to "unzip" the XML inside the file. - Memory Usage: The agent must load portions of the file into RAM to perform the pattern matching (Regex).
- Scan Time: Scanning the content of 1,000 Word documents takes significantly longer than just looking at 1,000 filenames.
- CPU Usage: Extracting text from compressed formats (like
- Tip: Combining Settings
- "Analyze file content" is usually paired with "Select Files by Extension" to keep the scan efficient.
- Example: You tell the agent to "Select Files by Extension" for
docx, xlsx, pdfand then "Analyze file content." This ensures the agent only spends its "heavy lifting" energy on files likely to contain documents, rather than trying to read the "content" of a.jpgor a.exe.
Compare File Hash
- This setting is a high-performance optimization tool. It is designed to prevent the agent from re-scanning files that have already been searched and have not changed.
- How it Works:
- Generates a "Fingerprint": When the agent scans a file for the first time, it calculates a mathematical "hash" (a unique string of characters like an MD5 or SHA-256) based on the file's binary content.
- Stores the Result: This hash is saved in the Agent's local database along with the scan results (for example, "This hash contains no sensitive data").
- The Comparison: During the next scan, the Agent calculates the hash of the file again and compares it to the stored hash.
- If the hashes match: The file hasn't changed. The Agent skips the "Content Analysis" entirely and simply reports the previous result.
- If the hashes are different: The file has been edited or modified. The Agent must perform a full content scan to see if new sensitive data was added.
- Why You Would Use It:
- Drastic Scan Speed Increases: On subsequent scans (after the initial "baseline" scan), the agent can skip 90-95% of the files on a hard drive because most files (Windows system files, old documents, archived PDFs) never change.
- Reduced Resource Impact: Calculating a hash is significantly faster and uses much less CPU/RAM than "cracking open" a document and running complex pattern matching (Regex) on 100 pages of text.
- Operational Efficiency: It allows organizations to run daily or weekly "Incremental" scans without disrupting the end-user's work, as the agent finishes in minutes rather than hours.
- ⚠️ Important Considerations:
- The Initial Scan: "Compare file hash" does not help during the very first scan of a machine. The agent must "read" everything once to build the initial hash database.
- Database Growth: Storing hashes for millions of files on a massive file server can make the agent's local database (SQLite) grow in size.
- Security vs. Speed: If you change your search criteria (e.g., you add a new "Passport Number" pattern to your policy), the agent must re-scan everything. Usually, Spirion is smart enough to know that if the Policy changed, the Hash comparison is invalid for that one run.
- Tip: "Skip If Not Modified" vs. "Hash"
- In some older versions of Spirion, there was a setting called "Skip if Not Modified" which relied on the Windows Modified Date.
- The Difference: "Compare file hash" is much more secure. A user can "touch" a file to change its date without changing the content, or an attacker could maliciously change content while keeping the original date. A Hash never lies—if one single character changes inside a 100MB file, the hash will be completely different.
- Summary:
- Compare file hash tells the Agent: "Remember what this file looked like last time. If it hasn't changed, don't waste time scanning it again—just give me the same result as before." It is the primary way to achieve "Incremental Scanning" in Spirion.
Analyze file name
- This setting tells the Agent to treat the actual name of the file as searchable text. While "Analyze file content" looks inside the document, this setting looks at the label on the outside.
- What it Does:
- Scans the String: The agent runs your enabled search expressions (Social Security Numbers, Credit Card numbers, Keywords, etc.) against the characters in the filename (e.g.,
SSN_123456789_Export.csv). - Flags Matches: If a user saves a file and includes sensitive data in the name itself, Spirion will generate a "Match" for that file, even if the content inside the file is empty or encrypted.
- Quick Metadata Check: This is a "surface-level" scan. It does not require the agent to "crack open" the file or use complex document parsers.
- Scans the String: The agent runs your enabled search expressions (Social Security Numbers, Credit Card numbers, Keywords, etc.) against the characters in the filename (e.g.,
- Why You Would Use It:
- Catching Human Error: Users often name files after the data they contain to make them easy to find later.
- Example:
2023_Payroll_With_SSNs.xlsxorCC_Numbers_for_Project_X.txt.
- Example:
- Database Exports: Automated systems often generate reports where the unique identifier (which might be an SSN or Account Number) is part of the filename for tracking purposes.
- Folder-Only Scans: In some advanced configurations, you might want to quickly scan a massive directory just for "filenames" to get a "heat map" of where sensitive data might be located before committing to a 10-hour "Full Content" scan.
- ⚠️ Important Considerations:
- High False Positive Potential: This is the biggest risk with "Analyze file name."
- Example: A system file named
A123-456-789-B.datmight trigger a "Social Security Number" match because the pattern of numbers and dashes looks exactly like an SSN to the agent's regex engine.
- Example: A system file named
- Low Performance Impact: Scanning a filename is incredibly fast. It takes almost zero CPU or RAM compared to scanning file content.
- Incomplete Security: By itself, this setting is insufficient for a real audit. 99% of sensitive data is hidden inside files, not in the name. It should almost always be used in conjunction with "Analyze file content."
- Best Practice:
- Exclude System Folders: If you enable "Analyze file name," make sure your policy excludes the
C:\WindowsandC:\Program Filesdirectories. Those folders contain thousands of files with long, random alphanumeric names that will trigger hundreds of "False Positive" SSN and Credit Card matches. - Keyword Matches: This setting is most effective when searching for Keywords (e.g., "Confidential," "Secret," "Salary") rather than just numerical patterns like Credit Cards.
- Exclude System Folders: If you enable "Analyze file name," make sure your policy excludes the
- Summary:
- Analyze file name tells the Agent: "Don't just open the book—read the title on the spine. If the title contains a Secret, tell me about it." It's a fast, "first-pass" security check for poorly named sensitive files.
Analyze file metadata
- This setting tells the Agent to search the "hidden" properties associated with a file, rather than just its visible text or its filename. Every modern file (Word docs, PDFs, Images) contains a set of background information—metadata—that describes the file's history, authorship, and characteristics.
- What it Does:
- Extracts Hidden Fields: The agent uses specialized libraries to "peek" into the file's internal header. It looks for sensitive data in fields such as:
- Author / Last Saved By: (e.g., A user's name or ID)
- Comments / Keywords: (e.g., "Contains SSNs for HR review")
- Title / Subject: Internal fields that may differ from the actual filename.
- Company / Organization Name: (e.g., "Confidential - [Company Name]")
- Custom Properties: Some applications allow users to add their own metadata fields.
- Scans Image EXIF Data: For picture files, metadata (EXIF) often includes GPS coordinates, the camera serial number, and the date/time the photo was taken.
- Runs Pattern Matching: The agent runs your enabled search expressions (SSNs, Credit Cards, Keywords) against these extracted strings of text.
- Why You Would Use It:
- The "Invisible" Leak: Users often copy-paste content into a document and then delete it, but the "Comments" or "Summary" field in the File Properties might still contain the original sensitive data.
- Document Templates: Sometimes a company's standard Word template has a sensitive project name or a client's ID number embedded in the "Subject" field of the metadata, which gets carried over to every document created from that template.
- Forensic Audits: If you are trying to find every document touched by a specific person (using a Keyword search for their name), metadata is often the only place their name is recorded.
- Compliance (Privacy): Under some privacy laws (like GDPR), the "Author" field itself might be considered Personal Data that needs to be tracked or scrubbed.
- ⚠️ Important Considerations:
- Low Performance Impact: Extracting metadata is much faster than scanning the full content of a 500-page document. The agent only has to read the first few KB of the file's "Header."
- High False Positive Potential: Like "Analyze file name," metadata often contains version numbers or software IDs that can look like SSNs or Credit Cards to a computer.
- Can be Combined: This is almost always enabled alongside "Analyze file content" to ensure a 360-degree search of the file.
- Best Practice:
- Office Documents: This setting is most powerful for Microsoft Office files (
.docx,.xlsx,.pptx). These files are "containers" that hold a surprising amount of background text that is invisible to a casual reader. - Scrubbing Metadata: If Spirion finds sensitive data in the metadata, you may need a specialized tool (or a Spirion "Remediation" action, if supported for that file type) to clean it, as simply deleting the text inside the document won't remove the metadata.
- Office Documents: This setting is most powerful for Microsoft Office files (
- Summary:
- Analyze file metadata tells the Agent: "Don't just read the pages of the book or the title on the spine—read the 'About the Author' section and the publisher's notes inside the front cover. Someone might have scribbled a secret there."
Advanced Options
NOTE: These settings are not available for Database Targets.
Advanced options apply to the following Target types:
- Cloud
- Files & Folders (Local & Remote Scans)
- Collaboration Tools
- Website
Skip files identified as text free binary
- This setting is an optimization feature that maintains an internal "blacklist" of file types that are known to be purely machine-executable or architectural in nature.
- When enabled, the Agent automatically skips these files during a scan, even if your other settings (like "All Files") would normally include them.
- By default, when advanced file identification is enabled via the setting Use Advanced File Identification and a file is determined to be a common binary file type, it is searched if the file type is included in the scope of files to search as determined by the setting File Type Search Option.
- For example, if the setting File Type Search Option is configured to search all files, the file is searched.
- To skip the file in this instance, set this value to "Skip" (1).
Common File Types Skipped
This feature targets files that are virtually guaranteed not to contain human-readable sensitive data, such as:
- Compiled Code & Libraries:
.exe,.dll,.sys,.ocx - Drivers:
.drv,.vxd - System Objects:
.bin,.dat(in certain system contexts),.pyc,.class - Fonts & Icons:
.ttf,.ico,.cur
Why You Should Use It
- Massive Performance Gains: On a typical Windows
C:\drive, there are hundreds of thousands of.dlland.sysfiles. Attempting to "open and read" these files is a waste of CPU cycles and significantly slows down the scan. - Reduces False Positives: Binary files often contain random strings of characters that accidentally trigger sensitive data patterns (e.g., a string of version numbers that looks like a Credit Card or SSN). Skipping them keeps your scan results clean.
- System Stability: Attempting to read active system binaries or large database files can occasionally cause the agent or the operating system to "hang." This setting acts as a safety guardrail.
⚠️ Important Interaction: Advanced File Identification
This setting is most powerful when used alongside Advanced File Identification (Magic Numbers).
- If a user renames a malicious program to
Secret_Data.txt, and you have Advanced File Identification enabled, the agent will see it is actually a binary.exeand—if this skip setting is on—it will skip it rather than trying to read it.
Best Practice
- Enable by Default: This should be ON for 99% of all scan profiles.
- When to Disable: Only disable this if you are performing a highly specialized forensic investigation where you suspect someone is intentionally hiding small snippets of text inside the headers of binary files (a technique called steganography).
Summary
Skip files as text free binary tells the agent: "Don't waste time and energy opening program files or system drivers; they never contain real documents or spreadsheets anyway. Focus only on the files that actually hold information."
- This setting is supported by Windows Agents only
Disable max file size for Access Database files
- This setting disables testing the size of Microsoft Access database files (
.mdb,.accdb).
What it Does
This setting creates an exception for Access Database files so they are not skipped by the global "Max File Size" limit.
- When Checked (Enabled): The Agent scans every Access Database it encounters, regardless of how large it is. Even if your policy says "Skip files larger than 50MB," a 2GB Access database will still be scanned.
- When Unchecked (Disabled): Access databases are treated like any other file. If they exceed your global size limit, they are skipped.
Why This Setting Exists
- Microsoft Access files are often very large because they are "containers" for entire databases. However, unlike a large video or ISO file, a large Access database is highly likely to contain sensitive tables of information (PII, SSNs, etc.).
- If you have a global size limit set to keep your scans fast (for example, 32 MB), you would normally skip these databases. This toggle ensures you don't miss those high-value targets while still skipping other "junk" large files.
⚠️ Important Considerations
- Performance Impact: Access databases can be several gigabytes in size. Enabling this can significantly increase your scan time because the agent must "crack open" and iterate through every table, row, and column in that large file.
- Memory Usage: Large database scans are more memory-intensive than standard document scans. Ensure the Agent machine has adequate memory (RAM) if you expect to encounter many large
.accdbfiles. - Potential for "Hangs": In older versions of the product, very large or corrupt Access databases could occasionally cause the database search module to time out.
Best Practice
- Use for "High Value" Targets: Only enable this if you are scanning areas (like Finance or HR shares) where you know legacy Access databases are used to store sensitive records.
- Monitor Search History: If you notice a specific agent's scan is taking days to complete, check the Search History to see if it is "stuck" processing a massive Access database. You may need to add that specific file to an Exclude list if it's too large to scan effectively.
Summary
Disable max file size for Access Database files tells the agent: "I know I told you to skip big files to save time, but if you find a Microsoft Access database, ignore that rule and scan it anyway—it probably has the data I'm looking for."
- This setting is supported by Windows Agents only
Set Max Memory File Size
- This setting is a performance and stability guardrail. It controls how the Agent handles a file's content during the scanning process.
- Specifically, it determines the threshold at which the Agent switches from "Reading the file in RAM" to "Streaming the file from the Disk."
- This setting sets the maximum size of files that are stored in memory (in bytes).
What it Does
- Memory Threshold: It sets a limit (usually in MB). If a file is smaller than this limit, the Agent loads the entire file into the computer's Memory (RAM) to scan it.
- Streaming Switch: If a file is larger than this limit, the Agent does not load it into RAM. Instead, it "streams" or "buffers" the file directly from the hard drive in small chunks.
- Default Value: The default is 16 MB or 32 MB, depending on the version of the Agent.
Why This Setting Exists
- Speed (RAM is Faster): It is significantly faster for a computer to search for patterns (like Social Security Numbers) when the data is sitting in high-speed RAM.
- Stability (Preventing Crashes): If the agent tried to load a 2 GB Outlook Archive (
.pst) or a 4 GB SQL database entirely into RAM, it would likely crash the agent or cause the entire computer to run out of memory ("Out of Memory" or OOM error). - Predictability: This setting allows administrators to ensure the Spirion agent never consumes more than a specific amount of memory per scanning thread, keeping the impact on the end-user's machine predictable.
How it Affects the Scan
- Files Under the Limit: These are scanned at maximum speed.
- Files Over the Limit: These are still scanned, but the process is slightly slower because the agent has to constantly "read and discard" chunks of data from the disk.
⚠️ Important Considerations
- Agent Hardware: If you are scanning machines with very little RAM (for example, 4 GB), you should keep this setting low (for example, 8 MB or 16 MB).
- Server Hardware: On a powerful file server or a dedicated Discovery Agent with 32 GB+ of RAM, you can increase this setting (for example, 64 MB or 128 MB) to speed up the scanning of larger documents and spreadsheets.
- Compressed Files: Note that for "Container" files (like
.zipor.docx), this setting usually applies to the extracted size of the text/data, not necessarily the size of the file as it sits on the disk.
Best Practice
- Leave Default Value: For most standard workstations, the default value is the "sweet spot" discovered by Spirion engineering for balance between speed and stability.
- Troubleshooting: If you see the Spirion agent (
spirion.exe) consuming massive amounts of RAM and slowing down a user's computer, check to see if this value has been set too high.
Summary
Set Max Memory File Size tells the Agent: "If a file is small, keep it in RAM so we can scan it fast. If it's bigger than this limit, read it off the disk in pieces so we don't crash the computer by using too much memory."
- This setting is supported by Windows Agents only
Max File Size
- This setting specifies the maximum file size to search (in megabytes).
- Acts as a global "cutoff" filter. It tells the Agent to completely ignore any file that is larger than the specified size.
- Unlike the "Max Memory File Size" (which just changes how a file is read), this setting determines whether a file is searched at all.
What it Does
- Size Threshold: You define a limit in megabytes (MB).
- The Filter: Before the Agent attempts to open, hash, or analyze a file, it checks the file size on the disk.
- The Action:
- If the file is smaller than the limit the Agent proceeds with the scan (checking extensions, content, etc.).
- If the file is larger than the limit the Agent immediately skips the file and moves to the next one; it does not look at the filename, metadata, or the file's content.
Why You Use It
- Scan Speed & Efficiency: Massive files—such as ISO disk images, high-definition videos (
.mp4,.mkv), or virtual machine disks (.vmdk)—can take hours to scan and are statistically very unlikely to contain human-readable spreadsheets or documents with PII. - Preventing Agent "Hangs": Extremely large log files (multi-gigabyte
.logfiles) or corrupted database dumps can sometimes cause a search agent to "throttle" or appear stuck as it tries to process millions of lines of text. - Resource Management: It ensures the agent stays focused on "Office-sized" documents (PDFs, Word, Excel) where 99% of sensitive data leaks occur.
⚠️ Important Interaction: Exceptions
There are specific settings that can "override" this global limit:
- "Disable max file size for Access Database files": If this is checked,
.accdbfiles will be scanned even if they exceed the Max File Size. - Compressed Files: Usually, this limit applies to the compressed file itself (the
.zipor.7z). If a ZIP file is 100 MB and your limit is 50 MB, the agent will skip the entire ZIP and everything inside it.
Best Practices
- The "Sweet Spot": For a standard workstation or file server scan, a limit between 50 MB and 100 MB is usually recommended. Most "dangerous" Excel files or PDFs are well under this size. Spirion strongly recommends that this value be less than 128 MB.
- High-Risk Environments: If you are scanning a Database Server or a Developer machine, you might want to increase this (for example, to 500 MB) because large SQL dumps or data exports can easily exceed 100 MB.
- Reviewing Skipped Files: If you want to see what was missed, you can check the Search History in the Console. It will often list files that were "Skipped due to size."
Summary
- Max File Size tells the Agent: "If a file is bigger than this, don't even touch it. It’s too big to be a normal document, and scanning it will just slow us down." It is one of the most effective ways to keep your Spirion scans fast and reliable.
- This setting is supported by Windows Agents only
Enable Max Compressed File Size
- This setting is a critical safety valve for the agent's "Decompression Engine."
- This setting specifies the maximum size of compressed files to search (in bytes).
- It sets a specific limit on how large a compressed archive (like
.zip,.7z,.rar, or.tar) can be before the Agent decides to skip it entirely. - This value is only read when the setting Enable Max Compressed File Size is set to "Enable" (1).
What it Does
- Archive Filter: When the Agent encounters a compressed file, it checks the file's size on the disk.
- The Threshold: If the archive is larger than the value you set (in MB), the Agent does not attempt to "unzip" or look at any of the files inside it.
- The Action: The entire archive is skipped.
Why This Setting Exists
- Preventing "Zip Bombs": A "Zip Bomb" (or decompression bomb) is a small file that, when unzipped, expands into hundreds of gigabytes of data. Without this limit, the Agent could crash the computer or fill up the hard drive trying to extract the data for scanning.
- Performance Stability: Unzipping a 10 GB archive just to scan the text inside is extremely CPU and disk intensive. This setting ensures the Agent doesn't get "stuck" for hours on a single massive backup file or installer package.
- Resource Management: Large compressed files are often software installers, ISO images, or database backups. These are statistically less likely to contain the "loose" Office documents (Word/Excel) that Spirion is primarily designed to find.
How it Differs from "Max File Size"
- Max File Size: Usually applies to all files (PDFs, Docs, etc.).
- Max Compressed File Size: Specifically targets archives.
- Example: You might set "Max File Size" to 50 MB for regular documents, but set "Max Compressed File Size" to 200 MB because you know your users often zip up folders of smaller, sensitive spreadsheets.
⚠️ Important Considerations: "Recursion"
Spirion Agents can scan ZIP files within ZIP files (Recursive Decompression).
- If you have a 100 MB ZIP file that contains a 50 MB ZIP file, this setting applies to the file currently being processed.
- If your limit is 75 MB, the Agent skips the outer 100 MB ZIP file entirely.
Best Practices
- The Default Balance: A common recommended value is 100 MB to 250 MB. Most legitimate "zipped" document folders are well under this size.
- Monitor Search History: If you see "Skipped: File too large" for a file ending in
.zip,.docx, or.xlsx, it means it hit this limit. (Note: Modern Office files like.docxare actually specialized ZIP files, so this setting can affect them too!) - Server Scans: On file servers where you expect large backups, you may need to increase this limit or create a separate policy for those specific high-capacity storage areas.
Summary
- Enable Max Compressed File Size tells the agent: "If a ZIP file is too big, don't try to open it. It's too much work to unzip, and it might crash the system or take all day to finish."
- This setting is supported by Windows Agents only
Max Compressed File Size
The “Max Compressed File Size” setting, paired with the setting “Enable Max Compressed File Size” on the “Select file type scan options - Advanced Options” page is a performance and stability safeguard that controls how the Spirion agent handles archive files (like .zip, .7z, .rar, or .tar).
What it does
This setting defines the maximum size an individual compressed archive can be for the Agent to attempt to open and scan its contents.
- How it works: When the agent encounters a compressed file, it checks the file's size on the disk.
- If the file is smaller than the limit, the Agent "decompresses" the file in memory (or a temporary location) and scan every file inside the archive.
- If the file is larger than the limit, the Agent skips the contents of that archive entirely to preserve system resources.
- Default/Disabled: If this is disabled, the Agent attempts to decompress and scan every archive it finds, regardless of how large it is.
Why is this important?
- Preventing "Zip Bombs": A "Zip Bomb" is a small archive that expands into an enormous amount of data (e.g., a 42KB file that expands to 4.5 petabytes). Without a limit, the agent could crash the endpoint by attempting to decompress a malicious or corrupted archive.
- Memory & CPU Management: Decompressing a 10GB zip file requires significant CPU cycles and temporary disk space. On a user's workstation, this could cause the computer to become unresponsive ("laggy") during the scan.
- Scan Duration: Large archives can take a very long time to process. If an agent gets "stuck" decompressing a massive backup archive, it might not finish the rest of its scan within the allotted window.
The "Risk" (Blind Spots)
If you set this limit too low (e.g., 50MB), you might miss sensitive data stored in large legitimate archives, such as:
- Email archives (
.pstfiles are handled differently, but zipped mailboxes are affected). - Database backups.
- Bundled project files or installer packages.
Best Practices
- Standard Workstations: A limit of 100MB to 250MB is usually sufficient. Most "office" zip files are well below this size.
- Servers / IT Admin Machines: You may want to increase this to 1GB or higher, as these machines are more likely to hold large, legitimate compressed backups that need to be audited.
- High-Security Scans: If you must ensure 100% coverage, you may need to disable the limit, but it is highly recommended to also use "Run Low Process Priority" to ensure the decompression doesn't crash the machine.
Key Distinction
This setting applies to the compressed size (the file as it sits on the disk), not the "expanded size" (what the files would weigh after being unzipped).
Summary: This setting is a "resource protector." It prevents the Spirion agent from attempting to "boil the ocean" by decompressing massive archives that could slow down the endpoint or cause the scan to hang.
Enable Scan Byte Limit
- This setting is a performance and "sampling" feature that limits how much of an individual file the Spirion agent will read before moving on to the next one.
- By default, the endpoint application searches each file in its entirety.
What it Does
- Partial Content Search: When enabled, you specify a number of bytes (for example, 10,240 bytes for 10KB). The Agent will open the file, scan from the beginning, and stop once it reaches the specified limit.
- The "Header" Focus: This is primarily used to find sensitive data that typically appears at the top of a document, such as a cover page, a form header, or the first few rows of a spreadsheet.
- The Rest is Ignored: Any sensitive data located after the byte limit (for example, on page 50 of a 100-page document) will be missed by the scan.
Why You Would Use It
- Extreme Scan Speed: If you are scanning millions of very large files (like multi-gigabyte logs or massive database exports) and you care only about the "Identity" information usually found in the header, this setting can reduce scan times from days to hours.
- Sampling / Discovery: It is useful for a "first pass" discovery to see if a directory contains PII without committing the resources required for a deep-dive scan of every single character on a server.
- Large Log Files: Developers often use this to scan the most recent entries in a giant log file (though note that Spirion typically scans from the start of the file, not the end).
Comparison with "Max File Size"
It is important to distinguish this from the "Max File Size" filter:
- Max File Size: If a file is larger than the limit (for example, 50MB), Spirion skips it entirely.
- Scan Byte Limit: If a file is larger than the limit (for example, 50MB), Spirion scans the first part of it and then stops.
⚠️ Important Risks (The "Compliance Gap")
- Incomplete Results: This is a "shallow" scan. It is not recommended for full compliance audits (like PCI or HIPAA) because it is very common for sensitive data to be buried in the middle or at the end of a file.
- False Sense of Security: If the Agent stops at 1 MB and an employee hid a list of 5,000 credit card numbers at the 2 MB mark, Spirion reports the file as "No Matches Found."
- Encoding Issues: In some file types, the "text" doesn't start until after a large binary header. If your byte limit is too small, you might only scan the unreadable binary header and miss the actual data.
Best Practice
- Keep it Disabled for Normal Scans: For standard "Data at Rest" protection, you should keep this setting Cleared (Disabled) to ensure "Analyze File Content" searches the entire file.
- For "Discovery" (Sampling): Use a limit of 1MB to 5MB. This is excellent for quickly identifying "dirty" folders or servers without waiting for full-file processing.
- For "Compliance/Audit" (Full Scans): Disable this setting. To be 100% sure a file is clean, the Agent must scan the entire file.
- Targeting Specific Files: If you are scanning a directory known to contain massive, repetitive log files, enabling a byte limit is a smart way to get a "representative sample" of the data without the performance hit.
- Use for "Triage": Only use this if you have a specific performance bottleneck with massive files where you are willing to accept the risk of missing data in exchange for speed.
- Standard Radio Button: In many versions of the UI, if this is enabled, you see an option to "Scan Entire File" or "Limit Scan to [X] Bytes." Ensure "Scan Entire File" is selected if you want 100% coverage.
Summary
- Enable Scan byte limit tells the Agent: "Don't read the whole book. Just read the first few paragraphs and move on to the next one." It trades thoroughness for speed, allowing you to find sensitive data quickly by only looking at the beginning of every file.
OCR
Enable OCR for Files
- Search supported file types via OCR.
- By default, when OCR is licensed, the supported file types are searched via the OCR module.
- To disable searching with OCR, set this to "Do not search" (0).
In the Spirion Sensitive Data Platform, the “Enable OCR for files” setting is one of the most powerful—and resource-intensive—features in the agent. OCR stands for Optical Character Recognition.
While "Analyze file content" reads text (like in a Word doc), the OCR setting allows the agent to read images and scanned documents.
What it Does
- Converts Pictures to Text: When the agent encounters an image file (like a
.jpg,.png, or.tiff) or a "flat" PDF (a scanned document with no selectable text), it cannot "read" it normally. - The "Visual" Scan: With OCR enabled, the agent uses an image-processing engine to "look" at the picture, identify the shapes of letters and numbers, and convert them into searchable text strings.
- Pattern Matching: Once the text is extracted from the image, the agent runs your standard search expressions (SSNs, Credit Cards, etc.) against that text.
Why You Use It
- The "Paperless" Office: Many organizations have thousands of "Scanned" PDFs (from a Xerox or Canon office scanner). These are actually just pictures of paper saved as PDFs. Without OCR, Spirion cannot see the Social Security Numbers or names on those forms.
- Screenshots: Employees often take screenshots of sensitive database records or customer profiles and save them to their desktops. OCR is the only way to find the data inside those images.
- Identity Documents: Photos of Passports, Driver's Licenses, and Credit Cards are common "high-risk" items that can only be found using OCR.
⚠️ Important Considerations: The "Performance Cost"
OCR is by far the slowest part of a Spirion scan.
- CPU Intensive: The Agent has to perform complex mathematical "Image Analysis" for every page of a document. This causes the Agent's CPU usage to spike significantly.
- Scan Duration: A scan that takes 1 hour without OCR might take 10 to 20 hours with OCR enabled if there are many images or scanned PDFs.
- Accuracy (Confidence): OCR is not 100% perfect. If a scan is blurry, tilted, or uses a strange font, the OCR engine might misread a "0" as an "O" or an "8" as a "B," causing it to miss a match.
Best Practices
- Targeted Scans: Do not enable OCR for every computer in the company. Only enable it for "High Risk" groups like Finance, HR, or Legal, where scanned documents are common.
- Scheduled Scans: Only run OCR scans during "Off-Hours" (nights or weekends) because of the heavy impact on the user's computer performance.
- File Filtering: Combine OCR with specific extension filters (e.g.,
pdf, jpg, png, tiff) to ensure the agent doesn't waste time trying to "OCR" binary system files or icons. - Resolution (DPI): For the best results, images should be at least 300 DPI. If the resolution is too low, OCR will fail to extract meaningful data.
Summary
- Enable OCR for files tells the Agent: "Don't just read the digital text—look at the pictures. If you see a photo of a document or a screenshot of a database, use your 'eyes' to read the words inside the image and tell me if they are sensitive."
- This setting is supported by Windows Agents only
Decomposition Mode
- Different methods/algorithms can be used to analyze the page before performing the OCR.
- By default, the method is selected automatically, but if the default setting is not producing acceptable output at an acceptable speed, a specific method can be forced.
What it Does
It tells the Agent whether it should attempt to "crack open" a compressed file to see what is inside, or if it should treat the file as a single, solid object.
There are 4 options:
- Auto - The recommended "hands-off" configuration. It tells the Agent to use its internal intelligence to decide when and how to "crack open" a file. Essentially, Auto is the "Smart Mode" for unzipping and inspecting files.
- Legacy - This is a compatibility setting designed to change how the Agent "unpacks" and scans compressed files and modern Office documents. It instructs the current agent to revert to the decompression engine and logic used in older, "classic" versions of the Spirion (formerly Identity Finder) client.
- Why You Would Use "Legacy"
- Troubleshooting "Corrupt" Files: If the modern Auto engine consistently crashes or fails when encountering a specific type of archive in your environment, switching to Legacy is a common troubleshooting step to see if the older engine can handle that specific file structure better.
- Consistency with Old Scans: If an organization is running a multi-year audit and needs the search results to be 100% consistent with scans performed 5+ years ago, they might use Legacy mode to ensure the file "expansion" behavior hasn't changed.
- Edge-Case Archive Formats: Some very old or proprietary compression formats might be handled more reliably by the older libraries that have been in the product for over a decade.
- ⚠️ Important Risks & Downsides
- Slower Performance: The Legacy engine is generally slower and less optimized for modern multi-core processors than the Auto engine.
- Security Vulnerabilities: Modern decompression engines include "anti-Zip Bomb" protections and more robust error handling for malicious files. The Legacy engine may lack some of these advanced safety guardrails.
- Limited Feature Support: Some newer features (like specific types of "Deep" OCR inside archives or specialized cloud-token scanning) may not function correctly when the agent is forced into Legacy decomposition mode.
- Best Practice
- Avoid by Default: You should never use Legacy mode as your primary setting. It is strictly a "Plan B" for troubleshooting.
- Standard - The engine uses standard page decomposition which generally produces better results than legacy but may execute slower.
- Fast - The engine uses fast page decomposition which generally executes the fastest of the methods, but produces the least accurate results unless the images are very simple representations of text. This method performs the least amount of page analysis and will not work well for forms, tables, differing font sizes, etc.
Best Practice
- Always Enable "Decomposition Mode": For a standard security audit, this must be turned on. If it's off, you are essentially blind to 90% of the data on a modern Windows machine.
- Limit Recursion: If the option is available, limit the "Depth" of decomposition (e.g., to 3 or 5 levels). It is very rare for legitimate data to be buried 10 folders deep inside 10 different ZIP files.
- Monitor Temporary Folders: The Agent uses a
Tempdirectory (usually underC:\ProgramData\Spirion\) to do this work. Ensure that antivirus software is not "locking" that folder, or it will break the Decomposition process.
Summary
Decomposition Mode tells the agent: "When you find a Zip file or a Word document, don't just look at the icon. Open it up, see what's hidden inside, and scan those individual pieces as if they were loose files on the desktop."
- This setting is supported by Windows Agents only
Deskew
In Spirion Sensitive Data Platform, the “Deskew” setting (found under the Advanced Options for OCR) is an image-processing feature that helps the Agent read scanned documents that were not fed perfectly straight into a scanner.
It is a "pre-processing" step that happens before the OCR engine tries to identify text.
- Automatically align skewed text.
- By default, if an image appears to be skewed or angled, an attempt is made to straighten the image to improve the likelihood of obtaining accurate text.
- To disable deskewing (which will increase speed if it is known that no images are skewed), set this to "Off" (0).
What it Does
- Straightens the Image: When a person scans a piece of paper (like a medical form or a tax document), it often comes out slightly tilted or "skewed" (e.g., at a 5-degree angle).
- The Correction: The Deskew algorithm detects the angle of the lines and the text on the page and digitally "rotates" the image back to a perfectly horizontal position.
- Improves Readability: Once the image is straightened, the OCR engine can much more accurately identify letters and numbers because they are now aligned with its internal "grid."
Why This Setting is Critical
- OCR Accuracy: OCR engines are very sensitive to alignment. If a document is tilted even slightly, the engine might misread a "1" as a "/" or fail to recognize a string of numbers as a Credit Card or Social Security Number. Deskew significantly reduces these "False Negatives."
- Scanned Forms: In departments like HR, Accounting, or Legal, thousands of documents are scanned manually. "Skew" is extremely common in these environments.
- Multi-Page PDFs: If a 50-page PDF has 3 pages that are crooked, Deskew will fix those specific pages so the sensitive data on them isn't missed.
⚠️ Important Considerations: The "Performance Hit"
- Extra Processing Time: To "Deskew" an image, the agent has to perform complex mathematical rotations on every pixel of the file. This adds a noticeable amount of time to the already slow OCR process.
- CPU Usage: Turning on Deskew causes the CPU usage of the Spirion Agent to stay higher for longer during a scan.
- Image Quality: If an image is extremely blurry or has a lot of "noise" (specks and dots), the Deskew algorithm might struggle to find the correct horizontal baseline, which could lead to further distortion.
Best Practice
- Turn it ON for Scanned Documents: If you are specifically targeting "Scanned PDFs" or "TIF" files from an office scanner, you should Enable Deskew. It is the difference between finding 60% of the data and finding 95% of the data.
- Leave it OFF for Screenshots: If you are primarily scanning screenshots (which are digitally "perfect" and already straight), you can leave Deskew disabled to save time and CPU resources.
- Combine with "Despeckle": Often, you will see a Despeckle option near Deskew. Using them together is the "Gold Standard" for cleaning up dirty, crooked scans before the OCR engine looks at them.
Summary
Deskew tells the Agent: "If you find a picture of a document that was scanned in crooked or at an angle, straighten it out first. It's much easier for you to 'read' the text when it's sitting perfectly flat on the page."
- This setting is supported by Windows Agents only
Despeckle
The “Despeckle” setting on the “Select file type scan options - Advanced Options” page is an image-processing feature used during Optical Character Recognition (OCR) to improve the accuracy of scans on low-quality or "noisy" images.
- Enhance image quality to reduce pixel artifacts.
- It may be possible to improve the accuracy of text extracted from certain images by first attempting to remove information that does not appear to be part of a valid character.
- This setting specifies whether the adaptive noise removal algorithm will be activated for black and white images with a resolution of 280 DPI or higher.
- This setting might influence the recognition accuracy.
- To enable despeckling, set this to "On" (1).
What it does
When Spirion performs OCR (scanning images like .jpg, .png, or scanned .pdf files for text), it first "cleans up" the image to make the characters easier for the engine to read.
- The Process: "Speckles" are tiny, random dots or "noise" that often appear on scanned documents, faxes, or old photocopies. These dots can confuse the OCR engine, causing it to misinterpret a dot as a period, a comma, or part of a letter (e.g., turning an "F" into an "E").
- When Enabled: The Agent applies a digital filter to the image to remove these pixel artifacts before attempting to recognize the text.
- When Disabled: The Agent scans the image exactly as it is, including any noise or graininess.
Why is this important?
- Reducing False Negatives: If a Social Security Number is obscured by "noise," the OCR engine might fail to see it. Despeckling clarifies the text, ensuring the sensitive data is found.
- Improving Match Confidence: By providing a cleaner image to the engine, the resulting text is more accurate, which helps Spirion's validation algorithms (like Luhn checks for credit cards) work correctly.
- Handling Scanned Documents: This is essential for organizations that deal with high volumes of scanned paper records, where "dust" on the scanner glass or poor print quality is common.
Does it affect performance?
- Processing Time: Yes, slightly. Applying image filters requires additional CPU cycles for every image page scanned. If you are scanning millions of images, enabling Despeckle will make the OCR portion of the scan take longer.
- Memory Usage: It requires a small amount of additional memory to hold the "cleaned" version of the image during processing.
Best Practices
- Enable for Scanned Archives: If you are scanning folders full of old PDFs or image-based faxes, enable Despeckle to ensure you don't miss data.
- Disable for Digital-First Images: If your images are mostly screenshots or high-quality digital exports (which are already "clean"), you can disable this to save processing time.
- Pair with "Deskew": Despeckle is most effective when used alongside the "Deskew" setting (which straightens crooked images), as both work together to create the best possible "view" for the OCR engine.
Summary: Despeckle is a "digital eraser" for image noise. It removes random dots and artifacts from scanned documents to help the OCR engine read sensitive data more accurately.
Document Type
*This setting is supported by Windows Agents only
The “Document Type” setting on the “Select file type scan options - Advanced Options” page is a specialized OCR configuration that tells the Spirion engine what style of writing it should expect to find within images and scanned documents.
What it does
This setting optimizes the Optical Character Recognition (OCR) algorithms to look for specific shapes and patterns associated with different types of writing. You typically have three choices:
- Machine Text (Default):
- Optimized for printed fonts (Times New Roman, Arial, etc.) found in typed documents, digital exports, and formal forms.
- This is the fastest and most accurate mode for standard business environments.
- Handwritten Characters (ICR):
- Switches the engine to Intelligent Character Recognition (ICR) mode.
- Optimized for "hand-printed" text (e.g., someone filling out a medical form or a credit application by hand).
- Note: This is generally for block-style printing, not cursive script.
- Both Machine Text and Handwritten Characters:
- The engine attempts to identify and process both styles simultaneously.
- This is the most thorough option but also the most resource-intensive.
- Note: If the input text type is known, it is more efficient to specify Machine Text or Handwritten Characters, as appropriate.
Why is this important?
- Accuracy: Machine text and handwriting have very different "geometries." An engine looking for a perfectly straight "1" might miss a handwritten "1" that has a slight curve or slant. Selecting the correct type ensures the engine uses the right "mathematical lens" to identify the characters.
- Use Case Specificity:
- HR/Finance: Often deal with scanned forms that have handwritten Social Security Numbers or bank details.
- IT/Legal: Mostly deal with typed contracts and logs where "Machine Text" is sufficient.
Does it affect performance?
- Scan Speed: Yes, significantly.
- Machine Text is relatively fast.
- Handwritten recognition is much slower because the engine has to account for thousands of variations in how a human might draw a "7" or a "B".
- Both is the slowest, as it essentially runs multiple passes or more complex algorithms on every image page.
- CPU/Memory: Processing handwritten text requires more intensive "pattern matching" logic, which will increase CPU usage on the endpoint during the OCR phase of the scan.
Best Practices
- Standard Office Audit: Stick with Machine Text. It covers 95% of modern business data and keeps scan times low.
- Medical/Insurance/Government: If you are scanning "Intake Forms" or "Applications" that were filled out by hand and then scanned, you must enable Handwritten or Both.
- Targeted Scans: If you know a specific folder contains handwritten records, create a separate, targeted scan policy for that location with "Handwritten" enabled, rather than enabling it globally for the whole company.
Key Limitation
Spirion's OCR is highly effective at Hand-Printed text (block letters). It is significantly less effective at reading Cursive (connected) handwriting, as the lack of clear separation between characters makes it difficult for the engine to segment the data.
Summary: This setting acts as a "focus" for the OCR engine. By telling it whether to look for typed print or human handwriting, you significantly increase the chances of finding sensitive data in scanned forms and documents.
Scan Only This Page
*This setting is supported by Windows Agents only
- Search all pages or only search the specified page number.
- By default, all pages of an image are processed with OCR.
- To only search a specific page for all files processed via OCR, set this value to a number greater than 0.
This is a performance-tuning feature for Optical Character Recognition (OCR) that limits the scan to a specific page number within multi-page image files or PDFs.
What it does
By default, when OCR is enabled, Spirion Agents attempt to scan every single page of a document (for example, all 50 pages of a scanned PDF). This setting enables you to override that behavior.
- Scan Specified Page: In some cases, it may be desirable to only search a specific page such as the first or second page. You enter a specific page number (for example, 1). When the Agent encounters a multi-page document that requires OCR, it processes only that specific page and then stops, moving on to the next file.
- Scan All Pages: Default. The Agent scans every page of the document.
Why use it?
- Standardized Forms: Many organizations use standardized forms where the sensitive data (like a Social Security Number or Account Number) is always on the first page (for example, a cover sheet or an application header). Scanning the subsequent 10 pages of "Terms and Conditions" is a waste of time and CPU.
- Massive Performance Gains: OCR is the most "expensive" task a Spirion agent performs in terms of CPU and time. If you have 1,000 documents that are 20 pages each, and you only scan page 1, you have reduced the OCR workload by 95%.
- Sampling/Triage: If you are doing a quick "smoke test" of a large image archive to see if it contains sensitive data, scanning only the first page of every file is a very fast way to get a high-level overview.
The "Risk" (False Negatives)
The risk is high if your data is not standardized. If a sensitive "Match" exists on page 2 or page 10 of a document, and you have set the limit to "Page 1," Spirion will report that file as "No Matches Found."
Best Practices
- Standardized Workflows: Only use this if you are 100% certain that the sensitive data you are looking for always appears on a specific page (e.g., Page 1 of a Driver's License scan or Page 1 of a Credit Application).
- General Discovery: Do not use this setting. For a general audit of a file server or workstation, leave this set to the default (Scan All Pages) to ensure no data is missed.
- Testing: If you are troubleshooting why OCR is taking too long, you can use this setting to see how much faster the scan completes when only processing one page per file.
Interaction with other settings
- OCR PDFs: This setting is particularly powerful when combined with the "OCR Always" or "OCR when no text" settings for PDFs. It ensures that even if a PDF is 100 pages of images, the Agent "works" only on the one page you've specified.
Summary: This setting is a "shortcut" for OCR. It allows the agent to skip the bulk of a multi-page document and only look at the specific page where you expect sensitive data to be located, drastically increasing scan speed at the cost of total coverage.
OCR PDFs
*This setting is supported by Windows Agents only
The “OCR PDFs” setting on the “Select file type scan options - Advanced Options” page is a critical configuration that determines how the Spirion agent handles PDF files, specifically deciding when to use the "expensive" Optical Character Recognition (OCR) engine versus the "fast" text extraction engine.
What it does
PDFs are unique because they can contain "real" text (selectable and searchable) or "image" text (like a photo of a document or a fax). This setting tells the agent which method to use. You have 3 options:
- Text Only:
- The Agent only attempts to extract "searchable" text.
- If the PDF is a scanned image (like a picture of a driver's license), the Agent does not use OCR and reports the file as having no matches.
- Benefit: Extremely fast; minimal CPU usage.
- OCR when no text (Default & Recommended):
- The Agent first tries to extract searchable text. If it finds text, it scans it and moves on.
- If the Agent detects that a page (or the whole file) contains no searchable text (i.e., it's an image), it automatically triggers the OCR engine to "read" the image.
- Benefit: The best balance of thoroughness and performance. It only uses the heavy OCR engine when absolutely necessary.
- OCR Always:
- The Agent ignores any searchable text layer and treats every single page of every PDF as an image, running the full OCR process on everything.
- Benefit: Highest possible accuracy for "hybrid" documents (e.g., a PDF that has a text layer but also has handwritten notes or stamps that the text layer missed).
- Drawback: Extremely slow and very high CPU/Memory usage.
Why is this important?
- The "Hidden Data" Problem: Many organizations believe their PDFs are searchable, but often a significant portion of their archives consists of "Image-only" PDFs (scanned faxes, signed contracts, ID copies). Without the "OCR when no text" setting, Spirion would be "blind" to all the sensitive data inside those files.
- Performance Management: Because OCR is resource-intensive, you don't want to run it on a 500-page text-based manual. This setting ensures the agent is "smart" about when to apply its most powerful tools.
Does it affect performance?
- Scan Speed: Yes.
- "Text Only" is the fastest.
- "OCR when no text" is fast for digital PDFs but slows down when it hits scanned images.
- "OCR Always" is the slowest possible way to scan PDFs.
- Resource Usage: OCR requires significantly more CPU and RAM than simple text extraction. Using "OCR Always" on a file server can significantly extend the duration of a scan.
Best Practices
- Standard Audit: Use "OCR when no text." This is the industry standard for ensuring you find data in scanned documents without destroying your scan performance.
- High-Security / Forensic Audit: Use "OCR Always" if you suspect that sensitive data might be hidden in images embedded within otherwise searchable PDFs (e.g., a screenshot of a credit card pasted into a Word-to-PDF export).
- Speed-First Triage: Use "Text Only" if you have a very short scan window and are only looking for "low-hanging fruit" in modern, digitally-created documents.
Interaction with other settings
This setting works in tandem with Despeckle, Deskew, and Document Type. If "OCR when no text" or "OCR Always" is selected, those image-cleaning settings will be applied to the PDF pages before they are read.
Summary: This setting is the "brain" of PDF scanning. It tells Spirion whether to take the "easy path" (reading text) or the "hard path" (performing OCR) to ensure that sensitive data isn't hiding inside scanned images.
What file formats support the OCR PDFs setting?
The "OCR PDFs" setting is specifically designed for the Portable Document Format (.pdf).
While Spirion has broad OCR capabilities, this specific setting is a "logic toggle" that only applies to PDFs because of their unique "hybrid" nature (the ability to contain both a searchable text layer and raw images).
Why it only applies to PDFs:
- Standard Images (.jpg, .png, .tiff, .bmp): These formats never have a searchable text layer. Therefore, if OCR is enabled for images, Spirion always uses the OCR engine. There is no "Text Only" or "OCR when no text" choice to make.
- Microsoft Office (.docx, .xlsx): These are XML-based text formats. While they can contain images, Spirion typically extracts the text directly. (Note: In some advanced configurations, Spirion can OCR images embedded inside Office docs, but that is handled by a different internal mechanism, not the "OCR PDFs" toggle).
- PDFs (.pdf): A PDF can be a "Digital PDF" (created by Word/Excel), a "Scanned PDF" (created by a photocopier), or a "Hybrid PDF" (a digital document with a scanned image of a signature or ID pasted inside). The OCR PDFs setting exists specifically to tell the agent how to navigate these different layers.
Related OCR Support
While the "OCR PDFs" toggle is for PDFs, the OCR Engine itself (which uses the same Despeckle, Deskew, and Document Type settings) supports a wide range of image formats, including:
- TIFF (.tif, .tiff) - Very common for faxes and document imaging.
- JPEG / JPG (.jpg, .jpeg)
- PNG (.png)
- BMP (.bmp)
- GIF (.gif)
Summary of Logic
File Format | Does "OCR PDFs" apply? | How it works |
|---|---|---|
Yes | Uses the setting to choose between Text Extraction or OCR. | |
Images (JPG/PNG/TIFF) | No | If OCR is on, it always uses OCR (no "text layer" exists). |
Office Docs (DOCX/XLSX) | No | Uses direct text extraction; images inside are handled by separate logic. |
In short: You use the "OCR PDFs" setting to manage the complexity of PDF files. For all other image types, Spirion simply applies OCR directly if the file type is included in your scan.
Fax Correction
*This setting is supported by Windows Agents only
- Enhance scanned faxes.
- Most OCR engines are optimized to recognize dark text on a light background (example: black ink on white paper). The Invert setting instructs the Spirion Agent to "flip" the color values of an image or PDF page before the OCR engine analyzes it.
- Original: White text on a black or dark blue background.
- Inverted: Black text on a white or light background.
- The Invert setting is a specialized image pre-processing tool used during Optical Character Recognition (OCR) to improve the detection of sensitive data in documents with non-standard styling.
Available Options
- Enabled (checked) - Resolution of black and white images with an approximate resolution of 200 x 100 DPI is doubled in the y direction (vertically) in an attempt to improve character recognition.
- Disabled (unchecked) - Resolution of images is left as-is
Functions
- This setting performs the following functions:
- Improves Recognition of "Reverse" Text: In many industries, specific documents use inverted styles for headers, highlighted sections, or specialized forms. For example:
- Blueprints or Technical Schematics: Often feature white text on dark backgrounds.
- Web-captured Screenshots: If a user uses "Dark Mode," text that appears sensitive may be white-on-black.
- Government/University Forms: Some older or stylized forms use dark header blocks with white lettering for field labels (e.g., "STUDENT NAME").
- Reduces OCR Failure: Without Invert, the OCR engine may see a dark block with white text as a solid "blob" or a graphical element, completely skipping any sensitive data contained within it.
Best Practice Recommendation:
- Selective Use: Do not enable Invert globally for every scan unless you know your data contains many "dark mode" or scanned negative documents. Inverting a standard black-on-white document makes it white-on-black, which will actually prevent the OCR engine from reading it correctly.
- Performance: Like all OCR settings, Invert adds a small amount of processing time as the agent must manipulate the image in memory before scanning.
- Check the checkbox to enable fax correction - When fax correction is enabled, the resolution of black and white images with an approximate resolution of 200 x 100 DPI is doubled in the 'y' direction (vertically) in an attempt to improve character recognition.
Invert
This setting is supported by Windows Agents only
- Swap black and white pixels before performing OCR.
- Check this checkbox to enable inversion.
- When enabled, black and white images are inverted from black on white to white on black.
- Enables Detection in "Reverse Video" Documents: It enables the Agent to extract sensitive data from specialized document types that would otherwise be invisible to a standard scan.
- Improves High-Contrast Recognition: By converting the image to the high-contrast format (black on white) that the OCR engine expects, it significantly reduces the number of "Unknown Characters" (placeholders) in the extracted text.
- The Invert setting is a specialized image pre-processing tool used during the Optical Character Recognition (OCR) process. It is designed to handle documents where the standard "dark text on light background" color scheme is reversed.
- Most OCR engines are optimized to recognize black text on a white background. When the engine encounters a document with white or light-colored text on a dark background (such as a dark blue header or a black "negative" scan), it often fails to see the text at all, treating the dark area as a solid image or "noise."
- The Invert setting instructs the Spirion agent to "flip" the color values of the image pixels before the OCR engine analyzes it:
- Original: White text on a black background.
- Inverted (Processed): Black text on a white background.
Common Use Cases for Sensitive Data
- Consider enabling the Invert setting if your data environment includes:
- Microfilm or Microfiche Scans: Historical student records are often digitized as "negatives" (white text on a black/dark gray background).
- Stylized Student IDs: Many university ID cards use dark backgrounds with white lettering for names or ID numbers.
- Blueprints or Lab Schematics: If you are scanning research data, these documents frequently use white-on-blue or white-on-black formatting.
- Dark Mode Screenshots: If users capture screenshots of database UIs or applications in "Dark Mode," the sensitive data will appear as light text on a dark background.
Critical Performance and Accuracy Note
- Do Not Enable Globally by Default: If you enable Invert on a standard document (black text on white paper), the Agent inverts it to white text on a black background. This causes the OCR engine to fail to read the standard document.
- Targeted Use: This setting is best used in specific Scan Profiles or targeted locations (like a "Historical Archives" folder) where you know inverted documents exist.
- CPU Impact: Like all OCR pre-processing (such as Deskew or Despeckle), Inverting adds a small amount of overhead to the scan time as the agent must manipulate the image in memory before performing the recognition.
Recognition Mode
*This setting is supported by Windows Agents only
- The method to use for character recognition.
- In the Spirion Sensitive Data Platform, Recognition Mode is a configuration setting for the Optical Character Recognition (OCR) engine. It acts as a "quality vs. speed" toggle, determining how much computational effort the agent spends analyzing an image to identify characters.
- The OCR engine uses different levels of algorithmic intensity to "read" pixels. Higher modes perform more "passes" over the image, using structural analysis and linguistic dictionaries to resolve ambiguous shapes (for example, deciding if a shape is a "0" or an "O").
- There are 2 modes available:
- Favor Accuracy - This option is a high-fidelity configuration for the Optical Character Recognition (OCR) engine. It instructs the Spirion Agent to prioritize the precision of character identification over the speed of the scan.
- What it does:
- When the OCR engine "looks" at an image, it uses mathematical algorithms to guess what each character is.
- The "Favor Accuracy" Logic: The engine performs a more intensive, multi-pass analysis of every character and word. It compares the shapes it sees against a larger library of patterns and uses more complex linguistic and structural checks to verify its "guess."
- The Alternative ("Favor Speed"): The engine uses a "best-guess" single-pass approach. It identifies characters quickly and moves on, which is faster but more prone to misinterpreting a "0" (zero) as an "O" (the letter) or an "I" as a "1".
- Why use "Favor Accuracy"?
- Critical Data Validation: Sensitive data like Credit Card numbers and Social Security Numbers rely on every single digit being correct. If the OCR engine misreads just one digit, the Luhn Check (the math used to verify a real credit card) will fail, and Spirion will report "No Match Found." Favoring accuracy ensures these digits are read correctly.
- Poor Quality Documents: If you are scanning low-resolution images, faxes, or documents with "bleeding" ink, the "Favor Speed" mode will likely fail. "Favor Accuracy" is much better at distinguishing characters in "noisy" or blurry environments.
- Complex Fonts: If your documents use unusual, stylized, or very small fonts, the accuracy-focused mode is better equipped to identify them correctly.
- The Trade-off: Performance
- The primary "cost" of Favor Accuracy is Time.
- Scan Duration: Enabling "Favor Accuracy" can make the OCR portion of your scan significantly slower (sometimes 2x to 4x slower than "Favor Speed").
- CPU Usage: Because the engine is performing more complex mathematical calculations per character, the CPU load on the endpoint will be higher and sustained for a longer period.
- Best Practices
- Compliance & Legal Audits: Always use Favor Accuracy. When the goal is to ensure no sensitive data is missed (minimizing "False Negatives"), the extra time spent is worth the increased reliability.
- Large-Scale Initial Discovery: If you are scanning petabytes of data for the first time just to find "hot spots," you might start with Favor Speed to get results quickly, then follow up with an "Accuracy" scan on the specific folders where data was found.
- Pairing with other settings: "Favor Accuracy" works best when combined with Despeckle and Deskew. These settings clean the image so the "Accuracy" engine has the best possible data to work with.
- Summary Table
Recommendation: For most Spirion customers, Favor Accuracy is the recommended setting. While it takes longer, the primary value of Spirion is the trustworthiness of the results. Missing a credit card number because the engine was "rushing" usually outweighs the benefit of a faster scan.Feature
Favor Speed
Favor Accuracy
Processing Style
Single-pass / Heuristic
Multi-pass / Intensive
Detection Rate
Good (for clean images)
Excellent (for all images)
Scan Speed
Fast
Slow
Resource Impact
Moderate
High
- Favor Speed - This is a performance-optimized configuration for the Optical Character Recognition (OCR) engine. It instructs the Spirion Agent to prioritize completing the scan quickly by using more efficient, less computationally intensive character recognition algorithms.
- What it does:
- When the OCR engine processes an image in "Favor Speed" mode, it streamlines the identification process:
- The "Favor Speed" Logic: The engine uses a "single-pass" approach. It identifies the most likely character based on initial pattern matching and moves immediately to the next character. It skips the deeper, multi-layered verification steps that the "Accuracy" mode performs.
- The Result: The agent can process many more pages per minute, but it is slightly more likely to make "substitution errors" (e.g., confusing a "5" for an "S" or a "1" for an "l") if the image quality isn't perfect.
- Why use "Favor Speed"?
- High-Volume Triage: If you are scanning millions of images across a massive file server and your primary goal is to find "where the data is" rather than finding every single individual match, this mode allows you to finish the scan in a fraction of the time.
- High-Quality Digital Images: If your "images" are actually high-resolution screenshots or clean digital exports (not scanned faxes or old photocopies), the "Favor Speed" mode is usually more than accurate enough to identify sensitive data correctly.
- Limited Scan Windows: If you only have a 4-hour maintenance window to scan a large department's workstations, "Favor Speed" may be the only way to ensure the scan completes before the users return to work.
- The Trade-off: Accuracy Risk
- The primary "cost" of Favor Speed is the potential for False Negatives:
- Validation Failures: As mentioned previously, sensitive data like Credit Cards and SSNs use mathematical validation (like the Luhn algorithm). If "Favor Speed" misreads a single digit in a 16-digit credit card number, Spirion will discard the match as "invalid data," and you will never know it was there.
- Sensitivity to Noise: This mode is much more likely to be "confused" by background noise, speckles, or slightly tilted text compared to the "Accuracy" mode.
Best Practices
- Initial "Smoke Tests": Use "Favor Speed" when you are doing a broad, first-time discovery to identify high-risk areas.
- Clean Environments: Use it if you know your data consists of modern, high-quality digital PDFs and images.
- When to Avoid: Do not use "Favor Speed" for final compliance audits, legal "Right to be Forgotten" (DSAR) requests, or when scanning low-quality faxes and scanned paper records.
Summary Comparison
Feature | Favor Speed | Favor Accuracy |
|---|---|---|
Primary Goal | Throughput / Time | Precision / Reliability |
Algorithm | Single-pass (Fast) | Multi-pass (Intensive) |
Ideal Image Quality | High / Digital | Low / Scanned / Noisy |
Risk Level | Higher risk of missing data | Lowest risk of missing data |
Summary: "Favor Speed" is the "express lane" for OCR. It is an excellent tool for rapid discovery and high-volume environments where time is the most constrained resource, provided the image quality is relatively high.
Resolution Enhancement
*This setting is supported by Windows Agents only
The “Resolution Enhancement” setting on the “Select file type scan options - Advanced Options” page is an image-processing feature designed to improve the clarity of color images before they are processed by the OCR engine.
What it does
When Spirion performs OCR on a color image (like a photo of a passport, a color-scanned ID, or a screenshot with a busy background), the colors can sometimes "bleed" or create low contrast between the text and the background. This makes it difficult for the OCR engine to distinguish individual characters.
- The Process: When enabled, the Agent applies a mathematical algorithm to increase the effective resolution and contrast of the image. It essentially "sharpens" the edges of characters and attempts to normalize the background colors.
- Targeted Use: This setting is specifically optimized for color images. It is less relevant for standard black-and-white faxes or grayscale scans (which are better handled by settings like Despeckle or Fax Correction).
Why is this important?
- Handling "Busy" Backgrounds: Many forms of identification (Driver's Licenses, Passports, Insurance Cards) have holographic overlays, watermarks, or complex color patterns behind the text. Resolution Enhancement helps "lift" the text off those backgrounds so it can be read.
- Low-Resolution Photos: If a user takes a photo of a credit card with a mobile phone in low light, the resulting image might be "soft" or blurry. This setting attempts to sharpen those edges to make the numbers recognizable.
- Improving Match Rates: By providing a higher-contrast image to the OCR engine, you reduce the likelihood that a "0" is seen as a "Q" or an "8" is seen as a "B" due to color interference.
Does it affect performance?
- Scan Speed: Yes. Like all image pre-processing, this adds an extra step to the workflow. The Agent must process the image in memory to "enhance" it before the OCR engine even starts its work.
- CPU/Memory: This is a computationally "expensive" task. Enhancing a high-resolution color photo requires more RAM and CPU cycles than processing a simple black-and-white text document.
Best Practices
- Enable for Identity Discovery: If your scan is specifically looking for IDs, Passports, or Credit Cards (which are almost always color images), you should enable this setting.
- Disable for Standard Office Docs: If you are mostly scanning black-and-white PDFs or screenshots of text-based applications, you can leave this disabled to save time and resources.
- Pair with "Document Type": This setting is particularly effective when the Document Type is set to "Both Machine and Handwritten," as handwritten notes on color forms are notoriously difficult for OCR engines to capture without enhancement.
Key Distinction
Resolution Enhancement is a pre-processing step. It doesn't change the actual file on the disk; it only creates a "better version" of the image in the agent's temporary memory to help the OCR engine "see" the data more clearly.
Summary: Resolution Enhancement is a "digital sharpener" for color images. It increases contrast and clarity to help Spirion find sensitive data hidden in complex, colorful, or low-quality photos and scans.
Rotation
- This setting is supported by Windows Agents only
The “Rotation” setting on the “Select file type scan options - Advanced Options” page is an image-processing feature that allows the Spirion agent to automatically detect and correct the orientation of an image before performing OCR.
What it does
When documents are scanned or photographed, they are often saved in the wrong orientation—for example, a landscape document might be saved as a portrait image, or a document might be scanned upside down.
- The Process: When enabled, the agent analyzes the image to determine the "up" direction based on the layout of the text and lines. It then digitally rotates the image (90, 180, or 270 degrees) so that the text is oriented correctly (left-to-right, top-to-bottom).
- The Goal: OCR engines are designed to read text in a specific direction. If the text is sideways or upside down, the engine will likely fail to recognize any characters at all, or it will produce "gibberish" results.
Why is this important?
- Ensuring Data Discovery: Without rotation correction, sensitive data on a sideways-scanned document (like a horizontal scan of a check or a driver's license) would be completely missed by the agent.
- Handling User Error: Users often scan documents quickly without checking the orientation. This setting ensures that Spirion remains effective even when the source data is poorly formatted.
- Comprehensive Coverage: This is essential for "unstructured" data environments where images come from many different sources (mobile uploads, various scanner models, etc.).
How it differs from "Deskew"
It is common to confuse Rotation and Deskew, but they handle different problems:
- Rotation: Fixes "large" orientation issues (90-degree turns or upside-down pages).
- Deskew: Fixes "small" orientation issues (straightening a page that is tilted by a few degrees).
- Interaction: Usually, the agent will Rotate the image first to get it roughly upright, and then Deskew it to make it perfectly straight.
Does it affect performance?
- Scan Speed: Yes, slightly. The agent must perform a "pre-scan" analysis to detect the text orientation before it can decide whether to rotate the image. This adds a small amount of time to the processing of every image file.
- CPU Usage: Rotating a high-resolution image in memory requires CPU cycles, though it is generally less intensive than the actual OCR process itself.
Best Practices
- Enable for General Discovery: In most business environments, it is highly recommended to keep Rotation enabled. The risk of missing data due to a sideways scan is usually much higher than the minor performance cost.
- Enable for Mobile/Photo Data: If you are scanning folders where users upload photos from their phones, rotation is essential, as phone cameras often save images in orientations that don't match the text.
- Disable for Standardized Digital Exports: If your images are all generated by a system that produces perfectly oriented screenshots or digital files, you can disable this to shave a small amount of time off the scan.
Summary: The Rotation setting is an "auto-upright" feature. It ensures that no matter how a document was placed on a scanner or how a photo was taken, the text is turned the right way up so the OCR engine can read it accurately.
Unknown Character Replacement
- The character to use when a character is not recognized.
- When the Spirion engine performs OCR on an image (like a scanned PDF, a JPG of a Driver's License, or a fax), it attempts to identify every character in the image. If the engine encounters a character it cannot confidently identify due to low image quality, pixel artifacts, or unusual fonts, it must still place a "placeholder" in the resulting text string so that the search patterns (AnyFinds/Regular Expressions) can continue to evaluate the surrounding data.
Common Use Cases
- Driver's License / ID Scans: As noted in internal guides for searching Driver's Licenses, this character ensures that even if a single letter in a name or ID number is blurry, the rest of the record is extracted and indexed.
- Legacy UTF-8 Handling: Historically, in some older agent versions, characters outside the standard ASCII range in UTF-8 files were sometimes replaced with spaces (as noted in engineering tickets like AL-22825) if a proper parser wasn't available. The replacement setting helps standardize what that "fallback" character is.
- Fax and Low-Res Documents: It is often paired with other OCR enhancements like Deskew (straightening), Despeckle (removing noise), and Invert (swapping black/white) to improve overall recognition.
The values that correspond to the settings in the endpoint UI are:
- No Character - By default, no character is displayed.
- Space - Enter a space character to see which characters were not recognized.
- - (dash) - Enter a dash character to see which characters were not recognized.
- ~ (tilde) - Enter a tilde character to see which characters were not recognized.
- Other characters may be specified - A space or question mark are commonly used and recommended by archTIS.
- Most administrators set this to a space or a question mark. These are the safest characters.
- A space is often best because many Spirion patterns are already designed to handle or ignore whitespace between characters.
- Using a unique character like a question mark (?) can be helpful when reviewing logs or "Match Context" in the console, as it makes it immediately obvious that the OCR engine struggled with that specific part of the document.
- This setting is supported by Windows Agents only
Important Notes
- Don't Use Numbers or Letters: Never use 0, X, or * as replacement characters, as these are frequently used in actual sensitive data (e.g., "X" in redacted IDs or "0" in account numbers), which will spike your false positive rate.
- Pair with "Max Substitutions": If your custom data type allows it, limit how many "unknowns" are acceptable in a single string. Allowing 1 unknown character in a 10-digit ID is usually safe; allowing 5 would lead to massive inaccuracy.
Additional Languages
*This setting is supported by Windows Agents only
- The Additional Languages setting dictates which character sets and linguistic dictionaries the OCR engine uses to interpret text from images and PDFs.
- When Spirion performs OCR, it doesn't just look for shapes; it uses "language packs" to increase the probability of a correct match.
- For example, if the engine sees a shape that could be an "n" or an "ñ," selecting Spanish as an additional language tells the engine that "ñ" is a valid and likely character, whereas in an English-only scan, it might be misinterpreted as a pixel artifact or a standard "n."
- Enables Non-English Character Recognition: It enables the engine to recognize accented characters, umlauts, cedillas, and other diacritics specific to languages like French, German, Spanish, and others.
- Improves Dictionary Validation: The OCR engine uses these languages to "guess" words more accurately. If a word is partially blurry, the engine compares it against the dictionaries of the selected languages to find the most likely match.
- Expands Search Scope: By default, many Spirion versions are optimized for English. Adding languages ensures that sensitive data embedded in foreign language documents (example: a French "Numéro de Sécurité Sociale") is extracted correctly for the search engine to evaluate.
- By default, only English characters are recognized when performing a search with OCR.
- To recognize characters from additional languages, select each desired language.
- Spanish
- French
- German
- Note: Each additional language has an impact on the performance of the recognition and therefore languages that are known not to be present in the target locations should not be enabled.
Impact on Performance and Accuracy
- Accuracy (Recall): Increases. It significantly reduces the number of "unknown characters" (the ? placeholders mentioned previously) in non-English documents, making it more likely that sensitive data will be found.
- Scan Speed: Decreases. Adding more languages requires the OCR engine to perform more "checks" against more dictionaries for every single image processed.
- Best Practice: Only enable the specific languages you expect to find in your environment. Do not select "All Languages" unless necessary, as it can substantially slow down your scan window.
- OCR Compensation: This setting often works in tandem with OCR Compensation logic, which handles common misinterpretations (like "8" vs "B") across the character sets of the selected languages.
Higher Education Environments
- If you are an organization with international operations or a university (handling FERPA data for international students), you should ensure the languages relevant to those students' primary documents are enabled to ensure high-fidelity data extraction.
SharePoint On-Premise/Online Options
Use the following steps to complete the settings on both the "Select SharePoint options" and "Select advanced SharePoint options" pages.
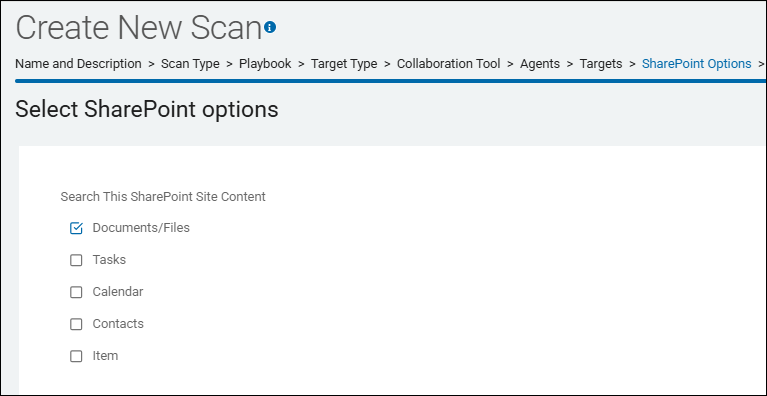
- Under "Search this SharePoint Site Content" select the types to search within SharePoint sites.
- Specify the search types to include when searching SharePoint sites.
- By default, all file types in the SharePoint document library are searched.
- Alternately, searches can be enabled for tasks, calendar events, or contacts that have been synchronized with Outlook or input into SharePoint.
When using this setting outside of the console, note that the value for this setting is a bitmask of the logical OR of any of these values.
- When created in the Windows Registry, they are of type REG_DWORD.
- When entered into the Windows Registry or a configuration XML file, they should be entered as hexadecimal values.
- When entered into a security template (.inf) file, they should be entered in decimal.
Name | Value | Default |
|---|---|---|
Documents/Files | 0x00000001 | On |
Tasks | 0x00000002 | Off |
Calendar | 0x00000004 | Off |
Contacts | 0x00000008 | Off |
Item | 0x00000010 | Off |
- On the Select advanced SharePoint options, select the settings to use.
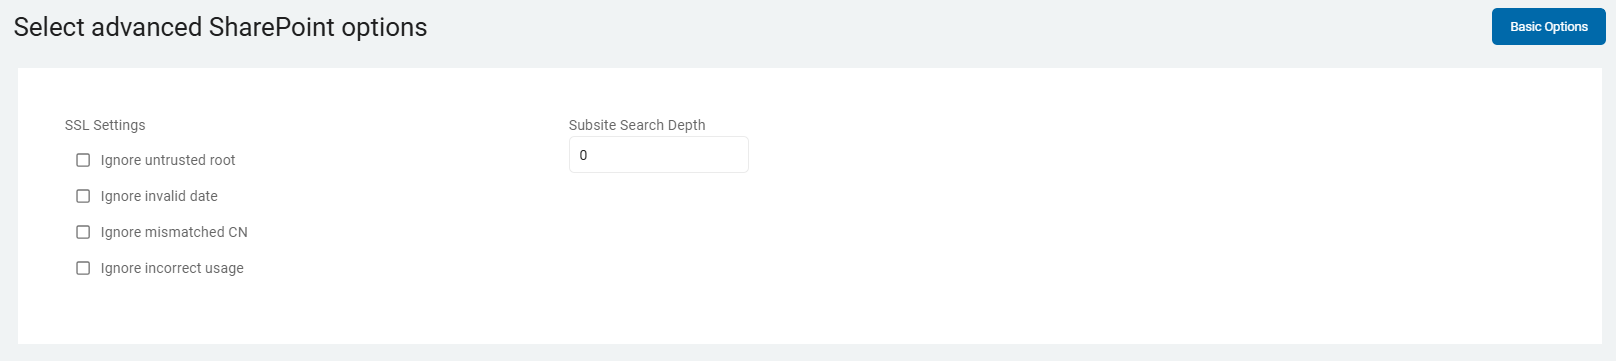
SSL Settings
The SSL settings to use when searching SharePoint sites.
- Ignore untrusted root: Continue searching if the root certificate of the SSL chain is not currently in the trust store.
- Ignore invalid date: Continue searching if the SSL certificate for the URL has an invalid or expired date.
- Ignore mismatched CN: Continue searching if the domain name on the SSL certificate does not match the URL configuration.
- Ignore incorrect usage: Continue searching if the SSL certificate is intended for a purpose other than verifying the identity of the sender and encrypting server communications.
When using this setting outside of the console, note that the value for this setting is a bitmask of the logical OR of any of these values.
- When created in the Windows Registry, they are of type REG_DWORD.
- When entered into the Windows Registry or a configuration XML file, they should be entered as hexadecimal values.
- When entered into a security template (.inf) file, they should be entered in decimal.
Name | Value | Default |
Ignore untrusted root | 0x00000001 | False |
Ignore invalid date | 0x00000002 | False |
Ignore mismatched CN | 0x00000004 | False |
Subsite Search Depth
The Subsite Search Depth setting controls how many levels of the SharePoint site hierarchy the Agent traverses during a scan.
- Subsites are searched after completing the search of the parent site.
- By default, SharePoint subsites are not searched.
- To search subsites, specify the depth to traverse.
- For example, when set to 1, only subsites directly below the site specified in the search is searched.
- If the value is 3, subsites that are subsites of subsites of a site specified in the search is searched.
Note: Subsites are treated as though they were explicitly specified in the SharePoint search configuration.
How it Works
SharePoint sites are often structured hierarchically, with a "Root" or "Parent" site containing multiple "Subsites," which may themselves contain further nested subsites.
- Enabling the Setting: By default, a SharePoint scan may only target the specific site URL provided. This setting must be enabled and configured with a numerical value to allow the agent to "discover" and move down into child sites.
- Recursion: The setting triggers a recursive enumeration process. The agent identifies all subsites of the parent, then all subsites of those subsites, and so on, until it reaches the limit defined by the depth value.
Functions
- Defines the Scope: It prevents the agent from infinitely crawling a massive SharePoint environment. If you set the depth to
2, the agent will scan the target site (Level 0), its direct children (Level 1), and its grandchildren (Level 2). It will ignore anything at Level 3 or deeper. - Automates Discovery: Instead of manually adding every subsite URL to your scan configuration, you can add the top-level site and use Subsite Search Depth to automatically include all nested departmental or project sites.
Key Considerations
- Performance & Scale: Increasing the search depth can exponentially increase the number of locations the agent must scan. For large university or enterprise environments, a high depth (for example, 5 or 10) can lead to extremely long scan times and significant load on the SharePoint API.
- Permissions: The credentials provided for the scan must have at least "Read" access to every subsite within the specified depth. If the Agent encounters a subsite it cannot access, it will log a permission error and move to the next available subsite.
- Distributed vs. Single Agent: As noted in internal troubleshooting (for example, SPIR-2282: SDM Agent DISTRIBUTED AGENT scan fails to search folders within sharepoint sites Closed), there have been historical cases where distributed scans and single-agent scans handled subsite enumeration differently. Always ensure your search agents have the same network path and permissions to the SharePoint environment as the discovery agent.
Example: Student Records
If your institution organizes student data by department (for example, UniversityRoot/Registrar/FinancialAid/2024_Records), and you only target UniversityRoot, you must set the Subsite Search Depth to at least 3 to reach the actual files in the 2024_Records subsite.
If set to 1, the scan will stop after searching the top-level Registrar site.
SQL Advanced Options
The SQL advanced options page appears only for the following SQL database Targets:
- Microsoft SQL Server
- SQLBase
- SAP SQL Anywhere
- MySQL
- SQLite
Include Primary Key Data
- If a database includes a "Primary Key" column, it is possible to return the data in the cell of the "Primary Key' column for the row in which a result was found.
- The data is displayed in the Preview window along with the list of columns in which the result was found.
- Do not include Primary Key data - Include the data from the cell of the Primary Key column for the row in which a result was found.
- Include Primary Key data - Include the data from the cell of the Primary Key column for the row in which a result was found.
Set Non-Matching cells limit
When searching structured data (files or databases searched via a connection string), the endpoint application looks within a column for data that matches the specified data type.
- After a specified number of cells in that column are searched without finding any matches, the search will move on to the next column.
- The counter is started at the first row and continues until the limit is hit or a match is found.
- If a match is found, all subsequent rows in that column will be searched.
- To disable this limit and search all cells, use a value of 0.
Exclude Column Types
- This setting allows you to filter out specific categories of data fields from a database scan based on their underlying data format.
- Specify which column types are excluded when searching databases.
- When using this setting outside of the console, note that the value for this setting is a bitmask of the logical OR of any of these values.
- When created in the Windows Registry, they are of type REG_DWORD.
- When entered into the Windows Registry or a configuration XML file, they should be entered as hexadecimal values.
- When entered into a security template (.inf) file, they should be entered in decimal.
How It Works
When Spirion Sensitive Data Platform connects to a database (such as SQL Server, Oracle, or MySQL), it queries the database schema to identify the "type" of each column in a table. By selecting options in this setting, you instruct the search agent to skip any columns that match the excluded types, regardless of what data they might contain.
What It Does
This setting is primarily a performance and noise-reduction tool. It allows you to skip columns that are mathematically or logically unlikely to contain the sensitive data you are looking for.
You can typically exclude the following types:
- Exclude Integer Types: Skips columns containing whole numbers (for example,
INT,BIGINT). Useful if you are only looking for names or addresses and want to avoid scanning ID increments. - Exclude Double Types: Skips floating-point or decimal numbers (for example,
FLOAT,DECIMAL). - Exclude DateTime Types: Skips timestamps and date fields (for example,
DATETIME,TIMESTAMP). - Exclude String Types: Skips text-based columns (for example,
VARCHAR,TEXT). Note: This is rarely used as most sensitive data is stored as strings. - Exclude Blob Types: Skips "Binary Large Objects" (for example,
BLOB,VARBINARY). These columns often store images, encrypted data, or file attachments. Scanning them is very resource-intensive, so excluding them can significantly speed up a scan if you only care about table text. - Exclude Cursor Types: Skips specialized database pointer types.
Why Use It?
- Scan Speed: Databases can have hundreds of columns. If you know your "Social Security Numbers" are always in
VARCHARfields, excludingDateTimeandDoubletypes prevents the agent from wasting cycles on columns that physically cannot match your search pattern. - Reducing False Positives: Some data types might contain numerical values that "look" like sensitive data fragments (like internal system timestamps) but are never actually PII.
- Resource Management: Excluding Blob Types is a common best practice for large-scale database discovery to prevent the agent from attempting to "read" gigabytes of binary image data or encrypted chunks during a standard SQL scan.
Example of Excluding a Column Type
If you are scanning a Student Information System (SIS) for FERPA compliance, you might exclude DateTime types to skip birthdates (if birthdate isn't in your current discovery scope) while focusing heavily on String and Integer types where Student IDs and names reside.
Log Level
The Log Level is configured within an Agent Policy, under the "Local Logging" section.
When searching databases via the Database Search Module, it is desirable to see detailed logging information during configuration or troubleshooting.
- The logging specified via this setting only applies when logging has been enabled and only specific log entries are displayed if their corresponding log type has been enabled (for example, Info, Error)
Standard Operations
- Default - This is the baseline logging configuration provided by the Spirion Default Policy.
- While the UI allows you to create custom policies, the "Default" options represent the standard operational state that Spirion recommends for typical enterprise deployments.
- When you see "Default" in the context of Standard Operations, it typically applies a pre-configured set of toggles that balance visibility with performance:
- Baseline Visibility: It enables essential logging so that if an agent fails to check in or a scan fails to start, there is enough information in the local .eps log to troubleshoot.
- Safety First: It includes pre-set values for Max Hard Drive Usage (typically a safety margin like 2GB or 5%) to ensure the agent doesn't crash the host system by filling the disk.
- Performance Balancing: It generally leaves high-intensity logging (like Log File Access or Log Debugging Messages) unchecked to keep the agent's footprint small on the end-user's machine.
- What it Does
- Selecting or reverting to "Default" for Standard Operations does the following:
- Sets the Log Level: Usually sets the level to 1 (Informational), providing a basic timeline of "Scan Started" and "Scan Finished" without the heavy detail of a Debug log.
- Enables Core Communication Logs: Ensures the agent logs its successful handshakes with the Console.
- Applies Internal "Spirion Defined" Settings: There are several "invisible" settings (such as Console\enable, Console\winHttpSecureProtocolOptions, and retry attempts) that are part of the default operational block. These ensure the agent follows standard security protocols (like TLS 1.2) when communicating.
- Priority & Overrides
- It is important to understand how "Default" interacts with your custom settings:
- Priority Levels: The Spirion Default Policy has a specific priority (often 1991). Custom Agent Policies generally have a higher priority, meaning if you create a custom policy, it overrides the "Default" Standard Operations.
- Inheritance: If you do not define a specific logging behavior in a new policy, the Agent may fall back to the "Default" settings to ensure it doesn't run without any safety parameters at all.
- Summary
- Default is the "out-of-the-box" configuration that ensures the agent is stable, safe, and communicative without requiring manual tuning by the administrator.
- Log Informational Messages - Found in both the Local Logging or Advanced Logging section of a policy. This setting controls whether the Agent records "routine" success events that do not indicate an error or a problem.
- When this setting is enabled, the Agent writes entries to the local log file for standard, healthy operations. Without this, the log file would only contain errors (something went wrong) or warnings (something might be wrong).
- "Informational messages" typically include the following:
- Process Start/Stop: "Scan started at 10:00 AM," "Scan completed at 10:45 AM."
- Policy Updates: "New policy received from console and applied successfully."
- Connectivity Heartbeats: "Successfully checked in with the console."
- Resource Milestones: "OCR engine initialized," "Database connection established."
- Skip Logic Reasons: "File X skipped because it exceeds the maximum size limit defined in policy." (This is a "success" in terms of logic, even if the file wasn't scanned).
- Why would you use this option?
- Verification of Activity: If a scan produces no results, you can look at the informational logs to verify the Agent ran and completed, rather than crashing or being blocked.
- Audit Trails: It provides a timeline of agent activity for compliance purposes, showing exactly when the agent was active on a machine.
- Baseline Performance: It helps you see how long specific phases of a scan (like "Enumeration" vs. "Content Analysis") took to complete.
- Recommendation
- Normal Production: It is usually safe to keep this enabled at a low Log Level (0 or 1). It provides a helpful "breadcrumb trail" without filling up the hard drive.
- Troubleshooting: If you are trying to find out why a file wasn't scanned, you must have this enabled. The "Information" log will often tell you exactly which policy rule caused the agent to bypass that file.
- High-Volume Environments: If you have tens of thousands of endpoints and are worried about disk I/O, you might disable this to ensure the agent only writes to the disk when an actual error occurs.
- Summary: Think of "Log Informational Messages" as the "I'm okay and I'm doing my job" signal. Disabling it means the Agent only speaks up when it has a problem.
- Log Debugging Messages - This setting (usually associated with Log Level 4) is the most verbose setting availabl: it instructs the Agent to record the internal "thought process" of the application, rather than just its final actions.
- When this setting is enabled, the agent records low-level technical details that are typically only useful to Spirion Support, QA, and Engineering. It bypasses the standard filtering that keeps logs clean and readable for administrators.
- Mechanism: It captures the exact API calls, memory allocations, thread transitions, and raw responses from the operating system or database.
- Dependency: This setting often requires the Log Level slider to be set to 4.
- While "Informational" messages tell you what happened (for example, "Scan started"), "Debugging" messages tell you how the scan happened and exactly where it might be stalling. It records the following:
- Raw Regex Execution: The specific steps the AnyFind engine took to evaluate a string against a data type pattern.
- Detailed Connection Strings: The exact parameters used to attempt a database or cloud connection (excluding passwords, which are masked).
- Buffer and Memory States: Information about how the agent is handling large files or OCR blocks in the system RAM.
- DLL and Driver Interactions: Details on how the Spirion Agent is interacting with system components like ntdll.dll or specific printer/scanner drivers.
- Queueing Logic: For Windows Agents, it shows the granular "heartbeat" of the
shipper_queueandjob_queueas they negotiate with the PostgreSQL database.
- Why (and When) to Use this option
- Troubleshooting Crashes: If an agent service stops unexpectedly (a "crash"), debug logs are the only way to see the last few milliseconds of activity before the failure.
- Performance Bottlenecks: If a scan is taking 24 hours when it should take 2, debug logs can show if the agent is "hanging" on a specific file or a corrupted archive.
- False Negative Investigation: If you have a file that should match but doesn't, debug logs show exactly why the engine decided the data didn't meet the criteria.
- ⚠️ Critical Warnings for Administrators
- Performance Impact: Writing debug messages to a disk is extremely resource-intensive. It can cause a noticeable spike in CPU usage and slow down the machine significantly.
- Disk Space Consumption: Debug logs can grow to several gigabytes in a matter of hours. Always monitor the "Max Hard Drive Usage" safeguards when this is enabled.
- Privacy/Security: While Spirion masks sensitive data in logs, debug logs are much "noisier" and could theoretically capture more metadata than standard logs.
- The "Revert" Rule: Never leave this setting enabled in production. It should only be turned on to capture a specific error and then immediately disabled.
- Summary: "Log Debugging Messages" is the "X-ray" for the Spirion Agent. It provides total visibility into the software’s internal operations to solve the most complex technical issues.
- Log Detailed Trace Messages - This setting is the absolute highest level of diagnostic logging available. It is even more granular than "Log Debugging Messages" and is almost exclusively used by Spirion Engineering to diagnose any possible deep architectural issues.
- Trace logging captures the "execution path" of the code. While a "Debug" message might say what a specific function is doing, a "Trace" message records every single line of code as it is executed, including entering and exiting specific sub-routines (functions).
- Granularity: It is the "atomic" level of logging.
- Dependency: This typically requires Log Level 4 to be active and often requires a specific flag or "Advanced" checkbox to be enabled in the policy.
- When "Detailed Trace Messages" is enabled, the Agent records the following:
- Function Entry/Exit: "Entering ScanFile()", "Exiting ScanFile() with return code 0". This helps developers see exactly where the code "hangs" or "loops" infinitely.
- Thread ID Tracking: In a multi-threaded scan (common on Windows agents), trace logs show which specific CPU thread is handling which file and how those threads are communicating.
- Variable States: It can record the specific values of internal variables at a micro-second level (e.g., the exact size of a memory buffer as it expands to hold a large PDF).
- Low-Level System Hooks: It tracks the exact interaction with the Windows Kernel or the macOS File System Events (FSEvents) API.
- Network Handshaking: It records the step-by-step "negotiation" between the agent and the SDP Ingress server, including the raw structure of the JSON packets being sent.
- Why Use It?
- Enabling Detailed Trace Messages has the most severe impact on system performance of any configuration setting in the Spirion platform. Because it records the "atomic" execution of the software—literally writing to a file for almost every line of code the agent runs—it creates massive resource contention.
- This setting is used only in very specific scenarios:
- Reproducing a "Hard Hang": If an Agent completely freezes a computer and even Debug logs don't show why, Trace logs can pinpoint the exact line of code that caused the freeze.
- Memory Leak Investigation: If the Spirion agent’s memory usage (RAM) slowly climbs over several days, Trace logs show which internal objects are being created but not destroyed.
- Race Conditions: When two parts of the software are trying to access the same resource at the same time, causing a crash.
- ⚠️ Extreme Performance Warning
- System Slowdown: Because the Agent has to stop and write to a file for almost every line of code it executes, the "Trace" mode will make a scan run 10x to 50x slower than normal.
- Disk Activity: The log files will grow at an incredible rate—potentially gigabytes per minute.
- Manual Intervention: Due to the risk of crashing the endpoint, Spirion Support will often ask you to run a "Trace" for only 60 seconds to capture a specific event and then immediately disable it.
- Summary
- If Informational is a "Summary," and Debug is an "X-Ray," then Detailed Trace is a "Microscope." It is a specialized tool for developers to look inside the engine while it is running.
- Log All Messages - When this setting is enabled, the agent is permitted to write to its local log files (.eps or .log files). The specific types of messages it writes are then determined by your other settings, such as Log Level (0-4), Log Informational Messages, and Log Debugging Messages.
- Dependency: This is the parent setting. If "Log All Messages" is disabled, no logs will be generated, regardless of what the Log Level slider or other checkboxes are set to.
- What It Does
- Enables/Disables Disk Writing: It controls whether the agent has permission to open a file handle on the local hard drive to record its activity.
- Silences the Agent: When unchecked, the agent operates in "Silent Mode." It will still perform scans and send results to the console, but it will leave no "footprint" of its technical process on the local machine.
- Preserves Resources: By turning this off, you completely eliminate the CPU and Disk I/O overhead associated with logging.
- Why You Would Use It
- Production Standard (Enabled): In most environments, this is kept Enabled with a low Log Level (0 or 1). This ensures that if a scan fails, there is at least a basic record of the error for Support to review.
- High-Performance/VDI Environments (Disabled): In environments with extremely limited disk space or high sensitivity to disk latency (like some Virtual Desktop Infrastructure or high-traffic SQL servers), administrators may disable "Log All Messages" to ensure the agent uses as few resources as possible.
- Privacy Compliance: Some highly regulated organizations disable local logging to ensure that no metadata about file structures or database schemas is stored in plain-text log files on the endpoint.
- Troubleshooting Tips
- If you are working with Spirion Support and they ask you to collect logs, but the log folder is empty, the first thing to check is whether "Log All Messages" was accidentally unchecked in the policy.
Discovery Teams
The logging settings for Discovery Teams function similarly to standard Agent logging but are specifically tailored to the distributed nature of the task.
This setting controls the technical "audit trail" created while multiple agents are collaborating on a single scan. It specifically records:
- Work Distribution (Job Queue): It logs how the "master" task was broken down and which specific "chunks" of data were assigned to which team member.
- Team Communication: It records the handshake between the individual agent and the console's job_queue to confirm it received its assigned work.
- Scan Lifecycle: It logs when the team member starts its portion of the scan, its progress (for example, "50% complete"), and when it finishes.
- Result Shipping: It tracks the progress of the
shipper_queueas the Discovery Team member sends its specific findings back to the Ingress server.
The following log levels are available:
- Disabled: A specific override that silences the technical logs created during distributed scanning operations.
- What this options does:
- Suppresses Team-Specific Events: The Agent will not write entries to the local .eps log file regarding the distributed scan mechanics. This includes the following:
- "Requesting work from the Job Queue."
- "Received chunk [X] of the Discovery Task."
- "Heartbeat sent for Discovery Task [ID]."
- "Task chunk completed successfully."
- Reduces Log Noise: Because Discovery Teams involve constant communication with the console to manage work "chunks," these logs can become very "chatty." Disabling them keeps the log file focused only on standard Agent health and errors.
- Preserves Disk I/O: Distributed scans are often high-intensity operations. By disabling logging for these specific tasks, you free up a small amount of CPU and Disk resources that the agent can instead use for scanning data.
- Important: What this option Does NOT Do:
- It does NOT stop the scan: The Agent still participates in the Discovery Team, performs its assigned work, and sends results back to the console. It just won't record the technical steps of doing so in the local file.
- It does NOT disable Error Logging: In most policy configurations, critical system failures or "Fatal" errors are still recorded even if the operational Discovery Team logging is set to "Disabled."
- It does NOT affect Result Shipping: The
shipper_queuestill operates normally to send findings to the Ingress server; those "Success" messages just won't appear in the local log.
- Standard logging: "Standard Logging" for Discovery Teams is the baseline operational logging level for Agents participating in distributed scanning.
- While "Standard Operations" covers the agent's general health, Standard Logging for Discovery Teams specifically tracks the "lifecycle" of a distributed task as it is broken into pieces and shared across multiple machines.
- What it Does
- When this is enabled, the agent records the specific "handshake" and coordination steps required for a Discovery Team to function. It writes the following to the local .eps log file:
- Queue Interaction: It logs when the agent checks the job_queue on the console to see if there is any work available for the Discovery Team.
- Task Acquisition: It records the moment the agent "claims" a specific chunk of data (e.g., "Received Work Unit ID: 12345 for Discovery Task Alpha").
- Progress Milestones: It logs high-level status updates, such as when a assigned chunk is 25%, 50%, or 100% complete.
- Completion/Handoff: It records when the agent successfully finishes its assigned portion and asks the console for the next available piece of work.
- Result Shipping: It tracks the status of the shipper_queue specifically for those discovery results as they are sent to the Ingress server.
- Why Use "Standard Logging"?
- Visibility: It enables an administrator to look at a local log and answer the question: "Is this machine actually helping with the distributed scan, or is it just sitting idle?"
- Troubleshooting: If a Discovery Team scan seems "stuck" at 90%, Standard Logging helps you identify which specific agents are failing to check-in or which "chunks" of data are causing errors.
- Audit Trail: It provides a record of which machines touched which data sources during a large-scale scan.
- Default logging: Standard logging. Includes basic information such as the name of the table being searched and errors.
- Additional logging: Standard logging plus information about the status of the search for the current row.
- Comprehensive logging: Additional logging plus details about each table, column and row.
- Full logging: Data from the database is written in clear text to the client log file.
Summary
- Use the Default: For 99% of distributed scans, keep the Discovery Team logging at Standard.
- Monitor Disk Space: Because of the potential for rapid log growth during distributed scans, ensure your Max Hard Drive Usage safety parameters are active on all machines participating in a Discovery Team.
- Consolidation: Newer versions of Spirion Sensitive Data Platform aim to centralize these settings so you only have to configure logging in the Agent Policy, rather than having separate (and potentially conflicting) settings in the Discovery Team panel.
Location Based Operations
- Default - This is a specific "template" provided by the Spirion Default Policy.
- When you leave this set to "Default," you are instructing the agent to follow the standard, pre-configured logging behavior that Spirion’s engineering team has determined is "best for everyone" (balanced for performance and visibility).
- Choosing "Default" for Location Based Operations means: "I want the agent to only tell me the technical details that Spirion recommends for a stable, high-performance environment."
- How it Works
- The "Default" setting is not a fixed level; it is a dynamic reference.
- If Spirion updates the core product with a new recommended logging strategy, Agents using the "Default" setting will automatically inherit those updates during their next policy refresh.
- What it Does
- Under the hood, the "Default" setting for Location Based Operations typically applies the following logic:
- Silent by Default for Files: It generally leaves Log File Access and Log Folder Access unchecked.
- Why? To prevent massive log files during 1-million-file scans.
- Enabled for Higher-Risk Connections: It often keeps Log Database Access and Log Cloud Access checked at a very low level (Level 0 or 1).
- Why? Because database and cloud connections (like SharePoint/O365) are much more likely to fail due to "Timeouts" or "Credential Errors." Having at least a basic log of those connection attempts is critical for support.
- Error-Only Logging: It ensures that even if you aren't logging "Successful" file access, the agent will still record "Fatal Errors" or "Access Denied" messages for any location.
- Priority-Based Logic: If your custom policy has a higher priority than the Spirion Default Policy, and you explicitly change any of these boxes, your changes will override the "Default."
- Why Use the "Default" Setting?
- Performance Safety: It ensures the agent won't accidentally "self-destruct" by filling up the disk on a high-traffic server.
- Predictability: Using the "Default" means your agents will behave exactly like the thousands of other agents Spirion Support deals with every day.
- Maintenance Free: You don't have to manually check or uncheck 15 different boxes every time you create a new policy.
- Log Informational Messages - A granularity filter. This setting tells the Agent to record "success" events and general status updates for the specific data locations you are scanning.
- While Standard Operations sets the global log level, this setting specifically enables Level 1 (Informational) logging for the data sources checked in the "Location Based Operations" section (like Files, Databases, or Cloud).
- How it Works
- Logging in Spirion is hierarchical.
- For this setting to perform, you must also have a specific location enabled (for example, Log File Access must be checked).
- Checked: The agent writes a "Journal" of its successful interactions with that location.
- Unchecked: The Agent writes to the log only if something goes wrong (Errors/Warnings) or if Debug/Trace is enabled. It does not record its successful "routine" actions.
- What it Does
- When "Log Informational Messages" is enabled for your locations, the local .eps log include entries such as:
- "Discovered" / "Discovering": Records each time the agent successfully identifies a file, database table, or email message it is about to scan.
- "Scanning Started/Finished": Marks the beginning and end of a scan for a specific location (e.g., "Started scanning SharePoint site: Marketing").
- Connection Success: Records when the agent successfully authenticates with a remote resource (e.g., "Successfully connected to SQL Server: PROD-DB-01").
- Policy Application: Logs which specific search expressions (regex) are being applied to that location.
- Why You Use It
- Proof of Work: If an auditor asks, "Did you actually scan the Finance folder?", these informational logs provide the forensic proof that the agent visited that location, even if no sensitive data was found.
- Troubleshooting "Silent" Issues: Sometimes a scan finishes too quickly and finds nothing. By enabling Informational Messages, you can see if the agent actually "saw" the files or if it skipped them because of a configuration error.
- Baseline Performance Tracking: These logs include timestamps for when a scan starts and ends for a specific location, helping you calculate how long your database or cloud scans typically take.
- ⚠️ Performance Warning: "The Firehose Effect"
- If you enable Log Informational Messages AND Log File Access on a machine scanning a large file server:
- Log Volume: The Agent writes a line for every single file it touches. On a drive with 1 million files, that is 1 million lines of text.
- Disk Pressure: This can easily generate several gigabytes of log data, potentially triggering the Max Hard Drive Usage safety shutdown.
- Recommended
- For Cloud/Database Scans: Enable it. These scans involve complex APIs and network handshakes where seeing "Success" messages is very helpful for stability monitoring.
- For Large File Scans: Disable it. It creates too much "noise" and can impact performance. Only enable it temporarily if you suspect the Agent is skipping a specific folder.
- Log Debugging Messages - This is a specialized diagnostic setting. This setting instructs the Agent to record low-level technical "Developer-grade" details specifically for the data sources you are scanning (Files, Databases, Cloud, etc.).
- While the global "Standard Operations" setting sets the overall volume, this checkbox "turns on the microscope" for your specific scan targets.
- How It Works
- According to internal engineering standards, this setting corresponds to LogLevel settings (typically values 1 through 4).
- Targeted Logging: Each area of the agent (for example, Settings\Locations\Files\LogLevel, Settings\Locations\Databases\LogLevel) has its own independent debug counter.
- Code-Level Trigger: When this box is checked, the Agent begins executing "Debug Blocks" in the code. For example, if the log level is set to 4, the code will trigger: if (logLevel >= 4) { LOGINFO("Low-level buffer allocation successful"); }.
- What It Does
- When "Log Debugging Messages" is enabled for your locations, the local .eps log records technical data such as:
- Raw API Handshakes: For Cloud or Database locations, it logs the exact request and response headers (excluding passwords) sent to the provider. This is critical for seeing why a "403 Forbidden" or "500 Internal Server Error" is occurring.
- Regex Engine Details: It logs how the Sensitive Data Engine is applying specific search patterns to a file or database cell.
- Authentication Handshakes: It records the step-by-step negotiation of tokens (e.g., OAuth for SharePoint or Google Drive).
- Buffer and Memory Management: It logs when the agent allocates memory to "chunk" a large file (like a 2GB ZIP) and if that allocation fails.
- External Module Loading: It records when the agent calls external drivers (like OCR engines for PDFs or JDBC drivers for databases).
- Why Use It?
- Engineering Escalations: This setting is primarily for Spirion Engineers. Support will ask you to enable this when standard "Informational" logs don't explain why a scan is crashing or skipping a specific database table.
- Support Mode: Engineers often use a "Support Mode" XML to automatically set these specific LogLevels to 4 (the most verbose) to capture the exact cause of a failure.
- Pinpointing "Hangs": If an Agent stops responding during a scan, Debugging Messages will show the very last thing the agent tried to do (e.g., "Attempting to open file: C:\Data\corrupt.zip") before the freeze.
- ⚠️ Important Warnings
- Format Strictness: Debug logs follow a strict format: Unable to <action> (<reason>): <location>. This allows engineers to quickly grep or search for specific API errors (like "OS Error Code: 1312").
- Performance Hit: Like "Detailed Trace," this setting causes a noticeable slowdown and generates significantly more data than "Informational" logging.
- Disk Space: It can fill the local disk quickly. Ensure your Max Hard Drive Usage limit is set before enabling this in a policy.
Summary
- Log Informational Messages turns on the "Routine Play-by-Play" for your scan locations. It’s great for verification but can be very "chatty" on large file systems.
- Log Debugging Messages for locations tells the agent: "Don't just tell me that you scanned a file; tell me every technical API call and internal function you used to open and read it." It is the standard tool for resolving complex connection or file-reading issues.
- Troubleshooting Tip: If you're ever troubleshooting a specific location (like a SQL server that won't connect), you should temporarily change this from the "Default" setting to "Custom" and check the box for "Log Database Access" to see what's really happening. Once fixed, change it back to "Default" to keep the agent's footprint small.
Note: Data from the database is written in clear text to the client log file.
Note: Logging beyond the default level, especially the maximum level, creates very large log files and may contain sensitive information.
Row Count Start - Logging
When the setting Settings\Locations\Databases\LogLevel is set to 1, it is possible to specify a row at which additional, detailed column information can be logged.
- To enable this logging, specify the row number at which to start
- This setting should be set only after consulting with the Support Team
Row Count Start
The row number at which to start detailed column logging:
- When Log Level (Settings\Locations\Databases \LogLevel) is set to 1, it is possible to specify a row at which additional, detailed column information can be logged.
- To enable this logging, specify the row number at which to start.
- This setting should only be set after consulting with the Support Team.
Row Count Stop
- By default, all rows in a Target database is searched.
- To specify the maximum number of rows to search in each table, set this to a value greater than 0.
- Once that number of rows have been searched, the search of that table is stopped and searching resumes with the next appropriate table.
Scan Column Names
By default, the column names listed in the field "Column Names to Include/Exclude" must match exactly to be included or excluded from the search.
- Allow partial match - Enable partial name matching - for example, allow the value "zip" (when specified in "Column Names to Include/Exclude") to match the column "ZipCodes"
- Require exact match - Default. If selected, the scanned column names must match exactly those specified in "Column Names to Include/Exclude".
*Windows-only setting. Mac/Linux are excluded.
Include/Exclude Columns (check to exclude)
- Enabled (checked) - Search all columns except those specified in "Column Names to Include/Exclude" (one per line)
- The column name list applies to all databases configured to be searched. - Disabled (unchecked) - Default. Search all columns in the specified database.
*Windows-only setting. Mac/Linux are excluded.
Column Names to Include/Exclude
- By default, all columns in a specified database are searched.
- To search only specific columns, enter those table names, one per line.
- The column name list applies to all databases configured to be searched.
- To use this list as a list of columns to exclude from search, enable (check) the setting above, "Include/Exclude Columns (check to exclude)"
*Windows-only setting. Mac/Linux are excluded.
Scan Table Names
- Require exact match - Default. By default, the table names listed in the setting "Table Names to Include/Exclude" below must match exactly to be included or excluded from the search.
- Allow partial match - Allow partial name matching when searching. For example, enable this setting to allow the value "cust" (when specified in "Table Names to Include/Exclude") to match the SQL table named "Customer_Data"
*Windows-only setting. Mac/Linux are excluded.
Include/Exclude Table (check to exclude)
- Enabled (checked) - Check this box to exclude table names entered in the field below (one per line) from search
- Disabled (unchecked) - Uncheck this box to include table names entered in the field below (one per line) in search
*Windows-only setting. Mac/Linux are excluded.
Table Names to Include/Exclude
- By default, all tables in a specified database are searched.
- To search only specific tables, enter those table names, one per line.
- The table name list applies to all databases configured to be searched.
- By default, the comparison of table names requires an exact match.
- To enable a partial match, set "Scan Table Names" above, to "Allow partial match."
- To use this list as a list of tables to exclude from the search, enable (check the box) the setting above: "Include/Exclude Tables (check to exclude)"
*Windows-only setting. Mac/Linux are excluded.
Scan Table Types
Specify whether tables or views are included when searching databases.
- When using this setting outside of the console, note that the value for this setting is a bitmask of the logical OR of any of these values.
- When created in the Windows Registry, they are of type REG_DWORD.
- When entered into the Windows Registry or a configuration XML file, they need to be entered as hexadecimal values.
- When entered into a security template (.inf) file, they need to be entered in decimal.
- Default: Include Tables
*Windows-only setting. Mac/Linux are excluded.
Database Preview Length
The number of characters before and after a database match to send to the Spirion console. To provide context to matches when viewing results on the console, endpoints and console version 10.7 and later can send the specified number of characters from before and after the match itself.
- By default, no characters preceding or following database matches will be sent to the console.
- The maximum allowed number of characters is 1000 and a value of 0 disables sending preview information to the console.
Valid values:
- 0: Default value. Disabled (no preview data will be sent to the console)
- 1-1000: The specified number of characters from before and after the database match are sent to the console
- >1000: Invalid (the value will be set back to the default of 20)
Note: When "Console\sendMatch" setting is set to Disable (0), preview information is not sent to the console.
*Windows-only setting. Mac/Linux are excluded.
Database Preview Match Max
Specify the maximum number of instances of a database match for which to include preview data.
- When the setting "Database Preview Match Max" above is set to a value greater than '0' preview information (characters before and after the match) are sent to the console to provide context around the matches.
- When there are multiple instances of a match in a location, it is often sufficient to review the preview context for just a few of the matches to determine if the matches are true or false positives.
- By default, preview data is not sent to the console for any database matches.
Valid values:
- Maximum: 1000000
- 0: Disabled. No preview information is sent to the console.
- For example, if a location has 5 unique matches (3 SSNs and 2 CCNs) and one of those CCNs appears 500 times, by default, the contextual preview information is only sent for the first 5 instances of that CCN. - 1-1000000: Preview data is sent to the console for the specified number of instances of each match.
- >1000000: Invalid
- Note: When the setting "Console\sendMatch" is set to Disable (0), preview information is not sent to the console.
*Windows-only setting. Mac/Linux are excluded.
Select Website Options
The "Select website options" page only appears when configuring website Targets.
Search linked webpage content
*This setting applies to Windows Agents only.
The setting “Search linked webpage content” is a primary toggle that determines whether the Spirion Agent analyzes the actual text and HTML content of a website's pages for sensitive information.
What it does
This setting controls the "crawling" behavior of the Spirion Web Crawler Agent:
- When set to "Yes": The Agent downloads the HTML of the specified URL and any sub-pages (depending on your "Search Depth" settings) and scans the text content displayed on those pages for sensitive data matches (e.g., Social Security Numbers, Credit Card numbers, or custom regex patterns).
- When set to "No": The Agent does not analyze the text or HTML structure of the pages themselves.
Why it exists
This setting enables you to distinguish between scanning the information presented on a website versus scanning the files hosted on a website.
- Text vs. Files: Often, a website is used as a repository for documents (PDFs, Excel sheets, Word docs). If you only care about finding sensitive data within those files and don't care about the text on the actual webpages, you would set "Search linked webpage content" to No and set "Search file content" to Yes.
- Performance: Searching the text of every page in a massive website can be time-consuming. Disabling this allows the crawler to move faster if it only needs to look for specific file extensions or metadata.
- Compliance Targeting: If you are specifically auditing a web portal for PII that might be "leaking" into the user interface (like a customer profile page displaying a full SSN), you would set this to Yes.
How it works with other settings
To use this effectively, be aware of this setting's interaction with Advanced Options:
- Search Depth: If "Search linked webpage content" is set to "Yes," the Agent follows links up to the number of levels (subsites) specified in the Set Search Depth field (default is usually 3).
- Restrict to Selected URL: If set to "Yes," the Agent searches only that linked content which stays within the directory or domain you provided.
- Follow External Links: This determines if the "Linked webpage content" includes pages hosted on different domains that your site links to.
Search file content
*This setting applies to Windows Agents only.
- The setting “Search file content” on the Select Website options wizard page is a toggle that directs the Spirion Agent to look for and scan downloadable files linked on a website.
- While the "Search linked webpage content" setting looks at the text in the HTML, this setting looks at the objects (documents) hosted on the site.
What it does
When enabled, the Spirion Web Crawler identifies links to files (like PDFs, Word documents, Excel spreadsheets, etc.) and analyzes the data inside those files for sensitive information.
- When Enabled (Yes): The Agent will "click" the links to files it finds while crawling. It downloads the file to a temporary location, extracts the text, and scans it for sensitive data matches (for exmaple, Social Security numbers, Credit Card numbers).
- When Disabled (No): The Agent ignores file links. It scans only the text content of the webpages themselves (if that setting is enabled).
Why it exists
Many organizations use websites (Intranets, SharePoint sites, or public portals) as repositories for documents. Sensitive data is often hidden inside these attachments rather than on the webpage itself.
- Finding "Hidden" Data: A webpage might look safe, but it could contain a link to an Excel file called
Employee_Salaries.xlsxthat contains thousands of PII records. This setting ensures those files are audited. - Targeted Auditing: If you are specifically looking for "leaked" documents on a public-facing web server, you can set "Search linked webpage content" to No and "Search file content" to Yes to focus purely on the downloadable assets.
- Broad Discovery: It enables Spirion to treat a website like a file server, ensuring that compliance standards (like HIPAA or GDPR) are met for all shared documentation.
How it works in the workflow
- Discovery: As the Agent crawls the website's HTML, it looks for anchor tags (
<a href="...">) pointing to file extensions. - Extension Filtering: The Agent compares the file extension (e.g.,
.pdf) against the "File Types" or "Extensions" list configured in your Playbook or Scan settings. - Extraction: If the extension is supported, the Agent downloads the file.
- Analysis: Spirion uses its AnyFind engines to search the internal contents of the document.
- Reporting: Results reveal the URL where the file was found and the specific sensitive data matches discovered inside it.
Important Considerations
- Performance & Bandwidth: Enabling "Search file content" can significantly increase the duration of a scan and the bandwidth used, as the Agent must download each file to inspect it.
- Restrict to Domain: It is highly recommended to use this with the "Restrict to Selected URL" or "Restrict to Selected Domain" settings. Otherwise, if your site links to a large PDF on an external site (like a government manual), Spirion attempts to download and scan that external file.
- Temporary Storage: The Agent requires a small amount of local disk space on the Windows machine running the scan to temporarily store and extract the files it downloads during the process.
Summary
The “Search file content” setting is the Document Crawler Toggle. It tells Spirion whether it should investigate the "attachments" and "downloads" found on a website to ensure no sensitive data is hiding inside files linked for public or internal consumption.
Website Options - Advanced Options
Exclude
Enter any website URL to prevent the website from being scanned.
Set Search Depth
Specify the maximum depth to crawl (search).
- Default: 3
*This setting applies to Windows Agents only. Mac and Linux platforms are excluded.
Set User Agent String
The user agent used during the Website search.
- By default, the user agent string used by the endpoint application during the Website search is, "Spirion Web Crawler Agent"
- To set a custom value for the webcrawler, change this value
*This setting applies to Windows Agents only. Mac and Linux platforms are excluded.
Follow External Links
Specify the behavior when externally linked sites are encountered.
- Ignore External Links - Default
- Search externally linked files but do not follow external page links - To disable the searching of files linked from web pages in the Website search, set this value to "False" (0)
- Follow External Links
*This setting applies to Windows Agents only. Mac and Linux platforms are excluded.
Restricted to Selected URL
Only search pages and files in folders that are sub-folders of the specified folder(s).
- For example, if the URL http://www.website.com/folder is specified in the list, the default behavior ('No' setting) is to read all of the pages in that folder and follow all the links (with respect to other settings such as link depth and redirect policy, of course) such as a link to the web page http://www.website.com/folder2/page1.html.
- When set to 'Yes' links outside of /folder from http://www.website.com/folder are not followed.
- No (default) - Do NOT restrict searches of website pages and files
- Yes - Restrict searches to only those website pages and files in folders that are sub-folders of URLs specified in the URL list.
*This setting applies to Windows Agents only. Mac and Linux platforms are excluded.
Advanced Options, Second Screen
The additional or second screen of Advanced options apply to the following Target types:
- Cloud, Files & Folders (Local & Remote), Email, Collaboration Tools (SharePoint & Bitbucket), Database, and Website Target types.
Scan Only Changed Files
The “Scan Only Changed Files” setting under "Search History" on the “Select advanced options” page of the Create New Scan Wizard is a performance optimization feature that instructs the Spirion Search Agent to skip files that have already been scanned and have not been modified since the last search.
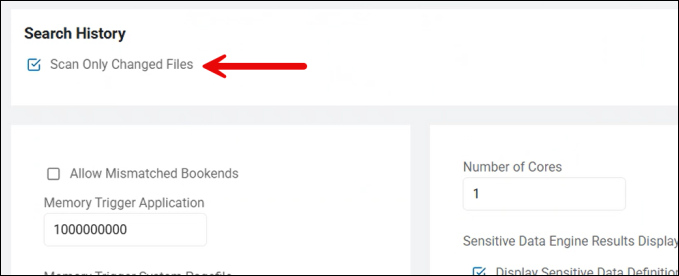
- This is the Differential Scanning setting
What it does
- Search History Comparison: The agent maintains a local "Search History" database (typically an
analysis.dborhistory.dbfile on the endpoint). When this setting is enabled, the agent compares the current file's metadata (specifically the Last Modified Timestamp and File Size) against the record in its history. - Conditional Scanning:
- If the file's timestamp and size match the previous record, the agent assumes the content hasn't changed and skips the file.
- If the file is new or the timestamp/size has changed, the agent performs a full scan of the file and updates the history.
- Result Persistence: Even though the file is skipped, Spirion "remembers" any sensitive data matches found in previous scans and includes them in the final report so your results remain complete.
What it is used for
- Drastic Reduction in Scan Time: This is the most effective way to speed up recurring scans. On a file server with millions of documents, only a small percentage typically change day-to-day. Enabling this can turn a 24-hour scan into a 20-minute scan.
- Resource Conservation: By skipping unchanged files, you significantly reduce the CPU, memory, and Network I/O impact on the target system. This is critical for scanning production servers or user workstations during business hours.
- Continuous Monitoring: It enables organizations to run "Daily" or "Weekly" scans efficiently, focusing only on the "delta" (new or modified data) rather than re-processing the entire environment every time.
Important Technical Distinctions
- Metadata-Based: This setting relies on the operating system's file metadata. If a file's content is changed but the "Last Modified" date is somehow preserved (which is rare but possible with certain forensic tools), the agent might skip the change.
- Policy Consistency: For this setting to work, the Data Types in the scan must remain the same. If you add a new Data Type (e.g., you start searching for "Passport Numbers" when you previously only searched for "SSNs"), the agent will recognize the policy change and re-scan the files to ensure the new data type is found.
Best Practices
- Use for Recurring Scans: Always enable this for your "Daily" or "Weekly" maintenance scans.
- Perform Occasional "Full" Scans: Every few months (or after a major product update), it is a best practice to run one scan with this setting disabled. This "Full" scan clears the history and ensures that no files were missed due to metadata anomalies.
- Initial Scans: This setting has no effect on the very first scan of a target, as there is no history to compare against.
Gmail and Exchange: Email Drafts and Attachments
- Gmail and Exchange sources: With Differential Scanning enabled (it is enabled by default), when scanning either Exchange or Gmail locations, emails in draft form as well as attachments to such emails are always scanned, regardless of their state of change.
- Emails and attachments are never marked to be skipped.
Impact of Classification
- Important! Given that Differential Scanning is enabled (it is enabled by default), locations/files which are classified by SDP during a scan are not marked for rescanning as the location/file has not been altered, and can therefore be skipped during the next scan, assuming no other changes are made.
Impact of Redaction
- Important! Given that Differential Scanning is enabled (it is enabled by default), and sensitive information in locations/files are redacted by SDP, then the locations/files are still marked for rescanning regardless of any other changes being made.
- Marking redacted files to be skipped by subsequent scans would result in playbook rules being unenforced.
Impact of AnyFind Definition Change
- Important! If your Agent is updated and this includes a change to AnyFind logic (the AnyFind definition file changes) all existing Search History is invalidated.
Scan Results with Skipped Locations
- Skipped locations on the Scan Results page are designated with a yellow, circular icon in-between the info icon and scan name in the "Scan Name" column:

- Spirion Sensitive Data Platform did not detect any changes to these locations since the last scan.
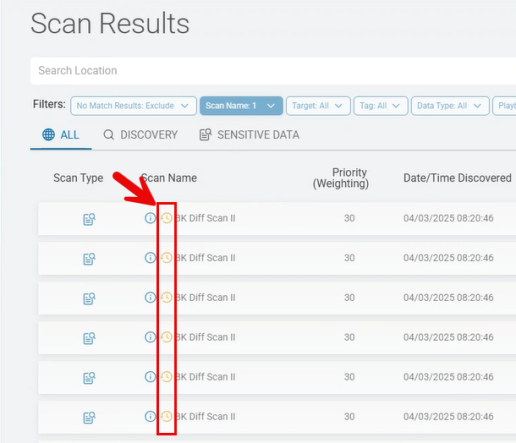
Skipped Location Details
- Note the Location Details in the screenshot below and the details under the column Last Action Taken
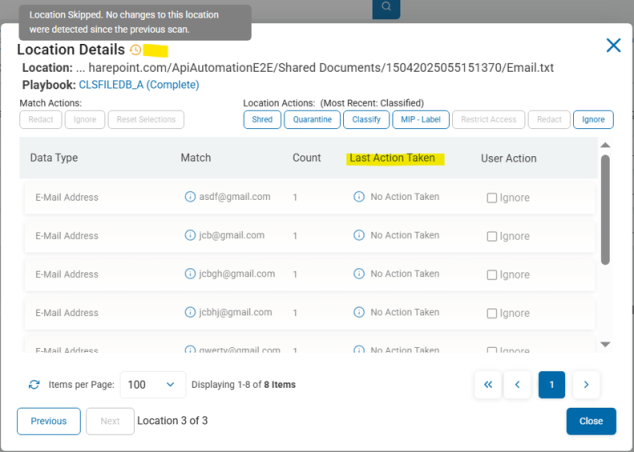
Supported Sources
- Amazon S3
- Box
- Dropbox
- Exchange
- Exchange Online
- Gmail
- Google Drive
- OneDrive
- Local files and folders
- Remote files and folders
- SharePoint
- SharePoint Online
Unsupported Sources
- Any Database
- BitBucket
- OLEDB
- ODBC
- Website
Global Ignore Lists
The Global Ignore List feature enables you to instruct Spirion Agents (version 13.6 or higher) to ignore data such as sample or fictitious data, when scanning. The data to ignore is specified in a list called a Global Ignore List. Global Ignore Lists can be created only by Admin users.
To ignore specific scan results, see How to Ignore Sensitive Data Matches.
The Global Ignore Lists section on the "Select advanced options" page appears to all users. To apply a Global Ignore List (which contains the specific data or type of data to ignore) to your scan, click the 'v' to expand the section and select one or more Global Ignore Lists from the list of available options.
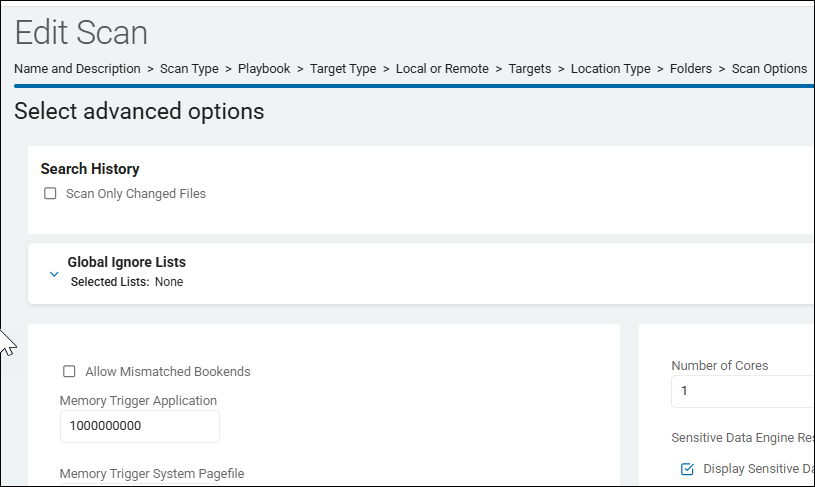
Note: If your scan uses Spirion Agents earlier than version 13.6, these older Agents can not apply any Global Ignore Lists you select.
Global Ignore Lists can be viewed, created, and managed by users with Admin rights on the Scans Settings page (Settings > Application Settings > Scans Settings > Global Ignore Lists).
See Global Ignore Lists.
Allow Mismatched Bookends
The “Allow Mismatched Bookends” setting on the “Select advanced options” page of the Create New Scan wizard is a pattern-matching configuration that controls how strictly the search engine validates the characters surrounding a potential sensitive data match.
What it does
In data discovery, "bookends" are the characters that appear immediately before and after a string of numbers or text (for example, parentheses, brackets, or quotes). When this setting is enabled, Spirion accepts a match even if the opening and closing characters do not "match" each other in a traditional pair.
- Standard Behavior (Disabled): Spirion typically looks for symmetrical bookends. For example, if a Credit Card Number is found inside parentheses
(4111-1111-1111-1111), the engine expects both the opening(and the closing)to be present. - Mismatched Behavior (Enabled): The engine allows different special characters to serve as the bookends for a single match. For example, it would validate a match that looks like
[4111-1111-1111-1111)(an opening square bracket and a closing parenthesis).
Why use it?
- Data Corruption or Poor Formatting: In some legacy databases, log files, or poorly formatted text documents, sensitive data might be wrapped in inconsistent characters due to coding errors or manual entry.
- Increasing Recall: Enabling this setting increases the "recall" of your scan—meaning it is more likely to find every possible instance of sensitive data, even if the formatting is non-standard.
- Complex Strings: It is useful when scanning structured data where sensitive information might be concatenated with other variables using different delimiters on either side.
Potential Downside
- Increased False Positives: By relaxing the rules for what constitutes a valid "wrapper" for sensitive data, you may see a slight increase in false positives. The engine might pick up random strings of numbers that happen to be surrounded by unrelated special characters which would have otherwise been filtered out by the "symmetrical bookend" rule.
Best Practices
- Standard Office Files: Keep this disabled. Most modern documents (Word, Excel, PDF) use standard formatting where mismatched bookends are rare.
- Legacy Systems & Raw Logs: Enable this if you are scanning raw system logs, "dirty" data exports, or legacy mainframe files where data formatting may be unpredictable.
- High-Security Discovery: If your goal is to find every single possible match regardless of the noise level, enable this setting to ensure no "weirdly formatted" data is skipped.
Summary Example
- Disabled:
(123-45-6789)is a match;[123-45-6789)is ignored. - Enabled: Both
(123-45-6789)and[123-45-6789)are reported as matches.
Memory Trigger Application
The “Memory Trigger Application” setting on the “Select advanced options” page of the Create New Scan wizard is a resource-capping mechanism that monitors the specific memory footprint of the Spirion agent process itself.
What it does
This setting allows you to define a maximum threshold of RAM (in bytes) that the Spirion scanning process (e.g., idffed.exe) is allowed to consume. If the process exceeds this limit, the agent will automatically pause the scan.
- Process-Level Control: Unlike the "System Pagefile" trigger (which looks at the whole computer's health), this trigger looks only at the Spirion application.
- Preventing "Memory Bloat": Some files—particularly massive, complex, or "malformed" archives—can cause a scanning engine to balloon in memory usage as it tries to decompress and analyze them. This setting acts as a "circuit breaker" to stop the process before it consumes an unreasonable amount of the system's physical RAM.
How to configure it
- The Value: You enter the limit in bytes.
- Example: To set a 1 GB limit, enter
1073741824.
- Example: To set a 1 GB limit, enter
- Logic: If the
idffed.exeprocess reaches that byte count, it pauses. It will periodically check its memory usage and resume only if the usage drops below the threshold (which usually requires the OS to reclaim memory or the agent to successfully clear its internal buffers).
Why use it?
- Multi-User Environments (VDI/Citrix): On a shared server where 20 users are working, you don't want a single Spirion scan to take up 4 GB of RAM and slow down everyone else. Setting an application trigger ensures the agent "stays in its lane."
- Handling "Zip Bombs" or Large PSTs: If the Agent encounters a "Zip Bomb" (a small file that expands into a massive amount of data), the memory usage spikes. This trigger prevents the spike from starving other critical applications (like anti-virus or system services) of memory.
- Debugging: If you have an endpoint that keeps crashing during scans, setting this trigger can help you identify if the crash is due to the Spirion process growing too large.
Key Difference from "System Pagefile" Trigger
- Memory Trigger System Pagefile: Pauses the scan to save the Operating System from crashing.
- Memory Trigger Application: Pauses the scan to keep the Spirion Agent within a specific resource budget.
Best Practices
- Standard Workstations: Usually, this can be left blank (disabled) to allow the agent to use what it needs, provided the Pagefile Trigger is set to protect the OS.
- Resource-Constrained Servers: Set this to a reasonable limit based on the available RAM (for example, 1024 MB or 2048 MB).
- If the Scan Pauses Frequently: If your logs show the scan is pausing due to the Application Trigger, you likely have very large or complex files (like large database exports or Outlook archives) that require more "breathing room" to process. You should increase the byte value or investigate those specific files.
Tip: When calculating the value in bytes, remember:
- 512 MB = 536,870,912 bytes
- 1 GB = 1,073,741,824 bytes
- 2 GB = 2,147,483,648 bytes
What happens if the application trigger is reached during a scan?
When the Memory Trigger Application threshold is reached during a scan, the Spirion Agent enters a self-preservation state. It does not crash or fail the scan immediately; instead, it follows a specific "Pause and Resume" logic.
Here is the step-by-step breakdown of what happens:
1. Immediate Suspension of the Search Engine
As soon as the memory usage of the Spirion process (e.g., idffed.exe) hits the byte limit you defined, the search engine pauses.
- Current File: The agent stops processing the file it is currently analyzing.
- CPU Drop: You will see the CPU usage for the Spirion process drop to near 0% because the "work" has stopped.
- Status: In the Spirion Console, the scan will still show as "In Progress," but no new results will be reported.
2. Logging the Event
The agent records the pause in its local logs so that administrators can see why the scan has stalled.
- Log File:
IDF/SystemSearchlog. - Message: You will see an entry similar to: "Search paused: Application memory limit reached." It will often list the current memory usage versus the trigger value.
3. The "Wait and Monitor" Cycle
The agent does not give up. It enters a loop where it "sleeps" for a short period (typically 30–60 seconds) and then checks its memory usage again.
- Memory Reclamation: The agent waits for the Operating System's garbage collection or memory management to reclaim any "leaked" or unused memory from the process.
- Buffer Clearing: If the agent was in the middle of a large decompression task, it may attempt to clear temporary buffers to bring the memory footprint back down.
4. Resume or Permanent Stall
- Resuming: If the memory usage drops below the trigger threshold during one of the checks, the agent will log "Search resumed" and continue from exactly where it stopped.
- Stalling: If the file being scanned is simply too large to be processed within that memory limit (e.g., you are trying to scan a 2GB file but set a 1GB application trigger), the agent will get stuck in a "Pause-Resume-Pause" loop. It will resume, immediately hit the limit again, and pause.
5. Potential for "Task Timeout"
If the Agent remains paused for an extended period (hours), the Spirion Console may eventually intervene:
- Stale Task: The Console might decide the task is "stale" because it hasn't received a progress update or heartbeat in too long.
- Re-queueing: In a distributed environment, the Console might mark the job as "Abandoned" and assign it to a different agent, hoping that the second agent has more resources to finish it.
Summary of Impact
Feature | Behavior |
|---|---|
Data Loss | None. Results found before the pause are kept in memory or the local shipper queue. |
Scan Progress | Stopped. The scan does not move to the next file until the current one is finished or the agent is restarted. |
System Stability | Protected. The machine remains responsive because Spirion has stopped "hogging" RAM. |
Troubleshooting a "Memory Trigger" Stall
If you find a scan is stuck because of this trigger perform the following steps:
- Check the Logs: Identify which file caused the spike. It is usually a large archive (.zip, .pst, .ost) or a database export.
- Increase the Limit: If the machine has physical RAM to spare, increase the byte value in the Scan Wizard.
- Exclude the File: If the file is a known "false positive" or too large to scan safely, add it to the Exclude list in your scan configuration.
Memory Trigger System Pagefile
The “Memory Trigger System Pagefile” setting on the “Select advanced options” page of the Create New Scan wizard is a safety mechanism designed to prevent system crashes or "Blue Screens" (BSOD) caused by low virtual memory.
What it does
This setting defines a percentage threshold for the Windows System Pagefile (Virtual Memory). If the available space in the pagefile drops below this percentage, the Spirion agent will automatically pause the scan.
- Virtual Memory Protection: Sensitive data scanning—especially when dealing with large compressed files (like .zip or .pst), OCR (Optical Character Recognition), or complex database blobs—can be memory-intensive. If the system runs out of pagefile space, the entire Operating System can become unstable or crash.
- Self-Throttling: By monitoring the pagefile, the agent ensures it doesn't "choke" the host machine. It will wait until the system frees up memory before resuming the search.
How to configure it
- The Value: You enter a percentage (e.g.,
10). - Logic: If you set it to
10, the Agent pauses the scan if the available pagefile space falls below 10%. - Default: If left blank or set to
0, the Agent typically relies on its internal defaults or the global Agent Policy.
Why is this important?
- Large File Decompression: When Spirion "unpacks" a large archive to scan its contents, it often uses virtual memory as a buffer. If the archive is massive, it can quickly consume the available pagefile.
- Low-Spec Machines: On older workstations or virtual machines (VMs) with small fixed-size pagefiles, this setting is a critical "safety valve."
- Preventing Scan Failure: Without this trigger, if the pagefile fills up, the Spirion process itself will likely crash with an "Out of Memory" error, and the scan will fail. Pausing is a much more graceful way to handle resource exhaustion.
Best Practices
- Standard Workstations: A setting of 10% to 15% is usually sufficient to provide a safety buffer for the OS.
- Servers with Large RAM: On servers with 64GB+ of RAM and large pagefiles, this is less of a concern, but keeping a 5% to 10% trigger is still a recommended "best practice" for stability.
- Troubleshooting: If you see scans that are "In Progress" but not moving, and the logs show the scan is "Paused," check the endpoint's disk space and pagefile usage. You may need to increase the pagefile size on that machine or lower this trigger percentage.
Note: This setting is specific to the Windows Agent, as it relies on the Windows-specific concept of the "System Pagefile." It does not apply to Mac or Linux Agents.
Prevent Suspension During Scan
The “Prevent Suspension During Scan” setting on the “Select advanced options” page of the Create New Scan wizard is a power management configuration that ensures the endpoint remains active until the scan is finished.
What it does
When this setting is enabled (checkbox is selected), the Spirion Agent sends a signal to the operating system to prevent the computer from entering sleep mode or suspending while a search is in progress.
- When this setting is enabled, the Spirion agent uses a standard OS API call (such as
SetThreadExecutionStateon Windows) to tell the system that it is performing a critical task. - Continuous Execution: It ensures that long-running scans (such as those on large file servers or deep local drives) are not interrupted by the system's power-saving settings.
- Reliability: Without this setting, if a computer is configured to sleep after 30 minutes of inactivity and a scan takes 2 hours, the scan would pause indefinitely as soon as the machine sleeps, potentially leading to incomplete results or delayed reporting.
- Once the scan finishes the Agent releases this request, and the system immediately returns to its normal power policy. If the machine has been idle for longer than its sleep timer, it likely goes to sleep shortly after the scan completes.
Important Limitations
The "Prevent Suspension During Scan" setting acts as a temporary override rather than a permanent change to system-wide power policies.
There are several system-level and hardware-level events that this setting cannot stop:
- Hard Power Events: It cannot prevent a user from manually clicking "Shut Down," "Restart," or "Sleep."
- Critical Battery Actions: On laptops, if the battery reaches a "Critical" level (for example, 5%), the Windows kernel will override all application requests and force a hibernation or shutdown to protect the hardware.
- Group Policy (GPO) Enforcement: In some highly restricted environments, a Domain Administrator may have set a "Hard" GPO that prevents applications from requesting execution state changes. In these rare cases, the OS ignores Spirion's request.
- Physical Hardware: It cannot prevent someone from closing a laptop lid (unless the OS is specifically configured to "Do Nothing" when the lid is closed) or pulling the power plug.
- Screen Savers: It does not typically prevent screen savers from activating, as screen savers do not usually suspend the underlying processes.
Best Practices
- Laptops/Workstations: Enable this setting if you are running a comprehensive scan that you expect to take several hours. This ensures the scan finishes even if the user walks away from their desk.
- Servers: This setting is generally less critical for servers (which are usually configured to never sleep), but it is still a good "safety net" to ensure no unexpected power policy interrupts the scan.
- Off-Hours Scanning: If you schedule scans to run at night, this setting is essential to ensure the machines don't sleep before the scan can complete.
Are there logs indicating if a scan was interrupted by power events?
Yes, there are specific logs and indicators you can look for to determine if a scan was interrupted by a power event (like sleep, hibernation, or a sudden shutdown).
Because Spirion Agents are designed to be resilient, they don't always log a "Power Failure" message directly. Instead, you look for gaps in activity and service restart markers.
1. The "Gap" Analysis (IDF/SystemSearch Logs)
The most common indicator is a sudden stop in the IDF (Identity Finder) logs without a "Search Completed" or "Search function complete" message.
- Location:
%ProgramData%\Identity Finder\Logs\SystemSearch\ - What to look for: Check the timestamps. If the log shows active scanning (e.g.,
Searching file...) and then suddenly stops, followed by a new log file starting several hours later with aSpirion Startedmessage, it is a strong indicator that the system was suspended or shut down mid-scan.
2. Service Start/Stop Markers (EPS Logs)
The Endpoint Service (EPS) is responsible for the agent's health and heartbeats. It logs when the service starts up after a system boot or wake event.
- Location:
%ProgramData%\Identity Finder\Logs\EPS\ - What to look for: Look for the message
Service starting...orEndpoint Service Started. - If you see a
Service startingmessage at 8:00 AM, but the previous log entry was from 11:00 PM the night before during a scan, the machine likely went to sleep or was shut down during that window.
- If you see a
3. Heartbeat Failures (Console Side)
If you have access to the Spirion Console, you can check the Agent Status.
- Indicator: If a scan is "In Progress" but the agent's Last Check-in time is hours old, the agent has stopped sending heartbeats. This usually happens because the machine is offline or asleep.
- Auto-Recovery: In newer versions (13.6+), the console uses heartbeats to detect "staleness." If an agent stops heartbeating mid-scan, the console will eventually mark that work as "Abandoned" and may re-queue it for another agent.
4. Windows Event Logs (System Level)
If the Spirion logs are inconclusive, the Windows Event Viewer is the definitive source for power events:
- System Log: Look for Event ID 42 (Kernel-Power). This event explicitly states: "The system is entering sleep."
- System Log: Look for Event ID 1 (Power-Troubleshooter). This indicates: "The system has resumed from sleep."
- Correlation: Compare the time of Event ID 42 with the last timestamp in your Spirion
IDFlog. If they match, the power policy overrode the scan (likely because "Prevent Suspension" was not enabled).
Summary Table for Troubleshooting
Indicator | Log Source | Meaning |
|---|---|---|
Sudden Silence | IDF / SystemSearch | Scan was interrupted; no "Completion" message found. |
"Service Starting" | EPS Log | The machine just booted or woke up. |
Event ID 42 | Windows System Log | The OS forced the machine to sleep. |
Stale Heartbeat | Spirion Console | The agent is no longer communicating (likely powered off). |
Tip: If you see "Errors Encountered" in the IDF log summary after a restart, check if they are "Timeout" or "Network" errors. These often occur right as a machine is losing its connection during a sleep transition.
How does Spirion handle scans if the system goes to sleep unexpectedly?
When a system goes to sleep unexpectedly during a scan (e.g., the "Prevent Suspension" setting was disabled, or a hardware event like a lid-close occurred), Spirion is designed with a "Pause and Resume" philosophy to ensure data integrity and scan completion.
The behavior depends on whether it is a Local Scan (single agent) or a Distributed Scan (multiple agents).
1. Local Scan Behavior (Single Agent)
If a standalone agent is scanning its own drive and the machine sleeps:
- Immediate State: The Spirion process (
idffed.exeorIdentityFinderCmd.exe) is frozen by the operating system. All threads, including the search engine and the database connection, are suspended in their current state. - Upon Wake: When the machine wakes up, the OS thaws the process. Spirion attempts to pick up exactly where it left off.
- The "Timeout" Risk: If the scan was accessing a network share or a cloud resource, the connection handles may have timed out while the machine was asleep. In this case, you will see "Network Error" or "Access Denied" entries in the logs immediately after the wake event as the agent tries to use a "dead" connection.
2. Distributed Scan Behavior (Windows Agents)
For modern Windows agents using the Postgres-based queueing model, the behavior is more sophisticated:
- Heartbeat Loss: While the machine is asleep, it stops sending heartbeats to the Console.
- Console Detection: The Console monitors these heartbeats. If an agent is silent for a specific threshold (typically several minutes), the Console marks that specific "Search Part" as Stale or Abandoned.
- Re-Queueing: To ensure the scan finishes, the Console will take the work that was assigned to the sleeping agent and put it back into the
job_queue. Another available agent will then pick up that work and finish it. - Duplicate Prevention: If the original agent wakes up and tries to submit results for a task that has already been reassigned and completed by someone else, the Console's Ingress service will typically identify the duplicate and discard the redundant results.
3. Result Shipping (The Shipper Queue)
Spirion uses a local SQLite database (the shipper_queue) to protect results:
- If the agent finds sensitive data and then the machine immediately sleeps before the results are sent, those results are not lost.
- They are safely stored in the local SQLite database on the endpoint.
- As soon as the machine wakes and regains internet/network connectivity, the Shipper process (
IDFMessagingSvc.exe) will detect the pending results and ship them to the Ingress server.
4. Search History & "Skipped" Files
Spirion maintains a Search History to prevent redundant work:
- If a scan is interrupted by sleep and eventually restarted, the agent checks its history.
- If a file's "Last Modified" date hasn't changed since the last successful scan attempt, the agent may skip it (depending on your "Ignore unchanged files" settings) to save time and make up for the interruption.
Summary of Outcomes
Scenario | Outcome |
|---|---|
Short Sleep | Agent wakes up and continues scanning from the last file. |
Long Sleep (Distributed) | Console reassigns the work to a different agent; scan finishes without the sleeping machine. |
Network Target | Agent may log errors upon waking due to dropped network credentials/connections. |
Results Found | Results are cached locally and sent immediately upon wake/reconnect. |
Recommendations: To avoid these complexities, always enable "Prevent Suspension During Scan" for critical or large-scale discovery tasks.
Run Low I/O Priority
The “Run Low I/O Priority” setting on the “Select advanced options” page is a performance configuration that manages how the Spirion Agent interacts with the computer's disk (Hard Drive or SSD).
What it does:
While "Process Priority" manages CPU usage, Low I/O Priority manages Disk Throughput.
- Enabled - When enabled, the operating system (specifically Windows) treats the Spirion Agent's requests to read or write to the disk as "background" priority.
- Disk Contention Management: If another application (like a database, a large file copy, or a system update) needs to access the disk, the OS prioritizes those requests over Spirion’s.
- Reducing "Disk Lag": High disk usage is often what makes a computer feel "laggy" or unresponsive (for example, icons taking a long time to load, or files taking forever to open). By lowering I/O priority, Spirion ensures it doesn't "hog" the disk's bandwidth.
Why use it?
- User Responsiveness: This is critical for workstations with traditional Hard Disk Drives (HDDs) or older SSDs. It prevents the Spirion scan from making the system feel sluggish during heavy file searching.
- Server Health: On shared file servers or database servers, enabling this ensures that the Spirion scan doesn't interfere with the server's primary job of serving files or processing transactions for users.
Key Differences from "Low Process Priority"
- Low Process Priority: Affects the CPU. It yields processing power to other apps.
- Low I/O Priority: Affects the Disk. It yields disk read/write bandwidth to other apps.
Best Practices
- Workstations/Laptops: Enable this setting. It is one of the best ways to keep a scan "silent" and non-intrusive for the end user.
- Virtual Desktop Infrastructure (VDI): Enable this setting. In VDI environments, disk I/O is often the biggest bottleneck. Running scans at low I/O priority prevents a single user's scan from slowing down the entire storage array for other users on the same host.
- Dedicated Scanning Servers: Disable this setting. If the machine's only job is to scan, you want it to read from the disk as fast as possible without waiting for other processes.
Technical Note
This setting utilizes the Windows I/O Prioritization framework. It is most effective on Windows 7 and newer. If the scan is running on a very old legacy system or certain non-Windows environments, this setting may have no effect as the underlying OS might not support I/O prioritization.
Run Low Process Priority
This setting is a resource management toggle that controls how the operating system prioritizes the Spirion Agent relative to other running applications.
What it does
When this setting is enabled, the Spirion Agent process (for example, idffed.exe on Windows) is started with a "Below Normal" or "Idle" priority class within the operating system's CPU scheduler.
- Yielding to Other Apps: It tells the CPU: "Only give processing power to Spirion if no other application needs it." If a user opens a heavy application like Outlook, Excel, or a web browser, the OS immediately diverts CPU cycles away from the Spirion scan to ensure those applications remain responsive.
- Background Execution: It effectively turns the scan into a "background task." The scan continues to run, but automatically slows down whenever the user is actively using the computer.
Why use it?
- User Experience: This is the most effective way to ensure that a sensitive data scan does not interfere with an employee's daily work. It prevents the "my computer is slow because of a security scan" complaint.
- Stability: On older hardware or systems with limited resources, it prevents the Spirion Agent from "starving" critical system processes of CPU time, which can lead to system instability.
Best Practices:
- Workstations/Laptops: Enable this setting. It ensures the scan is "invisible" to the user.
- Servers/Dedicated Scanners: Disable this setting. On a server dedicated to scanning, you want Spirion to have high priority so it can finish the task as fast as possible without yielding to minor background tasks.
- Combined with Cores: If you set the "Number of cores" to a high number (or 1 for all), enabling "Run Low Process Priority" is a great safety net to ensure that even a multi-threaded scan won't lock up the machine.
Number of Cores
The “Number of cores” setting on the “Select advanced options” page is a performance configuration that controls the multi-threading capability of the Spirion Agent during that specific scan.
What it does
This setting determines how many CPU cores the Spirion Agent is permitted to use simultaneously to process files and search for sensitive data.
- Parallel Processing: By increasing the number of cores, the Agent can scan multiple files at the same time. For example, if set to 4, the Agent attempts to process 4 files in parallel, significantly reducing the total time required to complete a large scan.
- Resource Management: It enables you to balance scan speed against the performance impact on the host machine.
- Higher Value: Faster scan completion, but higher CPU utilization on the endpoint.
- Lower Value (for example, 0): Slower scan, but minimal impact on other applications running on the machine.
How it works
- The "1" Logic: Setting the core count to 1 acts as a flag for "Auto-detect / Use All." The Agent queries the operating system of the endpoint, identifies the total number of logical processors (cores) available, and attempts to utilize all of them for parallel file processing.
- Maximum Throughput: This is the most aggressive performance setting. It is ideal for dedicated scanning servers or "Discovery Agents" where the primary goal is to finish the scan as quickly as possible.
- By default, the search uses all available CPU cores when searching for AnyFind and OnlyFind information within a location.
- Valid values:
- 0: Use a single logical processor core
- 1: Use all available logical processor cores
- >1: Use a maximum of this many logical processor cores.
- For example, on a system with 8 cores, set this value to 4 to limit the search to a maximum of 4 cores.
Important Considerations
- CPU Impact: Using all available cores significantly increases CPU utilization. On an end-user's workstation, this may cause the system to become sluggish or "hang" while the scan is running.
- Memory Usage: Parallel processing requires more RAM. Each additional core used for scanning increases the memory footprint of the
idffed.exe(or equivalent) process, as multiple files are being buffered and analyzed in memory simultaneously.
Key Behaviors & Best Practices
- Hardware Awareness: The Agent does not exceed the physical or logical cores available on the machine. If you set this to 8 on a dual-core machine, the Agent uses the maximum available (2).
- Default Behavior: If left at the default (often 0 or 1 depending on the Agent version), the Agent typically operates in a single-threaded mode or follows the global Agent policy.
- Use Case - Servers: For high-performance servers or dedicated scanning nodes, increasing the number of cores is recommended to maximize throughput. Use 0 to maximize speed.
- Use Case - Workstations: For end-user laptops, it is best to keep this number low to ensure the scan remains "invisible" to the user and doesn't cause system lag. Specify a low number (like 0 or 2) or use the "Low Priority" setting in the Agent Policy to ensure the user's experience isn't impacted.
Summary
Think of this setting as the "Speed vs. Impact" toggle. Increasing the number of cores is the most effective way to speed up a scan, provided the endpoint has the CPU overhead to support it.
Sensitive Data Engine Results Display
The “Sensitive Data Engine Results Display” setting on the “Select advanced options” page of the Create New Scan wizard controls how match information is categorized and presented in the final scan results.
This setting determines whether the console shows you the specific Definition that triggered the match or a broader Result Type category.
Available Options
You can select one or both of the following checkboxes:
- Display Sensitive Data Definition Name
- What it does: Shows the specific name of the rule or "Definition" that found the data.
- Example: Instead of just saying "Social Security Number," it might display the specific internal definition name like "US SSN (Strict Validation)" or a custom definition you created called "Employee ID Pattern."
- Benefit: This is highly useful for troubleshooting custom expressions or understanding exactly which policy rule was triggered.
- Display All Matching Result Types
- What it does: Shows every category that the found data fits into.
- Example: If a 16-digit number is found that qualifies as both a "Credit Card Number" and a "Generic 16-digit ID," this setting ensures both classifications are displayed in the results.
- Benefit: This provides a more comprehensive view of the data's risk profile, as one piece of data might violate multiple compliance categories (for example, both PCI and a custom internal data standard).
Why this matters
- Reporting Clarity: If you only select "Definition Name," your reports will be very granular, but might be harder for non-technical stakeholders to read. If you select "Result Types," the reports align better with high-level compliance categories (PCI, PII, PHI).
- Policy Tuning: For Security Admins, seeing the Definition Name is essential for "tuning" a scan. If a specific definition is causing too many false positives, you need this setting enabled to identify exactly which rule needs to be adjusted.
- Audit Requirements: Some auditors require seeing the specific "Result Type" (e.g., "Credit Card") rather than the internal technical name of the rule that found it.
Best Practices
- For Initial Discovery: Enable both. This gives you the most information possible while you are still learning what data exists in your environment.
- For Production/Ongoing Scans: You may choose to only display Result Types to keep the "Scan Results" page clean and focused on compliance categories.
- For Troubleshooting: If you are testing a new custom playbook, ensure Display Sensitive Data Definition Name is enabled so you can verify your custom RegEx is the one actually finding the data.
Summary: This setting doesn't change what is found; it only changes how the findings are labeled in your reports and on the Scan Results page.
Note: If only "Display Sensitive Data Definition Name" is selected, no match preview information is sent to the console.
- One or both of the options must be selected.
- If no option is selected, no results are displayed.
Display Sensitive Data Definition Name
The “Display Sensitive Data Definition Name” setting on the “Select advanced options” page of the Create New Scan wizard is a reporting configuration that determines how specific the labeling of a match will be in your scan results.
What it does
When this setting is enabled, the scan results will include the exact name of the internal rule or "Definition" that identified the sensitive data.
- Without this setting: The results typically show a broad category or "Result Type" (for example, "Social Security Number").
- With this setting: The results show the specific technical rule name (for example, "US SSN - High Confidence" or "Custom Regex - Employee ID").
Why is this useful?
- Troubleshooting Custom Rules: If you have created multiple custom regular expressions (RegEx) to find similar data, this setting tells you exactly which one of your rules triggered the match. This is essential for testing and "tuning" your policies.
- Distinguishing Between Validation Levels: Spirion often has multiple definitions for the same data type (for example, one that uses strict checksum validation and one that is more "loose"). This setting allows you to see which level of validation was successful.
- Policy Auditing: It provides a clear audit trail of which specific policy logic was applied to a file, which is helpful when explaining to data owners why a file was flagged.
Example Scenario
Imagine you are scanning for a 10-digit "Account Number." You have two definitions:
- Internal Account Number (Standard)
- Legacy Account Number (Pre-2010)
If Display Sensitive Data Definition Name is enabled, your results explicitly say "Legacy Account Number (Pre-2010)" for a match. If it is disabled, it might just say "Account Number," leaving you to guess which rule found it.
Best Practices
- Enable during Testing: Always enable this when you are creating new playbooks or custom data types so you can verify your logic is working as expected.
- Enable for Support/Admin Views: It is highly recommended for administrators who need to deep-dive into "why" a file was flagged.
- Disable for Executive Reports: If you are exporting results for non-technical leadership, you may want to disable this to keep the reports focused on high-level categories (like "PII" or "PCI") rather than technical rule names.
Summary: This setting provides granularity. It bridges the gap between "what" was found (the data) and "how" it was found (the specific rule).
Display All Matching Result Types
- Specify which results are displayed when a Sensitive Data definition is matched.
- When displaying results from a Sensitive Data Definition, the default behavior is to show only the definition name itself in the results.
- To display all the matching types, select Display All Matching Result Types (2).
Note: If only Display Sensitive Data Definition Name is selected, no match preview information is sent to the console.
- One or both of the options must be selected.
- If no option is selected, no results are displayed.
Restore Original Modified Timestamp
The “Restore Original Modified Timestamp” setting (sometimes labeled as "Reset timestamps on files during search") on the “Select advanced options” page of the Create New Scan wizard is a forensic and administrative feature that ensures the "Last Modified" date of a file remains unchanged after it has been scanned.
What it does
When a Spirion Agent opens a file to scan its contents, the Windows operating system (or the file system) may automatically update that file's "Last Modified" or "Last Accessed" timestamp to the current time.
- When Enabled: After the Agent finishes scanning a file, it manually resets the file's metadata back to the exact timestamp it had before the scan started.
- When Disabled: The file's "Last Modified" date reflects the time the Spirion scan occurred.
Why is this important?
- Preserving Data Integrity: For legal, forensic, or compliance reasons, many organizations require that file metadata remain untouched. Changing the modified date can be seen as "tampering" with evidence or records.
- Backup & Archiving Logic: Many backup systems and cloud sync tools (like OneDrive or Dropbox) use the "Last Modified" date to decide which files need to be backed up. If Spirion changes the date on every file it scans, it could trigger a massive, unnecessary backup of the entire environment.
- User Experience: Users often sort their folders by "Date Modified." If a scan runs overnight and updates every file, the user's sorting order will be ruined, making it look like every file was edited at 2:00 AM.
- Search History Efficiency: Spirion’s own "Ignore Unchanged Files" feature relies on these timestamps. If the timestamps are not restored, the agent might think every file has changed and re-scan them unnecessarily in the next cycle.
Scope of the Setting
- Discovery Scans: This setting primarily applies to the initial search process.
- Remediation (Redact/Classify): There are often separate, specific settings for remediation (for example, "Restore Redact Modified Timestamp"). If you redact a file, you are physically changing the file, so you must decide if you want that change to be reflected in the timestamp or if you want to "hide" the fact that a remediation occurred by restoring the old date.
Best Practices
- General Workstations: Enable this setting to avoid disrupting users and backup systems.
- File Servers / SMB Shares: Enable this setting to prevent massive sync/backup overhead.
- Forensic Environments: Enable this setting to maintain the chain of custody and metadata accuracy.
- Remote File Systems: Note that it is not always possible to reset timestamps on non-Windows remote file systems (like some Linux-based NAS devices), even if this setting is enabled.
Summary
This setting enables Spirion to be a "silent" observer. It ensures that the act of searching for sensitive data does not leave a visible footprint on the file's metadata.
Access Bitness
The “Access Bitness” setting (often labeled as “Set Outlook Bitness” or “Set Access Bitness”) on the “Select advanced options” page of the Create New Scan wizard is a compatibility configuration that tells the Spirion Agent which version of Microsoft Office drivers to use when scanning specific database or email files.
What it does
This setting allows you to specify whether the Spirion agent should use 32-bit or 64-bit components to open and read Microsoft Access (.mdb, .accdb) or Microsoft Outlook (.pst, .ost) files.
- 32-bit: Forces the agent to use 32-bit drivers.
- 64-bit: Forces the agent to use 64-bit drivers.
- Auto/Default: The agent attempts to detect the installed version of Office and match it.
Why is this necessary?
Microsoft Office components (like the Access Database Engine or the Outlook MAPI provider) can only be installed as either 32-bit or 64-bit on a single machine. If Spirion tries to use a 64-bit process to talk to a 32-bit version of Outlook, the connection will fail, and the agent won't be able to scan the emails.
- MAPI Connectivity: To scan Outlook, Spirion must "talk" to the Outlook application's internal engine. This communication requires the "bitness" of the requester to match the "bitness" of the provider.
- Access Database Engine: Similarly, to "peek" inside an Access database file without just treating it as raw text, Spirion needs to load the appropriate database drivers.
When should you change this?
- Scan Failures: If your logs show errors like "Failed to initialize MAPI" or "Cannot open Access database," it is almost always a bitness mismatch.
- Mixed Environments: If your organization has a mix of older 32-bit Office installs and newer 64-bit installs, you may need to create two separate scan policies—one for each bitness—to ensure 100% coverage.
- VDI/Citrix: In virtual environments where Office is "streamed" or virtualized, the agent may struggle to auto-detect the bitness, requiring you to set it manually.
Best Practices
- Modern Environments: Most modern organizations have standardized on 64-bit Office. If you are unsure, try 64-bit first.
- Check the Endpoint: You can verify the bitness on a machine by opening Outlook and going to File > Office Account > About Outlook. It will explicitly state "32-bit" or "64-bit" at the end of the version string.
- Use "Auto" if available: The Spirion Agent is generally good at detecting the environment, so only set this manually if you are experiencing specific "Access" or "Outlook" scan failures.
Summary: This setting is a "bridge" between Spirion and Microsoft Office. It ensures the 2 programs are speaking the same "language" (32-bit vs 64-bit) so that sensitive data inside databases and emails can be discovered.
Match Preview Length
The “Match Preview Length” setting on the “Select advanced options” page of the Create New Scan wizard controls how much surrounding text (context) is captured and displayed alongside a sensitive data match.
What it does
When Spirion finds a piece of sensitive data (like a Social Security Number), it doesn't just report the number itself. It also grabs a "snippet" of the text appearing before and after the match to help you verify if the finding is a "True Positive" or a "False Positive."
- The Value: You enter a number representing the number of characters to capture on either side of the match.
- Example: If you set this to 50, and a match is found, the Spirion Console will show you the match plus the 50 characters immediately preceding it and the 50 characters immediately following it.
Why is this important?
- Validation (Context is King): Seeing the context helps you immediately identify the data.
- Context: "The employee's SSN is 000-00-0000." (Clearly a True Positive).
- Context: "The part number for the bracket is 000-00-0000." (Clearly a False Positive).
- Remediation Decisions: Context helps you decide how to handle the file. If the match is in a formal contract, you might Redact it. If it's in a random log file, you might Shred the file.
- Reducing False Positives: By reviewing the preview length, an admin can "tune" the search engine. If they see that a certain pattern is always surrounded by "Part Number," they can add "Part Number" as an exclusion keyword.
Does it affect performance?
- Storage/Database Size: Yes. If you set a very high preview length (for example, 500 or 1000 characters) and your scan finds millions of matches, the size of your results database will grow significantly. This can lead to slower console performance and higher storage costs.
- Scan Speed: Negligible. The Agent is already reading the file; grabbing a few extra characters of text doesn't significantly slow down the scanning process.
Best Practices
- Standard Recommendation: 50 to 100 characters. This is usually enough to see the sentence or table row containing the data without bloating the database.
- High-Security Environments: Some organizations set this to 0 or a very low number (like 4) for privacy reasons, ensuring that even the "context" of the sensitive data isn't stored in the Spirion database.
- Troubleshooting: If you are having trouble identifying why a certain file is being flagged, temporarily increase this to 200 to get a better look at the file's structure.
Summary
This setting determines the "window" of text you see around a match. It is the primary tool for human verification of scan results.
Preview Match Maximum Instances
The “Preview Match Maximum Instances” setting on the “Select advanced options” page of the Create New Scan wizard is a "data-capping" feature that limits how many individual match previews are reported for a single file.
What it does
This setting defines the maximum number of times the agent will record and send context/preview data for a specific data type within one file.
- The Value: You enter a whole number (for example, 10, 50, 100).
- Unlimited: Entering 0 (or leaving it blank, depending on the version) typically means "Unlimited," where every single match found in the file will be reported with its preview context.
Why is this important?
- Preventing "Result Bloat": If you scan a large database export or a log file that contains 1,000,000 Social Security Numbers, you don't actually need to see 1,000,000 previews to know the file is sensitive. Reporting all 1,000,000 would create a massive results packet that could slow down the network and overwhelm the Spirion Console.
- Console Performance: Loading a "Results" page in the console that contains tens of thousands of previews for a single file can cause the browser to hang or the database to respond slowly.
- Efficiency: Once you have seen 10 or 20 previews of a match in a file, you generally have enough information to decide on a remediation action (e.g., "This file is full of PII; I need to delete it").
How it works in practice
If you set this to 10 and Spirion scans a file containing 500 Credit Card numbers:
- The agent will find all 500 matches.
- The agent will only send the first 10 match previews (the context snippets) to the console.
- The console will show a total count of 500, but you will only be able to "expand" and view the details for the first 10.
Does it affect performance?
- Scan Speed: It can improve scan speed for "noisy" files. If the agent stops generating previews after the 10th match, it saves a small amount of processing time and a significant amount of I/O time when shipping the results.
- Database Health: This is one of the most important settings for keeping your Spirion database size manageable.
Best Practices
- Standard Recommendation: 10 to 25. This provides plenty of context for a human to verify the data without causing performance issues.
- Discovery Phase: If you are doing a "Deep Dive" and need to see every single location of data (perhaps for a complex redaction project), you might set this to 100 or 0 (Unlimited).
- Large Scale Scans: For enterprise-wide scans across thousands of endpoints, keep this number low (for example, 5 or 10) to ensure the Ingress server and Console remain responsive.
Summary: This setting is a "safety valve." It ensures that a single "dirty" file doesn't overwhelm your reporting system with redundant information.
How does 'Preview Match Maximum Instances' affect report size?
The “Preview Match Maximum Instances” setting is the single most influential factor in determining the size of your scan results and the overall growth of your Spirion database.
Here is exactly how it impacts report size across the three main stages of the data lifecycle:
1. Result Packet Size (Agent to Console)
When an Agent finishes scanning a file, it bundles the findings into a result packet to ship to the console.
- With a Low Limit (for example, 10): If a file has 10,000 matches, the agent only attaches 10 "snippets" of text. The packet remains small (a few kilobytes), ensuring it travels quickly across the network and doesn't clog the Ingress server.
- With No Limit (0/Unlimited): The agent must attach 10,000 snippets of text. If your Match Preview Length is set to 100 characters, that’s 1,000,000 characters of text (plus metadata) for just one file. If hundreds of agents do this simultaneously, it can saturate network bandwidth and cause the Ingress service to back up.
2. Database Storage (The "Bloat" Factor)
This is where the impact is most permanent. Every preview snippet is stored as a row or a large text string in your SQL database.
- Exponential Growth: If you have 1,000 "dirty" files and set the limit to 10, you store 10,000 previews. If you set it to Unlimited and those files average 1,000 matches each, you are now storing 1,000,000 previews.
- Disk Space: High limits can cause the SQL database to grow by gigabytes in a single week, potentially leading to "Disk Full" errors on the database server.
3. Console & Export Performance
The "Report Size" also refers to the size of the data the Console has to load into your browser or export to a CSV/PDF.
- UI Responsiveness: When you click on a file in the "Results" view, the Console queries the database for the previews. If it has to pull 5,000 previews for that one file, the UI will likely "spin" or hang for several seconds.
- Exporting Reports: If you try to export a "Detailed Match Report" to CSV with no limit set, the resulting file can be hundreds of megabytes. These files are often too large to open in Excel and can cause the export task to time out and fail.
Summary Table: Impact of "Maximum Instances"
Setting Value | Network Impact | DB Growth | Report Exportability |
|---|---|---|---|
5 - 10 | Minimal | Very Slow | Excellent (Fast & Small) |
50 - 100 | Moderate | Steady | Good (May be slow to load) |
0 (Unlimited) | High | Rapid | Poor (High risk of failure) |
Recommendations for Report Management
If you need to find every instance of data but want to keep your reports small, use this strategy:
- Set Preview Match Maximum Instances to a low number (for example, 10).
- The Total Match Count for the file will still be accurate (it will show "10,000 matches").
- You get the "Context" you need to verify the file is sensitive without the technical "weight" of storing 9,990 redundant previews.
Send Only Last Four Characters
Send only the last four characters of the match string to the console.
- By default, the entire match string is sent to the console.
- When the setting send Match is disabled, this setting has no effect.
To send only the last 4 characters (or all characters if the match string is 4 characters or less), set this value to Enable (1).
- Disabled/Entire match (Default)
- Last four only
- Last four only (and first six for credit card numbers)
- Note: Send Match and Send Only Last Four Characters options only display if Sensitive Data Finder feature is disabled.
- For information on specific options for a specific target type, see How to Create a New Sensitive Data Scan.
- These options also apply to Discovery Scans.
Compressed Files
The “Compressed files” setting on the “Scan email and compressed files” page of the Create New Scan Wizard is used to instruct the Spirion Search Agent to "look inside" and scan the contents of archive and compressed file formats.
What it does
- Archive Extraction: When the Agent encounters a compressed file (like a
.zipor.7z), it virtually extracts the contents into memory to inspect the files hidden inside. - Recursive Scanning: It doesn't just scan the top level; it can scan files within folders, within archives, and even "nested" archives (for example, a
.zipfile inside another.zipfile). - Format Support: It enables the scanning of a wide variety of compression formats, including:
- Standard Archives:
.zip,.7z,.rar,.tar,.gz - Self-Extracting Executables:
.exefiles that contain compressed data. - Package Formats:
.iso,.cab,.msi
- Standard Archives:
What it is used for:
- Finding Hidden Data: Sensitive data is frequently "hidden" in archives to bypass simple file-name filters or to save space. This setting ensures that a spreadsheet full of SSNs doesn't escape detection just because it was zipped.
- Legacy Data Discovery: Organizations often have years of old data stored in compressed backups or "zip-and-forget" folders on file shares. This setting is essential for auditing those legacy repositories.
- Comprehensive Security: It prevents users from accidentally (or intentionally) bypassing security policies by simply compressing sensitive documents before storing them on a shared drive or endpoint.
Important Technical Details
- In-Memory Processing: Spirion typically performs this extraction in memory or in a secure temporary directory to ensure that sensitive data is not "leaked" to the disk in an unencrypted state during the scan.
- Password Protection: If a compressed file is password-protected or encrypted, the Agent is not be able to see inside it unless the password is provided in the scan's "Passwords" configuration. The Agent typically logs these as "Skipped" or "Encrypted" files.
Best Practices
- Always Enable for Discovery: This should be a "mandatory" setting for any thorough discovery scan. Without it, your visibility into the environment is significantly reduced.
- Monitor Performance: Scanning compressed files is more CPU-intensive than scanning flat files. If you are scanning a massive file server with millions of archives, you may want to adjust the "Depth" of the scan (how many layers deep it goes) to balance thoroughness with speed.
- Check for "Skipped" Archives: After a scan, review the logs for encrypted archives. These are high-risk locations because they are intentionally hidden and cannot be audited without the password.
Summary: The “Compressed files” setting enables the Agent to decompress and scan the contents of archives (like ZIP and RAR). It is used to find sensitive data that is packaged or hidden inside compressed containers.
MBox
Search by extension
- To enable the searching of files with the extensions specified in the MBOXFiles value as MBOX mail files, set this value to "True" (1).
Search specific files / folders
- To enable the searching of files and/or folders specified in the MBOXLocationList as MBOX mail files, set this value to "True" (1).
Scan Microsoft Outlook
The “Scan Microsoft Outlook” setting on the “Scan email and compressed files” page of the Create New Scan Wizard is used to instruct the Spirion Windows Agent to search the local email data managed by the Microsoft Outlook desktop application.
What it does
- Local Outlook Discovery: It targets the local data files used by Outlook, specifically .pst (Personal Storage Table) and .ost (Offline Storage Table) files.
- Deep Inspection: The agent opens these container files and scans every individual email message, calendar entry, task, and note.
- Attachment Scanning: It automatically extracts and scans files attached to Outlook messages, which is a common location for "hidden" sensitive data like spreadsheets or PDFs.
- MAPI Integration: The agent uses the Messaging Application Programming Interface (MAPI) to interact with the Outlook profile on the endpoint, ensuring it can access the same folders the user sees in their Outlook client.
What it is used for
- Endpoint Data Discovery: It is the primary method for finding sensitive data that has been downloaded or cached locally on a user's computer through Outlook.
- Finding "Shadow" Archives: Users often create
.pstfiles to archive old emails. These files are frequently forgotten and can contain years of sensitive data. This setting ensures those archives are discovered and searched. - Compliance Auditing: It helps organizations prove that regulated data (like PCI or HIPAA information) is not being stored insecurely in local email caches or personal archives on employee workstations.
Important Distinctions
- Local vs. Remote: This setting is for local endpoint scanning. It searches the files physically located on the computer's hard drive. It is not used for scanning a live Office 365 or Exchange mailbox directly from the server (for that, you would use a "Remote Email" or "Cloud Email" target).
- Outlook Must Be Configured: For the agent to scan the active profile, Outlook generally needs to have been configured on that machine so the agent can identify the correct data paths.
Best Practices
- Enable for Workstation Scans: This should almost always be enabled when scanning employee laptops or desktops, as Outlook is the most common place for sensitive data to accumulate.
- Performance Tip: Scanning large
.ostor.pstfiles (which can be tens of gigabytes) can take a long time. If you are performing a quick "Discovery" scan, you may want to limit the scan to specific folders or use the "Search History" feature to avoid re-scanning unchanged archives.
Summary: The “Scan Microsoft Outlook” setting targets local .pst and .ost files on an endpoint. It is used to find sensitive data within emails and attachments that are stored or cached locally by the Outlook desktop client.
Scan Windows Mail
The “Scan Windows Mail” setting on the “Scan email and compressed files” page of the Create New Scan Wizard is used to instruct the Spirion Windows Agent to discover and search the local message stores used by the built-in Windows Mail and Windows Live Mail applications.
What it does
- Local Mail Discovery: It targets the local database and individual message files (
.eml) stored on the user's hard drive by the Windows Mail app. - Message & Attachment Search: When enabled, the agent opens each locally stored email and scans the body text, headers, and any attachments for sensitive data.
- User Profile Targeting: The agent automatically identifies the correct storage paths within the user's
AppDatafolders (e.g.,\AppData\Local\Microsoft\Windows Mail\) to ensure it captures all locally cached messages.
What it is used for
- Endpoint Compliance: It is primarily used to ensure that sensitive data hasn't been "leaked" into local mail caches. Even if a user primarily uses webmail, some Windows configurations may automatically sync or cache messages locally in the Windows Mail app.
- Legacy Data Discovery: It is effective for finding sensitive information in older Windows Live Mail archives that may have been migrated from previous versions of Windows.
- Comprehensive Coverage: It fills a gap in endpoint scanning by ensuring that sensitive data isn't hiding in "shadow" email clients that the user might not even realize are active or caching data.
Important Distinctions
- Not for Outlook: This setting does not scan Microsoft Outlook. Outlook has its own dedicated settings (for
.pstand.ostfiles) because it uses a different storage architecture. - Not for O365/Exchange: This is a local endpoint setting. It scans the files on the computer's disk, not the live mailbox on a remote server. To scan a live Office 365 or Exchange mailbox, you would use a "Remote Email" or "Cloud Email" connector instead.
Best Practice
- Enable for Full Audits: If you are performing a "Full System Scan" for a high-risk user, you should enable this to ensure no stone is left unturned.
- Performance Note: Scanning local mail stores can be time-consuming if the user has a large archive. If you are trying to keep scan times low and know your users only use Outlook or Webmail, you can leave this disabled to save time.
Summary: The “Scan Windows Mail” setting targets the local message files of the built-in Windows Mail app. Use it to find sensitive data cached on an endpoint's hard drive within that specific email client.
Thunderbird
The “Thunderbird” setting on the “Scan email and compressed files” page of the Create New Scan Wizard is used to instruct the Spirion Windows or Mac Agent to discover and search the local email databases used by the Mozilla Thunderbird email client.
What it does
- Profile Discovery: The Agent automatically locates the Thunderbird profile folders on the endpoint (typically found in
\AppData\Roaming\Thunderbird\Profiles\on Windows or~/Library/Thunderbird/Profiles/on Mac). - MBOX/Maildir Search: It parses the specific storage formats used by Thunderbird (traditionally MBOX files) to read individual email messages.
- Message & Attachment Inspection: The Agent scans the body text, headers, and all attachments within the Thunderbird message store for sensitive data patterns.
What it is used for
- Cross-Platform Email Discovery: Since Thunderbird is a popular open-source alternative to Outlook and is used on both Windows and Mac, this setting ensures that sensitive data is captured regardless of which email client the employee prefers.
- Finding Local Archives: Thunderbird is often used to manage "Local Folders" or offline archives. This setting ensures that sensitive data moved out of a primary mailbox and into a local Thunderbird archive is still discovered.
- Shadow IT Detection: It helps security teams find sensitive data in non-standard email clients that may not be officially supported by the IT department but are still present on company hardware.
Important Distinctions
- Local Storage Only: Like the "Windows Mail" and "Microsoft Outlook" settings, this is an endpoint-side search. It only scans the email data that has been downloaded or cached to the computer's local disk.
- Independent of Outlook: This setting operates independently of the Outlook or Windows Mail settings. If a user has multiple email clients installed, you must enable each corresponding setting to ensure full coverage.
Best Practice:
- Include in Baseline Policies: If your organization allows users to choose their own email clients, or if you have a significant number of Mac users, you should include the "Thunderbird" setting in your standard endpoint scan policy to ensure comprehensive coverage.
- Performance Note: Thunderbird stores many emails in single, large MBOX files. Scanning these can be resource-intensive. If you are scanning a machine with very large local archives, ensure the Agent has sufficient disk I/O priority to complete the scan efficiently.
Summary: The “Thunderbird” setting targets the local message stores of the Mozilla Thunderbird client. It is used to find sensitive data in emails and attachments cached on an endpoint's hard drive by this specific application.
- Disabled (unchecked) - Do not include Mozilla Thunderbird files in the e-mail search.
- Enabled (checked) - Include Mozilla Thunderbird files in the e-mail search.
- The search method to use for Thunderbird mbox files:
- Only use MSF file (if MSF does not exist, skip mail folder)
- Try MSF, if MSF does not exist, directly read mbox file (Default)
- Ignore MSF and always read directly from mbox file
Exchange/Exchange Online Options - Mailbox Accounts
Depending on whether you are scanning Exchange or Exchange Online, you are prompted to with the page "Select Accounts to scan" (Exchange Online) or "Scan servers by account list" (Exchange).
Scan Attachments
When this checkbox is checked, the Spirion Agent scans not only the body and metadata of email messages but also downloads, extracts, and inspects the contents of all files attached to those emails.
Key Operational Details
- Deep Inspection: The Agent opens the attachment (for example, a PDF, Excel sheet, or Word doc) and applies your selected Data Types (like SSNs or Credit Card numbers) to the text within that file.
- Compressed Files: If an attachment is a compressed file (like a
.zipor.7z), the Agent extracts the contents and scan the files inside the archive as well. - Performance Impact: Enabling this setting significantly increases the duration of the scan. Each attachment must be retrieved from the mail server, which consumes network bandwidth and processing power on the agent machine.
- Scope: This setting applies to all mailbox accounts specified in your "Account List" for that particular scan policy.
Recommendations
- Always Enable for Compliance: If you are scanning for PCI, HIPAA, or GDPR compliance, this setting should almost always be Enabled, as sensitive data is frequently shared via attachments rather than in the email body itself.
- Use with File Size Limits: To prevent the scan from "hanging" on massive files, it is a best practice to combine this setting with a Maximum File Size limit (configured in the Advanced Options section) to skip exceptionally large attachments that are unlikely to contain the data you are looking for.
Summary
This setting is the "deep dive" for email scanning. Without it, Spirion only sees the "envelope" and the message text; with it, Spirion inspects every document and file hidden inside the mailbox.
Scan All Mailboxes
The “Scan All Mailboxes” setting (often represented by leaving the mailbox account list empty or selecting a "Scan All" option) is a powerful configuration used when scanning email environments like Exchange, Microsoft 365, or Google Workspace.
What it does
When this setting is active, the Spirion Agent automatically enumerates and scans every single mailbox it can find within the Target environment, rather than just a specific list of users.
Key Operational Details
- Automatic Discovery: The Agent uses the permissions of the provided Service Account or Admin Account to query the mail server for a list of all active mailboxes. It then adds all of them to the scan queue.
- Dynamic Updates: If new employees are hired and new mailboxes are created between scan runs, this setting ensures they are automatically included in the next scan without you having to manually update the account list.
- Permissions Requirement: For this to work, the Admin/Service account must have broad permissions (for example,
ApplicationImpersonationin Exchange orGlobal Admin/Domain Wide Delegationin Google) to "see" and access all accounts. - Default Behavior: In many versions of the Spirion wizard, if you do not specify any individual mailbox accounts in the "Account List" grid, the system defaults to performing a search on all user accounts associated with that endpoint.
Best Practices
- Use for Compliance Audits: This is the best setting for "Full Environment" audits where you need to prove to an auditor that no mailbox was left un-inspected.
- Be Cautious of Duration: Scanning "All Mailboxes" in a large organization (for example, 10,000+ users) can take weeks to complete. For large environments, it is better to use Targeted Account Lists or to split the "All Mailboxes" scan into smaller, department-based policies.
- Monitor Throttling: When scanning all mailboxes, you are much more likely to hit API throttling limits from Microsoft or Google. Ensure your thread counts are set appropriately low to maintain a steady, uninterrupted scan.
Summary
"Scan All Mailboxes" is the "set it and forget it" option for email coverage. It ensures total visibility across the organization but requires high-level permissions and careful management of scan duration.
Include Dumpster
The “Include Dumpster” setting is a specific configuration for Microsoft Exchange and Outlook environments. It enables Spirion to search for sensitive data in a hidden area of the mailbox that is normally invisible to the end user.
What it does
When this checkbox is selected, the Spirion agent will scan the Recoverable Items folder, commonly known as the "Dumpster."
In Exchange, when a user deletes an item from their "Deleted Items" folder (or uses Shift+Delete), the item is not immediately destroyed. Instead, it is moved to the Dumpster, where it remains for a set retention period (typically 14 or 30 days) before being permanently purged by the server.
Key Operational Details
- Hidden Risk: Sensitive data often resides in the Dumpster because users believe that by "emptying the trash," they have removed the risk. This setting ensures that those "deleted" files and emails are still inspected.
- Scope: This setting typically includes sub-folders within the "Recoverable Items" area, such as:
- Deletions: Items removed from the Deleted Items folder.
- Versions: If "In-Place Hold" or "Litigation Hold" is enabled, this may also include previous versions of items.
- Purges: Items that have been "hard deleted" but are still within the retention window.
- Availability: This option is not available for Gmail/Google Workspace accounts, as Google uses a different "Trash" and "Vault" architecture.
Best Practices
- Enable for "Clean Slate" Audits: If your goal is to ensure an environment is truly free of sensitive data (e.g., after a data breach or a termination), you must include the Dumpster.
- Remediation Note: If Spirion finds sensitive data in the Dumpster, remediating it (e.g., Shredding) may require higher-level permissions, as the agent is essentially performing a "purge" of the Exchange recovery area.
- Performance: Including the Dumpster adds to the total item count of the scan, but since it is usually a fraction of the size of the main mailbox, the impact on scan duration is generally moderate compared to scanning Online Archives.
Summary
"Include Dumpster" is a safety net. It prevents sensitive data from "hiding" in the Exchange recovery folders after a user thinks they have deleted it.
Include Online Archive
The “Include Online Archive” setting is a configuration specifically for Microsoft Exchange and Microsoft 365 (Outlook) environments. It enables Spirion to extend its search beyond the user's primary mailbox into their secondary, server-side storage.
What it does
When this checkbox is selected, the Spirion Agent enumerates and scans the In-Place Archive (also known as the Online Archive) associated with the user's account.
In many organizations, older emails are automatically moved out of the primary mailbox and into an Online Archive to keep the primary mailbox small and performant. These archives are stored on the Exchange server and are only accessible when the user is online.
Key Operational Details
- Bypasses Local Cache: Unlike a primary mailbox, which is often scanned using a local cached file (
.ost), Online Archives do not have a local cache. - Network Intensive: To scan an Online Archive, the Agent must pull every email and attachment directly from the server over the network. This makes the scan significantly slower than a standard mailbox scan.
- Historical Risk: Online Archives are often "data graveyards" containing years of legacy emails, old tax forms, and historical spreadsheets that users have forgotten about but that still pose a significant compliance risk.
- Availability: This option is not available for Gmail accounts, as Google Workspace uses a single-label architecture rather than a separate "Archive" mailbox structure.
Best Practices
- Expect Longer Scan Durations: Enabling this setting can increase the time it takes to scan a single user by 3x to 10x.
- Separate Your Policies: As a best practice, do not include Online Archives in your "Daily" or "Weekly" scans. Instead, create a dedicated "Quarterly Archive Audit" policy to handle this high-volume, slow-moving data.
- Check Throttling: Because the Agent must request every item from the server, you are more likely to trigger Microsoft 365 Throttling. Ensure your Agent's thread count is set appropriately (usually 1-2 threads per agent for archive scans) to avoid being blocked by the server.
- Use with "Search History": Always ensure "Use Search History" is enabled for archive scans. This enables the Agent to skip millions of old, unchanged archived emails on subsequent runs, drastically reducing the time for the second and third scans.
Summary
"Include Online Archive" is essential for total visibility into legacy data risk, but it should be used strategically due to its high impact on network bandwidth and scan duration.
How to Input Specific Mailbox Accounts for Targets
On the “Scan servers by account list” page, you have 2 primary ways to input mailbox accounts for your selected Targets: Manual Entry and Bulk Upload.
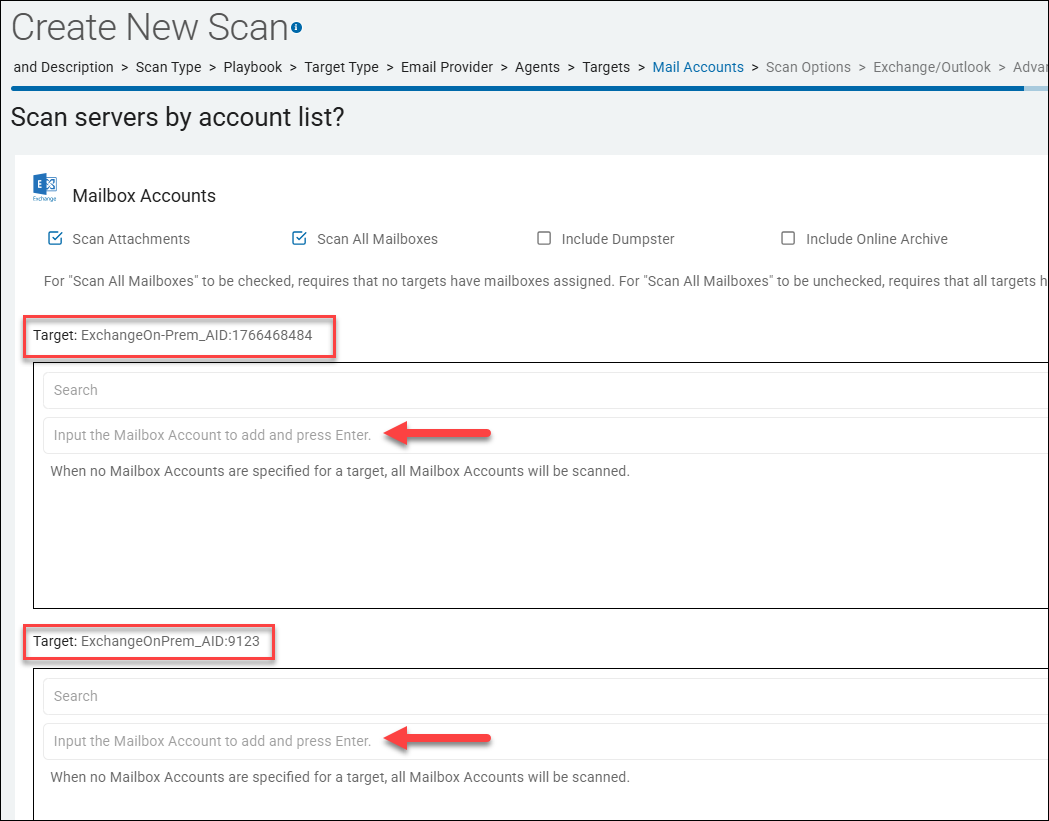
1. Manual Entry (Best for 1-5 accounts)
In the Endpoint Grid at the bottom of the page is a list of the Targets (endpoints) you selected in the previous step.
- Locate the Target: Find the specific endpoint name in the grid.
- Enter the Address: Click into the Mailbox Account column next to that Target.
- Input: Enter the full email address of the mailbox you want to scan (for example,
jdoe@company.com). - Add Multiple: If you need to add a second account for the same target, look for the Add or + icon within that Target's row to create a new entry line.
2. Bulk Upload (Best for large lists)
If you need to scan dozens or hundreds of specific mailboxes, manual entry is not efficient.
- Prepare your file: Create a simple text file (
.txt) or CSV where each email address is on its own line. - Click "Upload Account List": Look for this button above the grid.
- Select Target: You are prompted to select which Target these accounts belong to.
- Upload: Browse to your file and click Open/Upload. The grid will automatically populate with all the addresses from your list.
3. The "Scan All" Shortcut (The "Empty List" Method)
If your goal is to scan every mailbox on that server and you have the appropriate administrative permissions:
- Leave the field blank: If you do not specify any mailbox accounts in the grid for a Target, the Spirion Agent defaults to performing a search on all user accounts it can discover on that endpoint.
- Requirement: This works only if your Service Account has broad permissions (like
ApplicationImpersonationin Exchange).
Troubleshooting Tips
- Formatting: Ensure there are no trailing spaces or hidden characters in your email addresses, especially when copying from Excel, as this can cause the Agent to fail to find the mailbox.
- Target Specificity: Remember that accounts are tied to the Target. If you have two different Exchange servers (Targets), you must ensure the correct email addresses are assigned to the correct server in the grid.
- Validation: The wizard does not "live-validate" if the email address exists on the server at this stage. It only records the intent. If you input an address wrong, the error only appears later in the Scan Results as a "Mailbox Not Found" or "Access Denied" error.
Summary: Use the Endpoint Grid for quick manual additions or the Upload Account List button to import a pre-prepared list of email addresses.
Select Exchange/Outlook options
The following settings apply to Microsoft Exchange email scans only.
Set Outlook Bitness
- When a 64-bit version of Microsoft Office is installed, a specific value is written into the Windows registry to indicate this.
- Under normal circumstances, the bitness of Office is the same as the bitness of Outlook.
However, if Office is 64-bit but Outlook is 32-bit, the registry value will be read and it will be assumed that Outlook is 64-bit (because Office is) and there will be a failure to load the proper resources to search within Outlook.
- Similarly, if Office is 32-bit but Outlook is 64-bit, it will be assumed that Outlook is 32-bit (because the registry value does not exist) and the Outlook search will not operate properly.
- If it is known that the bitness of Outlook differs from the bitness of Office, set this to "Force 32 bit" (1) or "Force 64 bit" (2), as appropriate.
PST
Specify when to search unattached PST files.
- Search Detached - This is a specialized configuration that allows Spirion to find and scan Outlook Data Files (.pst) that are not currently open or "attached" to an active Outlook profile.
- By default, Spirion can scan the active mailbox and any PST files that a user has currently opened in their Outlook client. However, users often have "orphaned" or "detached" PST files—old archives, backups, or files moved from other machines—sitting on their hard drives that are not visible within Outlook.
- When Enabled: The Spirion Agent performs a file-system-level search for any file with the
.pstextension. When it finds one, it will "peek" inside the file to scan the emails, attachments, and folders within it, even if the user hasn't opened that file in years. - When Disabled: Spirion scans only the PST files that are actively linked to the user's Outlook profile. Any "loose" PST files on the desktop or in the Documents folder will be ignored (unless they are scanned as raw binary files, which is far less effective).
- Why is this important?
- Finding "Dark Data": Detached PST files are a major source of "hidden" sensitive data. Employees often create archives before a migration or laptop refresh and then forget about them. These files frequently contain years of unencrypted emails with sensitive attachments.
- Comprehensive Auditing: For a full compliance audit (e.g., GDPR or HIPAA), you must ensure that sensitive data isn't just missing from the active mailbox, but also from any archived copies stored locally.
- Zimbra Support: This setting often includes a sub-option called "Search detached Zimbra," which allows the agent to also include
.zdbfiles (Zimbra's version of a PST) in this deep-dive search.
- Does it affect performance?
- Scan Duration: Yes. Searching inside PST files is a "heavy" operation. If a user has several 10GB archive files, the agent must parse the entire internal structure of those files. Enabling "Search detached" can significantly increase the time it takes to complete a workstation scan.
- Disk I/O: The Agent must read the PST files from the disk. If these files are large, it can cause high disk utilization during the scan.
- Best Practices
- Initial Clean-up: Use this setting during an organization's first "major clean-up" to identify and remediate old archives that shouldn't be on local workstations.
- Targeted Policies: If you are worried about performance, create a specific "Archive Discovery" policy that runs once a month with "Search detached" enabled, while your daily/weekly scans keep it disabled to stay fast.
- Combine with "Skip PST on remote drive": It is highly recommended to enable "Skip PST on remote drive" alongside this. Scanning a "detached" PST over a network connection (like a VPN or a slow file share) is extremely slow and can cause the scan to hang or time out.
- Recommendation: Always enable "Search detached" if your goal is a thorough security audit. Detached PSTs are one of the most common places where "forgotten" sensitive data lives.
- Skip PST on remote drive - This setting is a performance and stability safeguard. It tells the Spirion Agent to ignore any Outlook Data Files (.pst) that it discovers on network-mapped drives or remote file shares.
- What it does: When Spirion scans a computer, it often encounters "Remote" or "Network" drives (for example, a
Z:drive mapped to a corporate file server). - When Enabled (Recommended): If the Agent finds a
.pstfile on a network location, it skips it and move to the next file. It scans only PST files that are stored on the local hard drive (for example, theC:drive). - When Disabled: The Agent attempts to open and "crawl" through the internal folders and emails of PST files located across the network.
- Why is this important?
- Network Congestion: PST files are often massive (multi-gigabyte). To scan one, the Agent must pull the data across the network. If 100 agents all try to scan their remote PSTs at the same time, it can saturate the office network and slow down the file server for everyone.
- Scan Timeouts & Crashes: PST files are notoriously fragile when accessed over a network. High latency or a temporary "blip" in the Wi-Fi can cause the Spirion Agent to hang, time out, or even cause the PST file to become temporarily locked or corrupted.
- Redundancy: In most well-managed environments, PST files on a file server should be scanned by a dedicated File Server scan (running locally on the server) rather than by individual workstation agents reaching across the network.
- Does it affect performance?
- Scan Speed: Yes, it makes scans much faster. By skipping remote PSTs, you avoid the "bottleneck" of network latency.
- Reliability: It significantly reduces the "Scan Failed" or "Agent Not Responding" errors that occur when an agent gets "stuck" trying to read a 20GB file over a VPN or slow connection.
- Best Practices
- Workstation Scans: Always enable this setting. You want workstation Agents to focus on local data.
- VPN Users: This is critical for remote workers. Attempting to scan a PST over a home internet VPN connection is almost guaranteed to fail or take days to complete.
- Server Scans: If you are running a scan on the file server itself, this setting doesn't really apply (as the files are local to that server), but it's still good practice to keep it enabled to prevent the server from trying to scan other servers it might have mapped.
- Interaction with "Search Detached"
- This setting is the "safety valve" for the Search Detached feature. If you tell Spirion to find every PST on the computer (Search Detached), you should almost always tell it to Skip PST on remote drive so it doesn't accidentally start a massive data transfer from a network share.
- Summary: This setting prevents "Network Drag." It ensures that the Spirion Agent doesn't try to perform the heavy task of email scanning over a network connection, which protects both the scan's stability and the organization's network bandwidth.
- What it does: When Spirion scans a computer, it often encounters "Remote" or "Network" drives (for example, a
- Search detached Zimbra
- This option is a specific sub-setting of the PST configuration. It extends Spirion's ability to find "orphaned" email archives to include Zimbra Offline Database (.zdb) files.
- What it does
- Zimbra is an enterprise email collaboration suite. When users use the Zimbra Connector for Outlook, the system creates .zdb files. These files are functionally almost identical to Microsoft's .pst files—they are local databases that store emails, contacts, and calendar items.
- When Enabled: If you have also enabled "Search detached," Spirion will not only look for
.pstfiles but will also specifically hunt for and "crack open".zdbfiles that are sitting on the hard drive but are not currently connected to an active mail profile. - When Disabled: Spirion will ignore
.zdbfiles during its search for detached archives, potentially missing sensitive data stored in old Zimbra backups or migrated accounts.
- Why is this important?
- Legacy Data Discovery: Many organizations have migrated from Zimbra to Office 365 or Exchange. During those migrations, old
.zdbfiles are often left behind in user profile folders (AppData) or "Old PC" backup folders. These files are "dark data"—they contain sensitive information but aren't visible to the user or standard antivirus tools. - Parity with PST Scanning: Because
.zdbfiles use the same underlying structure as PSTs, Spirion can use its advanced email parsing engine to scan them with the same level of detail (scanning attachments, nested folders, etc.). This setting ensures that Zimbra users (or former users) have the same security coverage as Outlook users. - Comprehensive Compliance: If your organization ever used Zimbra, a "thorough" audit for PII (Personally Identifiable Information) is incomplete if it only looks for
.pstfiles and ignores.zdbfiles.
- Legacy Data Discovery: Many organizations have migrated from Zimbra to Office 365 or Exchange. During those migrations, old
- Interaction with other settings
- Requires "Search detached": This setting is usually a "child" of the Search detached option. You must enable the main "Search detached" feature for the agent to go looking for these files in the first place.
- Subject to "Skip PST on remote drive": Just like standard PSTs, if you have "Skip PST on remote drive" enabled, the agent will ignore Zimbra
.zdbfiles found on network shares to protect network performance.
- Best Practices
- Migration Cleanup: If your company recently moved away from Zimbra, enable this for at least one "Deep Discovery" scan cycle to find and remediate leftover archives.
- Standard Workstation Policies: If your organization currently uses Zimbra, keep this enabled to ensure that local "offline" copies of mailboxes are being audited for sensitive data.
- Summary: "Search detached Zimbra" is a "safety net" for Zimbra email archives. It ensures that sensitive data hiding in
.zdbfiles is discovered and reported, even if those files are no longer being actively used by the employee.
Search Selected Outlook Folders
- The “Search Selected Outlook Folders” option is a precision-targeting setting for Outlook and Exchange scans. It enables you to restrict the Spirion Agent to scanning only specific folders within a mailbox, rather than scanning the entire account.
What it does
- By default, when Spirion scans an Outlook or Exchange account, it crawls through every folder it has permission to access (Inbox, Sent Items, Drafts, etc.).
- When Enabled: The Agent ignores the general mailbox structure and focuses exclusively on the folders you specify. This is done by providing the Folder GUIDs (Globally Unique Identifiers) in the associated input field ("Insert Outlook Folder GUIDs"). See "Tips: How to find the Outlook Folder GUIDs to use?"
- When Disabled: Spirion performs a comprehensive scan of the entire mailbox (subject to any other exclusions like the "Dumpster" or "Public Folders").
Why is this important?
- Performance Optimization: Large mailboxes (50GB+) can take a very long time to scan. If you know that sensitive data is only likely to be in specific high-risk folders (for example, a "Finance" folder or "HR_Inbound"), you can significantly reduce scan time by targeting only those locations.
- Privacy & Scope Limitation: In some legal or HR scenarios, you may only have authorization to scan specific folders related to an investigation. This setting ensures the agent does not "over-scan" into private or irrelevant areas of a user's mailbox.
- Troubleshooting: If a scan is consistently hanging on a specific, massive folder (like a "Junk" folder with 100,000 items), you can use this setting to bypass the problematic area and scan only the critical folders.
How it works (The GUID)
- This setting requires the Folder GUID rather than the folder name (like "Inbox").
- The GUID is a unique string of characters that identifies that specific folder in the Exchange database.
- Because folder names can be localized (e.g., "Inbox" in English vs. "Posteingang" in German) or changed by the user, using the GUID ensures the agent always finds the correct target regardless of the display name.
- See "Tips: How to find the Outlook Folder GUIDs to use?"
Does it affect performance?
- Scan Speed: Yes, it makes scans much faster. By limiting the scope to a few specific folders, the agent spends less time "enumerating" (listing) the contents of the mailbox and can get straight to the search.
- Resource Usage: It reduces the memory and CPU overhead required to track the state of a large mailbox scan.
Best Practices
- Use for High-Risk Targets: Use this when you have a shared mailbox where only one or two folders are used for processing sensitive documents (like "Invoices").
- Combine with "Scan Attachments": Even when targeting specific folders, ensure "Scan Attachments" is still enabled, as that is where the majority of sensitive data in email usually resides.
- Avoid for General Audits: For a standard "Compliance Audit," you should generally leave this disabled. Users often move sensitive data to unexpected folders (like "Notes" or "Archive") to hide it or "save it for later," and this setting would cause the agent to miss those items.
Summary: This is a "surgical" scan setting. It tells Spirion to ignore the rest of the mailbox and focus all its energy on a specific list of folders identified by their unique GUIDs.
How do I format multiple Folder GUIDs in the Spirion wizard?
When entering multiple Outlook Folder GUIDs into the "Insert Outlook Folder GUIDs" field in the Spirion Create New Scan wizard, you must follow a specific formatting rule to ensure the Agent processes them correctly:
The Rule: One GUID Per Line
- Enter each GUID on its own individual line.
- Do not use commas, semicolons, or spaces to separate them.
Correct Format:
AAMkAGU0MmY1YjJkLTMzNGQtNDY0Ny1hYjdiLWU0YmY0MmY1YjJkLTMzNGQtNDY0Ny1hYjdiLWU0YmY0MmY1YjJkLTMzNGQtNDY0Ny1hYjdiLWU0YmY0MmY1YjJk
AAMkAGU0MmY1YjJkLTMzNGQtNDY0Ny1hYjdiLWU0YmY0MmY1YjJkLTMzNGQtNDY0Ny1hYjdiLWU0YmY0MmY1YjJkLTMzNGQtNDY0Ny1hYjdiLWU0YmY0MmY1YjJk
Important Formatting Details
- No Extra Characters: Do not include the folder name (for example, "Inbox") or any brackets
{ }unless they are part of the actual GUID string you retrieved. The agent expects the raw string. - No Leading/Trailing Spaces: Ensure there are no accidental spaces at the beginning or end of the lines, as this can cause the Agent to fail to recognize the ID.
- Case Sensitivity: While GUIDs are generally not case-sensitive, it is a best practice to paste them exactly as they were provided by your retrieval tool (PowerShell or MFCMAPI).
- Hidden Characters: If you are copying from Excel or a Word document, be careful not to paste hidden formatting characters. It is often safest to paste the GUIDs into Notepad first to "clean" the text, then copy from Notepad into the Spirion wizard.
Troubleshooting Tips
- Field Disabled? If the "Insert Outlook Folder GUIDs" box is grayed out, make sure you have checked the box for "Search Selected Outlook Folders" first.
- Scan Results Empty? If the scan completes instantly with no results, double-check that the GUIDs are correct. If a GUID is malformed or incorrect, the Agent will simply skip it without necessarily throwing an error, as it assumes the folder doesn't exist in that specific mailbox.
Summary: Simply paste your list of GUIDs into the box, ensuring that each unique ID starts on a new line.
How do I verify if the GUIDs are correct before scanning?
The most effective way to verify Outlook Folder GUIDs before launching a large-scale scan is to perform a "Discovery-Only" scan on a single test endpoint. This enables you to see exactly how the Spirion Agent interprets the mailbox structure without the time-consuming process of searching for sensitive data.
Here are the three steps to verify your GUIDs:
1. Run a "Discovery" Scan (The Verification Step)
Instead of a full "Sensitive Data Scan," create a temporary scan with the following settings:
- Location: Select only the test endpoint and the specific Outlook/Exchange account.
- Data Types: Uncheck all sensitive data types (SSN, Credit Card, etc.).
- Options: Enable "Search Selected Outlook Folders" and paste your GUIDs.
- Goal: This scan will finish very quickly because it is only "listing" what it finds.
2. Check the "Locations" or "Status" Tab
Once the discovery scan completes, look at the results in the Spirion Console:
- Success: If the GUIDs are correct, you will see the specific folders listed in the Locations view of the scan results.
- Failure: If the GUIDs are incorrect or the agent cannot find them, the scan will likely complete with "0 Locations Found" or "0 Items Scanned."
3. Inspect the Agent Log File (The "Deep Dive" Method)
If the scan doesn't show what you expect, you can look at the local log file on the test endpoint to see exactly what happened during the folder enumeration.
- Log Location:
C:\ProgramData\Identity Finder\Console\IdentityFinder.log(or similar path depending on your version). - What to look for: Search the log for the term "MAPI" or "Outlook."
- If the GUID is correct, you will see a line indicating the agent successfully opened the folder.
- If the GUID is wrong, you will see an error like:
Error opening folder: [GUID] - MAPI_E_NOT_FOUNDorAccess Denied.
Common Reasons for "Incorrect" GUIDs:
If your verification fails, check for these three common issues:
- The "Bitness" Mismatch: If you are using a 64-bit Outlook client but the Spirion agent is configured to use 32-bit MAPI (or vice versa), it may fail to resolve the GUIDs. Ensure the "Set Outlook Bitness" setting in the wizard matches the installed version of Office.
- Cached vs. Online Mode: If the user is in "Cached Exchange Mode," the GUIDs for their local
.ostfile might occasionally differ from the server-side GUIDs. Try toggling the "Search only Cached Exchange Stores" setting to see if it changes the result. - Permissions: Ensure the account running the scan (the logged-in user or the service account) has "Folder Visible" and "Read" permissions for the specific folders you are targeting.
Tip: The "Folder Name" Test
If you are struggling with GUIDs, try running a discovery scan without the "Search Selected Outlook Folders" option enabled first. Look at the resulting log or report—Spirion will often list every folder it found along with its GUID. You can then copy the GUID directly from Spirion's own log to ensure 100% accuracy for your targeted policy.
Summary: Never "guess" with GUIDs. Run a Discovery-only scan on one machine first. If Spirion reports that it found the folders, your GUIDs are verified and ready for a production scan.
Exclude Exchange Public Folders
The “Exclude Exchange Public Folders” setting is a scope-control option used to prevent the Spirion Agent from scanning shared organizational data stored in Exchange Public Folders.
What it does
Exchange Public Folders are designed for shared access and can contain large volumes of archived emails, discussion threads, and documents accessible to many people in an organization.
- When set to "Yes" (Default/Recommended): The Agent skips any Public Folders it encounters during the scan. It focuses only on the user's primary mailbox, personal folders, and any specifically targeted archives.
- When set to "No": The Agent attempts to crawl and scan every Public Folder that the scanning account (the user or service account) has permission to access.
Why is this important?
- Scan Duration: Public Folders can be massive, often containing years or decades of historical data. Including them in a standard workstation scan can cause the scan to take days to complete and may lead to the Agent appearing "stuck."
- Redundant Results: Because Public Folders are shared, scanning them from multiple user workstations will result in the same sensitive data being discovered and reported hundreds of times (once for every user who has access).
- Network and Server Load: Scanning Public Folders across the network puts significant strain on the Exchange server's performance, as it must serve the same large data sets to multiple agents simultaneously.
Best Practices
- Standard User Scans: Always set this to "Yes." You should generally avoid scanning shared organizational data from individual user endpoints.
- Targeted Audits: If you specifically need to audit Public Folders for sensitive data, it is better to run a single, dedicated scan using a Service Account with administrative rights, rather than including it in a general user policy.
- Permissions: If you set this to "No" to include them, ensure the account running the scan has at least "Read" and "Folder Visible" permissions on the Public Folders, or the agent will simply skip them due to access errors.
Summary: This setting is a "noise reducer." By setting it to Yes, you ensure that the scan stays focused on the user's own data and doesn't get bogged down in large, shared organizational archives that are better handled by a centralized server scan.
Exclude IMAP Folders
The “Exclude IMAP Folders” setting is a filter used to prevent the Spirion agent from scanning email accounts that are connected to Outlook via the IMAP (Internet Message Access Protocol).
What it does
In Microsoft Outlook, users can connect to multiple types of email accounts. While corporate accounts usually use Exchange/MAPI, personal or third-party accounts (like Yahoo, iCloud, or older ISP mail) often use IMAP.
- When set to "Yes": The Agent identifies any folders or mailboxes in the Outlook profile that are connected via IMAP and skip them entirely. It scans only the primary Exchange/Outlook data.
- When set to "No": The Agent attempts to scan every mailbox connected to the Outlook profile, including personal IMAP accounts.
Why is this important?
- Privacy and Legal Compliance: In many jurisdictions and corporate policies, employers are only authorized to scan company-owned email (Exchange). Scanning a user's personal IMAP account (for example, a personal Gmail or Yahoo account linked to their work Outlook) could be a violation of privacy laws or HR policies.
- Scan Performance: IMAP folders are often "online-only" or use a different synchronization method than Exchange. Scanning them can be slow because the Agent may have to download headers and attachments from a third-party server, which can significantly increase scan time.
- Scope Control: IMAP accounts are often used for non-work purposes. Excluding them ensures that the Spirion results only reflect the security posture of the organization's own data.
Interaction with other settings
- Search only Cached Exchange Stores: This setting primarily affects Exchange. IMAP folders have their own local storage (
.ostor.pstfiles), but the "Exclude IMAP" setting acts as a hard block regardless of whether the data is cached or online. - PST Scanning: If a user has exported an IMAP mailbox to a local
.pstfile, Spirion may still find it if "Search detached PSTs" is enabled, as it is then treated as a file on the drive rather than an active IMAP folder in the mail profile.
Best Practices
- Corporate Policy: Most organizations should set this to "Yes" to avoid legal complications and ensure they are only auditing corporate data.
- BYOD Environments: If users are using personal devices for work, this setting is critical to ensure the agent doesn't overreach into the user's private life.
- Troubleshooting: If a scan is taking an unusually long time and the user is known to have multiple personal accounts linked to Outlook, toggling this to "Yes" can often resolve the performance issue.
Summary: "Exclude IMAP Folders" is a privacy and scope boundary. It tells Spirion to ignore any non-Exchange email accounts (like personal Yahoo or Gmail accounts) that a user has added to their Outlook profile.
Search only Cached Exchange Stores
The “Search only Cached Exchange Stores” setting determines whether the Spirion agent scans the local copy of a mailbox stored on the computer's hard drive or connects directly to the Exchange server to scan live data.
What it does
Most modern Outlook configurations use "Cached Exchange Mode," which creates a local synchronized copy of the mailbox (an .ost file).
- When set to "Yes" (Default): The Agent scans only the data that has already been downloaded to the local machine. It does not request any new data from the Exchange server.
- When set to "No": The Agent scans the local cache first, but if it encounters folders or items that are "online only" (not yet synchronized), it forces Outlook to download that data from the server so it can be searched.
Why is this important?
- Network Performance: Setting this to "Yes" is significantly faster and uses almost no network bandwidth. If you set it to "No" for 1,000 users at once, your Exchange server and network could be overwhelmed as every Agent tries to download gigabytes of "online" data simultaneously.
- User Experience: When set to "No," the user may notice Outlook becoming sluggish or "Not Responding" because Spirion is competing with the user for the connection to the Exchange server.
- Completeness vs. Speed:
- "Yes" is safer for the network but might miss very recent emails or older emails that the user has configured Outlook not to cache (for example, if their "Mail to keep offline" slider is set to only 3 months).
- "No" ensures a 100% complete scan of the entire mailbox history but at a high cost to performance and time.
Interaction with "Online Archive"
It is important to note that Exchange Online Archives (In-Place Archives) are almost always "online only."
- If you have "Include Online Archive" enabled but set "Search only Cached Exchange Stores" to Yes, the Agent may skip the archive entirely because it is not part of the local cache.
- To scan an Online Archive, you typically must set this option to No.
Best Practices
- Standard Monthly Scans: Set to "Yes." This provides a great balance of finding sensitive data without impacting the user or the network.
- Termination or Legal Audits: Set to "No." When you need to be 100% certain that every single email in the history of the account has been checked, you must bypass the cache.
- VDI/Thin Clients: If users are running in "Online Mode" (no cache allowed), you must set this to No, or the Agent will find zero results because there is no local store to search.
Summary: This setting is a toggle between Local Speed (Yes) and Server Completeness (No). For most enterprise deployments, "Yes" is the recommended setting to prevent network congestion.
Discovery Team Settings
Discovery Team Settings become available when you select more than one Agent to perform your scan.
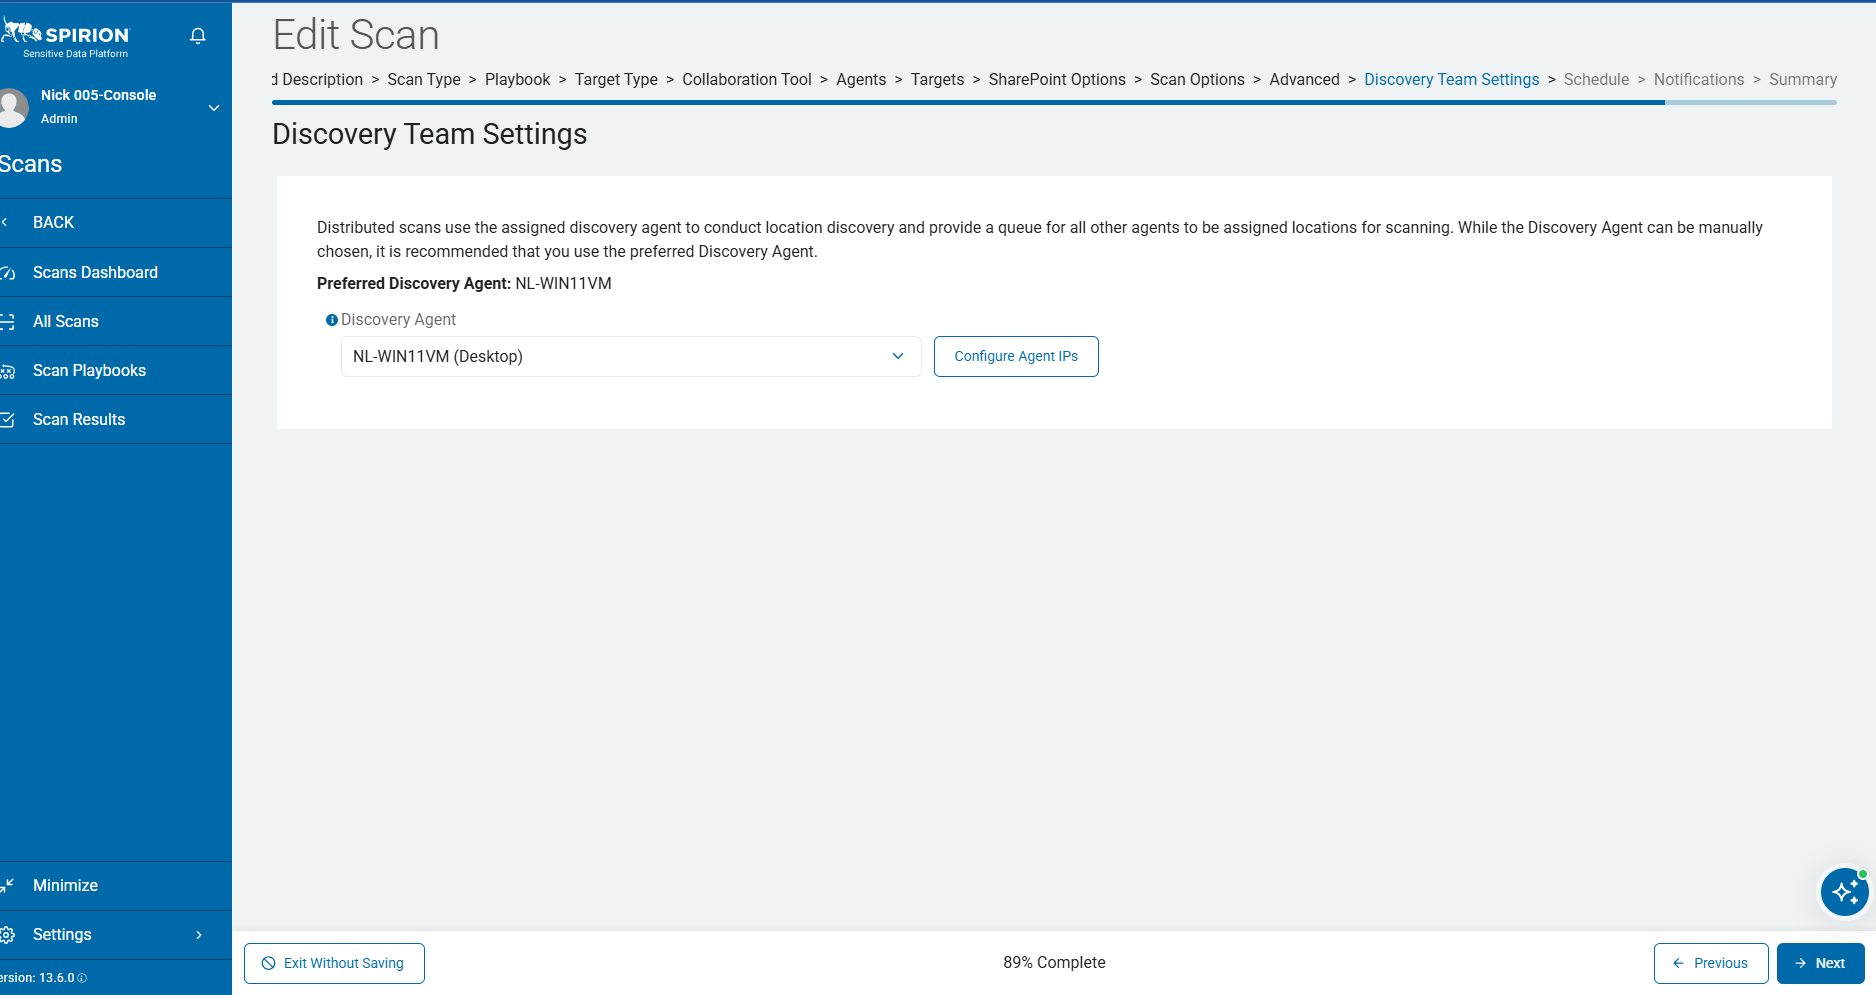
The "Discovery Team Settings" page is approximately the 11th step in your scan wizard.
Distributed scans use the assigned discovery agent to conduct location discovery and provide a queue in which all other Agents are assigned locations to scan. While the Discovery Agent can be manually chosen, Spirion recommends you use the preferred Discovery Agent (preferred Agent) - this is the default Agent shown in the field "Discovery Agent" on the page.
Note: Only in special use cases are static discovery Agents used.
Cloud Storage Analysis Type
- The type of analysis to perform when analyzing Cloud Storage for Discovery Team searches.
- Specify the method to be used when analyzing Cloud Storage locations for inclusion in a Discovery Team search.
- Count by Bytes (0)
- Default
- Count and report by bytes in each cloud storage folder.
- The workload will be divided by folders based on the size of the files/objects stored within them.
- Count by Items (1)
- Count and report by number of items in each cloud storage folder.
- The workload will be divided by folders based on the number of files/objects stored within them.
Exchange Analysis Type
- The type of analysis to perform when analyzing Exchange for Discovery Team searches.
- Specify the method to be used when analyzing Microsoft Exchange locations for inclusion in a Discovery Team search.
- Count by Bytes (0)
- Count and report by bytes in each Microsoft Exchange mailbox folder.
- The workload will be divided by folders based on the size of the files/objects stored within them.
- Count by Items (1)
- Default
- Count and report by number of items in each Microsoft Exchange mailbox folder.
- The workload will be divided by folders based on the number of files/objects stored within them.
- Count by Mailboxes (2)
- Count and report by the number of Microsoft Exchange mailbox users.
- The workload will be divided by number of mailboxes.
File System Analysis Type
The type of analysis to perform when analyzing File Systems for Discovery Team searches.
- Specify the method to be used when analyzing File System locations for inclusion in a Discovery Team search.
- Count by Bytes (0):
- Default
- Count and report by bytes in each File System folder.
- The workload will be divided by folders based on the size of the files/objects stored within them.
- Count by Items (1):
- Count and report by number of items in each File System folder.
- The workload will be divided by folders based on the number of files/objects stored within them.
Gmail Analysis Type
The type of analysis to perform when analyzing Gmail for Discovery Team searches.
- Specify the method to be used when analyzing Gmail locations for inclusion in a Discovery Team search.
- Count by Bytes (0):
- Count and report by bytes in each Gmail folder.
- The workload will be divided by folders based on the size of the files/objects stored within them.
- Count by Items (1):
- Default
- Count and report by number of items in each Gmail folder.
- The workload will be divided by folders based on the number of files/objects stored within them.
- Count by Users (2):
- Count and report by the number of Gmail users.
- The workload will be divided by user account.
SharePoint Analysis Type
The type of analysis to perform when analyzing SharePoint for Discovery Team searches.
- Specify the method to be used when analyzing SharePoint locations for inclusion in a Discovery Team search.
- Count by Bytes (0):
- Default
- Count and report by bytes in each SharePoint folder.
- The workload will be divided by folders based on the size of the files/objects stored within them.
- Count by Items (1):
- Count and report by number of items in each SharePoint folder.
- The workload will be divided by folders based on the number of files/objects stored within them.