
How To Search a Snowflake Database
Overview
Spirion Sensitive Data Platform users have two ways to scan a Snowflake database:
- Native Connector (recommended)
- Built into Sensitive Data Platform
- This method supports multi-factor authentication (MFA)
- ODBC with a CData Connector
- Requires a CData connector license
- This may require additional cost and is not recommended
📌 If you need help with AnyScan and CData connectors, see the article "Spirion AnyScan™ Connector Install Guide: Salesforce" on the Spirion Support Portal.
Before You Start
- When forming your connection string ensure that
DB Type=13 - Ensure the Snowflake database has a direct connection with the agent
- Permissions do not transfer from data lake to data lake in Snowflake
- The agent must have a connection to each data lake for every database you want to scan
- If you are using a certificate you must alter your connection string to account for the certificate
- The native connector can scan a Snowflake database behind MFA
- To scan Snowflake, you must use Agent version 13.2.2 or later
- The Snowflake ODBC driver is required (both the 32 and 64-bit version of the driver to scan Snowflake using either the native or ODBC connector)
- See the ODBC Downloads page here: ODBC Driver - Developer Resources
How to Create a Snowflake Connection String
Unlike other databases, Snowflake does not have a built-in connection string builder in the Spirion Sensitive Data Platform Agent.
- The connection string must be manually created.
- Manually paste the connection string into the "Target" field.
Example Connection String
- The connection string below is a sample.
- You must modify the example connection string if you are using it for your own needs.
- To configure connecting to Snowflake through a proxy see the topic below
DRIVER={SnowflakeDSIIDriver};Server=your snowflake server address;Database=Showflakedatabasename;Warehouse=warehousename;UID=Username;PWD=password;DB Type=13;Key Parameters
In this connection string the following parameters are specified as:
- DRIVER – This specifies the driver being used will always be SnowflakeDSIIDriver
- Server – Name of your Snowflake server.
- Database – Name of the Database being scanned.
- Warehouse – Warehouse location of the database being scanned.
- UID – Username used to authenticate to Snowflake.
- PWD – Password of that user.
- DB Type – The database scan type for Spirion Sensitive Data Manager customers. Set this value to 13.
Additional Parameters (if using a certificate)
If you are using a certificate, you may also need to add the following information to your connection string.
Note: The following is not the exhaustive list of variables:
- Priv_Key_File – The file path location of the private key
- Priv_Key_PWD – The password to the private key
- Role – User Role if the UID in the Snowflake database
- Authenticator - Snowflake_JWT
How to Scan Using the Native Spirion Sensitive Data Platform Snowflake Connector
Procedure:
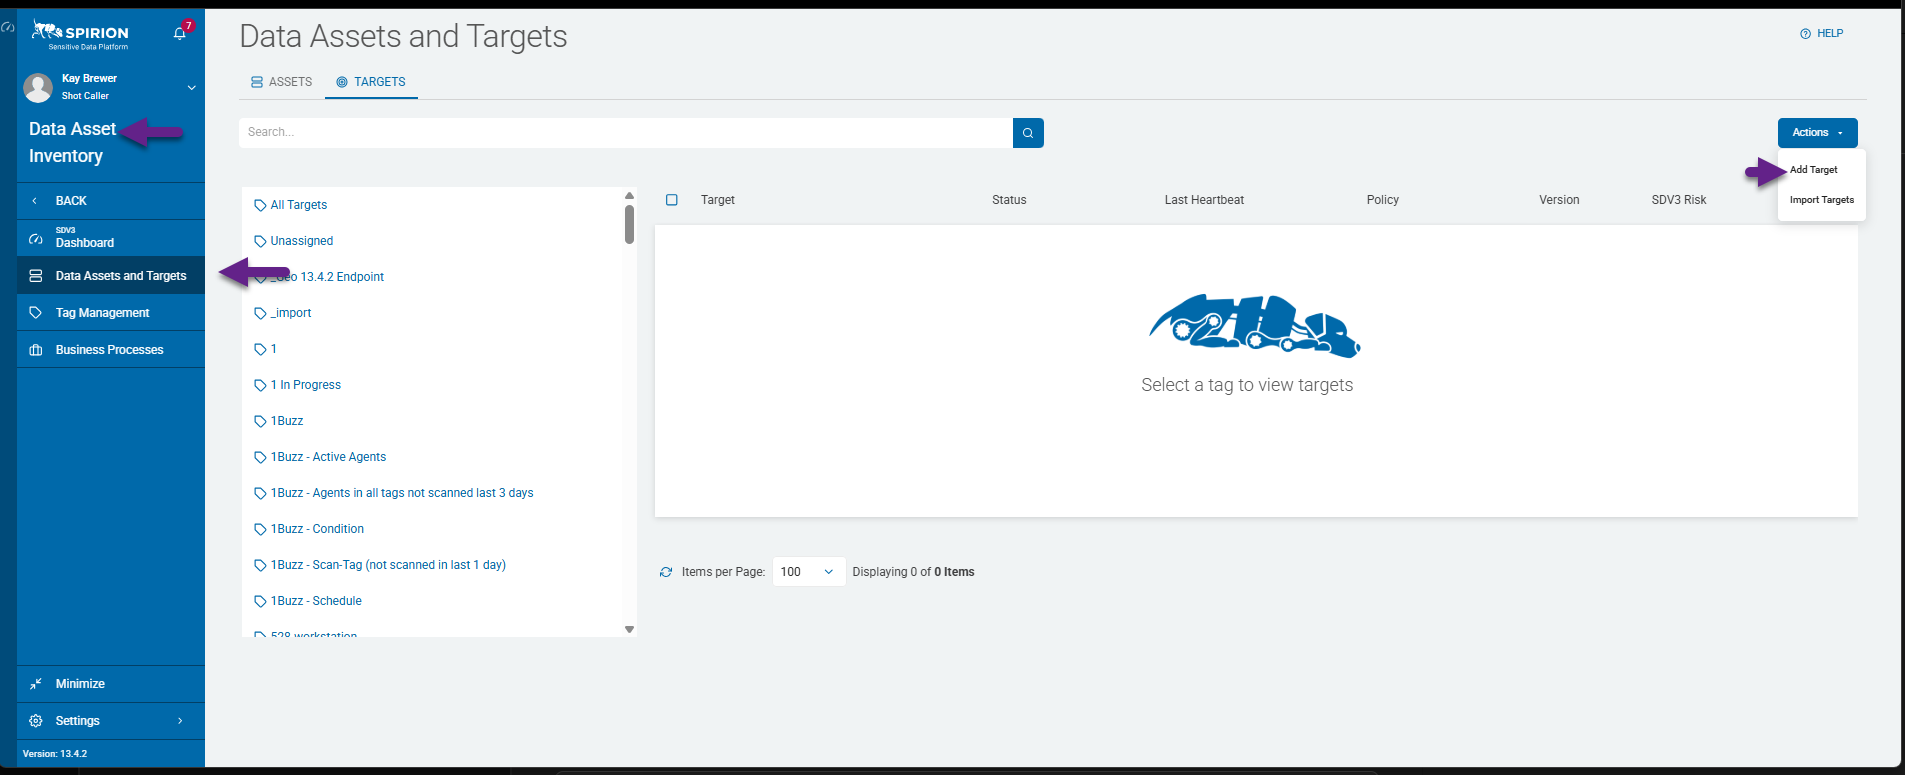
- From the left side navigation menu select Data Asset Inventory > Data Assets and Targets.
- The "Data Assets and Targets" page opens.
- Select the TARGETS tab at the top of the screen.
- Select the blue Actions button at the top right corner of the page.
- Select Add Target from the drop-down menu that appears.
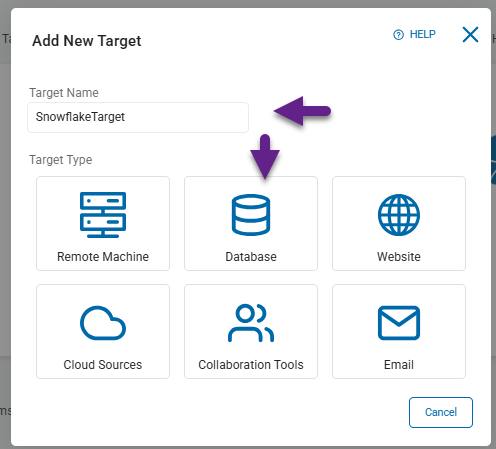
- The Add New Target pop-up box appears.
- Enter a descriptive Target name in the "Target Name" field.
- Next, select the Database tile under the Target Type section.
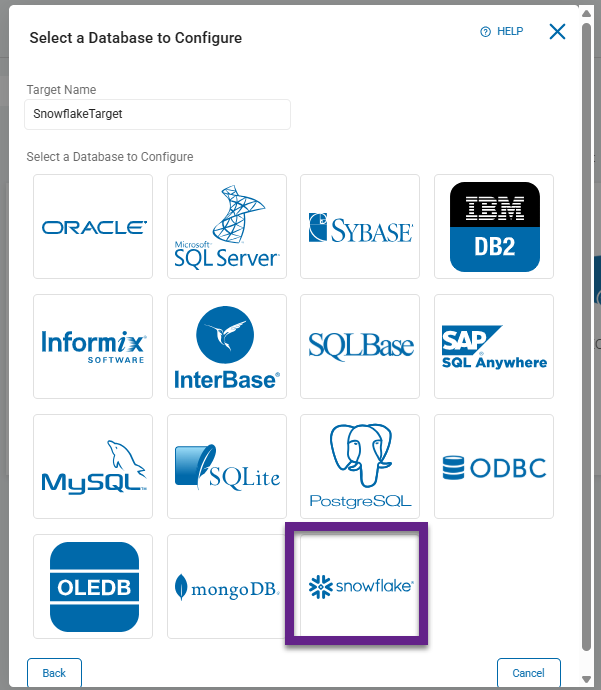
- The Select a Database to Configure pop-up box appears.
- Select the Snowflake tile under the "Select a Database to Configure" section.
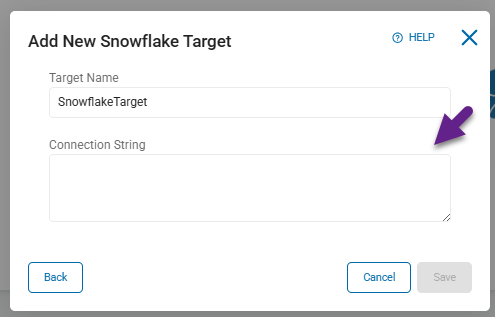
- Paste the connection string you created in the section above into the "Connection String" field.
- To create a search, follow the article How to Create a New Sensitive Data Scan.
How to Connect to a Snowflake Database via Proxy
Connecting to your Snowflake database through a proxy requires additional configuration, described below.
About Required Proxy Parameters and Format
db type=13- Without this parameter the Agent uses a generic ODBC driver instead of
SnowflakeDSIIDriver - The generic ODBC driver doesn't support Snowflake-specific proxy parameters, so proxy settings are silently ignored
- Without this parameter the Agent uses a generic ODBC driver instead of
- Wrong proxy parameter format
- The Snowflake ODBC driver doesn't accept
Proxy+ProxyPortas separate parameters — those are rejected as invalid keys. - The correct parameter is a single
proxy=host:portin lowercase. For example: proxy=192.168.1.1:8080
- The Snowflake ODBC driver doesn't accept
Connection String and Parameters
Both parameters must be set correctly in the connection string.
- For example, assume the proxy is running on 192.168.1.17.
The connections string with the correct db type and proxy address appears in the following partial connection string example:
db type=13; DRIVER={SnowflakeDSIIDriver}; Server=...;proxy=192.168.1.17:8080Proxy Server Installation and Information
- Use the following command to install the proxy:
pip install proxy.py- Then start an interactive Python session and load the helper functions:
pythonThis launches a python interactive session:
%run proxy.py          # load start_proxy() and stop_proxy()
proc = start_proxy2()   # starts proxy on 127.0.0.1:8080
# ... test the agent using proxy=127.0.0.1:8080 in the connection string ...
# ... traffic will be logged in this terminal ...
stop_proxy2(proc)       # stop the proxy when done
How to Troubleshoot a Failed Connection
Sometimes when attempting to connect to a Snowflake database the connection fails.
The following errors may occur.
ERROR: Unable to open database
Module error:28000
To troubleshoot these errors, note the following:
- Module error:28000 means that an incoming request with IP/Token is not allowed to access snowflake.
- Contact your account administrator.
- In this case the agent does not have a direct connection to the database or the Data lake being scanned.
- Your organization's Snowflake admin must grant access.