Custom Report Examples
How to Discover the Age of Your Locations: Age Profiling Report
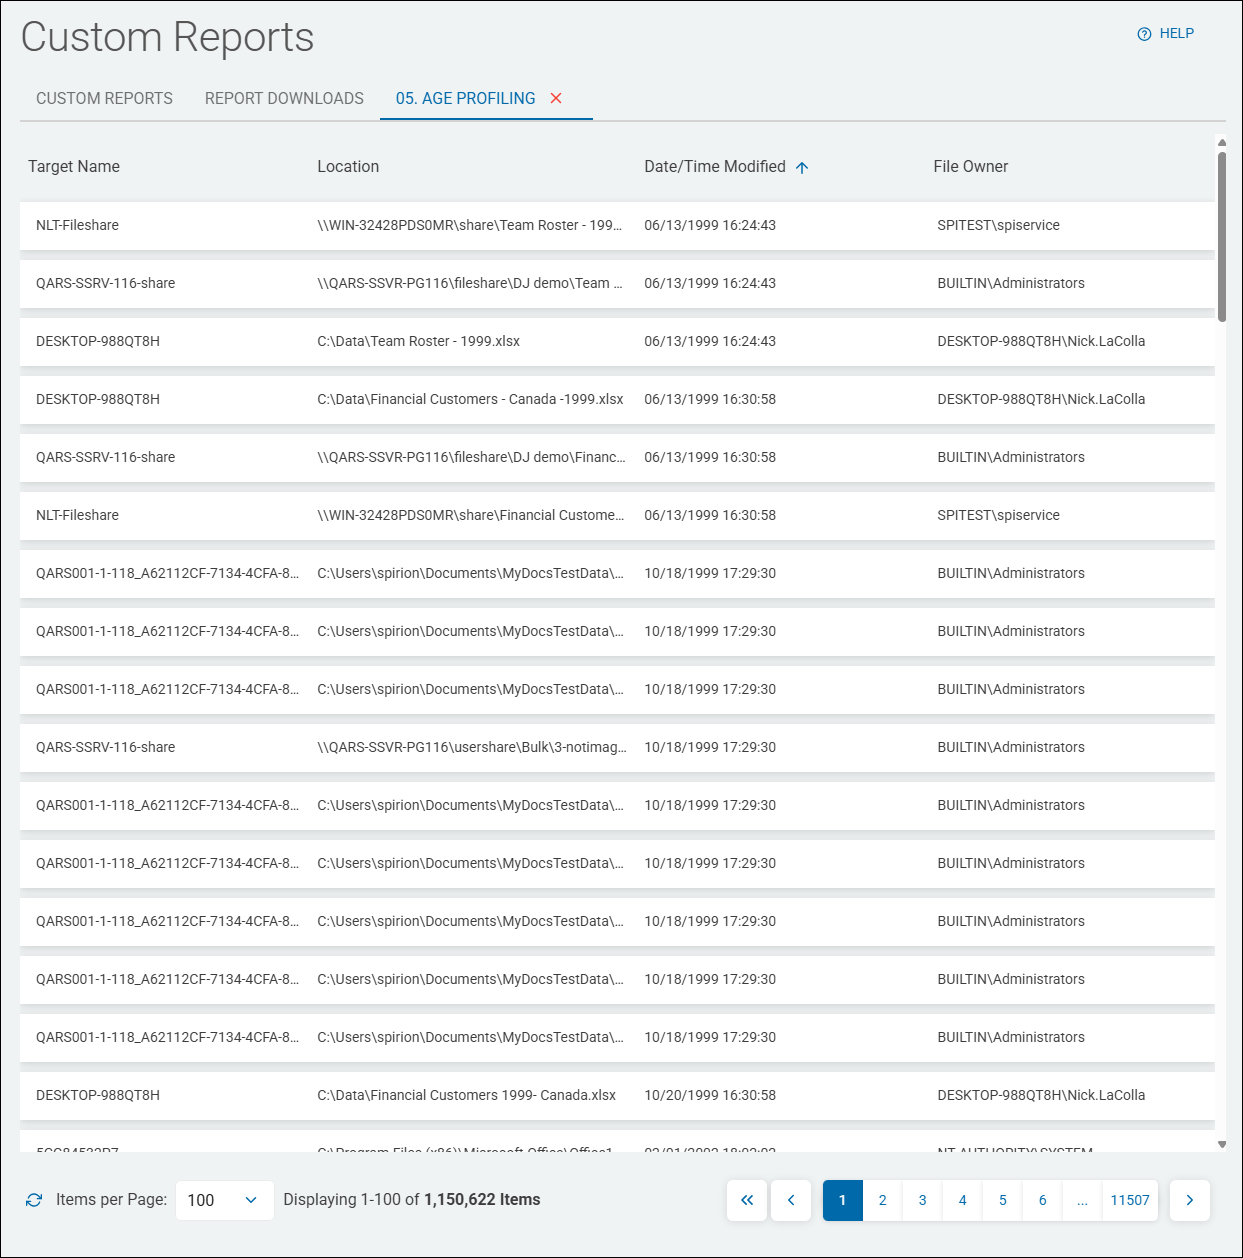
The "Age Profiling" report displays the last Date/Time unstructured sensitive data match locations (file, including full file path, or email), were modified.
This is useful when trying to discover the latest changes made to the sensitive data locations (files, including path or emails) in your environment. This report also provides the Targets of these locations as well as the file owner.
The results of this report may result in you taking one or more of the following actions: applying classifications to the discovered locations, applying labels to the locations, or notifying users of the locations. These actions are performed using scan playbooks.
Use the following steps to create an Age Profiling report:
- From the left side navigation menu, select Reports > Custom Reports.
- The "Custom Reports" page opens.
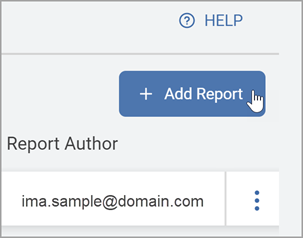
- In the top right corner click the blue + Add Report button.
- The "Create Report" wizard is displayed.
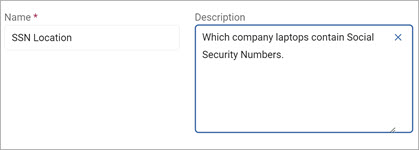
- On the Basic Information page, provide a name and description that describe what your report will provide. This information can be changed at a later time:
- Name: Enter a descriptive name such as "Age of Locations," or "SSN Location"
- Description: Enter a proper description, such as "Which company laptops contain Social Security numbers."
- Click the Next button.
- The "Columns Setup" page appears.
- The columns and filters you choose next determine what kind of information (Targets, locations, data types, etc.) your report will contain and display in the table on the "Custom Reports" page when viewed.
Columns Setup Page
Set up your columns as follows (all options found under Available Columns on the "Columns Setup" page):
- Endpoints: Target Name
- Header Label: Target Name
- Sort: None
- Aggregate: N/A
- Locations: Location
- Header Label: Match Count (changed from default label)
- Sort: None
- Aggregate: N/A
- Locations: Date/Time Modified
- Header Label: Date/Time Modified
- Sort: None
- Aggregate: None
- Locations: File Owner
- Header Label: File Owner
- Sort: None
- Aggregate: N/A
Filters Page
Set the following filter on the Filters page:
- Date/Time Modified
- Not Empty
Set Export Schedule and Finish Report Creation
When the columns and filters for your report have been set, only two pages remain. Continue with the steps below to set the Export Schedule and finish creating the report on the Summary page.
- Click the Next button.
- The Export Schedule page opens.
- Leave the No Schedule (Export manually) option selected to manually run the report. (See How to Use Custom Reports for other scheduling options.)
- Click the Next button.
- The Summary page opens.
- Click the Generate Report Preview to preview your report (optional).
Note: The report preview loads up to 100 rows of data for review. For complex reports this can take several minutes to complete.
- Click the Generate Report Preview to preview your report (optional).
- Click the Finish & Save button to save the report.
View the Report
To view the report perform the following steps:
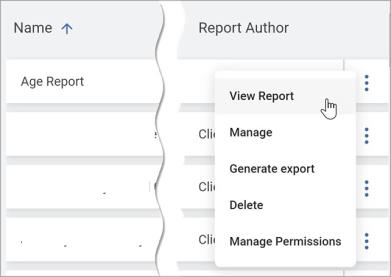
- Locate the new report in the Custom Reports section.
- Click the kebab menu then click View Report from the sub-menu that appears.
Sorted by oldest (using Date/Time Modified) column in the screenshot below.
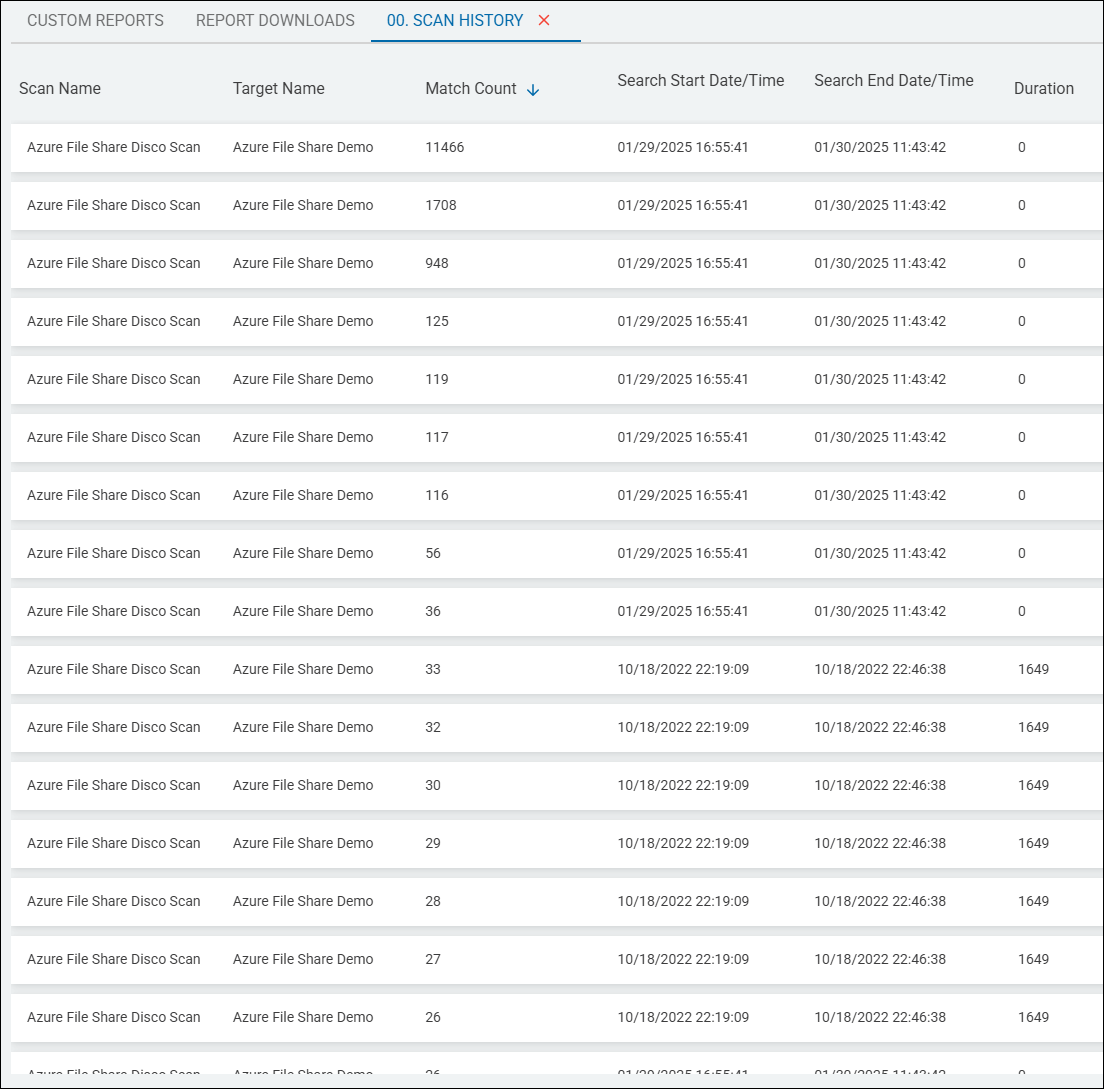
Scan History Report
This report provides a summary of console-initiated discovery scans sorted by locations (total matches).
Use the following steps to create a Scan History report:
- From the left side navigation menu, select Reports > Custom Reports.
- The "Custom Reports" page opens.
- In the top right corner click the blue + Add Report button.
- The "Create Report" wizard is displayed.
- On the Basic Information page, provide a name and description that describe what your report will provide. This information can be changed at a later time:
- Name: Enter a descriptive name such as "Age of Locations," or "SSN Location"
- Description: Enter a proper description, such as "Which company laptops contain Social Security numbers."
- Click the Next button.
- The "Columns Setup" page appears.
- The columns and filters you choose next determine what kind of information (Targets, locations, data types, etc.) your report will contain and display in the table on the "Custom Reports" page when viewed.
Columns Setup Page
Set up your columns as follows (all options found under Available Columns on the "Columns Setup" page):
Columns Setup for Scan History Report
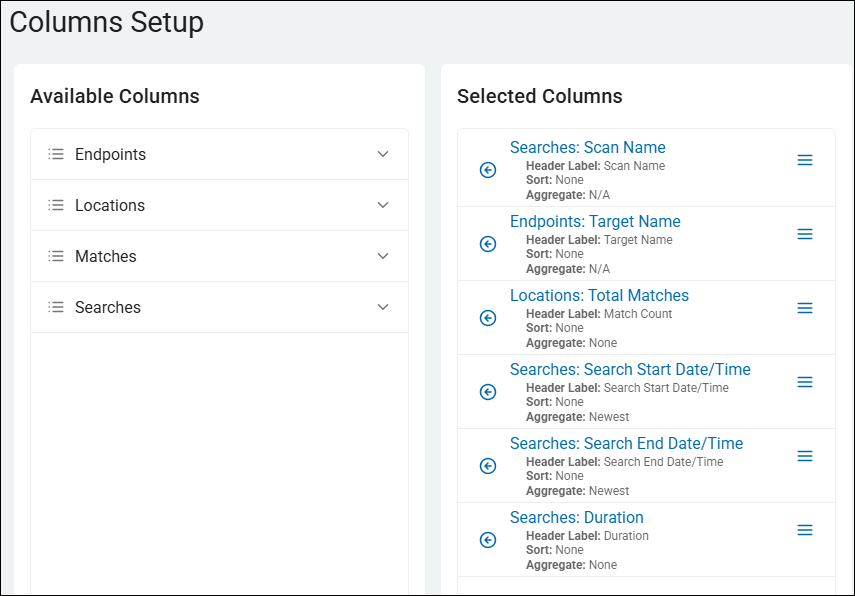
- Searches: Scan Name
- Header Label: Scan Name
- Sort: None
- Aggregate: N/A
- Searches: Duration
- Header Label: Duration
- Sort: None
- Aggregate: None
- Searches: Search Start Date/Time
- Header Label: Search Start Date/Time
- Sort: None
- Aggregate: None
- Searches: Search Start End/Time
- Header Label: Search End Date/Time
- Sort: None
- Aggregate: None
- Endpoints: Target Name
- Header Label: Target Name
- Sort: None
- Aggregate: N/A
- Locations: Total Matches
- Header Label: Match Count (changed from default label)
- Sort: None
- Aggregate: None
Filters Page
Optional. No filters are configured for this scan, by default.
Set Export Schedule and Finish Report Creation
When the columns and filters for your report have been set, only two pages remain. Continue with the steps below to set the Export Schedule and finish creating the report on the Summary page.
- Click the Next button.
- The Export Schedule page opens.
- Leave the No Schedule (Export manually) option selected to manually run the report. (See How to Use Custom Reports for other scheduling options.)
- Click the Next button.
- The Summary page opens.
- Click the Generate Report Preview to preview your report (optional).
Note: The report preview loads up to 100 rows of data for review. For complex reports this can take several minutes to complete.
- Click the Generate Report Preview to preview your report (optional).
- Click the Finish & Save button to save the report.
View the Report
To view the report perform the following steps:
- Locate the new report in the Custom Reports section.
- Click the kebab menu then click View Report from the sub-menu that appears.
Example Scan History Report sorted by match count
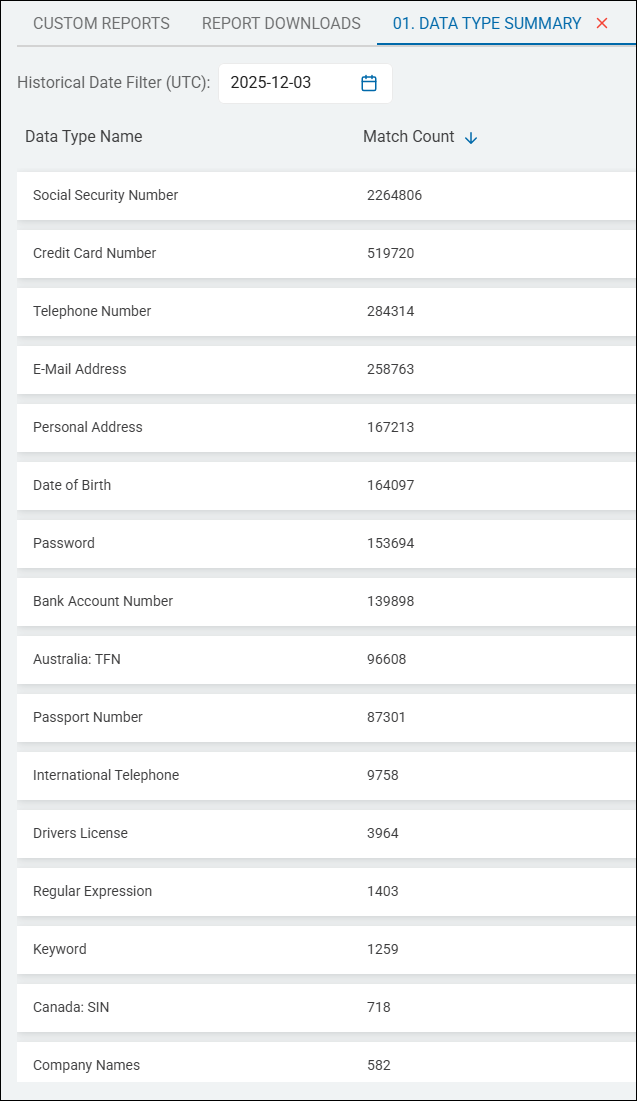
Data Type Summary Report
This report provides a total count of sensitive data matches found for each sensitive data type: Social Security number, Credit Card number, Telephone Number, etc.
Use the following steps to create a Data Type Summary report:
- From the left side navigation menu, select Reports > Custom Reports.
- The "Custom Reports" page opens.
- In the top right corner click the blue + Add Report button.
- The "Create Report" wizard is displayed.
- On the Basic Information page, provide a name and description that describe what your report will provide. This information can be changed at a later time:
- Name: Enter a descriptive name such as "Age of Locations," or "SSN Location"
- Description: Enter a proper description, such as "Which company laptops contain Social Security numbers."
- Click the Next button.
- The "Columns Setup" page appears.
- The columns and filters you choose next determine what kind of information (Targets, locations, data types, etc.) your report will contain and display in the table on the "Custom Reports" page when viewed.
Columns Setup Page
Set up your columns as follows (all options found under Available Columns on the "Columns Setup" page):
- Matches: Data Type Name
- Header Label: Data Type Name
- Sort: None
- Aggregate: N/A
- Matches: Match Count
- Header Label: Match Count
- Sort: None
- Aggregate: Sum
Filters Page
Optional. While no filters are configured for this scan, by default, in the example below the checkbox "Include historical data in the report when applicable" is checked.

Set Export Schedule and Finish Report Creation
When the columns and filters for your report have been set, only two pages remain. Continue with the steps below to set the Export Schedule and finish creating the report on the Summary page.
- Click the Next button.
- The Export Schedule page opens.
- Leave the No Schedule (Export manually) option selected to manually run the report. (See How to Use Custom Reports for other scheduling options.)
- Click the Next button.
- The Summary page opens.
- Click the Generate Report Preview to preview your report (optional).
Note: The report preview loads up to 100 rows of data for review. For complex reports this can take several minutes to complete.
- Click the Generate Report Preview to preview your report (optional).
- Click the Finish & Save button to save the report.
View the Report
To view the report perform the following steps:
- Locate the new report in the Custom Reports section.
- Click the kebab menu then click View Report from the sub-menu that appears.
Example Data Type Summary Report
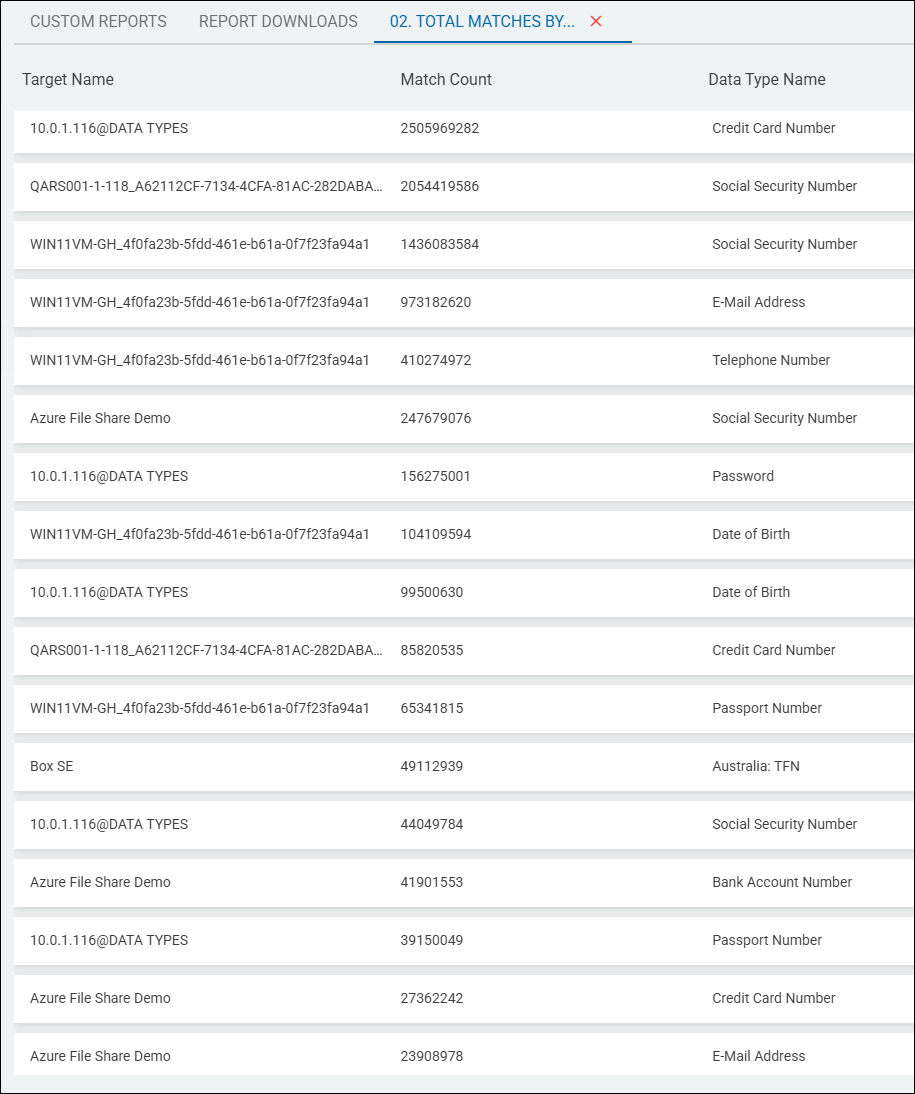
Total Matches by Target Report
This report provides insight into the concentration of sensitive data matches by Target.
In the example screenshot below, note that Data Types have been added. This is optional.
Use the following steps to create a Total Matches by Target report:
- From the left side navigation menu, select Reports > Custom Reports.
- The "Custom Reports" page opens.
- In the top right corner click the blue + Add Report button.
- The "Create Report" wizard is displayed.
- On the Basic Information page, provide a name and description that describe what your report will provide. This information can be changed at a later time:
- Name: Enter a descriptive name such as "Age of Locations," or "SSN Location"
- Description: Enter a proper description, such as "Which company laptops contain Social Security numbers."
- Click the Next button.
- The "Columns Setup" page appears.
- The columns and filters you choose next determine what kind of information (Targets, locations, data types, etc.) your report will contain and display in the table on the "Custom Reports" page when viewed.
Columns Setup Page
Set up your columns as follows (all options found under Available Columns on the "Columns Setup" page):
- Endpoints: Target Name
- Header Label: Target Name
- Sort: None
- Aggregate: N/A
- Locations: Total Matches
- Header Label: Match Count
- Sort: Descending
- Aggregate: Sum
Note: In the example screenshot below "Matches: Data Type Name" is added. This is optional.
Filters Page
Optional. No filters are configured for this scan, by default.
Example Total Matches by Target report, including Data Type Names
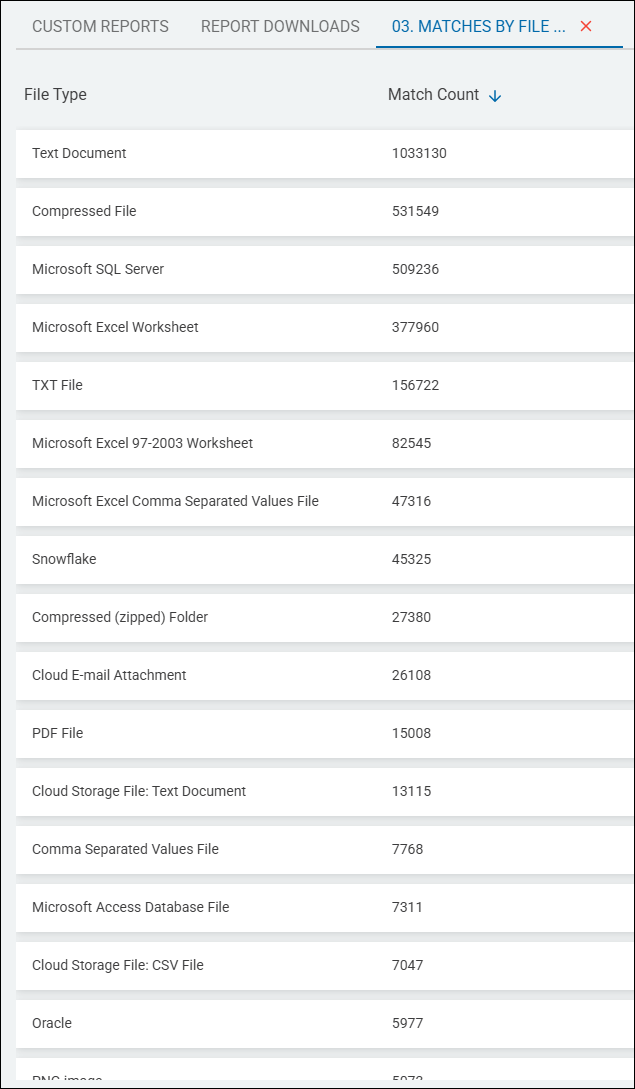
Matches by File Type Report
The Matches by File Type report provides a total of all sensitive data matches by file type: Text document, compressed file, Microsoft SQL Server, Microsoft Excel Worksheet, CSV, Snowflake, cloud e-mail attachment, PDF file, Microsoft Access database file, Oracle, etc.
The following steps apply when creating any kind of custom report:
- From the left side navigation menu, select Reports > Custom Reports.
- The "Custom Reports" page opens.
- In the top right corner click the blue + Add Report button.
- The "Create Report" wizard is displayed.
- On the Basic Information page, provide a name and description that describe what your report will provide. This information can be changed at a later time:
- Name: Enter a descriptive name such as "Age of Locations," or "SSN Location"
- Description: Enter a proper description, such as "Which company laptops contain Social Security numbers."
- Click the Next button.
- The "Columns Setup" page appears.
- The columns and filters you choose next determine what kind of information (Targets, locations, data types, etc.) your report will contain and display in the table on the "Custom Reports" page when viewed.
Columns Setup Page
Set up your columns as follows (all options found under Available Columns on the "Columns Setup" page):
- Locations: File Type
- Header Label: File Type
- Sort: None
- Aggregate: N/A
- Locations: Total Matches
- Header Label: Match Count
- Sort: Descending
- Aggregate: Sum
Filters Page
Optional. No filters are configured for this scan, by default.
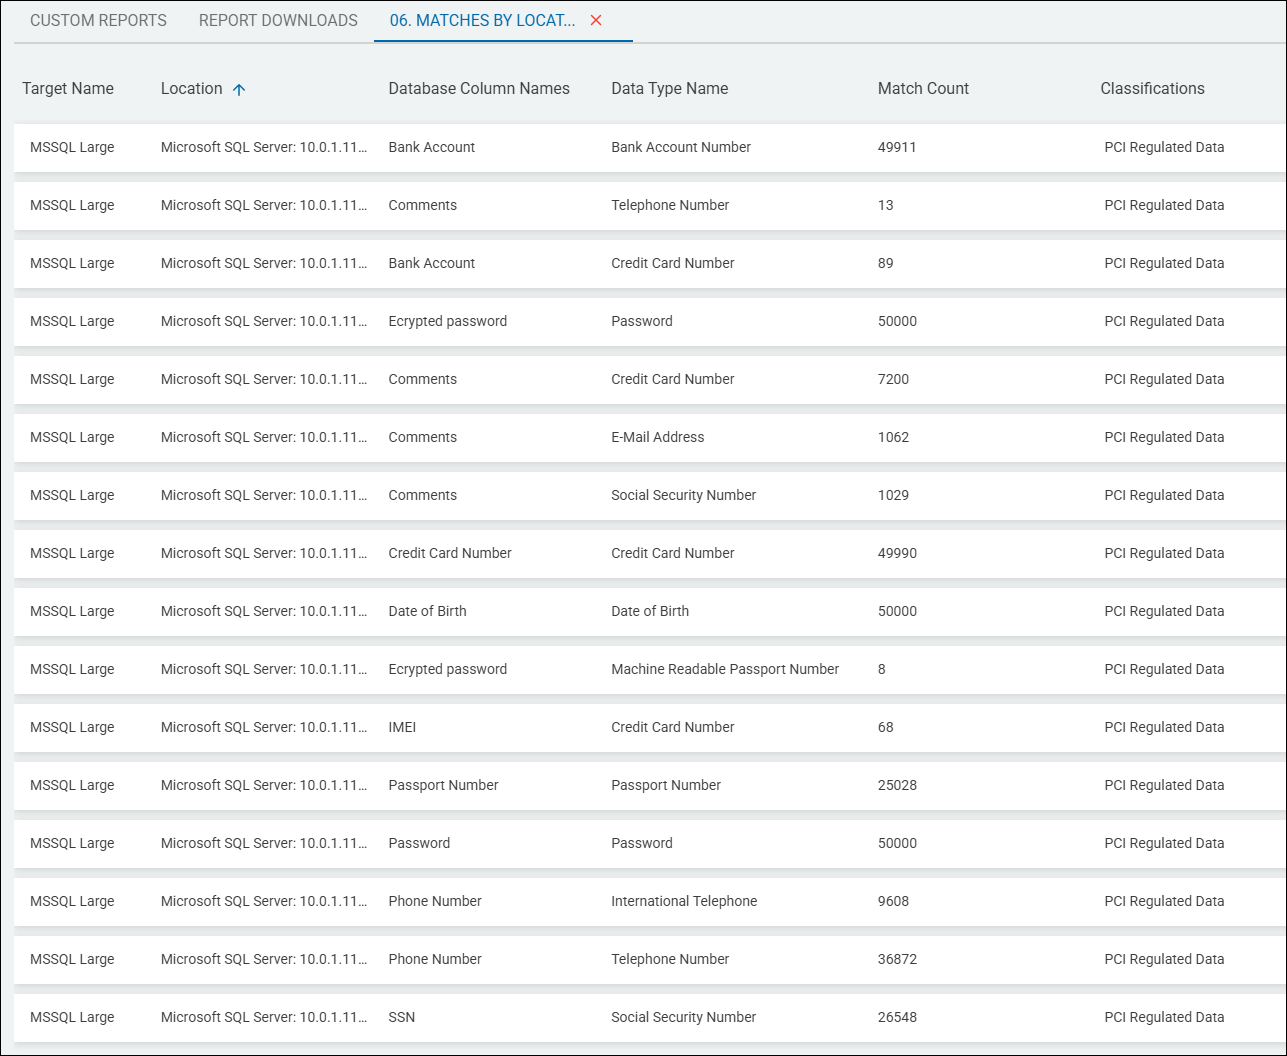
Matches by Location, Structured Report
This report provides a sensitive data match summary, including Targets, locations, data types, match counts, and classifications of all structured data scans. This report provides a very thorough and complete look into sensitive data matches sorted by location.
Use the following steps to create a Matches by Location, Structured report:
- From the left side navigation menu, select Reports > Custom Reports.
- The "Custom Reports" page opens.
- In the top right corner click the blue + Add Report button.
- The "Create Report" wizard is displayed.
- On the Basic Information page, provide a name and description that describe what your report will provide. This information can be changed at a later time:
- Name: Enter a descriptive name such as "Age of Locations," or "SSN Location"
- Description: Enter a proper description, such as "Which company laptops contain Social Security numbers."
- Click the Next button.
- The "Columns Setup" page appears.
- The columns and filters you choose next determine what kind of information (Targets, locations, data types, etc.) your report will contain and display in the table on the "Custom Reports" page when viewed.
Columns Setup Page
Set up your columns as follows (all options found under Available Columns on the "Columns Setup" page):
- Endpoints: Target Name
- Header Label: Target Name
- Sort: None
- Aggregate: N/A
- Locations: Location
- Header Label: Location
- Sort: None
- Aggregate: N/A
- Matches: Database Column Names
- Header Label: Database Column Names
- Sort: None
- Aggregate: N/A
- Matches: Data Type Name
- Header Label: File Type
- Sort: None
- Aggregate: N/A
- Matches: Match Count
- Header Label: Match Count
- Sort: None
- Aggregate: Sum
- Locations: Classifications
- Header Label: Classifications
- Sort: None
- Aggregate: N/A
Filters Page
Set the following filter on the Filters page:
- Database Column Name
- Is Not Empty
Example Matches by Location Structured Report
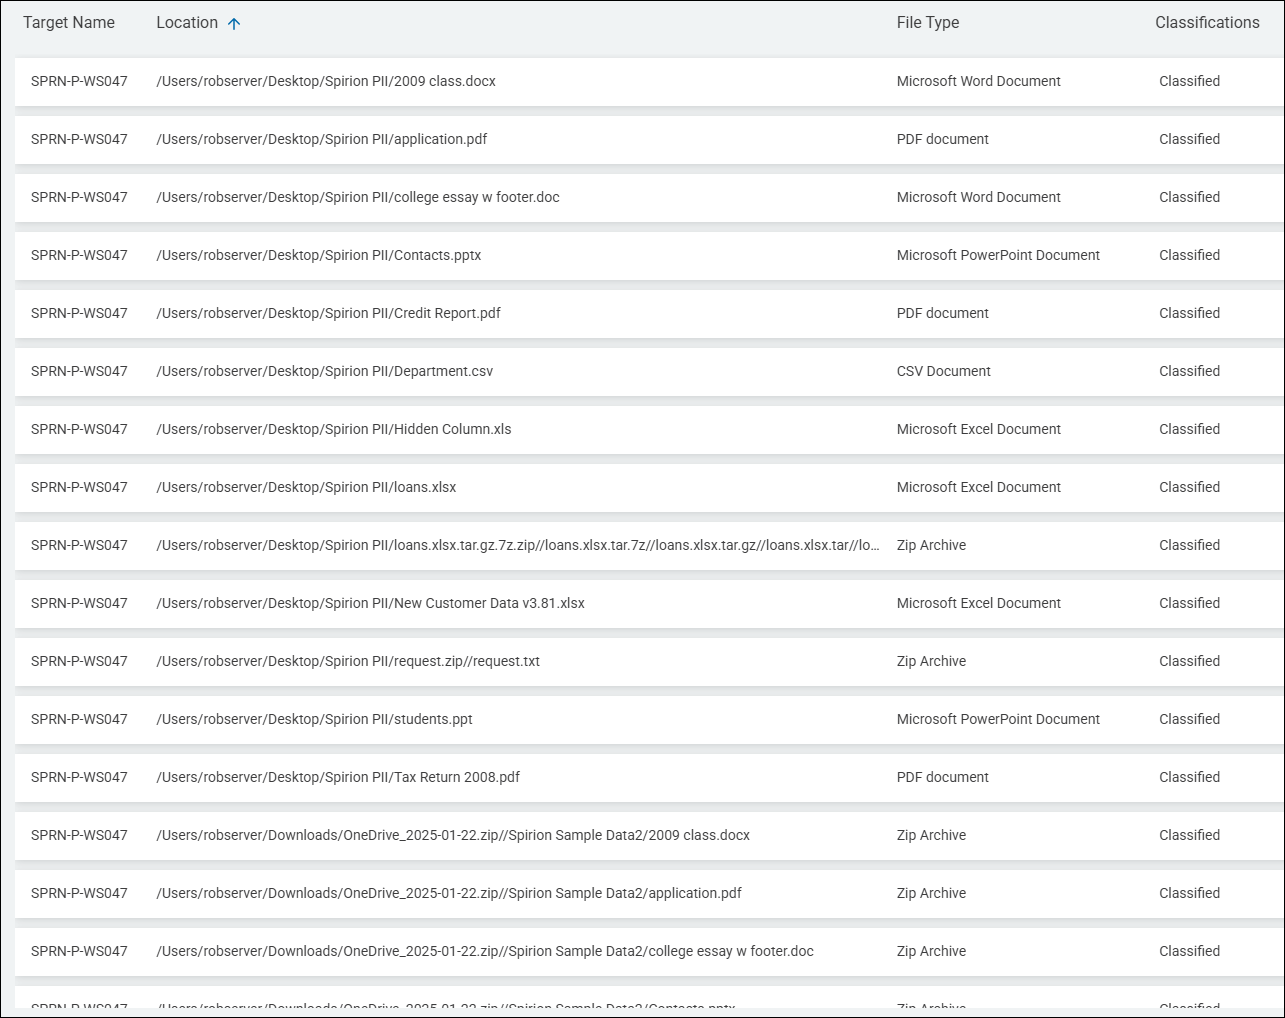
Classifications by Location Report
This report publishes a summary of individual locations with classification labels. As many users require accuracy and visibility into their sensitive data location classifications, this is a very important and often used report.
The following steps apply when creating any kind of custom report:
- From the left side navigation menu, select Reports > Custom Reports.
- The "Custom Reports" page opens.
- In the top right corner click the blue + Add Report button.
- The "Create Report" wizard is displayed.
- On the Basic Information page, provide a name and description that describe what your report will provide. This information can be changed at a later time:
- Name: Enter a descriptive name such as "Age of Locations," or "SSN Location"
- Description: Enter a proper description, such as "Which company laptops contain Social Security numbers."
- Click the Next button.
- The "Columns Setup" page appears.
- The columns and filters you choose next determine what kind of information (Targets, locations, data types, etc.) your report will contain and display in the table on the "Custom Reports" page when viewed.
Columns Setup Page
Set up your columns as follows (all options found under Available Columns on the "Columns Setup" page):
- Endpoints: Target Name
- Header Label: Target Name
- Sort: None
- Aggregate: N/A
- Locations: Location
- Header Label: Location
- Sort: None
- Aggregate: N/A
- Locations: File Type
- Header Label: File Type
- Sort: None
- Aggregate: N/A
- Locations: Classifications
- Header Label: Classifications
- Sort: None
- Aggregate: N/A
Filters Page
Set the following filters on the Filters page:
- Classification Names
- Is Not Empty
Classifications by Location Report Example
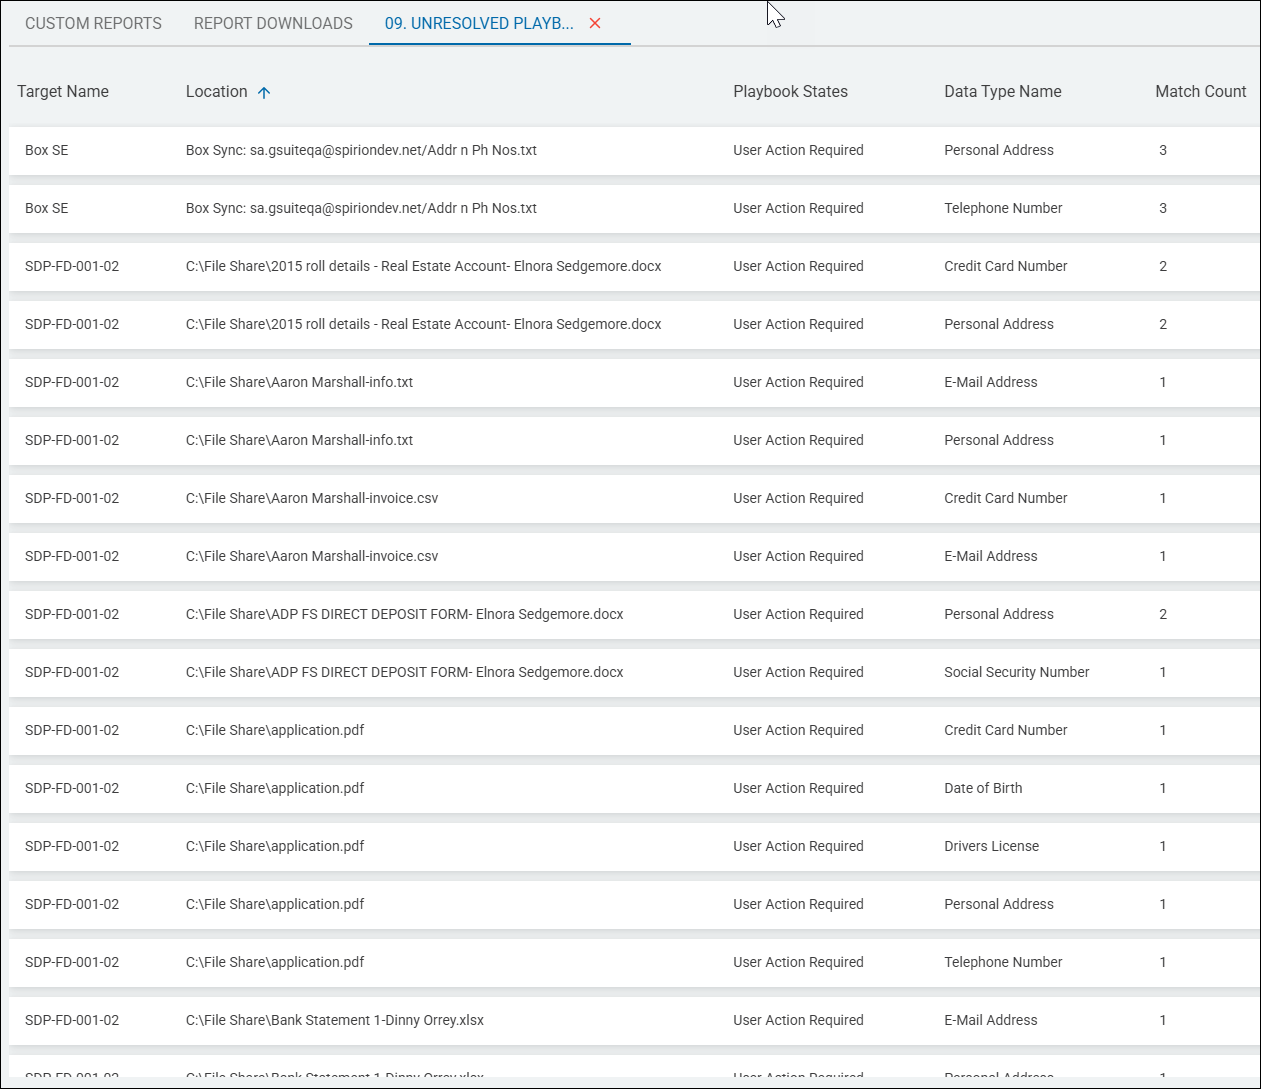
Unresolved Playbooks Report
Locations with incomplete user action/ intervention required (per playbook logic), sorted by Location.
Use the following steps to create a Unresolved Playbooks report:
- From the left side navigation menu, select Reports > Custom Reports.
- The "Custom Reports" page opens.
- In the top right corner click the blue + Add Report button.
- The "Create Report" wizard is displayed.
- On the Basic Information page, provide a name and description that describe what your report will provide. This information can be changed at a later time:
- Name: Enter a descriptive name such as "Age of Locations," or "SSN Location"
- Description: Enter a proper description, such as "Which company laptops contain Social Security numbers."
- Click the Next button.
- The "Columns Setup" page appears.
- The columns and filters you choose next determine what kind of information (Targets, locations, data types, etc.) your report will contain and display in the table on the "Custom Reports" page when viewed.
Columns Setup Page
Set up your columns as follows (all options found under Available Columns on the "Columns Setup" page):
- Endpoints: Target Name
- Header Label: Target Name
- Sort: None
- Aggregate: N/A
- Locations: Location
- Header Label: Location
- Sort: None
- Aggregate: N/A
- Locations: Playbook States
- Header Label: Playbook States
- Sort: None
- Aggregate: N/A
- Matches: Data Type Name
- Header Label: Data Type Name
- Sort: None
- Aggregate: N/A
- Matches: Match Count
- Header Label: Match Count
- Sort: None
- Aggregate: Sum
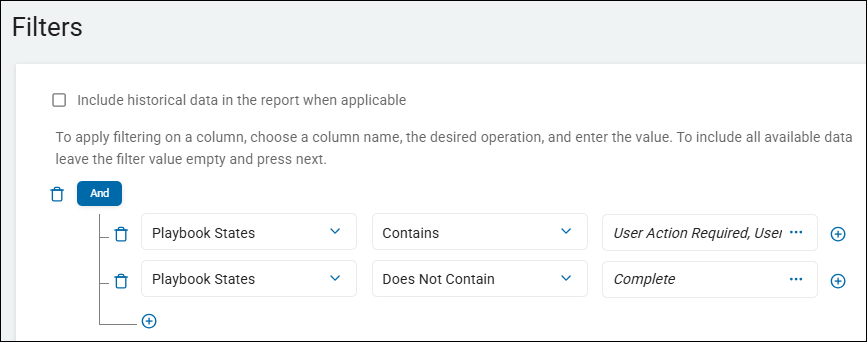
Filters Page
Set both of the following filters on the Filters page:
Note: Both of these filters are required, so the And operator must be used.
- Playbook States
- Contains
- User Action Required
- User Intervention Required
- Playbook States
- Does Not Contain
- Complete
Unresolved Playbooks Filters Example
Set Export Schedule and Finish Report Creation
When the columns and filters for your report have been set, only two pages remain. Continue with the steps below to set the Export Schedule and finish creating the report on the Summary page.
- Click the Next button.
- The Export Schedule page opens.
- Leave the No Schedule (Export manually) option selected to manually run the report. (See How to Use Custom Reports for other scheduling options.)
- Click the Next button.
- The Summary page opens.
- Click the Generate Report Preview to preview your report (optional).
Note: The report preview loads up to 100 rows of data for review. For complex reports this can take several minutes to complete.
- Click the Generate Report Preview to preview your report (optional).
- Click the Finish & Save button to save the report.
View the Report
To view the report perform the following steps:
- Locate the new report in the Custom Reports section.
- Click the kebab menu then click View Report from the sub-menu that appears.
Example Unresolved Playbooks Report
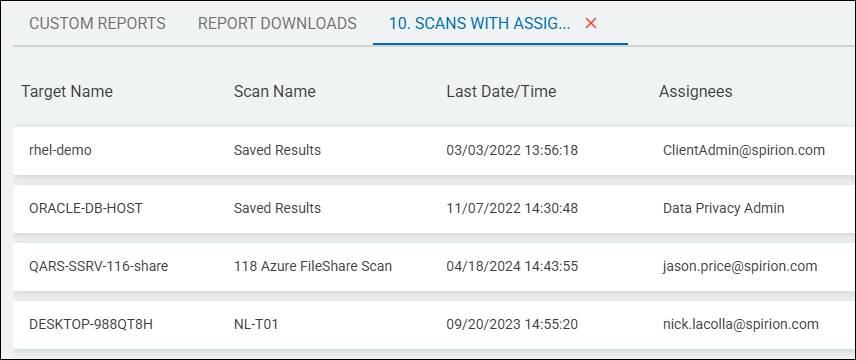
Scans with Assignments Report
Scans with results assigned to Spirion console operators via scan playbooks.
Use the following steps to create a Scans with Assignments report:
- From the left side navigation menu, select Reports > Custom Reports.
- The "Custom Reports" page opens.
- In the top right corner click the blue + Add Report button.
- The "Create Report" wizard is displayed.
- On the Basic Information page, provide a name and description that describe what your report will provide. This information can be changed at a later time:
- Name: Enter a descriptive name such as "Age of Locations," or "SSN Location"
- Description: Enter a proper description, such as "Which company laptops contain Social Security numbers."
- Click the Next button.
- The "Columns Setup" page appears.
- The columns and filters you choose next determine what kind of information (Targets, locations, data types, etc.) your report will contain and display in the table on the "Custom Reports" page when viewed.
- Use the examples below to choose which columns and filters to include in your custom report.
Columns Setup Page
Set up your columns as follows (all options found under Available Columns on the "Columns Setup" page):
- Endpoints: Target Name
- Header Label: Target Name
- Sort: None
- Aggregate: N/A
- Locations: Last Date/Time
- Header Label: Last Date/Time
- Sort: None
- Aggregate: None
- Locations: Assignees
- Header Label: Assignees
- Sort: None
- Aggregate: N/A
- Searches: Scan Name
- Header Label: Scan Name
- Sort: None
- Aggregate: N/A
Filters Page
Set the following filter on the Filters page:
- Assignee Names
- Is Not Empty
Set Export Schedule and Finish Report Creation
When the columns and filters for your report have been set, only two pages remain. Continue with the steps below to set the Export Schedule and finish creating the report on the Summary page.
- Click the Next button.
- The Export Schedule page opens.
- Leave the No Schedule (Export manually) option selected to manually run the report. (See How to Use Custom Reports for other scheduling options.)
- Click the Next button.
- The Summary page opens.
- Click the Generate Report Preview to preview your report (optional).
Note: The report preview loads up to 100 rows of data for review. For complex reports this can take several minutes to complete.
- Click the Generate Report Preview to preview your report (optional).
- Click the Finish & Save button to save the report.
View the Report
To view the report perform the following steps:
- Locate the new report in the Custom Reports section.
- Click the kebab menu then click View Report from the sub-menu that appears.
Example Scan with Assignment Report