
How to Quarantine OneDrive Files
Overview
Spirion highly recommends using Quarantine in an enterprise environment to protect sensitive data. Once your scans have discovered sensitive data on a OneDrive location (Target) in your environment, you can choose to quarantine that sensitive data to a different location.
- Use the steps in this article to use Spirion Sensitive Data Platform to quarantine the sensitive data discovered by your scans on your Microsoft OneDrive targets - there are a number of different scenarios available
- Quarantine is one of the remediation options available in scan playbooks.
Supported Quarantine Scenarios
Spirion supports the following scenarios when quarantining OneDrive files:
- OneDrive Target to OneDrive account
- In this scenario files from your OneDrive Target are quarantined to another, different OneDrive account
- Windows and Linux Spirion Agents support this scenario
- OneDrive account to Spirion Agent machine
- In this scenario files from your OneDrive Target are quarantined to the Spirion Agent machine which scans the OneDrive Target
- Windows, Mac, and Linux Spirion Agents support this scenario
- OneDrive account to Windows File Server
- In this scenario files from your OneDrive Target are quarantined to a local or remote (Windows) File Server
Before You Start
- The quarantine path is case sensitive
OneDrive for Business Requirements
- Minimum requirement for scanning Microsoft OneDrive for Business:
- Active Office 365 E1 license
- User Account must have Admin priveleges
- The account must be provisioned before attempting to quarantine
- To provision an account for Office 365 E1, a global administrator must assign a valid E1 license in the Microsoft 365 admin center under Billing > Your products.
- This activates web/mobile apps, Exchange email, and Microsoft Teams.
- Ensure sufficient licenses are available and allow time for Azure Active Directory to synchronize
How to Configure the Quarantine Settings in Spirion Sensitive Data Platform
Note: For OneDrive Targets that authenticate using the user-configured Azure app, this requires version 13.5 or later agents. If you attempt to use this method with Agents earlier than version 13.5, an EPS failure occurs requiring the reboot of the machine or manual intervention.
Supported Scenarios and Paths
OneDrive Target to OneDrive account
- This scenario quarantines the sensitive data discovered on your OneDrive target to the OneDrive account configured in global settings
- Windows and Linux Spirion Agents support this scenario
- You do NOT need to set a quarantine path in the Scan Playbook used to scan your OneDrive target.
Use the following steps to configure the Microsoft OneDrive quarantine settings:
- From the left side navigation menu, navigate to Settings > Application Settings.
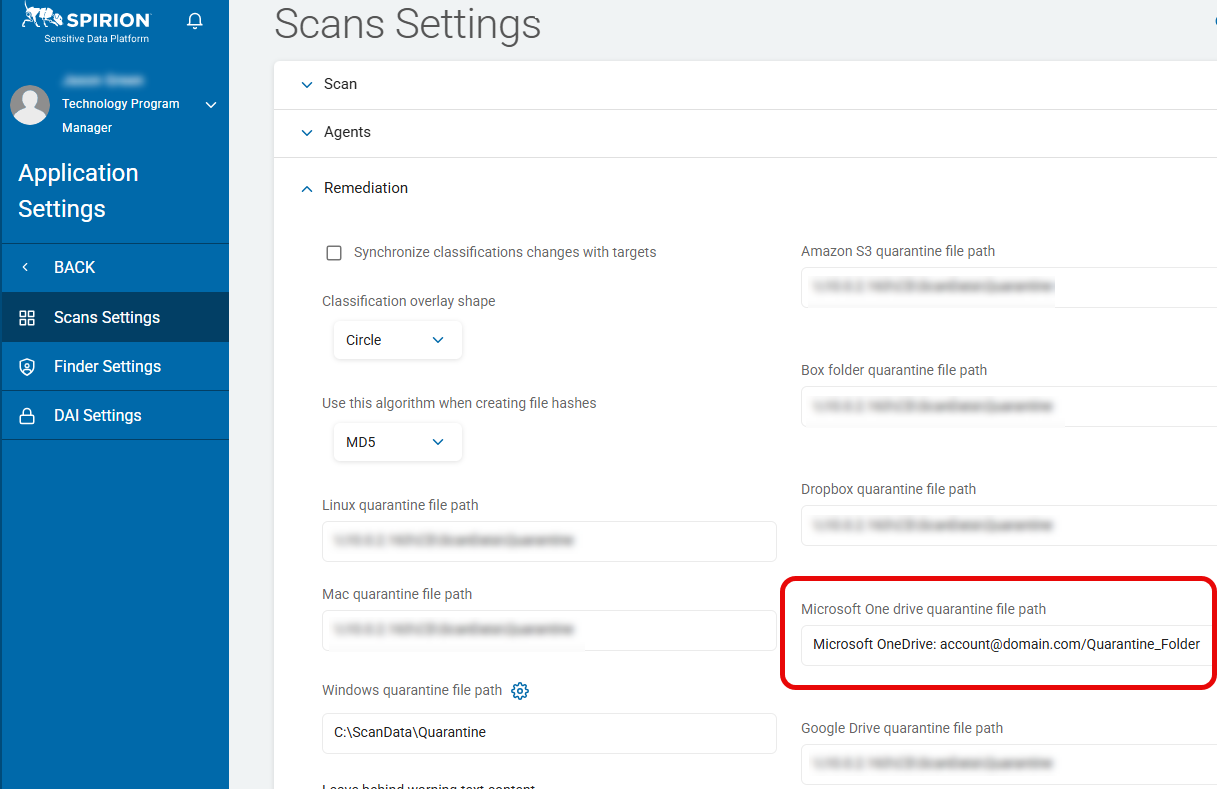
- Expand the Remediation section.
- In the field "Microsoft OneDrive quarantine file path" specify the default OneDrive location to use to quarantine files discovered by Spirion Agents used by Spirion scans.
- Quarantines sensitive data found in the Target OneDrive account to the specified quarantined OneDrive account.
- The settings below are for the OneDrive account you are quarantining your files to.
- Settings for the OneDrive Target account that contains the files you wish to quarantine are set in the OneDrive Target. Note: Existing Targets, including OneDrive Targets can be found under Data Asset Inventory > Data Assets and Targets > TARGETS tab.
- The quarantine file path is entered in the following format:
- Microsoft OneDrive: <user account>@domain.com/Quarantine_Folder
- <user account> is the specified OneDrive user account
- Example: Microsoft OneDrive: jsmith@spirion.com/OneDriveQuarantine
- In this scenario, the scan of your OneDrive Target quaratines the sensitive data it finds to the OneDrive quarantine folder you specify in the field "Microsoft OneDrive quarantine file path" on the Scans Settings page.
OneDrive Target to Spirion Agent Machine
- In this scenario, your scan quarantines sensitive data found in your OneDrive target to the Spirion Agent machine performing the scan.
- Spirion Agents can reside on a local workstation, server, VM, etc.
- Windows, Mac, and Linux Spirion Agents support this scenario
- In this scenario, pay careful attention to the Spirion Agent you use to scan OneDrive Target(s)
- This scenario requires that you set the Spirion Agent quarantine path in the Scan Playbook used by your OneDrive scan
Procedure:
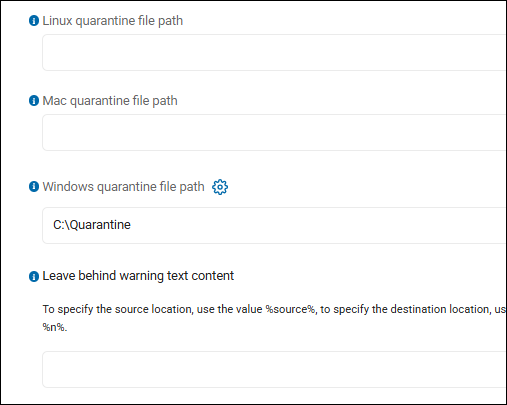
- On the Scans Settings page (Settings > Application Settings > Scans Settings), expand the "Remediation" section.
- In the field "Windows Quarantine File Path," enter the path to use on the machine running the Spirion Agent you use to scan your OneDrive target:
- Format: Uses standard file system paths
- Example: E:\Quarantine
- The Scan Playbook used by the scan must be configured with the same quarantine path ("C:\Quarantine" in the example above).
- From the left side navigation menu select Scans > Scan Playbooks.
- For an existing playbook, select "Manage Playbook" from the 3 dot options menu at the end of the table row. To create a new Scan Playbook select the + Add Playbook button in the top right corner of the page.
- Ensure there is a Quarantine action in your Scan Playbook. For more about Scan Playbooks, see How to Add a New Scan Playbook.
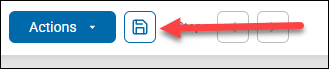
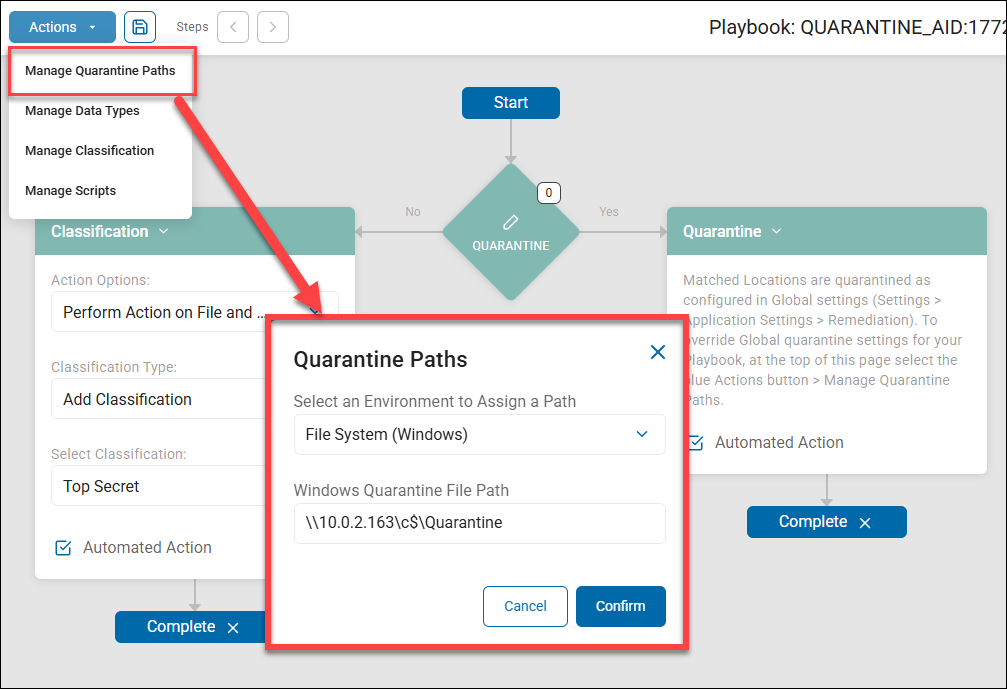
- Set the quarantine path for this Scan Playbook to use. Click the Actions button in the top left corner of the page, select "Manage Quarantine Paths" from the drop-down menu.
- The "Quarantine Paths" pop-up window opens.
- Under "Select an Environment to Assign a Path" select "File System (Windows)."
- Under "Windows Quarantine File Path" enter the file system path to use, such as "c:\quarantine."
- In the example below, a Quarantine Scan Playbook, used by OneDrive scans, is configured with a file system path to use for quarantine.
- Click the Save button to save your Scan Playbook.

OneDrive Target to Local or Remote (Windows) File Server
- In this scenario sensitive data found on your OneDrive target is quarantined to a local or remote Windows server
- In both Local and Remote Windows file server quarantine scenarios the path to the Windows File server must be defined in the Scan Playbook used by your OneDrive scans
Local Windows File Server
Procedure:
- On the Scans Settings page (Settings > Application Settings > Scans Settings), expand the "Remediation" section.
- In the field "Windows quarantine file path," enter the path to the local Windows file server:
- Format: \\FileServer\Quarantine
- Example: \\Windows11Server\OneDriveQuarantine
- The local Windows server quarantine path is defined in the Scan Playbook used by OneDrive scans.
- From the left side navigation menu select Scans > Scan Playbooks.
- For an existing playbook, select "Manage Playbook" from the 3 dot options menu at the end of the table row. To create a new Scan Playbook select the + Add Playbook button in the top right corner of the page.
- Ensure there is a Quarantine action in your Scan Playbook. For more about Scan Playbooks, see How to Add a New Scan Playbook.
- Set the quarantine path for this Scan Playbook to use.
- Click the Actions button in the top left corner of the page
- Select "Manage Quarantine Paths" from the drop-down menu.
- The "Quarantine Paths" pop-up window opens.
- Under "Select an Environment to Assign a Path" select "File System (Windows)."
- Under "Windows Quarantine File Path" enter the UNC path to use.
- Format: \\FileServer\Quarantine
- Example: \\Windows11Server\OneDriveQuarantine
- Click the Save button to save your Scan Playbook.
Remote Windows File Server
Procedure:
- On the Scans Settings page (Settings > Application Settings > Scans Settings), expand the "Remediation" section.
- Leave the field "Windows quarantine file path" blank.
- As part of the quarantining process, the Spirion Agent must authenticate to the remote Windows file server. The remote Windows file server must be set as a Target in Spirion Sensitive Data Platform.
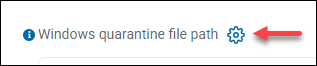
- Click the sprocket icon next to the "Windows quarantine file path" text.
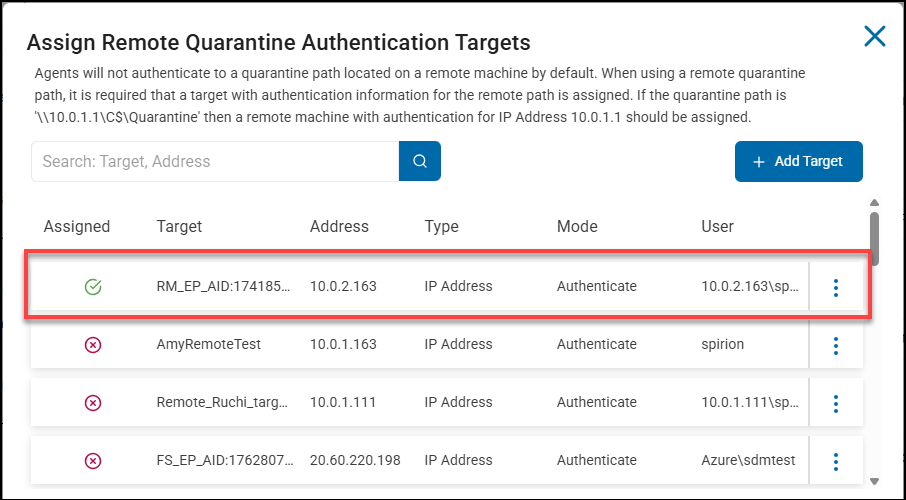
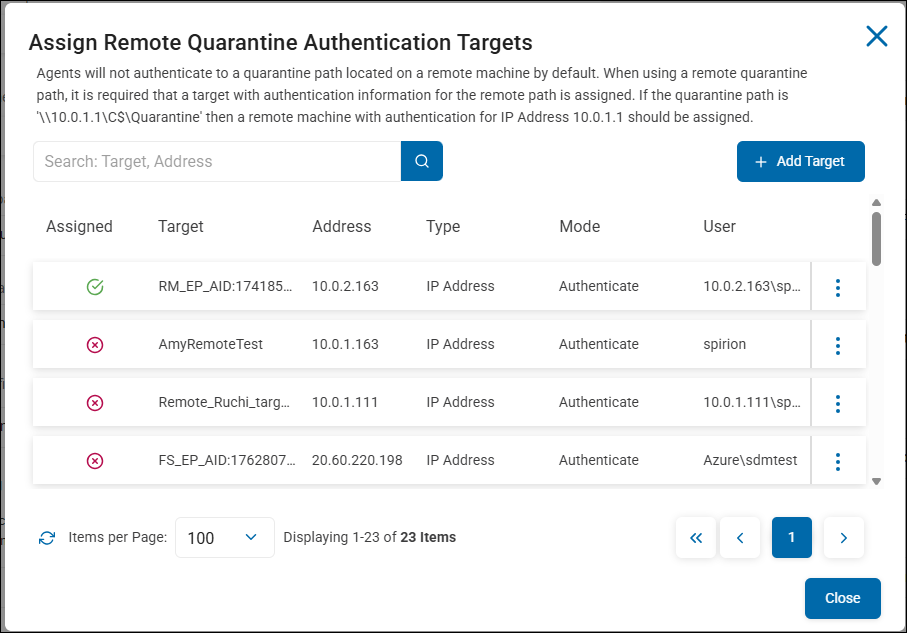
- The "Assign Remote Quarantine Authentication Targets" window opens.
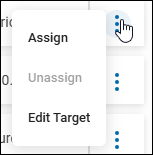
- If your remote Windows file server exists (as a Target), select it by setting it as "Assigned." This is done using the 3 vertical dot options menu for the entry in this window
- If your remote Windows file server does not exist (as a Target), click the + Add Target button in the top right corner and enter the necessary information. Set the remote Windows server as "Assigned." This is done using the 3 vertical dot options menu for the entry in this window.
- If your remote Windows file server exists (as a Target), select it by setting it as "Assigned." This is done using the 3 vertical dot options menu for the entry in this window
- The remote Windows server quarantine path is defined in the Scan Playbook used by a OneDrive scan.
- From the left side navigation menu select Scans > Scan Playbooks.
- For an existing playbook, select "Manage Playbook" from the 3 dot options menu at the end of the table row. To create a new Scan Playbook select the + Add Playbook button in the top right corner of the page.
- Ensure there is a Quarantine action in your Scan Playbook. For more about Scan Playbooks, see How to Add a New Scan Playbook.
- Set the quarantine path for this Scan Playbook to use. Click the Actions button in the top left corner of the page, select "Manage Quarantine Paths" from the drop-down menu.
- The "Quarantine Paths" pop-up window opens.
- Under "Select an Environment to Assign a Path" select "File System (Windows)."
- Under "Windows Quarantine File Path" enter the address of the remote Windows server.
- Format: \\<IP_address>\<drive_letter>$\<Folder>
- Example: \\10.0.2.163\c$\Quarantine
- In the example below, a Scan Playbook, used by OneDrive scans, is configured with a quarantine path. This quarantine path assigns a remote Windows File System (file server) and defines the path to the quarantine folder on the remote server.
- Click the Save button to save your Scan Playbook.
How to Troubleshoot a Failed Quarantine
The following topic can help you troubleshoot a failed quarantine.
How to Verify Quarantine Settings
- Ensure your quarantine settings are correct and accurate: locations, server names, quarantine paths, user account names, etc.
- If you are quarantining to a remote Windows file server ensure authentication to the file server is configured correctly.
- Authentication settings for remote Windows servers are configured on the Scans Settings page (Settings > Application Settings > Scans Settings, Remediation section, Windows quarantine file path, sprocket icon). For more information see How to Use Remediation Settings
How to Ensure Debug Logging is Enabled
- Enable Debug logging and then run a scan.
- This produces a message at the end of the search that tells you if a Quarantine is successful or if it failed and why.
How to Enable Logging in Windows
To enable this logging on a Windows Machine use the following sub-topics.
How to Create a System Setting Named logLevel
In Windows, create a system setting in the local registry of the system that is experiencing the issue by following these steps:
- In Microsoft Windows, create a system setting by editing the local registry of the system that is experiencing the issue by following these steps:
- Launch the Windows registry editor.
- Navigate to or create the following path:
- For 32-bit Windows:
HKEY_LOCAL_MACHINE\Software\Identity Finder\Endpoint Service\ - For 64-bit Windows:
HKEY_LOCAL_MACHINE\Software\Wow6432Node\Identity Finder\Endpoint Service\
- For 32-bit Windows:
- Create a setting named logLevel (case sensitive) of type REG_DWORD.
- Set the value to the desired level:
- Informational messages, set the value to 1.
- Debugging messages, set the value to 2.
- Detailed trace messages, set the value to 3.
- All messages, set the value to 4.
- Restart the Identity Finder Endpoint Service by accessing Services via Control Panel/Computer Management or by rebooting the system.
- Because there is no command console attached to the service, the messages are written to the endpoint service log, which by default is located at the following path:
%ProgramData%\Identity Finder\Logs\EPS\endpointservice.log
Note: After obtaining the desired information and resolving the issue, it is critical to delete this setting or set it to a value of 0 to disable verbose logging or else the log file may consume large amounts of disk space.
- You can enable verbose EPS logging also via command line with the following three commands which can be put in a batch file.
- Run these commands from a command prompt opened as admin.
reg add "HKLM\SOFTWARE\WOW6432Node\Identity Finder\Endpoint Service" /v logLevel /t REG_DWORD /d 4 /fnet stop "spirion endpoint service"net start "spirion endpoint service"
How to Use GraphAPI to Confirm Permissions
To determine if the service account being is correct:
- Check the end of the search log for an error stating access is denied (wrong service account used).
- For a complete guide on using graph explorer: Troubleshooting Exchange Online Using Graph Explorer – Spirion Support Portal