
How to Assign a Policy
Use the instructions in this article to assign a policy to a Spirion Agent.
How to Assign Policy to an Agent
Use the following steps to assign an Agent policy:
- From the left side navigation menu select Agents.
- The Agent Management page opens.
- Selec the appropriate Agent "Tag" (collection of Agents) to populate the table on the page with Agent details.
- Locate the Agent you want to manage.
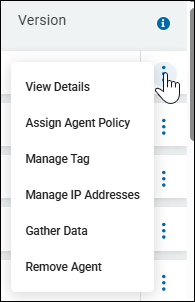
- On the far right of the row, click the more options menu.
- Click Assign Agent Policy.
- The Assign Agent Policy pop-up window opens. Select an Agent policy.
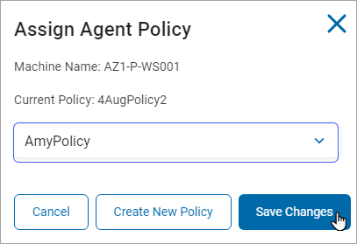
- Click the Save Changes button to save the changes
- Click Create New Policy if you wish to create a new policy on the Policies screen
- Click the Cancel button to discard any changes.
- See Working with Policies for more information on adding/creating a policy
Temp Files
The Agent Operation settings use the Temp File Location if it has an assigned value.
The file location must have a Windows file path and cannot be a mapped network drive.
Set up Temp File options for clean-up either:
- To begin shredding temp files immediately or delay until the scan is complete.
- To asynchronously shred temp files, or shred in sync with the scan.
When scanning, compressed files can be downloaded to the Temp File.
- To save processing time, the compressed file is decompressed one file at a time and the same set of decompressed files are used for each discovered location.
- The file will not be compressed or decompressed again.
- The Temp File is shredded intermittently to limit space usage and processing time.