
How To Configure Single Sign-On (SSO) using Okta Identity Management
Before You Start
Required Fields
- When filling out user mapping the fields Id, Username, and Email all show a red star next to them to indicate these are required fields.
- Contact email, first name, and last name are also required fields.
- Do not click the slider to enable Single Sign On until you are finished with this process.
Okta is a cloud-based identity and access management (IAM) company that provides a platform to manage user identities and control access to applications and resources. It helps organizations secure their systems by verifying user identities, automating user lifecycles, and providing features like single sign-on (SSO) and multifactor authentication (MFA) to improve security and productivity.
How to Set Up Single Sign-On (SSO) with Okta
How to Enable the Module
Procedure:
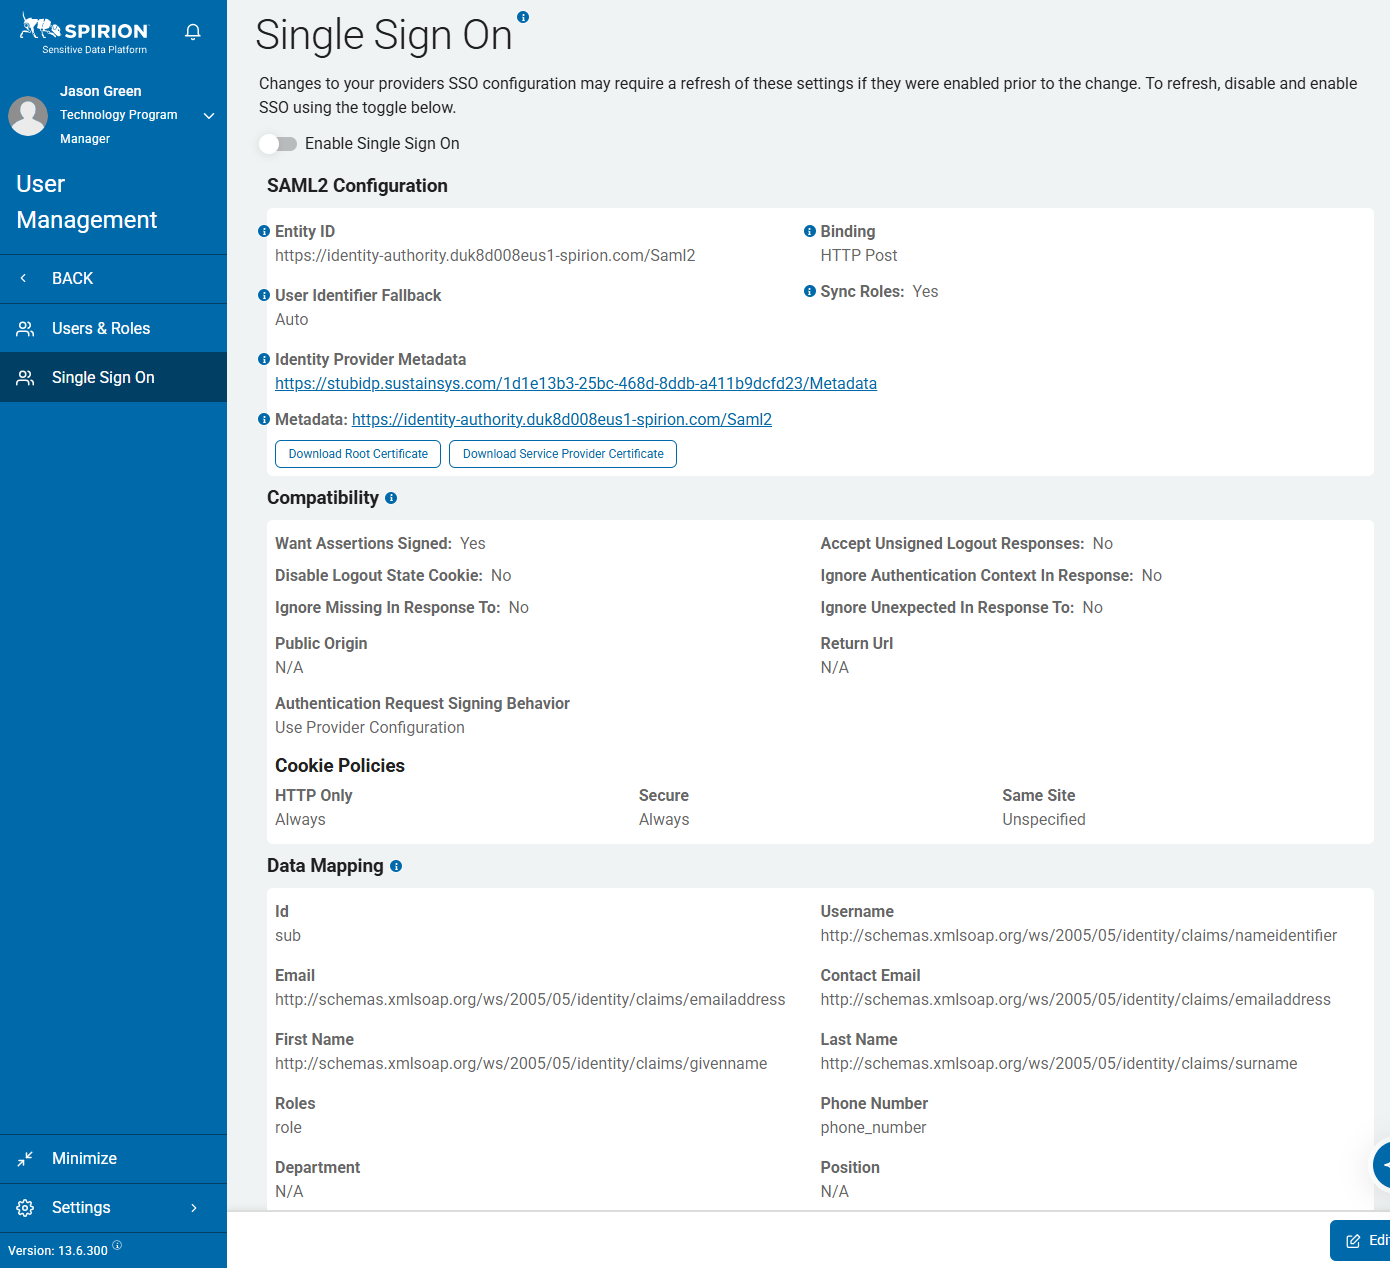
- In Spirion Sensitive Data Platform, in the blue navigation menu on the left side of the page, navigate to Settings > User Management > Single Sign On.
- At the top of the page, set the Enable Single Sign On slider to the left - disabled (grey) - until the very end of the process.
- This setting enables and disables SSO functionality.
- We recommend leaving this disabled until all settings are configured.
- Select the blue Edit button on the bottom right of the screen to configure Single Sign On with Okta.
How to Set Up an Okta App
Procedure:
- Navigate to your Okta admin page.
- Select Applications from the left and side of the screen.
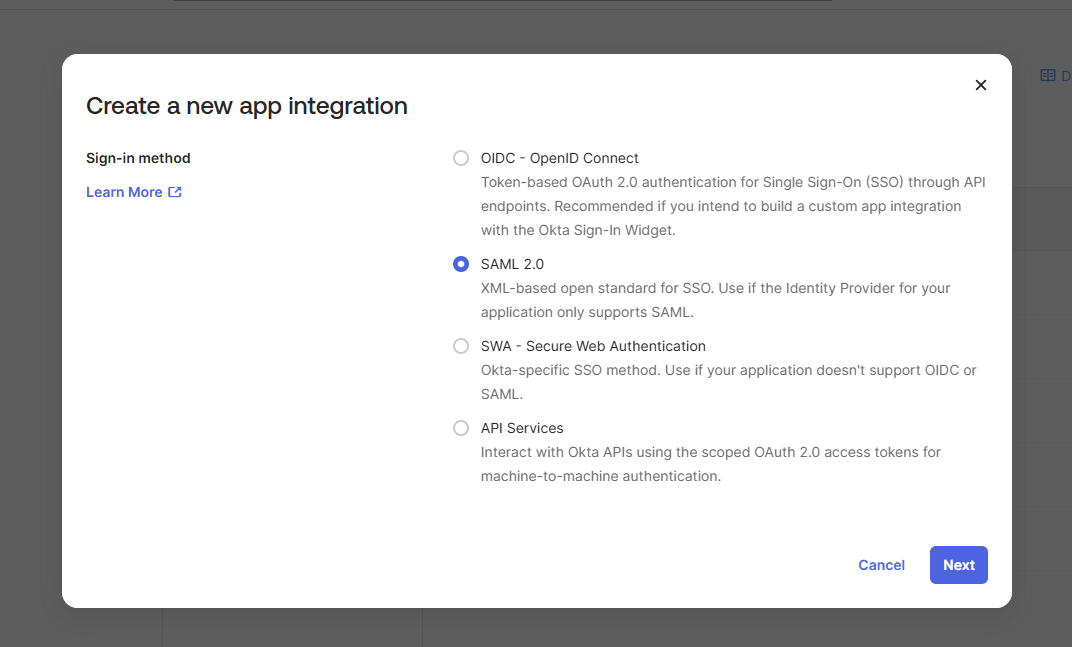
- Select create new app integration.
- Select the SAML 2.0 radio button from the list in the pop-up menu.
- Click Next.
- Enter a name for the SAML Integration App.
- In this example, we are using SpirionSSO.
- You may add a logo and hide the app on this screen if you wish.
- Click Next.
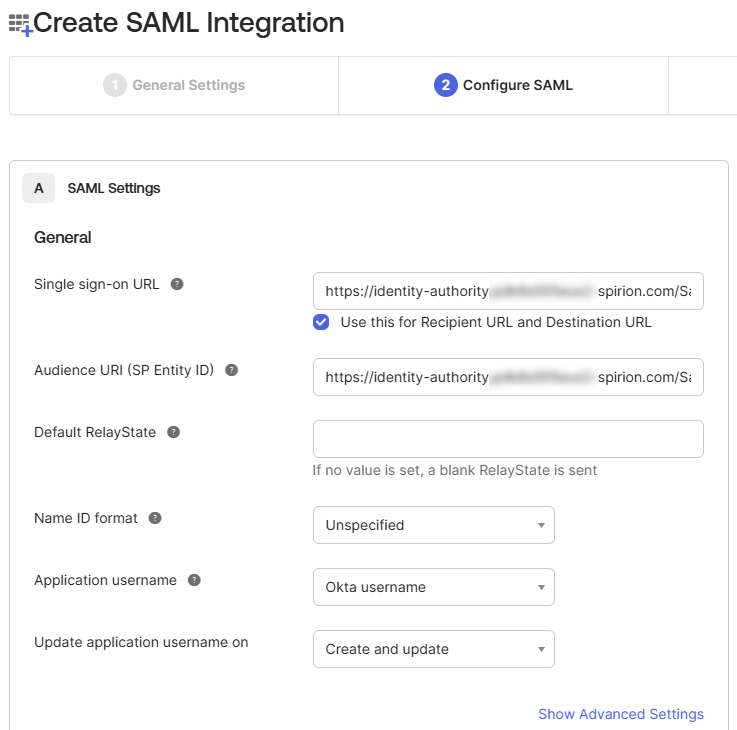
- Open the Sensitive Data Platform console in another browser window.
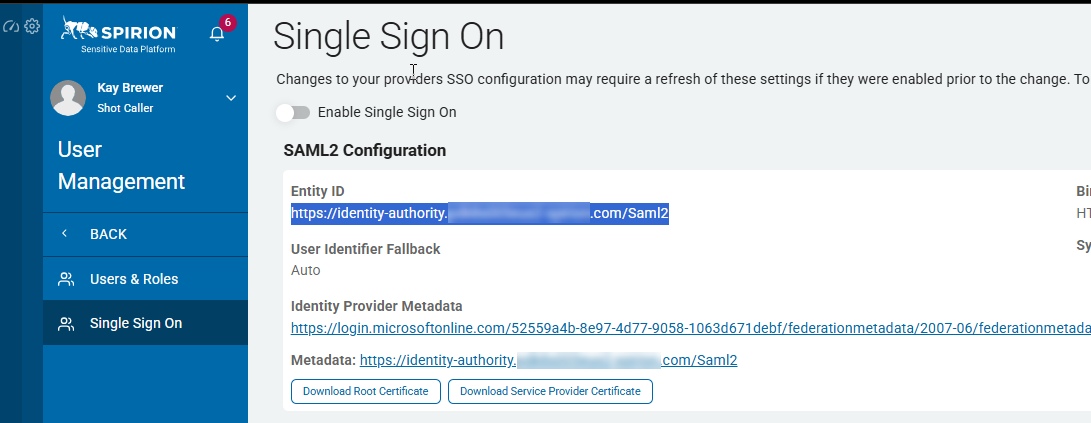
- Navigate to Settings > User Management > Single Sign On.
- Copy out the URL from the Entity ID section.
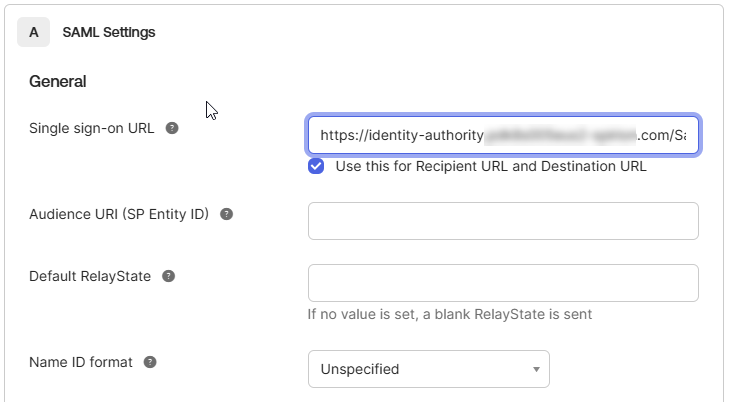
- Paste the URL into the Single sign-on URL box and add
/ACSto the end of the URL. - Paste the URL again into the Audience URI field.
- Other settings can remain as default. However, some organizations may require these settings to be filled in in a specific way. Consult your Okta Admin just in case.
How to Map Okta Data to Spirion Sensitive Data Platform SSO
Okta breaks up the data mapping into two sections.
- Section One is the Attribute statements
- Section Two is for Groups
Attribute Statements
The following table shows the matching of the attributes from the Spirion Console to Okta.
These mappings can change from organization to organization with exception of ID URI which must be http://schemas.microsoft.com/identity/claims/objectidentifier and must be mapped to user.id as shown in the bottom filed.
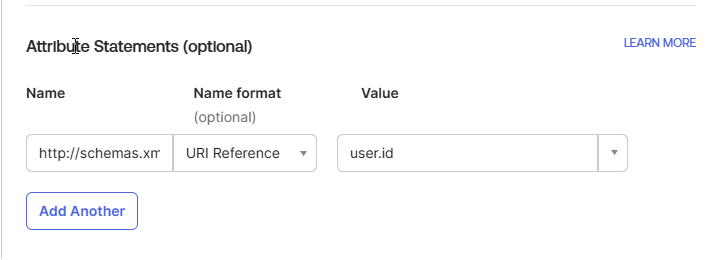
When filling out the Okta Statements the URI goes in the name field, the Name Format is always going to be URL Reference, and the Value is from the column Okta Value in the table below. Below the table is an example entry.
| Sensitive Data Platform Console Attribute Name | URI of the Attribute (Name field on the Okta Attribute Statement screen) | Okta Value |
|---|---|---|
| Id | http://schemas.microsoft.com/identity/claims/objectidentifier | user.id |
| Username | http://schemas.xmlsoap.org/ws/2005/05/identity/claims/nameidentifier | User.displayname |
| http://schemas.microsoft.com/ws/2008/06/identity/claims/emailaddress | user.email | |
| Contact Email | http://schemas.microsoft.com/ws/2008/06/identity/claims/emailaddress | user.email |
| First Name | http://schemas.xmlsoap.org/ws/2005/05/identity/claims/givenname | user.firstName |
| Last Name | http://schemas.xmlsoap.org/ws/2005/05/identity/claims/surname | user.lastName |
| Phone Number | http://schemas.microsoft.com/ws/2008/06/identity/claims/phone | user.primaryPhone |
| Department | http://schemas.xmlsoap.org/ws/2005/05/identity/claims/department | user.department |
| Position | http://schemas.microsoft.com/identity/claims/jobtitle | user.title |
| Address | http://schemas.microsoft.com/ws/2008/06/identity/claims/location | user.postalAddress |
Example Entry
Group Attribute Statements
The only attribute that goes into the Group Attribute Statement is for Spirion user Roles.
The URI that populates the names field for this is: http://schemas.microsoft.com/ws/2008/06/identity/claims/groups
- The filter is for the Group(s) that your organization set up in Okta that it would like to have access to Spirion Sensitive Data Platform (SDP).
- You can have more than one filter.
- For roles to be assigned to Users in Spirion Sensitive Data Platform they must be a part of an OKTA group that has been assigned to the SSO app.
- For example, if you already have a group created that you want to use, just assign them to the SSO app, or create a new group and add it to the SSO app.
- Every user added to the group inherits those permissions.
- Next, define the group settings by picking a filter that will be easiest to associate to your groups.
- The options are as follows:
- Starts with
- Equals
- Contains
- Matches regex
- For more information on Groups and mapping see: Define group attribute statements | Okta Identity Engine
Group Attribute Example

- Once this is complete, click Next.
Feedback
This page is optional and not required.
- However, support recommends putting this guide in the supported documentation box just in case you need it for future reference.
- Select the radial button that this is an internal app and click Finish.
How to Link Okta with Spirion Sensitive Data Platform
Procedure:
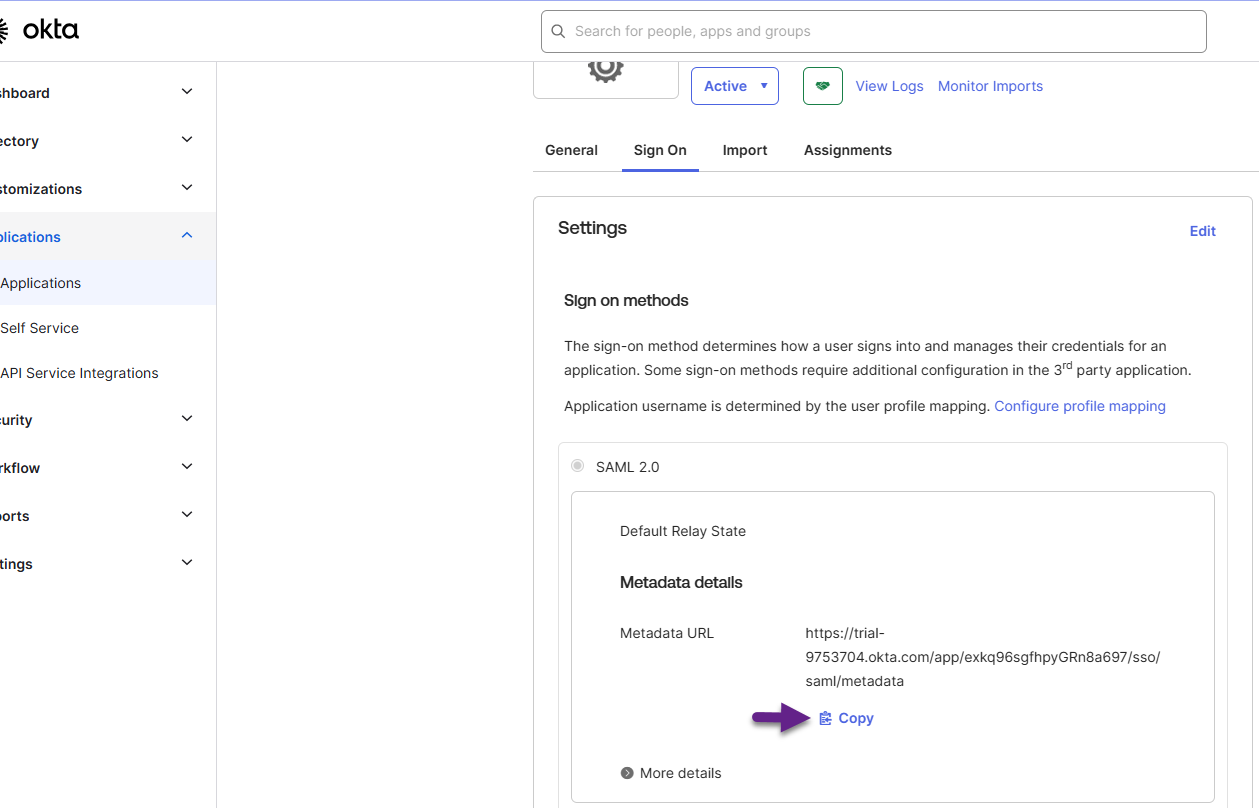
- In Okta, on the left side navigation menu, click Applications.
- Click the Application made in the previous section.
- In our example, it would be called SpirionSSO
- Click Sign On from the ribbon in the middle of the screen.
- Click the blue Copy link under the Metadata URL in the SAML 2.0 box under Settings.
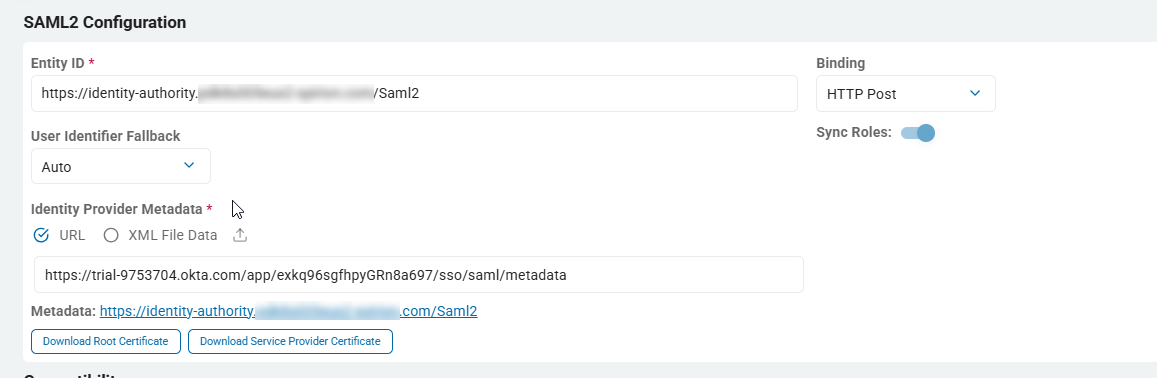
- Paste this URL into the box under Identity Provider Metadata in the Sensitive Data Platform console.
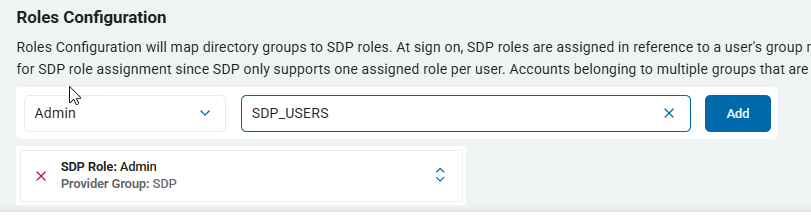
How to Configure Roles
The Roles Configuration section maps Okta directory groups to Spirion Sensitive Data Platform user Roles.
- To configure this section, refer to the Group Attribute that was set up under the Group Attribute Statements section.
- Select the Spirion Sensitive Data Platform Role from the combo box on the left
- Type the Okta Group name into the box on the right.
- If you have more than one group do this for EACH Okta Group that was specified under the Group Attribute Statements.
How to Complete Single Sign-On in Spirion Sensitive Data Platform
Procedure:
- Once all fields in the sections above are finished click Save.
- Slide the bar for Enable Single Sign On to the right so that it is blue
- Single Sign-On configuration with Okta is now complete.