
How to Add Jira Cloud as a Target using the Spirion AnyScan (CData) Connector
Overview
To scan a Jira Cloud source via the Spirion AnyScan (CData) Connector, you must follow a 4-step process:
- Install the CData ODBC Jira driver
- Configure the CData ODBC Driver for Jira
- Test the Jira Cloud connection string
- In the Spirion Console, create and configure a Jira Cloud Target and scan the Target
Note: CData connectors cannot be used for Linux or Mac Agents. Linux and Mac Agents typically are supported only for scanning their own drives or other connected Linux-based file systems.
Note: Local CData documentation for Jira can be found on your Windows Agent at: file:///C:/Program%20Files/CData/CData%20ODBC%20Driver%20for%20Jira/help/help.htm
Prerequisites
- Windows Agent: AnyScan connectors are only supported on Windows Agents.
- CData Jira Driver: You must have the
System_CData_Jiraexecutable provided by Spirion. - Note: the CData Jira Driver is provided at additional cost. It is not included as part of Spirion Sensitive Data Platform.
- Firewalls: If the Agent machine is behind a restrictive firewall, ensure it has outbound access to
*.atlassian.neton port 443. - Jira Credentials: You need the following:
- Your Jira Cloud URL
- A valid User Email
- A Jira API Token
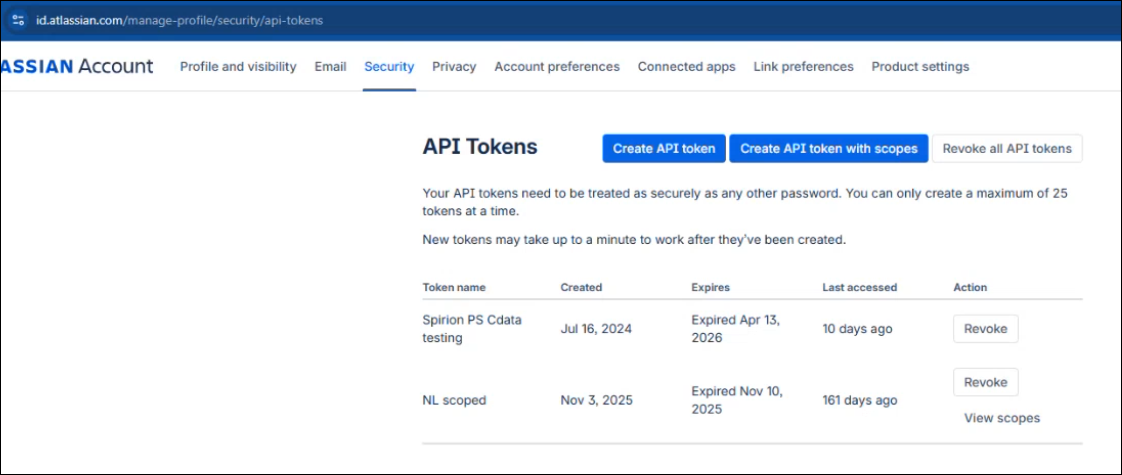
- To create an API token:
- Log into your Atlassian account
- Go to Security > Create and manage API tokens.
- You can also use the following URL: https://id.atlassian.com/manage-profile/security/api-tokens
- Click the Create API token button and follow the prompts provided.
- Pay careful attention to the token's expiration date. This can affect the future function of your Jira Cloud CData ODBC connector.
About the Jira Cloud DSN Connection
When using the Spirion AnyScan (CData) connector for Jira Cloud, you must configure a DSN (Data Source Name) connection via the ODBC Data Source Administrator (64-bit) on the Windows machine that contains the Agent you plan to scan with.
- Typically, user environments require multi-factor authentication (MFA) which requires a DSN because the CData data driver has a mechanism to refresh the token as it updates.
Structure of a Jira Cloud DSN Connection
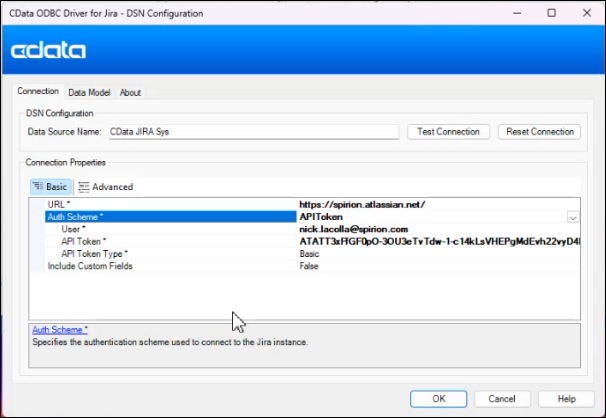
A standard DSN configuration for the CData Jira driver requires the URL, User, and API Token, as shown in the DSN Configuration window below.

Breakdown of Parameters
- URL: This is the base URL of your Jira Cloud instance. It must include the https:// prefix.
- User: The e-mail address associated with the Atlassian account that generated the API token.
- APIToken: This is the 24-character (approximately) token generated from the Atlassian ID security settings.
- Do not enter your password here
- Jira Cloud authentication requires an API Token for external connectors
Example
When you enter the DSN connection string into the Connection String field within the Spirion Sensitive Data Platform "Create New Scan Wizard" (assuming the CData driver is already installed on the Agent), it resembles the following:
Provider=ODBCSQLAPI;DB Name=CData JIRA Source;DB Type=1;Username=myemail@companyname.com;Password=mypassword;
Advanced Connection Properties
Depending on the size of your Jira instance or security requirements, you might add these optional parameters to the string:
- Pagesize: Controls how many rows are fetched per API request. (Default is usually 100).
- Example: ...APIToken=xyz;Pagesize=500;
- SupportCustomFields: Set to True if you want Spirion to scan data inside custom Jira fields.
- Example: ...APIToken=xyz;SupportCustomFields=True;
- PseudoColumns: Use if you need to filter by specific Jira-specific metadata that isn't a standard table column.
- Example: ...APIToken=xyz;PseudoColumns="*";
Critical Reminder
- Driver Dependency: This connection string works only if the
System_CData_Jiradriver is installed on the specific Windows Agent machine running the scan. - 64-Bit: Spirion is a 64-bit application. Ensure that when you test this via the ODBC Administrator on the local machine, you are using the 64-bit version (located at
C:\Windows\System32\odbcad32.exe). - Security: Because this string contains a plain-text API Token, ensure that only authorized Spirion administrators have access to view the Scan Task configuration in the Console.
Step 1: Install the CData Jira Driver
- Log onto the Windows machine where the Spirion Agent is installed.
- Run the CData ODBC Jira Driver installer (for example,
Jira.exe). - Follow the prompts to complete the installation.
- You may need to provide the license key provided by Spirion during this step.
Step 2: Configure the ODBC Data Source (DSN)
The Spirion Agent uses a System DSN to communicate with Jira.
Use the steps below to add and configure the ODBC data source:
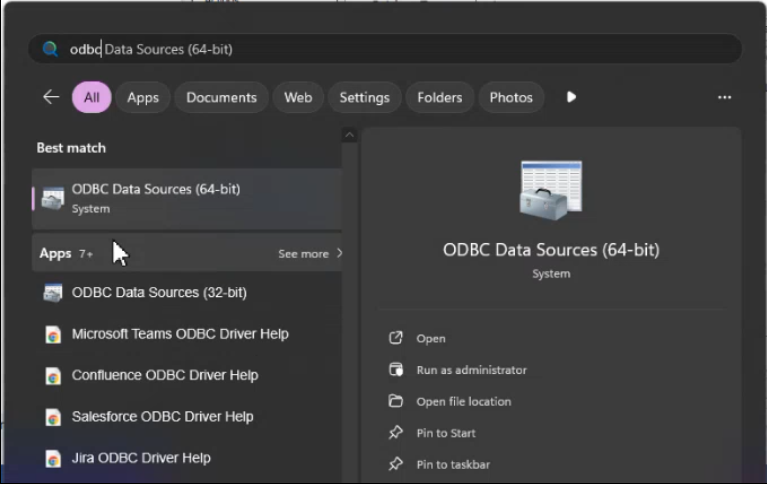
- From the Windows start menu type "ODBC Data Sources" to locate and open the ODBC Data Source Administrator (64-bit) on the Windows Agent machine.
- The ODBC Data Source Administrator (64-bit) program opens.
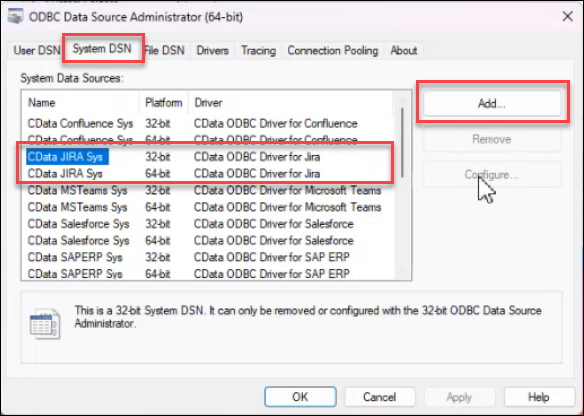
- Navigate to the System DSN tab and click the Add button.
- Note: In the screenshot below the CData ODBC Jira drivers are shown under "System Data Sources" for sample purposes. When you add the "CData ODBC Driver for Jira" both 32-bit and 64-bit drivers are installed.
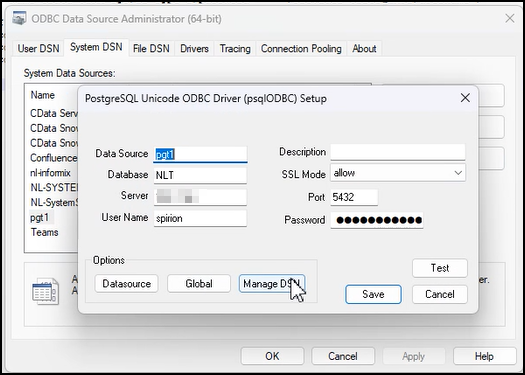
- Other ODBC Database drivers can be installed using the ODBC Data Source Administrator (64-bit) program. In the example below, PostgreSQL is shown.
- Other ODBC Database drivers include IBM Informix, shown below:
- Note: In the screenshot below the CData ODBC Jira drivers are shown under "System Data Sources" for sample purposes. When you add the "CData ODBC Driver for Jira" both 32-bit and 64-bit drivers are installed.
- Select CData ODBC Driver for Jira from the list and click the Finish button.
- Select your CData Jira entry from the list of System Data Sources and click the Configure button on the right side of the window.
- The CData ODBC Driver for Jira window opens.
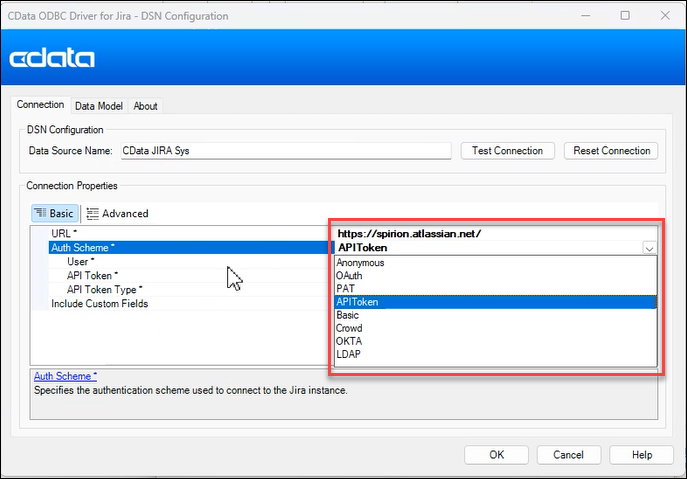
- In the configuration window, (Connection tab selected) enter the following:
- Data Source Name: Enter a recognizable, descriptive name (for example,
JiraCloud_Spirion). Record this name. You enter this name in the field "Database Name in the Spirion Client GUI," below. - URL: Enter your Jira Cloud instance URL (for example,
https://yourcompany.atlassian.net) - User: Enter your Jira login email address.
- API Token: Enter the API Token you generated in Jira as instructed in the Prerequisites topic, above.
- Note that other Authentication methods are available, if you so desire.
- Data Source Name: Enter a recognizable, descriptive name (for example,
- Click the Test Connection button in the top right part of the window to ensure the driver can reach Jira Cloud.
- Click OK at the bottom of the window to save the DSN connection.

Step 3: Create and Test the Connection String
To test your Jira Cloud database (via ODBC) connection string using the Spirion Client GUI, use the steps below:
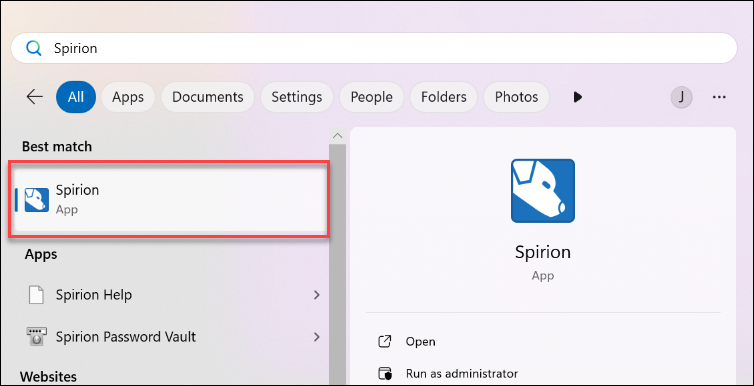
- From the Windows start menu, enter "Spirion" to launch the Spirion Client GUI.
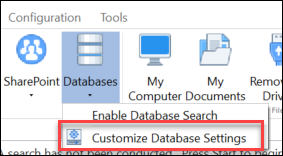
- Click the Locations tab.
- Click the Databases drop-down and then Customize Database Settings.
- The Settings window opens.
- Select "Databases" from the left side menu.
- Under "Database Type" select "Other via ODBC."
- Click the Configure button to the right of the field.
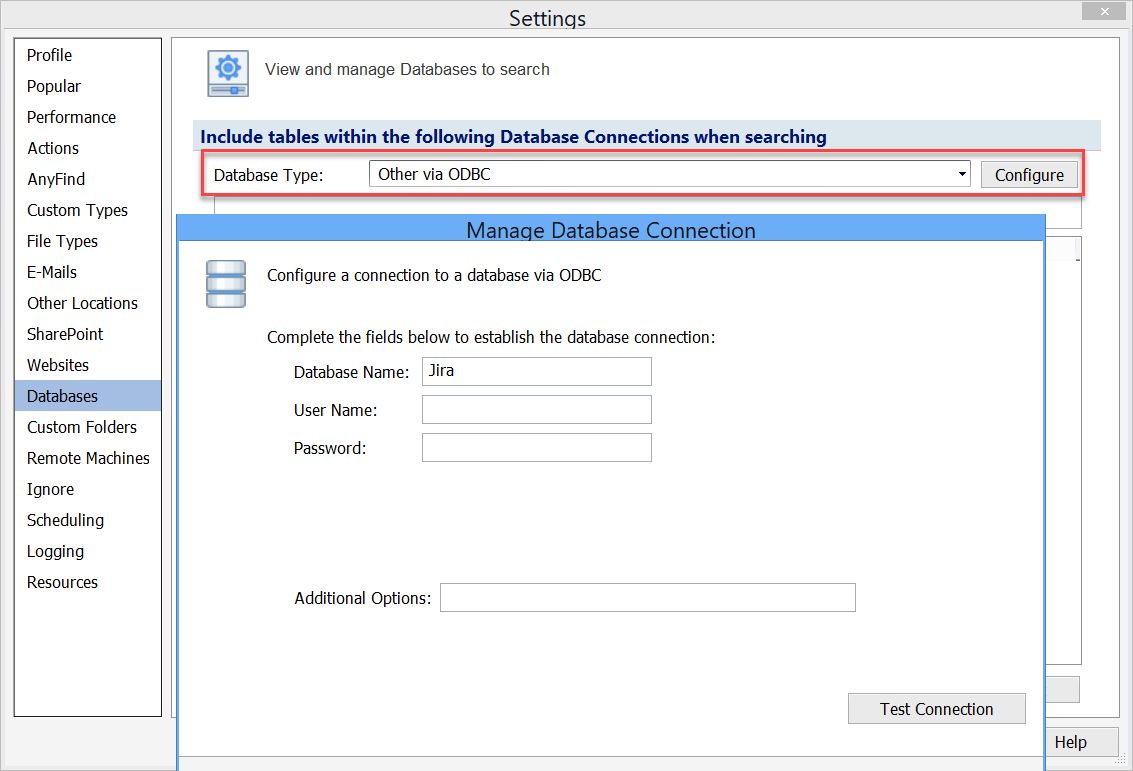
- The "Manage Database Connection" window opens.
- Enter the Data Source Name from the DSN Configuration into the field "Database Name."
- Enter your user name and optionally, your password.
- Click the Test Connection button in the lower right corner.
- Click the OK button at the bottom of the window.
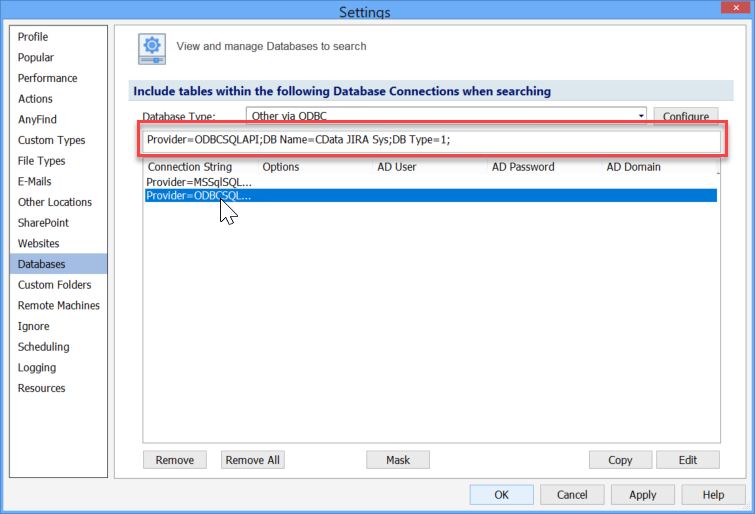
- Select the connection string from the list to populate the entry in the window just above it. Your string may or may not contain a username and password, depending on the configuration you set earlier.
- Copy this string. Later in this topic you use this string to configure your Jira Cloud Target in Spirion Sensitive Data Platform.
- For more information see the article How to Configure and Test Database Connection Strings.
Step 4: Create the Scan of your Jira Cloud Database in the Spirion Console
Now that the "bridge" is built on the Agent machine, you instruct the Spirion Console to use it.
- First set up your Jira Database as a Target in Spirion Sensitive Data Platform.
- Next create a scan configured to search the Target
- Important! The scan must use a Windows Agent with the Jira Cloud CData ODBC connector installed on it.
Add your Jira Database as a Target
Use the following steps to add your Jira Database as a Target:
- Log into Spirion Sensitive Data Platform.
- From the left side navigation select Data Asset Inventory > Data Assets and Targets.
- Click the TARGETS tab at the top of the page.
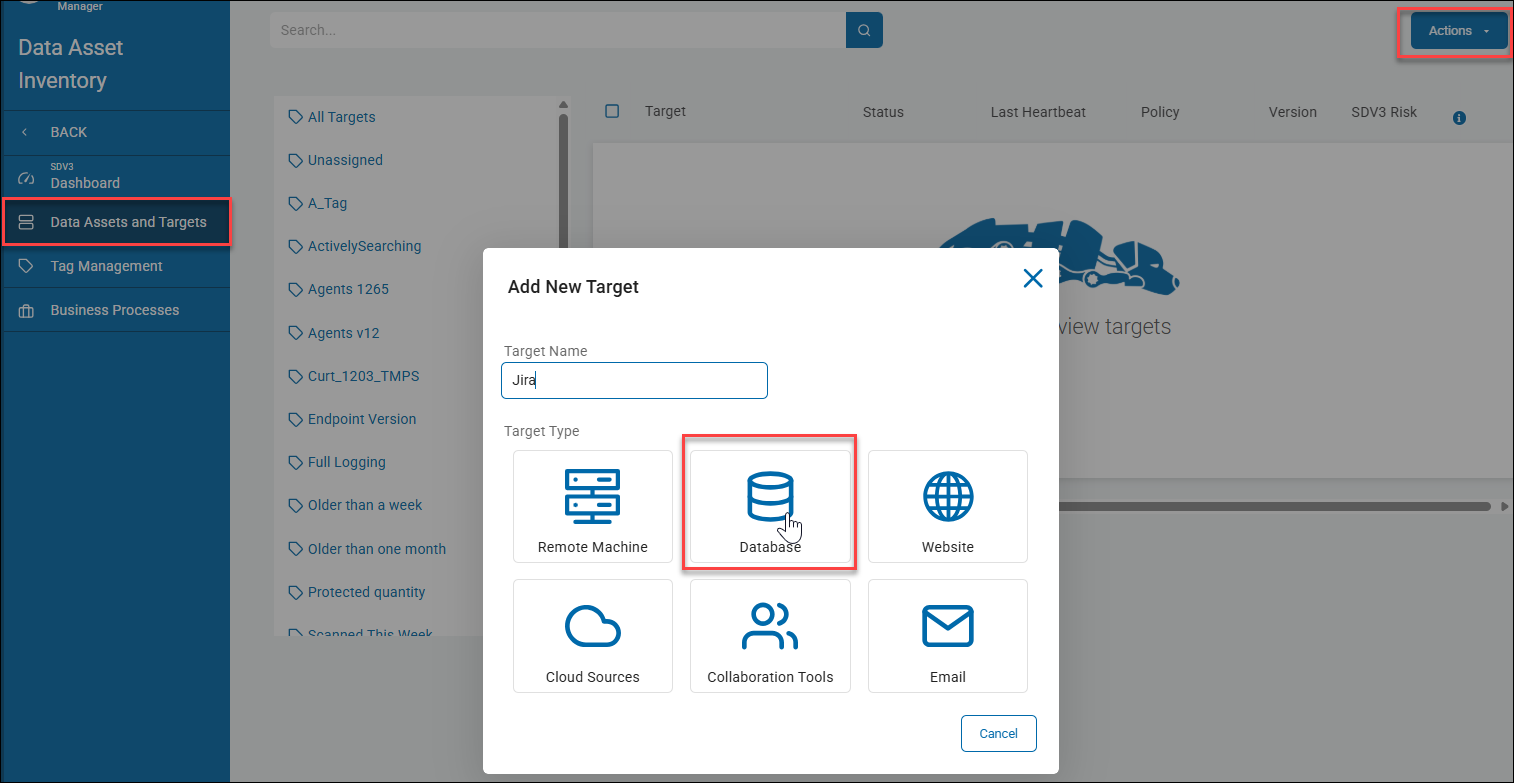
- Click the blue Actions button in the top right corner and select "Add Target" from the drop-down menu.
- Enter a descriptive name for your Target.
- Select the Database tile under "Target Type."
- The "Select a Database to Configure" window appears.
- Select the ODBC tile.
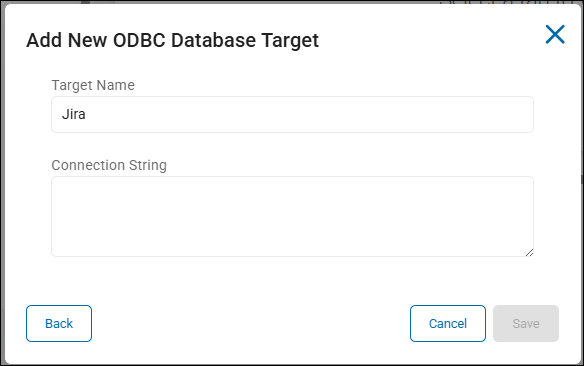
- The "Add New ODBC Database Target" window appears.
- Enter a descriptive Target name.
- Enter the connection string in the field "Connection String."
- This is the connection string you created using the Spirion Client GUI in "Step 3: Create and Test the Connection String," above.
- Your connection string will resemble the following sample:
Provider=ODBCSQLAPI;DB Name=CData JIRA Source;DB Type=1;Username=myemail@companyname.com;Password=mypassword; Nameis the Data Source Name from your DSN configuration from "Step 2: Configure the ODBC Data Source (DSN)" above. For example, "CData JIRA Sys."
- Click Save. The Target success message is displayed in the lower left corner.

Create a Scan to Search the Jira Database
Now that the Jira database has been configured as a Target, you create a new scan and search the Target for sensitive data (as defined by your Scan Playbook).
When you set up this scan, you select:
- Your Jira database(s)
- The Agent on which you installed the CData Jira Driver in Step 1 of this article
Procedure:
- Start by creating a new scan.
- From the left side navigation menu select Scans > All Scans.
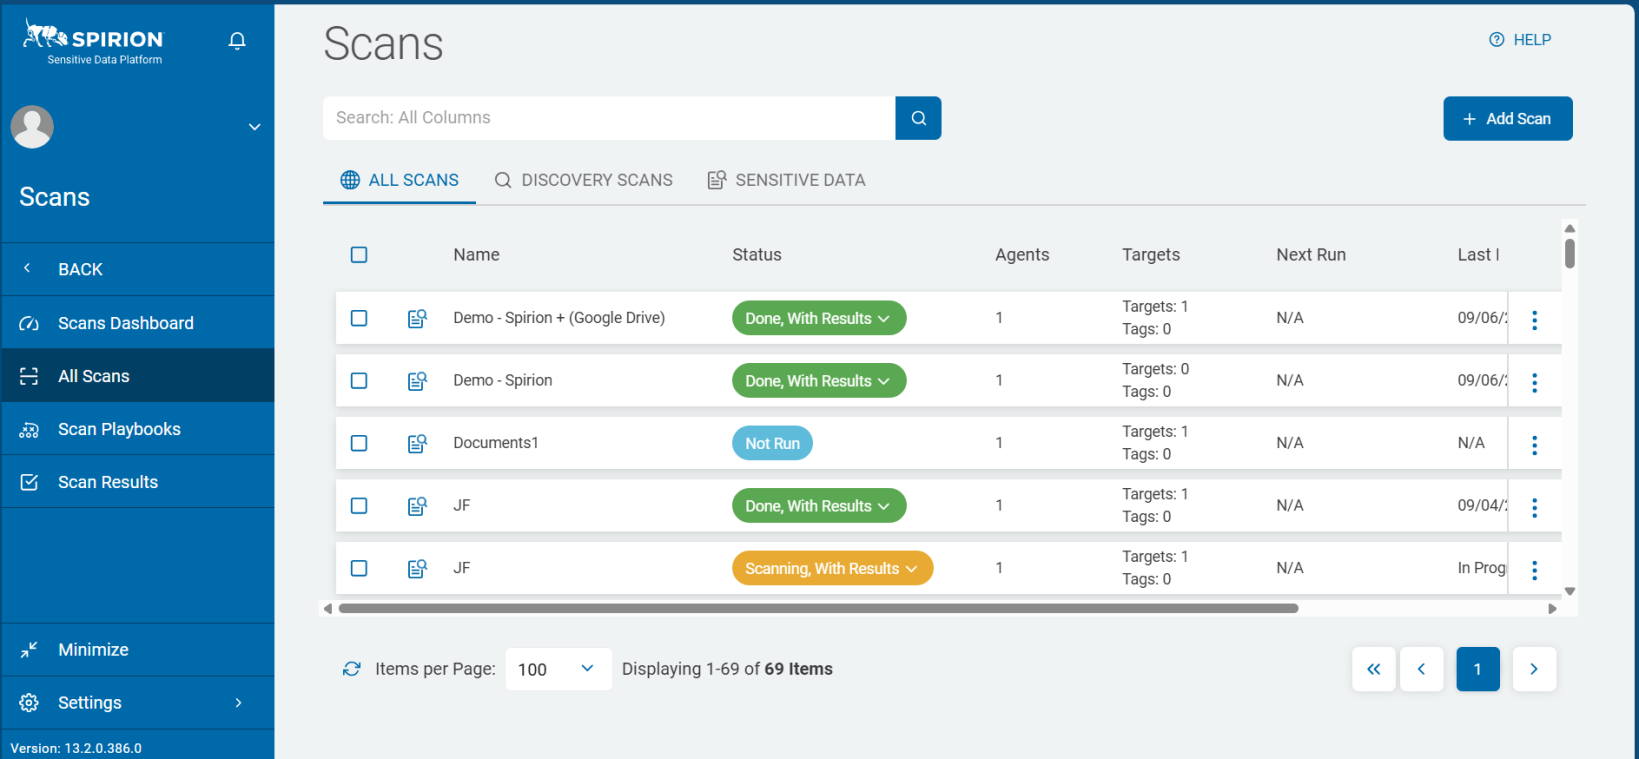
- The "Scans" page opens.
- In the top-right corner of the screen, click the + Add Scan button.
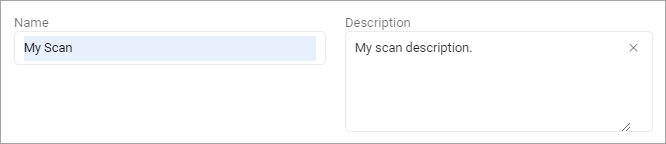
- The "Enter a name and description" page opens. Later, you may search for your scan by name, so enter a descriptive Name and Description. Your name might include the name of the Jira database or location, etc. Some users append the date the scan was first created ("_25Nov")
- The page Select what type of scan to create opens.
- Click the tile Sensitive Data Scan.

- Click the Next button.
- The Select a Playbook to apply to the scan page opens.
- Choose a Scan Playbook from the list - this is typically created with the Target, such as a local or remote database, in mind.

- On the page Select the target type to scan, select the Database tile.
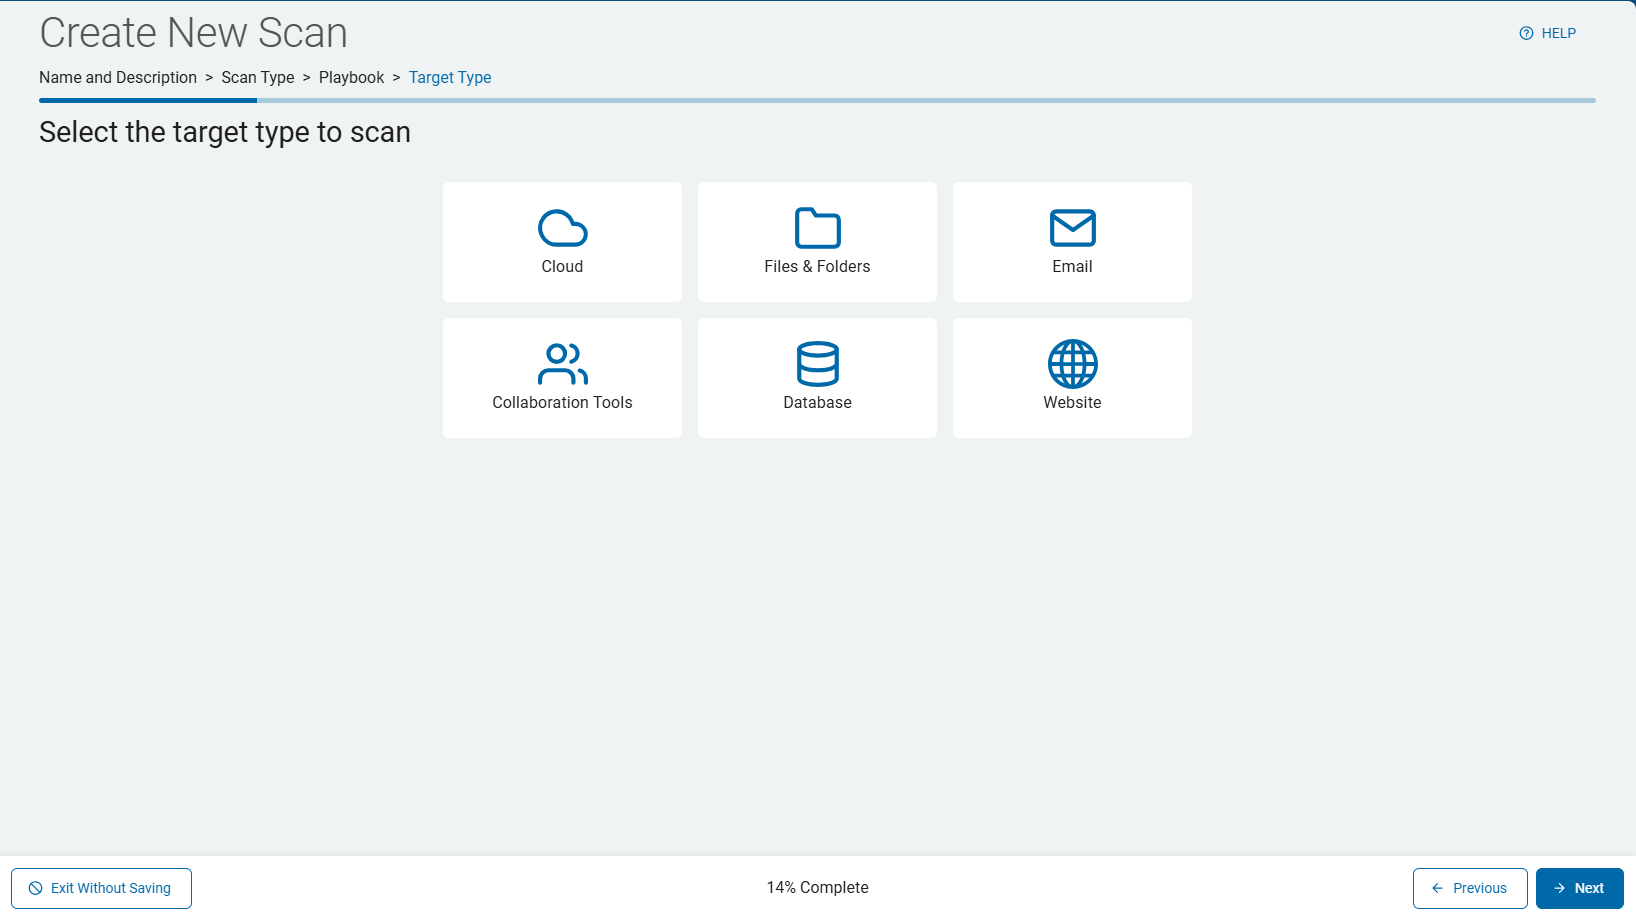
- Click the Next button.
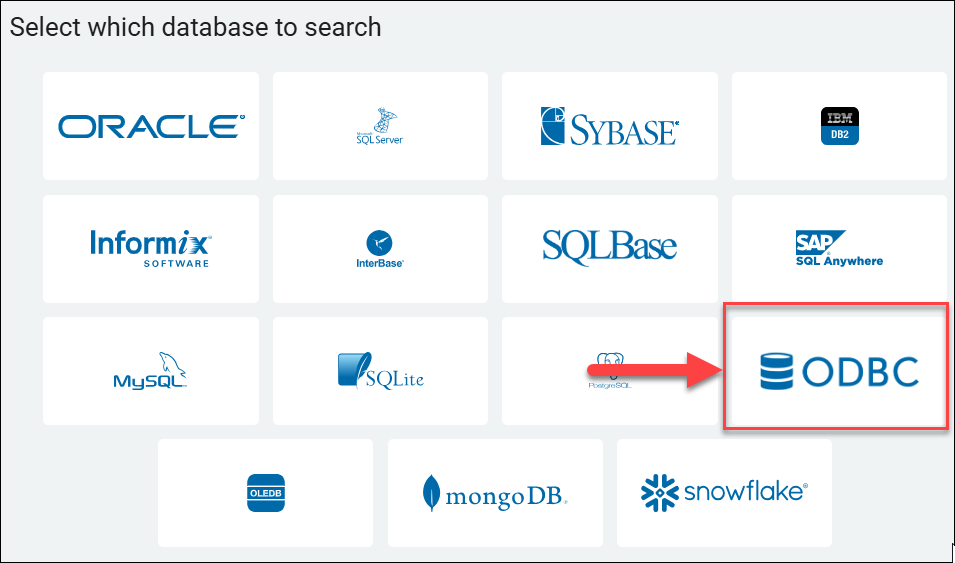
- The "Select which database to search" window opens. Click the ODBC tile.
- The "Select the agent(s) to perform the scan" page opens.
- Select the Windows Agent(s) on which you installed the CData ODBC Jira Driver by clicking the right-pointing arrow next to each Agent.
- The "Select the target(s) to scan" page opens.
- Select the Jira database Target.
- Click the Next button.
- The "Select SQL advanced options" page opens.
- Select the appropriate options.
- For example, if applicable, specify which Jira tables to include or exclude (for example,
Issues,Comments,Worklogs), by using the settings "Table Names to Include/Exclude," and "Include/Exclude Tables (check to exclude). If these settings are left blank, the Agent scans all accessible tables.
- Click the Next button.
- Complete the wizard and Launch the scan.
Troubleshooting Tips
- Permissions: Ensure the Jira account associated with the API Token has "Browse Projects" and "View Issues" permissions for all the areas you intend to scan.
- 64-bit vs 32-bit: Always use the 64-bit ODBC Administrator and ensure you are using the 64-bit CData driver, as the Spirion Agent is a 64-bit application.
- Firewalls: If the Agent machine is behind a restrictive firewall, ensure it has outbound access to
*.atlassian.neton port 443. - No Remediation: Remember that AnyScan connectors are for Discovery only. You can find sensitive data in Jira, but you cannot use Spirion to "Shred" or "Quarantine" a Jira comment or ticket automatically.
Summary
Adding Jira Cloud via AnyScan turns Jira's complex API into a readable "database" for Spirion. By setting up the CData Driver and a System DSN, the Spirion Agent can systematically crawl through your tickets and comments to identify exposed PII or credentials.