How to Create a Custom Report: End-to-End
Use the instructions in this topic to create a custom report from beginning to end.
Overview
Spirion Sensitive Data Platform Custom Reports can be created to support different use cases and provide visibility into your organization's data security posture management.
- Below is an end-to-end example of creating a custom report that captures the social security numbers by location (files, including file path, that contain sensitive data).
- For more example custom reports with detailed instructions, see Custom Report Examples.
Example Report 1: Discover Social Security Numbers by Location
Create a report that shows endpoints, such as company laptops, that contain Social Security numbers (SSN).
Using the Matches by Location you can determine the physical location of specific data value(s): Which company laptops have Social Security Numbers (SSN) on them?
- From the left side navigation menu, select Reports > Custom Reports.
- The "Custom Reports" page opens.
- In the top right corner click the blue + Add Report button.
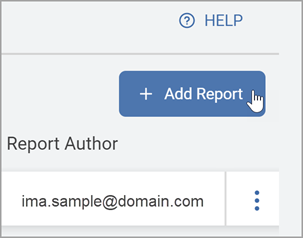
- The "Create Report" wizard is displayed.
- On the Basic Information screen, our example uses a name and description that describes what our report will provide:
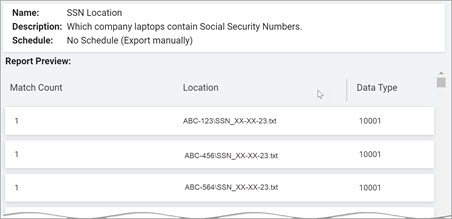
- Name: SSN Location
- Description: Which company laptops contain Social Security Numbers
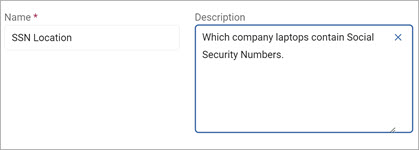
- Click the Next button.
- In the "Columns Setup" screen "Available Columns" section, select the following to move to the "Selected Columns" section:
- Locations Settings:
- Match Count
- Location
- Matches:
- Data Type
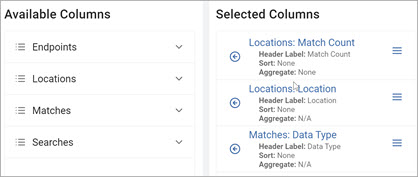
- Data Type
- Click the Next button.
- The Filters screen opens. Add the following:
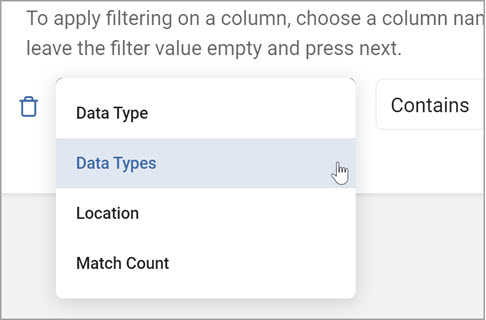
- From the left column, select Data Type from the drop-down list.
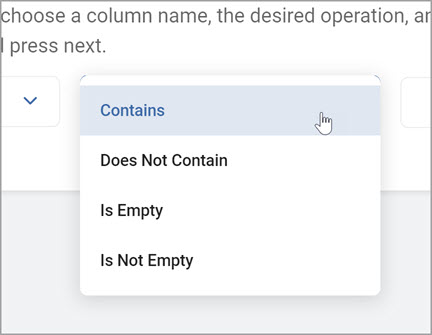
- From the center column, select Contains from the drop-down list.
- From the left column, select Data Type from the drop-down list.
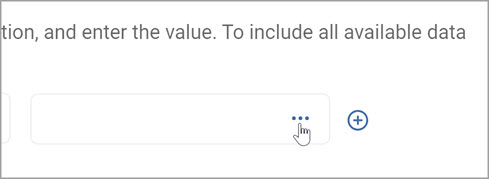
- From the right column, click the ellipse to open the Select Items pop-up window.
- The Select Items pop-up window opens.
- Enter Social in the search box.
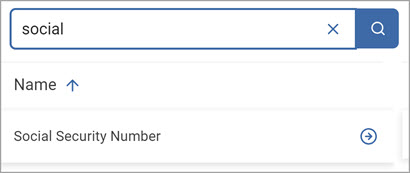
- In the left column, locate Social Security Number and click the right arrow to select the value.
- Click the OK button to add.

- Enter Social in the search box.
- Click the Next button.
- The Export Schedule screen opens.
- Leave the No Schedule (Export manually) option selected to manually run the report. (See the scheduling portion of Searches for other scheduling options.)
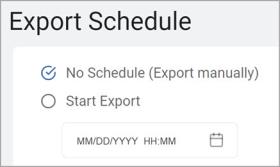
- Click the Next button.
- The Summary screen opens.
- Click the Generate Report Preview button to preview your report (optional).

- Click the Confirm button to generate the preview.
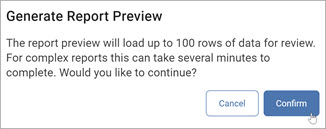
Note: The report preview will load up to 100 rows of data for review. For complex reports this can take several minutes to complete.
- Click the Generate Report Preview button to preview your report (optional).
- The report preview is displayed.
- Click the Finish & Save button to save the report.
- To view the report use the following steps:
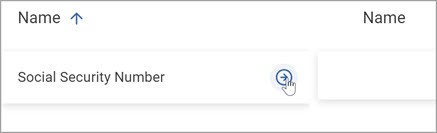
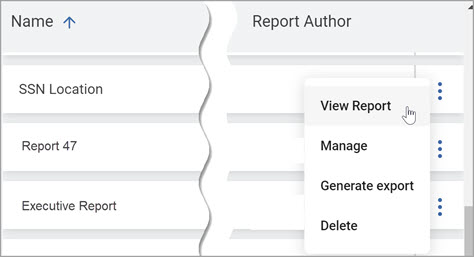
- Locate the new report in the Custom Reports section.
- In the row of the report click the more options menu at far right, and then click View Report.
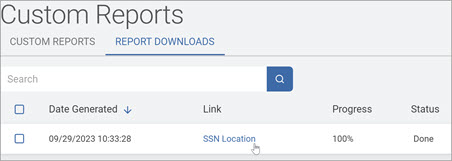
- To export the report use the following steps:
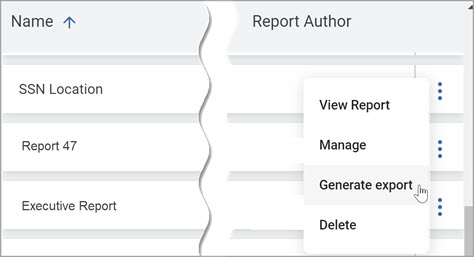
- Locate the new report in the Custom Reports section.
- Click the more options menu, and then click Export Report.
- A Report Export notification message is displayed.

Note: It may take several minutes to generate the report. You can view the report progress in the REPORT DOWNLOADS tab. - You receive an email notification when the report is ready.
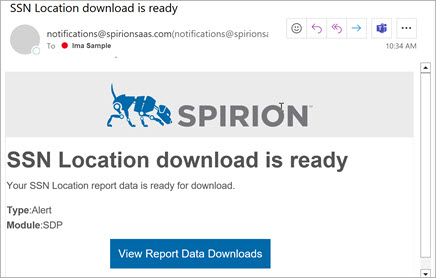
- Locate your report in the REPORT DOWNLOADS tab and click on the link shown in the Link column in the table to download to your computer and use the data in your report software.