
How to Set Up Purview Labels in a Playbook and Scan
A guide to complete your Purview integration.
Overview
Once the Purview Integration has been configured the following must be done:
- Classifications labels must be created
- A playbook must be made
- Scans must be configured so that Purview labels can be applied to sensitive data.
- See Related Articles at the bottom of this page.
This guide helps you walk though that process.
Note: You may need to consult guides on how to create playbooks and scans if you have not done these pieces before.
Creating Classifications for Purview
This section will cover the creating of custom classifications to be used with Purview labels.
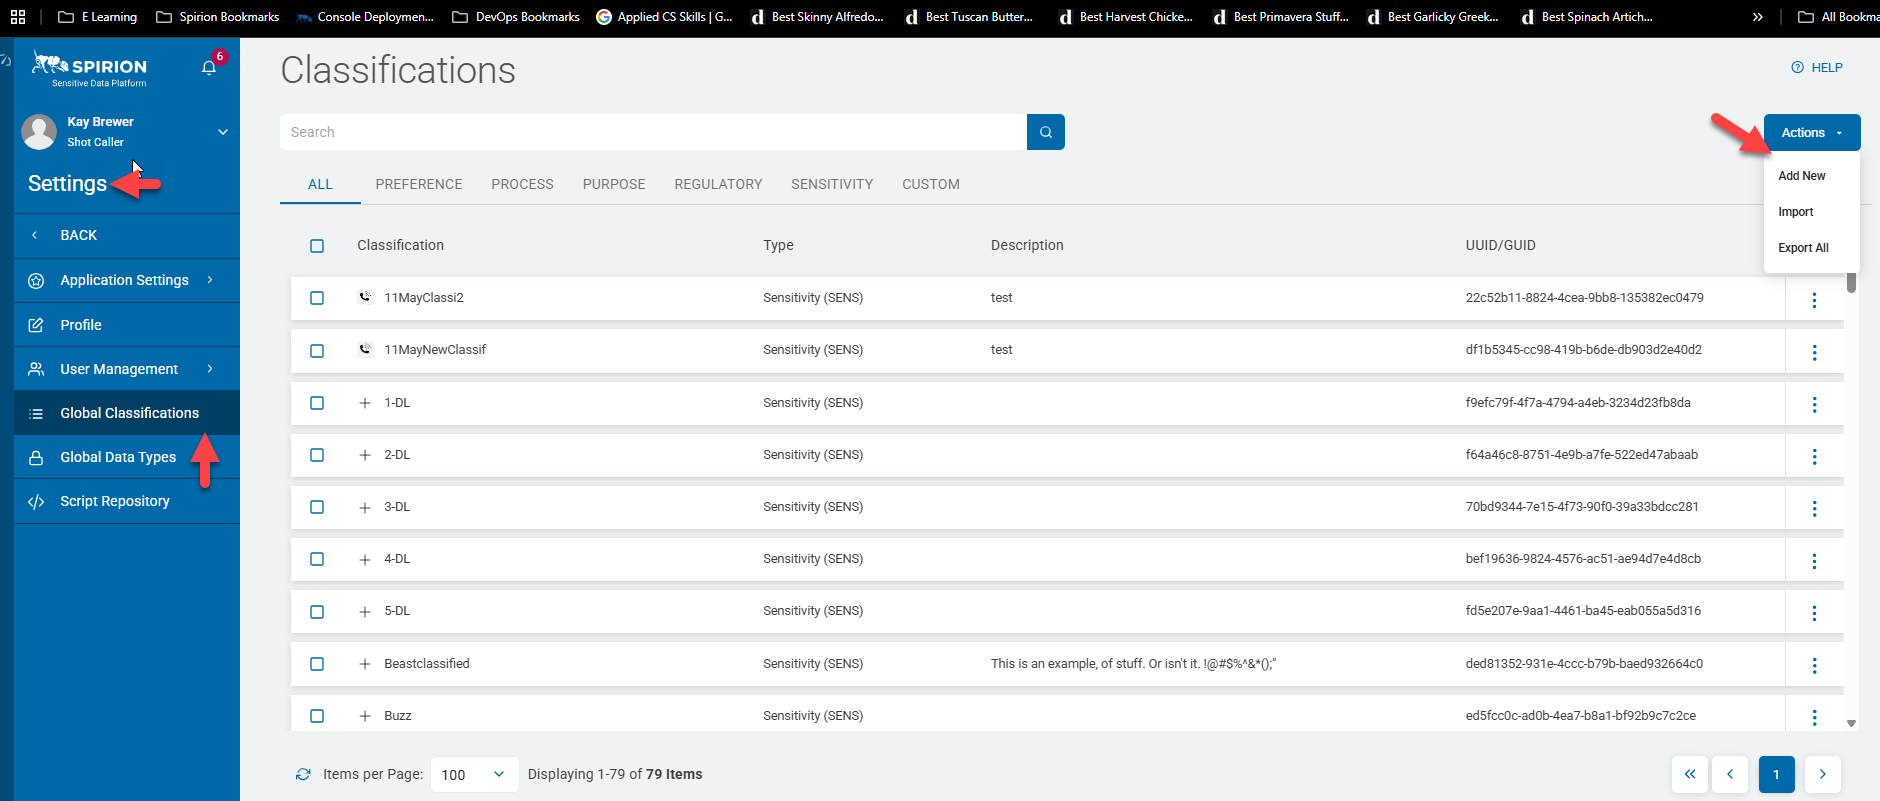
- Navigate to Settings > Global Classifications in the Spirion Console.
- Select Actions from the top right corner of the screen.
- Select Add New from the combo box.
- Fill out the fields in the Add Classification pop-up box.
- Name - Make this match the Purview labels with "-Purview" at the end of the classification name.
- Note: This will be used for reporting
- Type - Select a type for this classification
- Description - What is this classification for
- Assign Icon - (optional) pick an icon for this classification
- Assign Color - Pick a color for this classification when displayed in explorer
- Click Confirm.

- The playbook below is looking for SSNs. If one is found, then it performs the following actions:
- Labels the file with the SSN (in the database ONLY) with “Public-Purview” (Spirion label)
- Applies the Purview label “Public” to the actual metadata of the file itself

Adding a Label to a Playbook
- For general information about making playbooks see: How to Write a Playbook.
- When adding a label to a playbook the MIP Label box appears to the right of the classification. See the graphic below.
- Make sure to select the matching label to the classification and select Add/Replace label.
- The playbook below is looking for SSNs and if one is found then the Purview Information Protection Client on an Agent will:
- Label the file with the SSN (in the database ONLY) with “Public-Purview” (Spirion label), and,
- Apply “Public” (Purview label) to the actual metadata of the file

How to Set up the Purview Information Protection Client on an Agent
To have labels visible on an agent the Purview Information Protection Client needs to be installed.
- Install the Purview Information Protection Client on machines where the Spirion agent is installed:
- Download/Install Link
- Installation guide/Technical Info - Extend sensitivity labeling on Windows | Microsoft Learn


- Purview client log locations:
- \ProgramFiles (x86)\Microsoft Purview Information Protection (64-bit operating systems only)
- %localappdata%\Microsoft\MSIP
- To confirm a successful installation and that the client is connected with the Microsoft tenant:
- Open the Information Protection File Labeler
- Click “Help and Feedback.”
- This shows the client is connected to the tenant and showing an active Session ID.

- To verify the file has been labeled appropriately, open one of the files that contained a match and verify the Purview label associated with the file:
