
How to Import a Custom Data Type
What File Formats are Supported for Custom Data Type Import?
archTIS supports 2 primary file formats for importing custom data types, depending on whether you are performing a bulk upload of simple patterns or a full object migration of complex logic.
1. CSV (.csv)
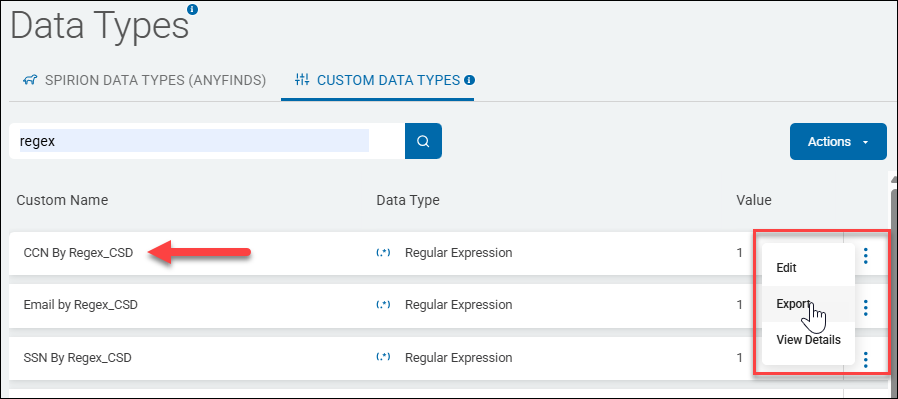
To create a perfectly compatible CSV template for import, archTIS STRONGLY RECOMMENDS first exporting a Custom Data Type. Create a Custom Data Type manually (or use an existing custom data type), then use the "Export Custom Data Types CSV" option from the data type's more options menu. The CSV file this creates contains all of the appropriate columns and names. This gives you the perfect template to follow. See the topic "Best Practices for CSV Imports," below.
The CSV (Comma Separated Values) format is used for the "Import Custom Data Types CSV" option. This is the standard for bulk-creating many simple detectors at once.
- Best for: Large lists of keywords, simple regex patterns, or internal ID lists.
- Structure: Typically includes columns for
Name,Type(Regex/Keyword/Dictionary),Definition(the pattern), andDescription. - SME Tip: Always use an exported CSV from your own console as a template to ensure your column headers match the expected schema for your specific version of SDP.
2. XML (.xml)
XML format is used for the "Import Custom Data Type" (singular) option. This file represent a complete "Data Type Object."
- Best for: Moving a single, highly complex detector between environments (for example, from a Lab/Dev console to a Production console).
- What it includes: Unlike CSV, these formats capture the entire configuration, including:
- The RegEx pattern
- Keyword proximity settings (for example, "Must be within 50 characters")
- Case sensitivity toggles
- Associated SearchAPI scripts or advanced validation logic
- Tip: This is the format used by Spirion Support or Professional Services when they provide you with a "pre-built" detector for a specific regulation.
Summary Comparison Table
Format | Import Option | Use Case | Data Depth |
|---|---|---|---|
CSV | Import Custom Data Types CSV | Bulk-uploading 100+ simple patterns or keywords | Pattern + Name only |
XML | Import Custom Data Type | Migrating one complex, "tuned" detector with all its logic | Full configuration + Scripts |
Important Note on Dictionaries:
While not technically a "Data Type Import" in the same menu, Dictionaries (which are a sub-type of Custom Data Types) typically support Plain Text (.txt) files where each line contains one term you want to search for.
Summary: Use CSV for bulk lists of simple patterns and XML for migrating single, complex detectors that include advanced logic and proximity settings.
Comparison: CSV Import vs. Object Import
Feature | Import Custom Data Types CSV | Import Custom Data Type (Object) |
|---|---|---|
Quantity | Bulk (dozens or hundreds at once) | Single (one complex object at a time) |
Format |
|
|
Complexity | Simple (Pattern + Name) | Full (Pattern + Keywords + Logic + Scripts) |
Best Use Case | Uploading a list of 500 project codes | Moving a refined HIPAA detector from Dev to Prod |
Pro Tip:
If you are working with a archTIS Solution Architect to build a very complex detector (for example, one that uses SearchAPI for checksum validation), ask them to export the XML for you. You can then use this "Import Custom Data Type" option to install it in your console in seconds, ensuring that no configuration errors are made during manual entry.
Best Practices for CSV Imports
- Start with an Export: If you are unsure of the format, create one Custom Data Type manually, then use the "Export Custom Data Types CSV" option from the data type's more options menu. This gives you a perfect template to follow. See below.
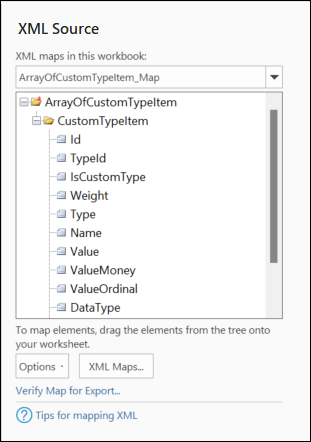
Sample Exported Custom Data Type XML in Excel
Sample XML Map of Custom Data Type in Excel - Escape Your RegEx: Be careful with special characters in your CSV (like commas or quotes) that might conflict with your RegEx. Ensure your CSV editor (like Excel) isn't "auto-correcting" your patterns.
- Bulk Updates: If you import a CSV with a Name that already exists in the console, the system typically overwrites the existing definition with the one from the file. This is a great way to update a large list of keywords across multiple data types simultaneously.
- Validation: After importing, always perform a "Single-File Test" (as described in previous steps) on at least one of the imported types to ensure the CSV import didn't break the RegEx logic.

How to Import a Custom Data Type
The “Import Custom Data Type” option (distinct from the CSV import) is used to import a single, complex Data Type definition that has been exported from another Spirion environment.
While the CSV option is for bulk-uploading simple lists or patterns, this option is designed for importing a complete object that includes all the advanced settings, validation logic, and metadata associated with that specific Data Type.
What it does
- Environment Portability: It enables you to move a highly refined custom detector (like a complex medical record regex with specific keyword proximity and validation scripts) from a Test/Dev environment to a Production environment without having to manually re-enter the settings.
- Sharing Best Practices: It enables Spirion Support or Professional Services to send you a "pre-built" detector file for a specific regulation or internal system that you can simply drop into your console.
- Preserves Logic: Unlike a CSV, which only imports the "pattern," this import preserves the entire configuration, including character distances, case sensitivity toggles, and any associated SearchAPI scripts.
To import a custom Data Type use the following steps:
- Obtain the File: You must first have an exported Data Type file (ending in
.xml) from another Spirion console. - From the left side navigation menu select Settings > Global Data Types.
- The "Data Types" page opens.
- Click the blue Actions button in the top right corner of the page.
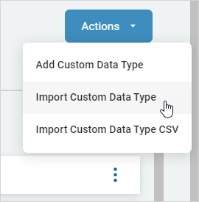
- Click Import Custom Data Type from the sub-menu.
- Locate and select your custom data type file (XML) on your local computer.
Note: File format .xml is required.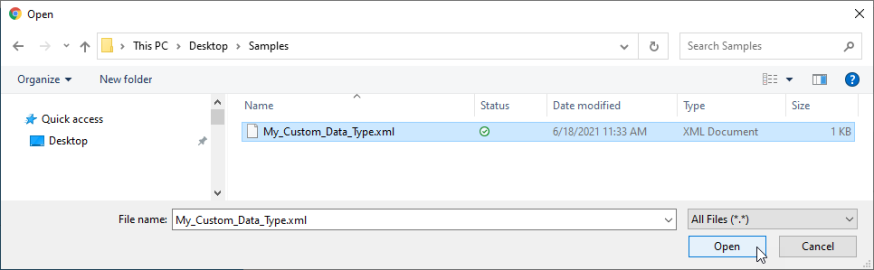
- Click Open.
- You will see a success message or an error message.


Summary
Use this option to import a single, fully-configured Data Type object (XML) from another environment or from Spirion Support. It is the most reliable way to move complex detection logic between consoles.
How to Import a Custom Data Type CSV
The “Import Custom Data Types CSV” option enables you to bulk-create or update multiple Custom Data Types (Regex, Keywords, or Dictionaries) at once by uploading a pre-formatted Comma-separated values (CSV) file.
This is primarily used to save time when you have dozens of internal identifiers or medical codes to add, rather than creating each one manually through the UI.
Step 1: Prepare your CSV File
The CSV must follow a specific structure for the Spirion Console to recognize the data. While the exact column headers can vary by version, a standard import file typically requires:
- Name: The display name for the Data Type (e.g.,
Internal MRN). - Type: The category of detector (
Regex,Keyword, orDictionary). - Definition: The actual pattern or list (e.g., the regex string
\b\d{8}\bor a comma-separated list of keywords). - Description: (Optional) A brief explanation of what the data type represents.
See "Best Practices for CSV Imports" above.
Step 2: Execute the Import
To import a custom Comma-separated values (CSV) file use the following steps:
- From the left side navigation menu select Settings > Global Data Types.
- The "Data Types" page opens.
- Select the CUSTOM DATA TYPES tab on the top of the page.
- Click the blue Actions button in the top right corner of the page.
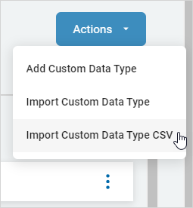
- Click Import Custom Data Type CSV.
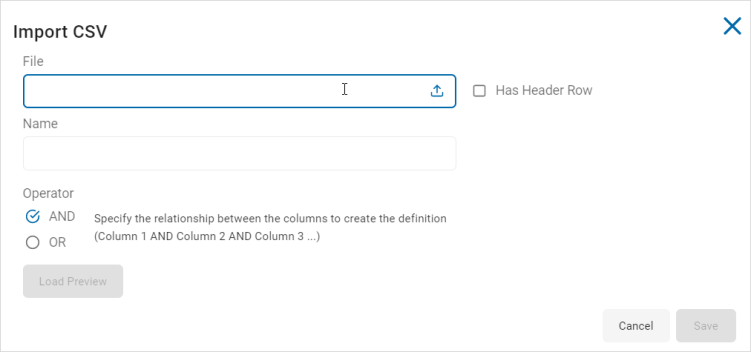
- The "Import CSV" pop-up window opens.
- In the Import CSV pop-up window, click the "File" field to launch the file Open dialog (shown after step 6 below).
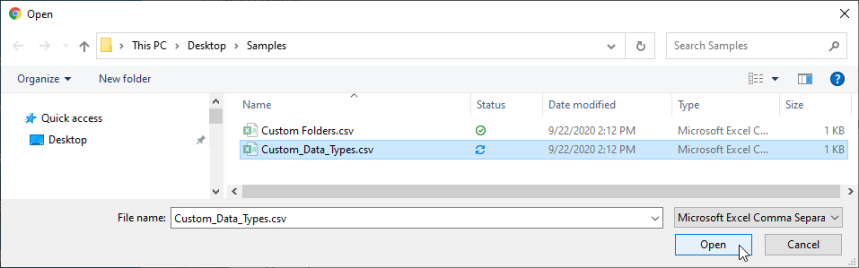
- Locate and select the parepared CSV file on your local computer. Click the Open button.
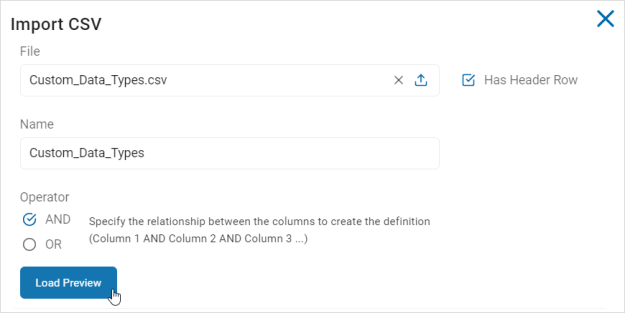
- Check the Has Header Row checkbox, if applicable.

- Operator: Select an operator to specific the relationship between the columns.
- Click the blue Load Preview button to review your upload.
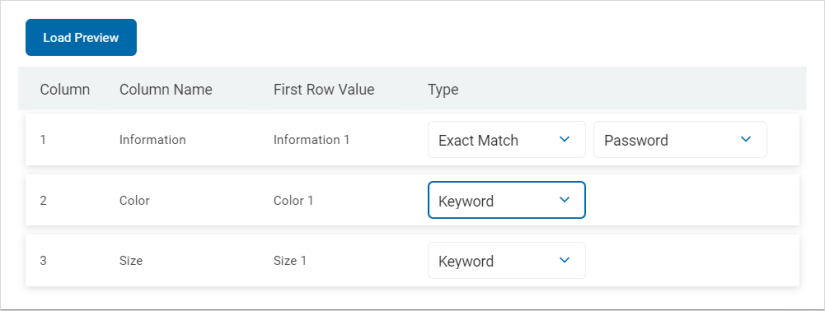
- In the "Load Preview" section, do the following:
- Review the data in the columns. Check for any syntax errors in your RegEx patterns.
- In the Type column, select an option from the drop-down list.
- If you select "Exact Match" as the Type, select an option from the Data Type drop-down list to the left.
- For example: Information 1 | Exact Match | Password
- For example: Information 1 | Exact Match | Password
- Click the Save button to save and import the file or the Cancel button to discard.
- The new data types now appear in your list and can be added to any scan.
Summary
Use this tool to bulk-upload large numbers of custom detectors. Use an exported CSV as your template to ensure the column headers are exactly what the console expects.