
How to Search OneDrive for Business
NOTE: Spirion searches “OneDrive for Business” accounts and not regular “OneDrive” accounts.
Searching Microsoft OneDrive for Business with Spirion Sensitive Data Platform has never been easier.
Follow this guide to set up a successful search of OneDrive for Business using Spirion Sensitive Data Platform:
Before You Search OneDrive
- Spirion searches “OneDrive for Business” accounts and not standard “OneDrive” accounts
- If you are searching OneDrive with an on-premises agent, Spirion requires an Azure enterprise application registered within the O365 tenant.
- The app is called “Spirion Azure App”
- Required Spirion Azure App Roles and Permissions are listed below
- Spirion recommends you complete a test search using minimal accounts (one) to ensure that connectivity and settings are working properly
- Spirion does not recommend scanning OneDrive as a locally logged-in user.
- If OneDrive is searched directly through the workstation or as a local, logged-in user, Spirion downloads the file and scans it locally
- If you're scanning a local OneDrive and encounter shortcuts, Spirion will download and scan the actual file.
Known Limitations
- Spirion Sensitive Data Platform cannot scan shared user folders in Microsoft OneDrive.
- This is due to limitations of the Microsoft Graph API.
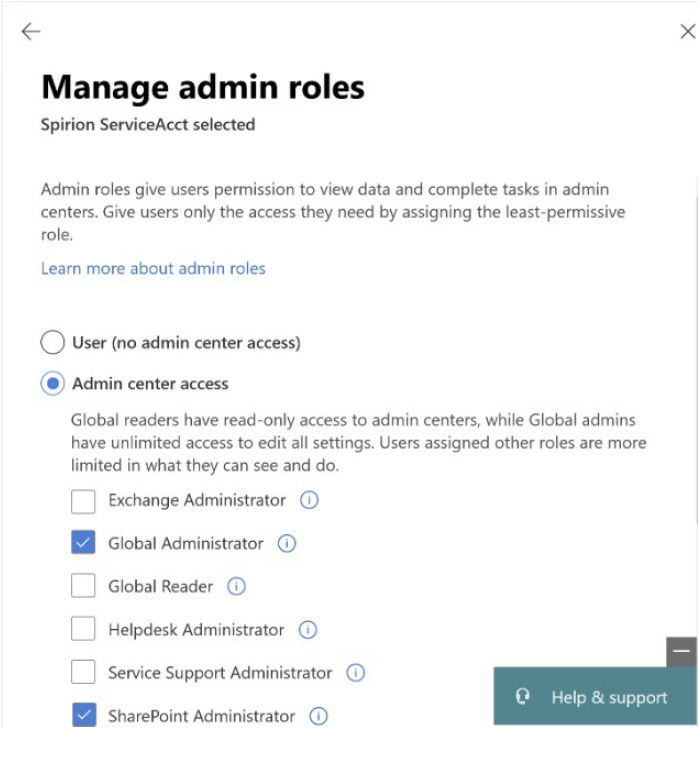
Required User Account and Admin Roles
- Searching OneDrive requires a service account with Admin privileges.
- Permissions for the account are configured in the SharePoint Admin Center.
- If you don’t have access to the Azure Admin Center, you can use a PowerShell script or else contact your SharePoint administrator.
- Depending on your environment, the service account may need to be one of the following administrator roles:
- Global Administrator
- SharePoint Administrator
- Site Collection Administrator
- (Rarely) Domain Administrator
SharePoint Integration
OneDrive for Business is managed through the SharePoint Admin Center, requiring SharePoint Administrator permissions for administrative tasks like accessing user profiles, managing site collection owners, or setting data retention.
- While users don't need a SharePoint admin for daily file saving, IT tasks require this role.
Key Administrative Requirements
- Access Management: To add a manager to an employee's OneDrive, a SharePoint Admin must manage user profiles via the SharePoint Admin Center.
- Pre-provisioning: Setting up OneDrive accounts for users requires a SharePoint Administrator.
- Site Management: Because OneDrive operates on top of SharePoint, managing site collection administrators for a user's personal drive requires SharePoint admin privileges.
- Alternative Support: For minor tasks (not full management), Help Desk staff can sometimes use the Microsoft 365 Admin Center to provide access to files.
Ultimately, Microsoft has consolidated OneDrive administration into the SharePoint Online ecosystem.
Roles and Permissions Required for the Spirion Azure App
Note that the Spirion Azure app is used to connect to the following applications:
- Exchange Online
- OneDrive for Business
- Spirion Microsoft Purview integration
Roles and permissions required by the Spirion Azure App are listed below.
OneDrive for Business API Permissions
Ensure the following API (Microsoft Graph) permissions are granted for your Spirion Azure App:
- Directory.ReadWrite.All
- Type: Application
- Admin consent required: Yes
- Description: Enables the app to read and write data in the organization directory accessible to the service account. Does not permit user or group deletion.
- Files.ReadWrite.All
- Type: Application
- Admin consent required: Yes
- Description: Enables the app to read, create, update, and delete all files the service account user can access.
- Sites.ReadWrite.All
- Type: Application
- Admin consent required: Yes
- Description: Enables the app to edit or delete documents and list items in all site collections accessible to the service account.
- Sites.Selected
- Type: Application
- Admin consent required: Yes
- Description: Enables app-only access to specific SharePoint Online sites, rather than the entire tenant.
- User.Read
- Type: Delegated
- Admin consent required: No
- Description: Enables the app to read basic company information of users.
- User.ReadWrite.All
- Type: Application
- Admin consent required: Yes
- Description: Enables the app to read and write all properties of user profiles.
- User.ReadWrite.CrossCloud
- Type: Application
- Admin consent required: Yes
- Description: Enables the app to read and update external cloud user profiles without a signed in user.
- UserAuthenticationMethod.ReadWrite.All
- Type: Application
- Admin consent required: Yes
- Description: Enables an app to read and write authentication methods like phone numbers and Authenticator settings, but not passwords or sign-in.
Roles and Permissions Required to Authenticate Cloud Scans
To authenticate Cloud Storage scans for OneDrive for Business, Spirion recommends you create the following accounts and roles:
- A service account with the SharePoint Admin role
- The Global Admin role (temporarily)*
*The reason for temporary Global Admin role is the initial authorization process creates a “Spirion Azure App” our system uses to connect to the tenant. Once this App is created, the Global Admin role can be removed.
How to Create a Service Account
Use the following steps to create a new O365 service account:
- Create a new Office 365 user account.
- Assign Global Admin rights to it.
- To add another admin see How to add another admin
- Optional: Assign the eDiscovery Manager role (if needed). Assign eDiscovery permissions
How to Assign Permissions to the Service Account
Option 1: Use the SharePoint Admin Center (Recommended)
Use this method if you have access to the Microsoft Admin Center.
- Go to: Manage Site Collection Admins
- Add your service account as a Site Collection Admin for each OneDrive account that you want to scan.
Option 2: Use a PowerShell Script (Alternative)
If you cannot use the Microsoft Admin Center the following steps guide your through using a PowerShell script:
- Install the SharePoint Online Management Shell using Microsoft documentation
- Download the script named AdminRights.ps1 script
- Open the script in Notepad.
- Edit the following four variables and enter your information:
- $o365login – Your service account username
- $o365pw – Your service account password
- $spAdminURL – SharePoint admin URL
- $spMyURL – OneDrive URL
- Example: https://yourdomain-my.sharepoint.com
- Save and close the file.
- Run the script using the following steps:
- Right-click on SharePoint Online Management Shell and click "Run as Administrator"
- Change your directory to the directory which contains the AdminRights.ps1 script
- Run the following command:
Set-ExecutionPolicy Unrestricted
- Next, run the following command:
.\AdminRights.ps1
- Press Enter to exit once complete.
How to Create a OneDrive Target in Spirion Sensitive Data Platform
Use the following procedure to create a OneDrive Target in Spirion Sensitive Data Platform. During this process you perform the following high-level steps:
- Create a new Target
- Authenticate with OneDrive
- Login to O365
- Authorize claims to create the Spirion Azure app
Note: For OneDrive Targets that authenticate using the user-configured Azure app, this requires Spirion Agents version 13.5 or later. If you attempt to use this method with Agent versions earlier than version 13.5, an EPS failure occurs which requires the machine to be rebooted or other manual intervention.
Procedure:
- Login to Spirion Sensitive Data Platform
- Select “Data Asset Inventory” from the left side navigation menu.
- Select “Data Assets and Targets”
- Select the “TARGETS” tab at the top of the screen
- Select the blue Actions button in the top right corner and select “Add Target” from the sub-menu.
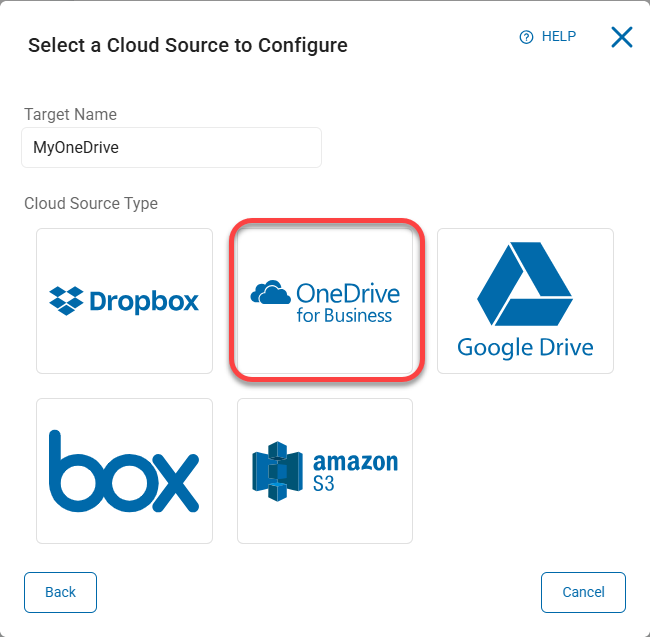
- Name your target in the “Target Name” field and select the “Cloud Sources” tile.
- Select “OneDrive for Business” from the section "Cloud Source Type."

How to Configure OneDrive Targets to Use Spirion-Hosted Authentication
(For self-hosted authentication, see the topic "Self-Hosted Authentication" below)
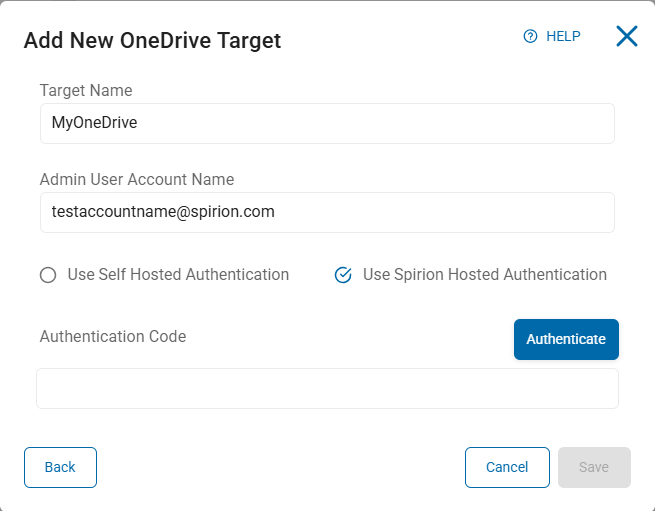
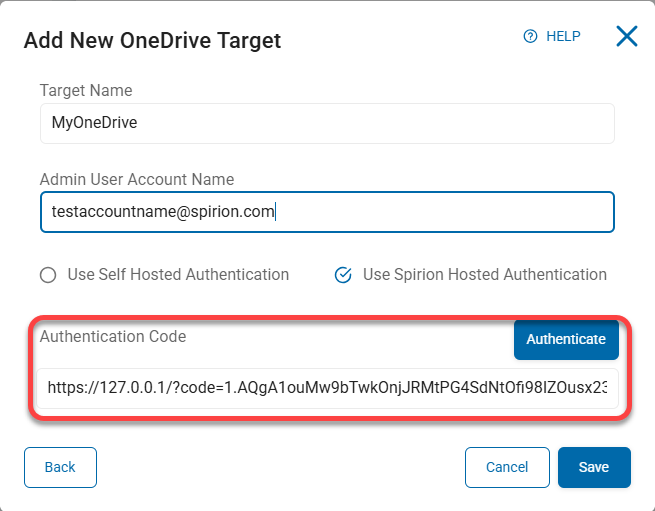
- Enter the OneDrive Admin user account name and select Use Spirion Hosted Authentication
- Click Authenticate.
- NOTE: Depending on how your tenant is configured in Azure Active Directory it’s possible this step needs either:
- A higher-level permissioned user (Global Admin, Cloud Application Admin)
- Consent requests which may need to be approved by a specified user within the tenant
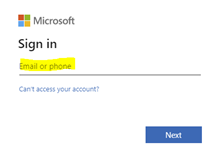
- This takes you to the Microsoft (Office 365) login page where you enter the same Admin user account from the previous step and complete the login process.
- You are asked to authorize claims to create the “Spirion Azure App”.
Note: The Spirion Azure App is used for both Exchange Online and OneDrive for Business connectivity, as well as the Spirion Microsoft Purview integration. You are prompted to grant access to Spirion using the permissions described in the topic "Roles and Permissions for Spirion Azure App" above. - Accept the claims. The Spirion Azure App is created. The browser page is redirected to a loopback page “127.0.0.1/code=xxxx”.
- Select and copy the entire URL.
- Within the Spirion Sensitive Data Platform Console browser window, paste the URL into the Authentication Code box.
- Click the Save button to create the Target.
- Click Save at the bottom of the screen.
- This completes the authentication process.
How to Configure OneDrive Targets to Use Self-Hosted Authentication
Use the following steps to configure your OneDrive Target in Spirion Sensitive Data Platform to use self-hosted authentication:
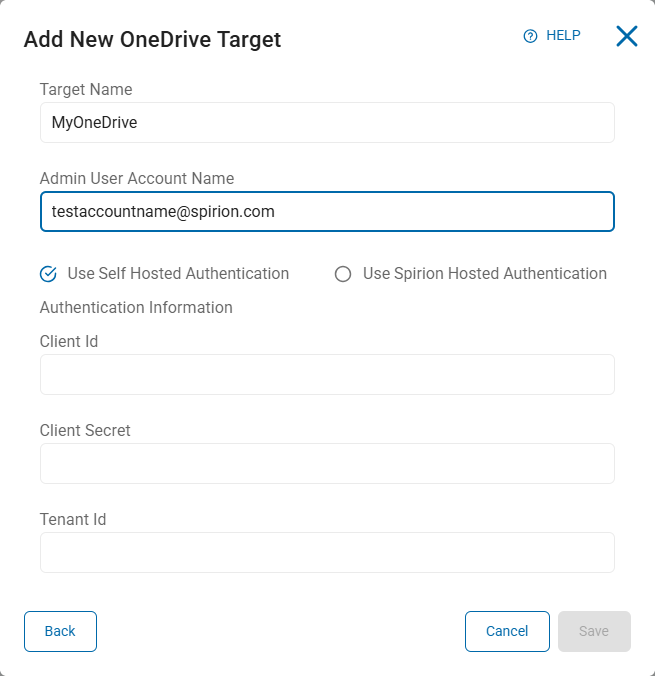
- (This step is a continuation after step 7) – Select the Self Hosted Authentication radio button.
- Enter the following information from your Azure App. (If you do not have an Azure App, see "Create an Azure App (Optional)" below):
- NOTE - Your Microsoft Client ID, Microsoft Client Secret, Microsoft Tenant ID are found in your Microsoft Azure dashboard. See the “Additional Information” section at the bottom of this document for instructions.
- Client ID – Enter your Microsoft Client ID
- Client Secret – Enter your Microsoft Client Secret
- Tenant ID – Enter your Microsoft Tenant ID
- Click Save to create the Target.
- Click Save at the bottom of the screen.
- This completes the authentication process.
Adjust the Service Account
- The Spirion Azure App is now created (if you selected Spirion Hosted Authentication).
- Remove the Global Admin role from the service account
How to Create an Azure App (Optional)
If you do not have an Azure App, use the following instructions to create the app and record the information you need to create your OneDrive for Business Target.
App Registration procedure:
- Log in to the Azure Portal.
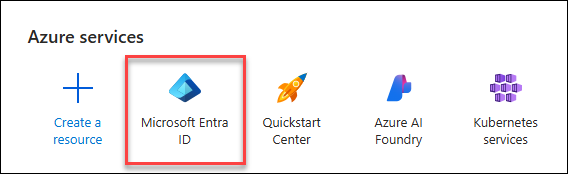
- Under "Azure services" search for and select Microsoft Entra ID.
- Select App Registrations under "Manage" on the left side menu. (Alternatively, click "Add application registration" under Quick Actions at the bottom of the page to jump to step 5.)
- Click New registration.
- Select one of the first two radio buttons based on your needs:

- Note: Redirect URI is not required.
- Click Register at the bottom of the page.
Note the IDs Record the following information:
- Application (client) ID
- Directory (tenant) ID
Certificates and Secrets
Procedure:
- From the left side menu, expand the "Manage" section and click Certificates & secrets.
- Click the "Client secrets" tab and click the + New client secret link above Description.

- Enter an appropriate name.
- Record your Client Secret Value and Secret ID.
NOTE: You will not have access to your client secret again.
How to Add API Permissions to Your Azure App
Use the following procedure to add the required API permissions to your Azure App (see "OneDrive for Business API Permissions" at the top of this page):
- One the left side menu, under Manage, select API Permissions.
- Click the Add a permission button.
- Select Microsoft Graph at the top of the collection of APIs.
- Select the Application Permissions box.
- In the Select permissions search field type the name of each permission to find it in the list and then select it. For example "Directory" will bring up Directory permissions. See below.
- Click the Add permissions button at the bottom of the pane.
- Repeat this process for each required permission.
- Grant Admin consent to the permission, if necessary.

How to Create a Scan in Spirion Sensitive Data Platform to Search OneDrive
Use the following steps to create a scan in Spirion Sensitive Data Platform to search OneDrive:
- Log in to Spirion Sensitive Data Platform.
- Select “Scans” from the left-side blue navigation menu.
- The Scans page opens.
- Select the blue “+Add Scan” button in the top right-hand corner:

- Provide a Title to the scan (for example: OneDrive Scan) and click the “Next” button.
- Select “Sensitive Data Scan”
- Select a Playbook to apply to the scan:

- On the page "Select the target type to scan," select the “Cloud” target type:

- On the screen "Select which cloud service to scan" select "OneDrive for Business” as the cloud service to scan:

- NOTE: This step uses On-Premise agents to conduct searches.
For steps using a Cloud Agent go to step 13:
- On the screen "Select the target(s) to scan" select the OneDrive target that was previously created:

- Enter the user accounts that you would like to search.
- NOTE: leaving this blank will search all OneDrive user accounts.
- The ability to import a list of OneDrive accounts is available by choosing “Upload Account List.”
- See your Professional Services or Support Consultant for an updated .csv template to upload accounts.

- On the screen "Select the file type scan options" select the file type scan options. Use the blue tooltips for descriptions of each setting.

- On the screen "Select advanced options" check the checkbox "Scan Only Changed Files" under Search History if it is not selected. This is the Differential Scanning feature and it is enabled, by default.

- On the screen "Discovery Team Settings" select the level of logs to capture under Scan Logging and select the Discovery Agent to use to scan your configured targets for sensitive data locations (files which contain sensitive data) in the drop-down menu.

- On the screen "Select the Scan Schedule" enter the date and time to run the scan as well as the recurrence schedule, if desired.

- Select the users to receive notification when the scan completes (if any).

- Review your scan Summary.
- When done select “Finish and Save” to save and initiate the OneDrive scan:

Additional Information
How to Locate your Azure IDs
To create a new cloud Target for Microsoft OneDrive for Business or Office 365 you need the following information from Azure:
- Client ID - Also known as Application ID. See steps below.
- Client Secret - See the steps below in the topic "How to Create a New Client Secret or View an Existing Client Secret."
- Tenant ID - Also known as Directory ID. See steps below. Alternatively, use: How to find your Microsoft Entra tenant ID
They are all located in your Microsoft Azure dashboard.
How to View Your Tenant ID
Use the following steps to view your Tenant ID:
- Sign in to the Azure portal.
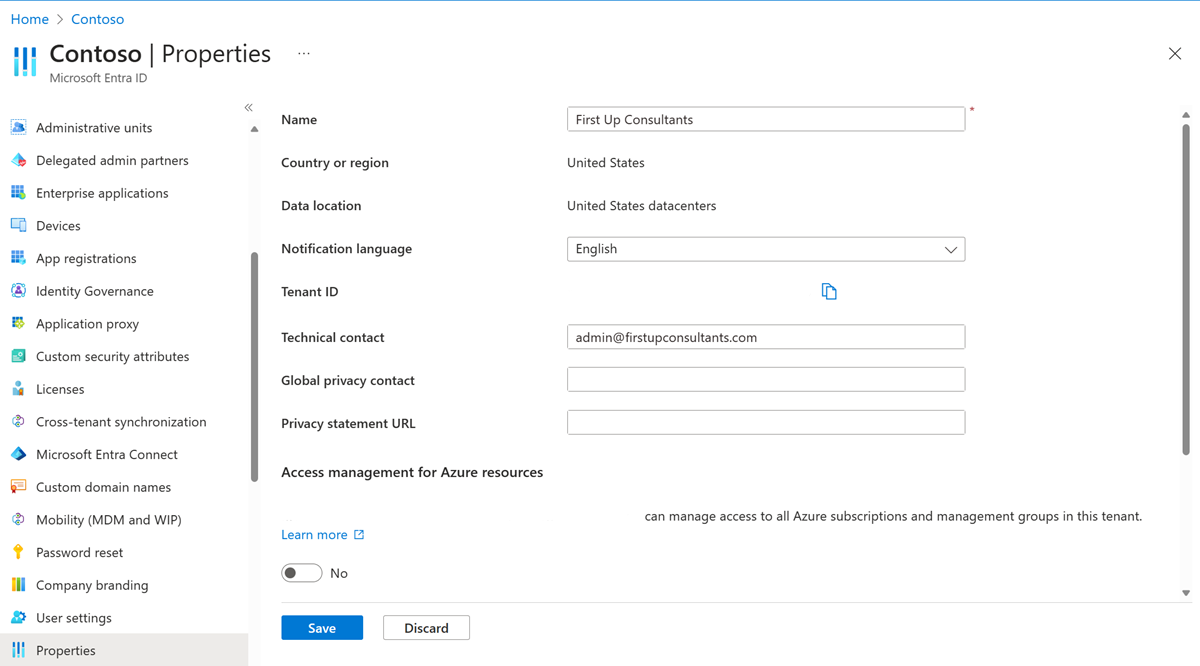
- Browse to Microsoft Entra ID > Properties.
- Scroll down to the Tenant ID section. You can find your tenant ID in the Tenant ID field.
- Record your Tenant ID by clicking the copy icon to the right of the Tenant ID. Store the ID in a secure location.
How to Create a New Client Secret or View an Existing Client Secret
Use the following steps to create a new client secret or view an existing client secret:
- Log in to your Microsoft Azure account dashboard.
- In the left panel, select Azure Active Directory.
- Under Manage in the left side menu, select App Registrations
- From the App Registrations panel, select your application. For example: OneDrive for Business.
Note: If you do not have an application in your Azure dashboard, your Azure administrator must create one. The application must have full permissions to function with Spirion Sensitive Data Platform. Consult with your Azure administrator for further information. - Access Certificates & secrets: In the application's left-hand menu, click on Certificates & secrets.
- View or create a new secret:
- If a client secret already exists and you have its value, it will be displayed in the "Value" column.
- If you need a new secret, click New client secret.
- Provide a description for the new secret and choose an expiration time.
- Click Add. The new secret's value will be displayed.
- Important: Copy the secret value immediately after creation. The value is only displayed once and cannot be retrieved later. If you navigate away from the page without saving the value, you will need to generate a new one.
How to Create a Client ID
Use the following steps to create a client ID:
- Log in to your Microsoft Azure account dashboard.
- In the left panel, select Azure Active Directory.
- Under Manage in the left side menu, select App Registrations
- From the App Registrations panel, select your application. For example: OneDrive for Business.
- On the application's Overview page, you'll find the Client ID (also referred to as Application ID) listed. You can also copy it to your clipboard from there.