
How to Create a New Discovery or Sensitive Data Scan
Overview
What is a Sensitive Data Scan?
Spirion Sensitive Data Platform searches or "scans" your environment for personally identifiable or sensitive data using applications called Agents.
- Scans are the searches that agents perform on endpoints (targets) such as laptops, desktops, servers, databases, cloud locations, etc. to find either the file locations (Discovery Scan) or find specific data types (Sensitive Data Scan) within the files and folders
- Sensitive Data Scans enable you to search for specific data types (social security numbers, telephone numbers, etc.) within files and folders at different locations (and take actions on them based on the playbook rule defined for them).
A playbook is a set of rules which define the action(s) to take (redact, quarantine, shred, etc.) when Spirion Sensitive Data Platform discovers sensitive data during a scan of your environment.
For example, a playbook action (after a scan completes) may be to notify specific data found by a scan to a specific department for review and remediation.
What is a Discovery Scan?
- The purpose of a Discovery scan is to discover the data that is assigned to the scan, but not manipulate the data discovered by the scan.
- Discovery scans are performed by one or more agents. Multiple Agents are called Discovery Teams. See Spirion Sensitive Data Platform: Architecture, Security, and Data Flow.
- A Discovery scan is similar to a Sensitive Data scan except that it does not require a Playbook.
- Discovery scans capture metadata only
- Note: Do not confuse Discovery scans with Distributed scans. See What is a Distributed Scan?
Differential Scanning Feature
- New in version 13.4 is a feature called Differential Scanning.
- Differential scanning is enabled by default.
- For detailed information about Differential Scanning see What is Differential Scanning and What is it Used for?
How to Create a New Sensitive Data Scan
Use the following steps to create a new sensitive data scan:
- From the left side navigation menu select Scans > All Scans.
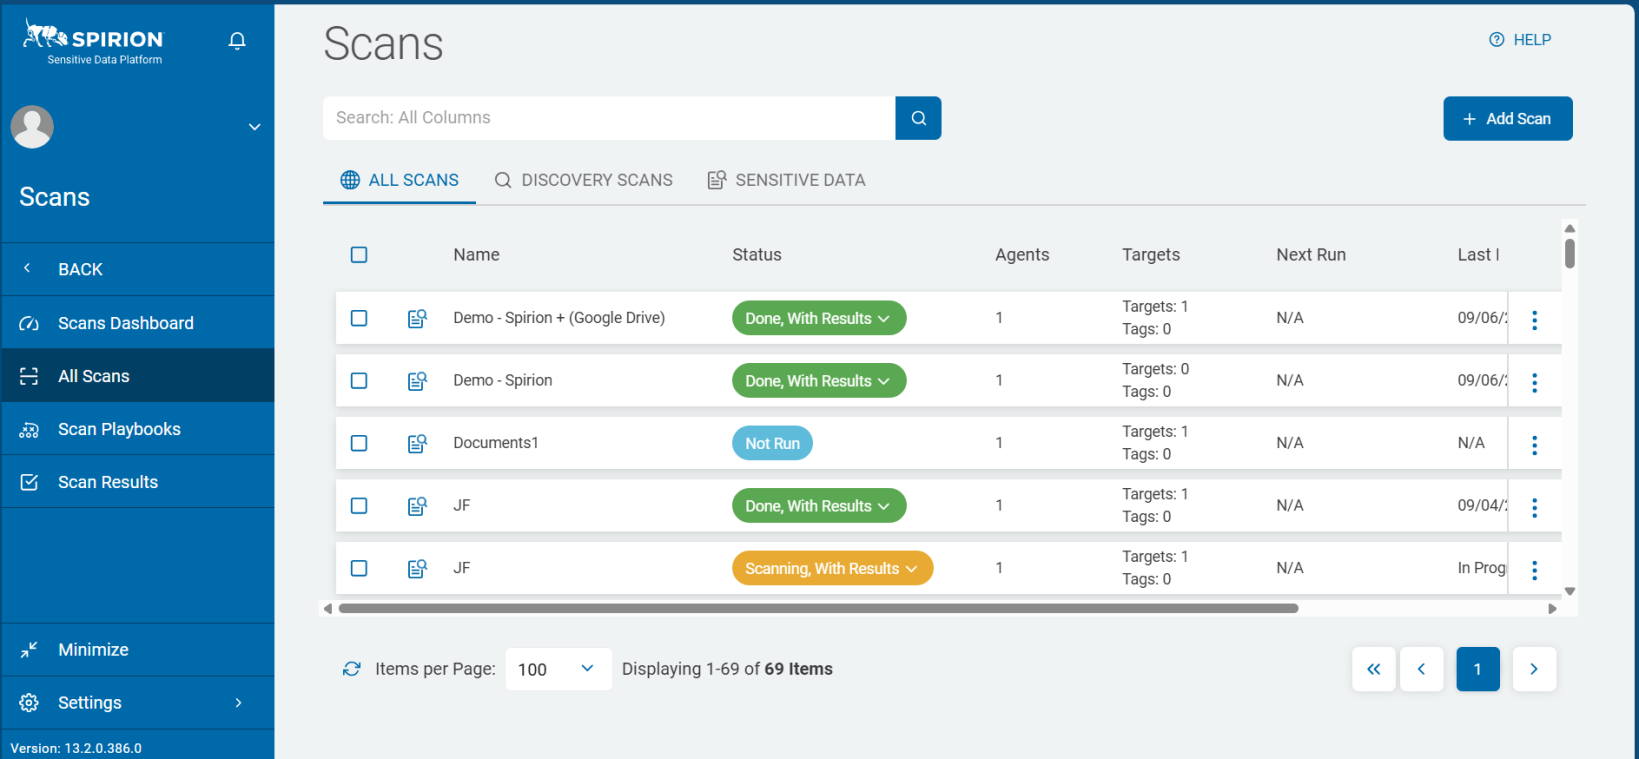
- The "Scans" page opens.
- In the top-right corner of the screen, click the + Add Scan button.
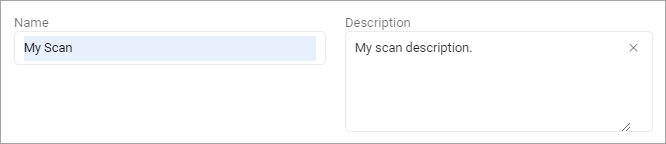
- The "Enter a name and description" page opens. Later, you may search for your scan by name, so enter a descriptive Name and Description. Your name might include the type of operating system being scanned - "MAC" for macOS, or Target being scanned such as "SharePoint." Also consider including terms indicating scan type ("local" or "remote") and/or Target type ("website" for website scans) and/or Location type ("Custom" for custom folder list scans). Some users append the date the scan was first created ("_25Nov")
- The page Select what type of scan to create opens.
- Click the tile Sensitive Data Scan.
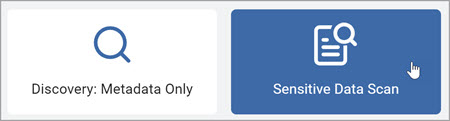
- Click the Next button.
- The Select a Playbook to apply to the scan page opens.
- Choose a Scan Playbook from the list.

- To search for a specific Playbook, type the name of the Playbook in the search box and then select the search icon.
- On the page Select the target type to scan, choose a Target type.
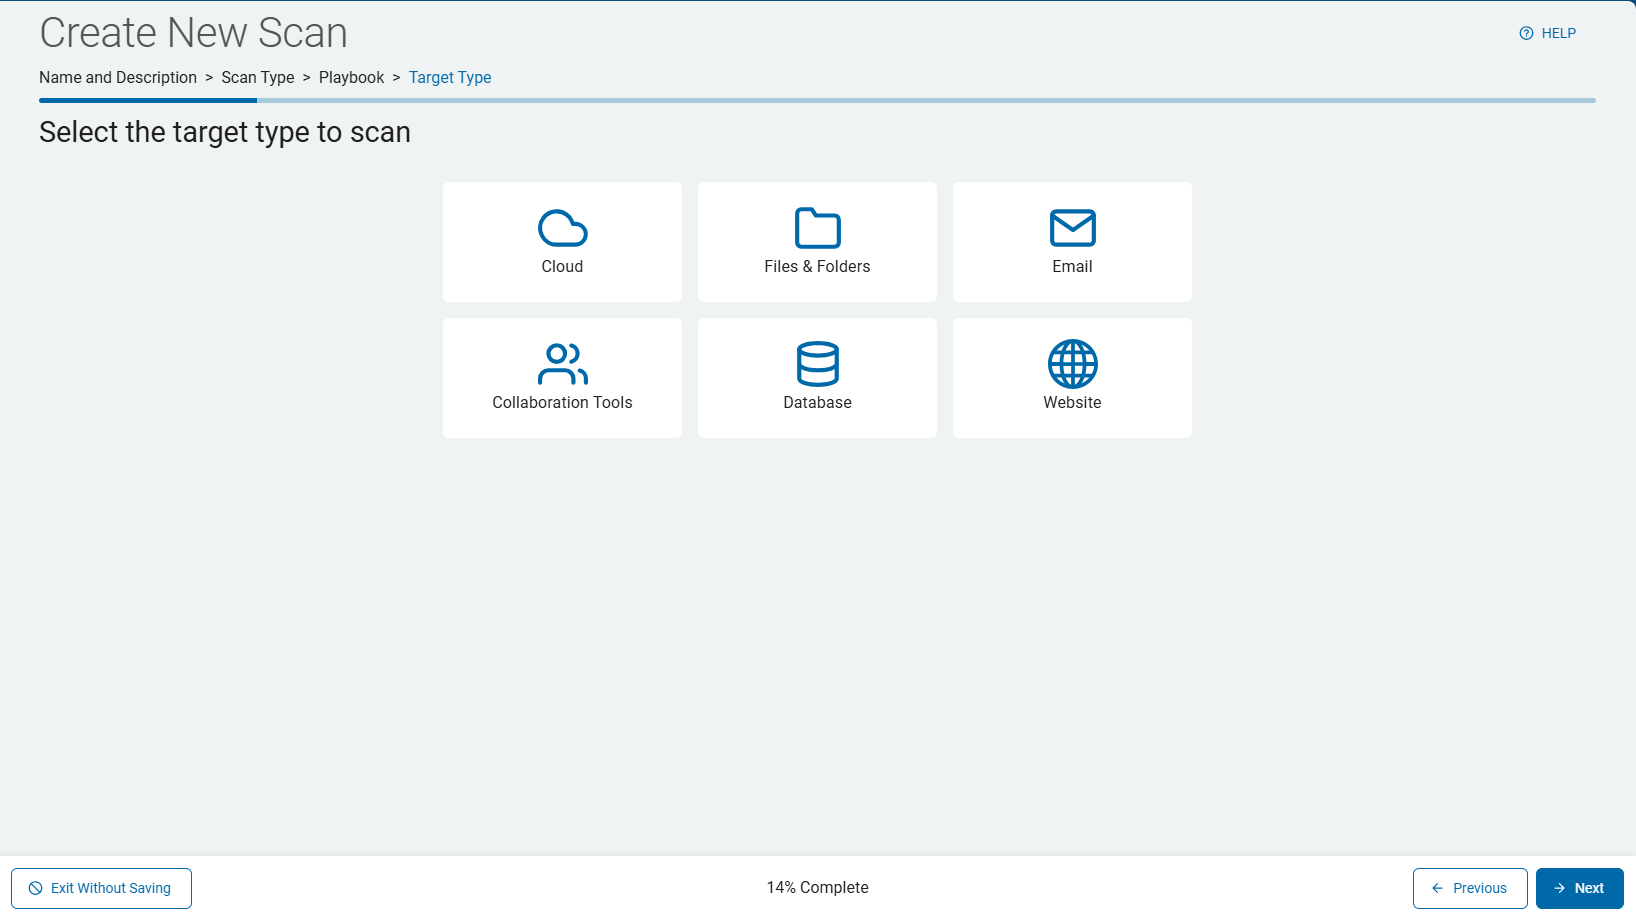
- Use the instructions in the following sections to configure each of the unique Target types.
Select the Target to Scan
In the following topics, note that the steps for configuring each Target type (Cloud, Files & Folders, Email, Collaboration Tools, Database, Website) are similar, but each Target type has unique settings not shared by other Target types.
Cloud
Use the following steps to configure a Cloud Target type (such as Amazon S3, Gdrive, Box, etc.).
- From the page "Select the target type to scan" click the Cloud tile.
- On the Select which cloud service to scan screen, select the desired cloud platform:
- Dropbox
- Google Drive
- Box
- OneDrive for Business
- Amazon S3

Files & Folders
Use the following steps to configure a Files & Folder Target type:
- From the screen "Select the target type to scan" click the Files & Folder tile.
Select the Target Type Page
This page only appears for "Files & Folders" Target types.
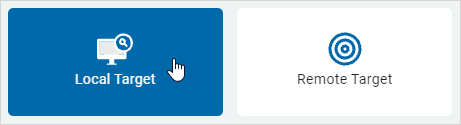
- The "Select a target type" page opens.
- Select "Local Target" to select a "File & Folder" Target on your local machine or "Remote Target" to select a Target located either on your network or on a cloud source.
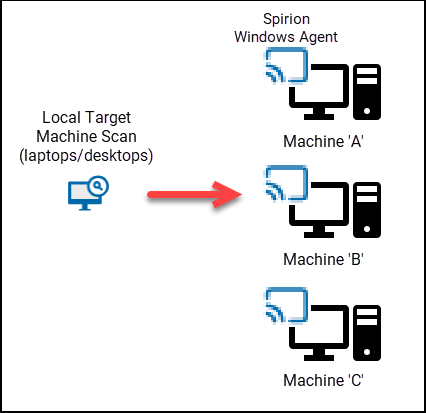
- NOTE: When scanning Local Targets only local Agents/Targets are listed as available Targets (Agents can act as Targets as the Agent scans the machine it is installed on).
- In scans of Local Targets, such as desktop/laptop machines, multiple Agents of the same type (Windows or Legacy/Mac/Linux) but different version (13.1.2, 13.5.0, 13.5.1, etc.) is supported.
- Note: Using multiple Agents with different versions is not supported in scans of Remote Targets.
- Distributed Scanning - In scans of multiple Local Agent Target machines such as desktops/laptops, with multiple Agents assigned, each Agent, acting as a Target, scans itself. See "What is a Distributed Scan?"
Use the following steps to configure an Email Target type (such as Exchange, Exchange Online, or Gmail):
- From the screen "Select the target type to scan" click the Email tile.

- Select an email service provider.

Collaboration Tools
Use the following steps to configure a Collaboration Target type (SharePoint, SharePoint Online, or Bitbucket):
- From the screen "Select the target type to scan" click the Collaboration Tools tile.

- Click the Next button in the bottom right corner to proceed, Previous button to return to the previous screen, or Exit Without Saving button to discard all changes.
- On the Select the collaboration tool to scan screen, select one of the following options:
- SharePoint | SharePoint Online
- Bitbucket
Database
Use the following steps to configure a Database Target type (SQL, Snowflake, Oracle, etc.):
Note: To establish the connection required to scan a database target, the relevant driver must be installed on the agent host system
- From the screen "Select the target type to scan" click the Database tile.
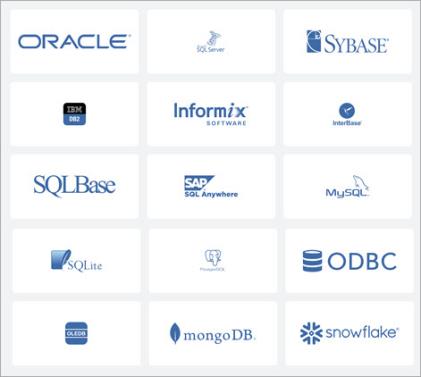
- On the "Select which database to search" screen, select the type of database you wish to scan.
- Oracle
- SQL Server
- Sybase
- IBM DB2
- Informix
- InterBase
- SQLBase
- SAP SQL Anywhere
- MySQL
- SQLite
- PostgreSQL
- ODBC
- OLEDB
- mongoDB
- Snowflake
Website
Use the following steps to configure a Website Target type:
- From the screen "Select the target type to scan" click the Website tile.

- Click the Next button in the bottom right corner to proceed, the Previous button to return to the previous screen, or Exit Without Saving button to discard all changes.
- Proceed to select the Agents to perform the scan.
Select the Agent to Perform the Scan Screen (All Target Types)
After selecting your Target type, select the Agents to perform the scan.
Note: You cannot employ Agents on machines with different operating systems in the same scan. Windows Agents (v13 and later) cannot be combined with Legacy Agents, MacOS, or Linux Agents (pre-v13) in the same scan. This means you cannot scan Windows and MacOS with the same scan. For the purpose of organization and auditing, we recommend Agents are organized by operating system using the Tag feature and Agent naming conventions such as "Win10-VM," "Win11-Azure," etc.
This step applies to all Target types:
- Select the service and the "Select the agent(s) to perform the scan" screen opens.
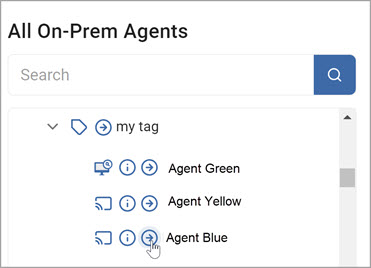
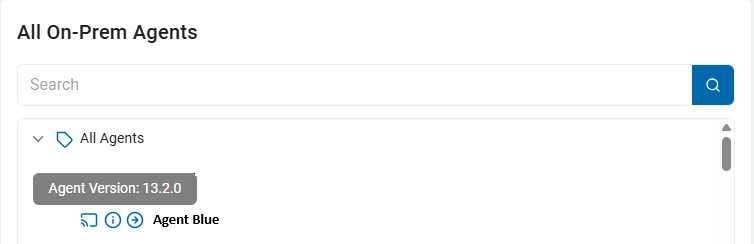
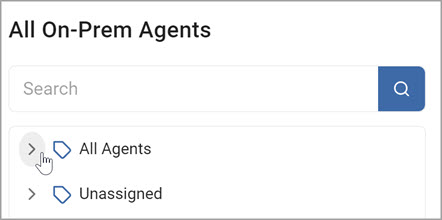
- From the All On-Prem Agents list, choose the agent(s) you want to use.
- To expand a section, click the chevron (>) icon.
Note: Learn more about the icons that appear on this page using the tooltips such as the tooltip next to "All On-Prem Agents."
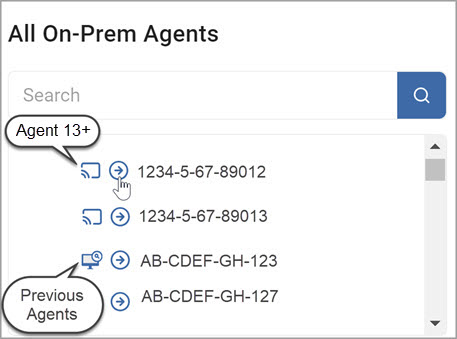
- To select an Agent, or a Tag which contains multiple Agents, click the right-pointing arrow next to the Agent or Tag name. This moves the Agent or Tag (collection of Agents) over to the Selected On-Prem Agents field.
- To determine the version of an Agent, hover your mouse pointer over the information icon - the 'i' inside a ciricle.
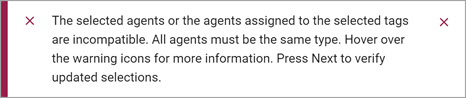
Note: Windows Agent versions 13 and greater cannot be combined with Legacy Agents (pre-version 13) to use in the same scan. - If you select more than one version from the list of available the agents, you receive an error message (below) and are prompted to reselect your agents.
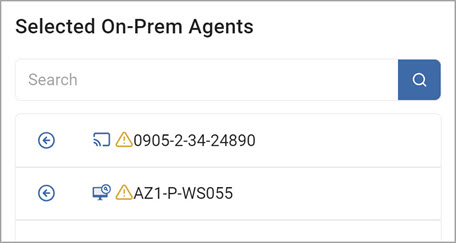
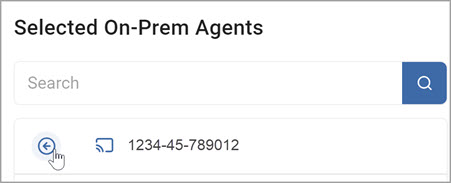
- To remove an agent from the Selected On-Prem Agents field, click the left-pointing arrow next to an Agent name in that field.
- If you select more than one version from the list of available the agents, you receive an error message (below) and are prompted to reselect your agents.
Select the Targets to Scan Screen
After selecting the Agents to perform the scan, select which Targets to scan for sensitive data. This step applies to all Target types:
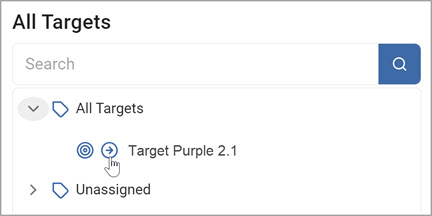
- On the "Select Targets(s) to Scan" page, select one or more Targets to scan.
- Expand the section and add a Target.
- To add a target, click the right-pointing arrow next to the Target name and move it to the "Selected Targets" field.
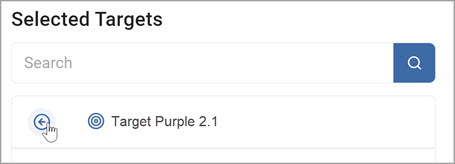
- To remove a target from the Selected Targets section, click the left-pointing arrow next to the target name and move it back to the All Targets field.
Note: To create a new Target, see How to View Target Details and Search for a Target.
- Click the Next button in the bottom right corner to proceed, the Previous button to return to the previous screen, or Exit Without Saving button to discard all changes.
Select SharePoint Options Screen (SharePoint Targets Only)
After selecting the Targets to scan, select your SharePoint options. This step applies only to SharePoint Target types:
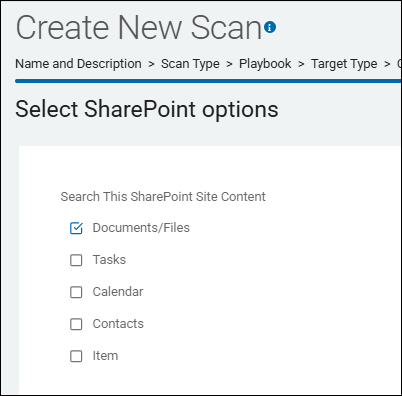
- From the "Select SharePoint options" screen, select the SharePoint site content to search:
- Documents/Files
- Tasks
- Calendar
- Contacts
- Item - A SharePoint item is a single data entry, like a row in a spreadsheet or a record in a database, within a SharePoint list, containing various pieces of information organized into columns (metadata) like text, numbers, or dates, allowing for collaborative data management.
- If applicable, click the blue Advanced Options button in the top right corner of the screen to add additional options. (Click the Basic Options button to return to the previous screen).
- The "Select advanced SharePoint options" screen appears. Select the options as you desire. Use the tooltips next to each option or see the descriptions in the topic Scan Options.
Select Which User Accounts You Would Like to Scan Screen (Cloud Targets Only)
After you select the agent(s) to perform the scan, select which user accounts to scan. This step applies to Cloud Target types only. For all other Target types, proceed to the topic "How to Select File Type Scan Options," below.
Procedure:
- The Select Which User Accounts You Would Like to Scan screen opens.
- Your cloud source brand is reflected on this screen. Note, this screen does not display for Amazon S3 cloud services.
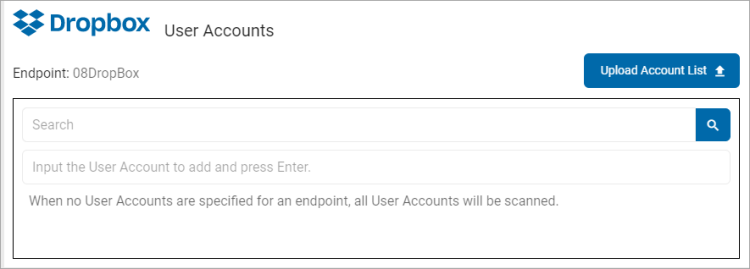
- Search: To search for a User Account, enter the name into the box and click the Search icon or click Enter.
- Input the User Account to add and press Enter: Enter the user account name and click Enter.
- Upload Account List: To upload a list of accounts from your local computer, click the upload icon and locate the file on your local computer.
- Click the Next button to proceed, the Previous button to return to the previous screen, or the Exit Without Saving buton to discard.
Select File Type Scan Options Screen
Next, you select the file type scan options. This step applies to all Target types.
Procedure:
- The Select file type scan options screen appears.
- Select the options as you desire. These options are described in the topic Scan Options.
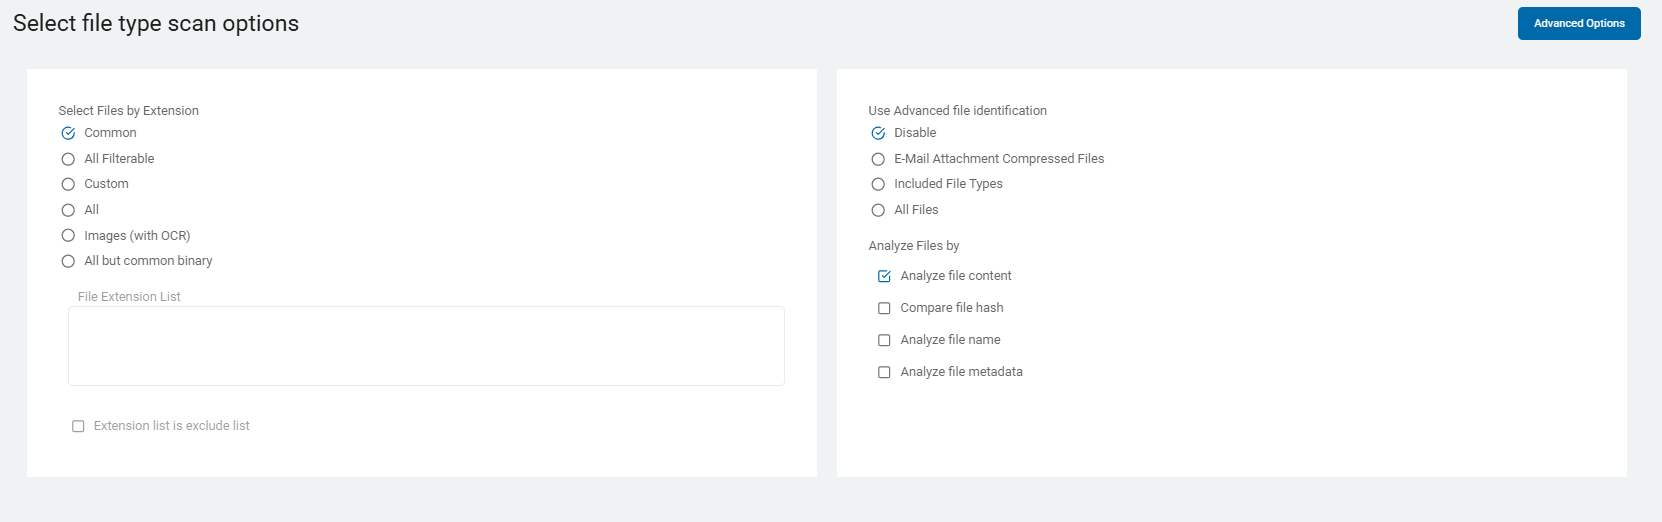
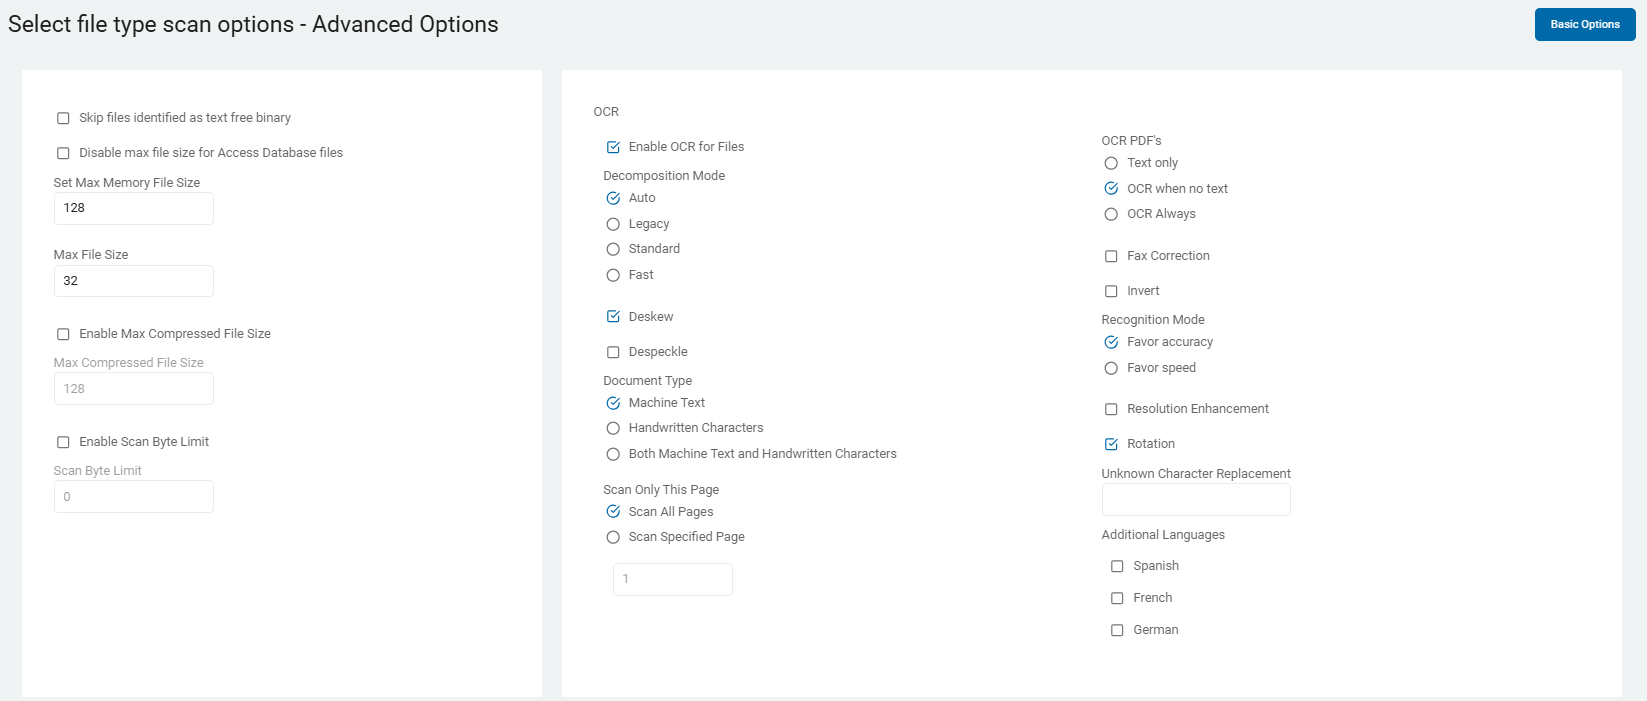
- If applicable, click the Advanced Options button in the top right corner of the screen to add additional options. (Click the Basic Options button to return to the previous screen).
- The Select file type scan options - Advanced Options screen appears. Select the options as you desire. Use the tooltips next to each option or see the descriptions in the topic Scan Options.
- Click the Next button in the lower right corner to proceed, the Previous button to return to the previous screen, or the Exit Without Saving button to discard.
Scan Email and Compressed Files Page
Next, the page "Scan email and compressed files?" opens. This step does not apply to all Target types.
- Select the options you desire. Use the embedded tooltips next to each option or use the descriptions in the topic Scan Options.
- Click the Next button in the bottom right corner to proceed, Previous button to return to the previous screen, or Exit Without Saving button to discard.
Select Exchange/Outlook options
Next, the page "Select Exchange/Outlook options" opens. This step does not apply to all Target types.
- Select the options you desire. Use the embedded tooltips next to each option or use the descriptions in the topic Scan Options.
- Click the Next button in the bottom right corner to proceed, Previous button to return to the previous screen, or Exit Without Saving button to discard.
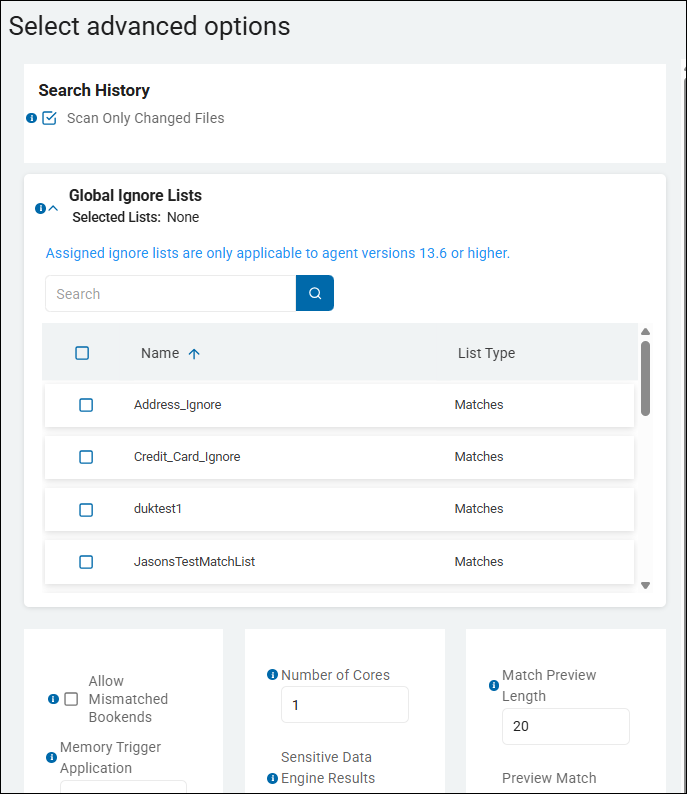
Select Advanced Options
The "Select advanced options" screen appears. This step applies to all Target types.
- The Select advanced options screen appears. Select the options you desire from the Advanced Options. Use the embedded tooltips next to each option or use the descriptions in the topic Scan Options.
- Scan Only Changed Files - This option controls the Differential Scanning feature. For more information, see What is Differential Scanning and What is it for?
- Global Ignore Lists - This option controls Global Ignore Lists.
- Note that any user who is creating or editing a Sensitive Data scan (using the "Create New Scan" wizard, for example) can view and select any of the available Global Ignore Lists shown on the "Select advanced options" page.
- To select a Global Ignore List for your scan to use (to ignore specific sensitive data matches or data match types), expand the Global Ignore List section and check the checkbox next to the appropriate Global Ignore List.
- Search for the Global Ignore List or scroll down to find it, if necessary
- Global Ignore Lists are available to be added to any scan. They do not apply to all scans, by default.
- For more information see How to Use Global Ignore Lists.
- Click the Next button in the bottom right corner to proceed, Previous button to return to the previous screen, or Exit Without Saving button to discard.
Select the Scan Schedule
The "Select scan schedule" screen appears. This step applies to all Target types.
- The next screen is Select the scan schedule.
- See Select Date and Time for how to set the date, time, and / or recurrence for a scan.
- Click Next to proceed, Previous to return to the previous screen, or Exit Without Saving
to discard.
Select who should receive notification of scan completion
The "Select who should receive notification of scan completion" screen appears. This step applies to all Target types.
- On the Who should receive notification of scan completion screen, select how to send email notifications.
- I'll Manually Check My Scans Results
- Send An Email Notification
- Select a user from the drop-down list and / or type an email address in the entry field and click Enter.
- To add additional email addresses, click the plus (+) icon and type the email addresses in the entry field.
- Click Next to proceed, Previous to return to the previous screen, or Exit Without Saving
to discard.
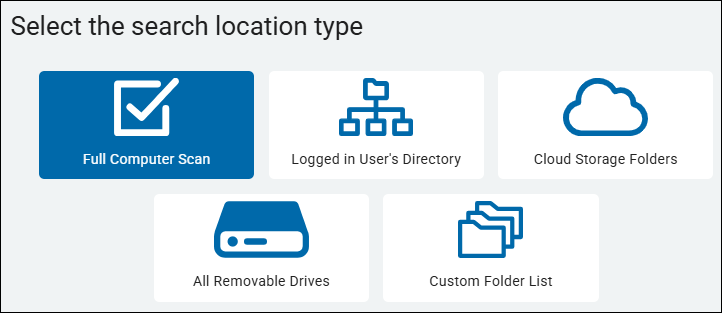
Select the Search Location Type (Files & Folders only)
The "Select the search location type" page appears only for Files & Folders Target types.
- Click Next to proceed, Previous to return to the previous screen, or Exit Without Saving
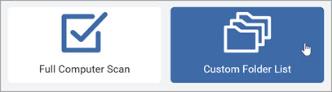
to discard. - On the Select the search location type screen, select a location type:
- Full Computer Scan - Scan all folders and files on the Target machine(s)
- Logged in User's Directory - Scan only the configured directory of the currently logged in user.
- Cloud Storage Folders - Spirion can search the following cloud folders (Dropbox, Amazon Cloud Drive, Microsoft OneDrive, Google Drive, Box Sync). Remote cloud search is also possible and can be configured using the console. To search cloud storage data, you must give permission to Spirion by authenticating each provider you would like to search.
- All Removable Drives - Spirion can also scan USB drives on connection for auto discovery, classification, and remediation actions.
- Custom Folder List - Scan only the selected folders and files on the Target machine(s)
- Select one:
- Create a new Full Computer
- Logged in User's Directory
- All Removable Drivers Scan
- For this example, select Full Computer Scan.
Custom Folder List
Procedure:
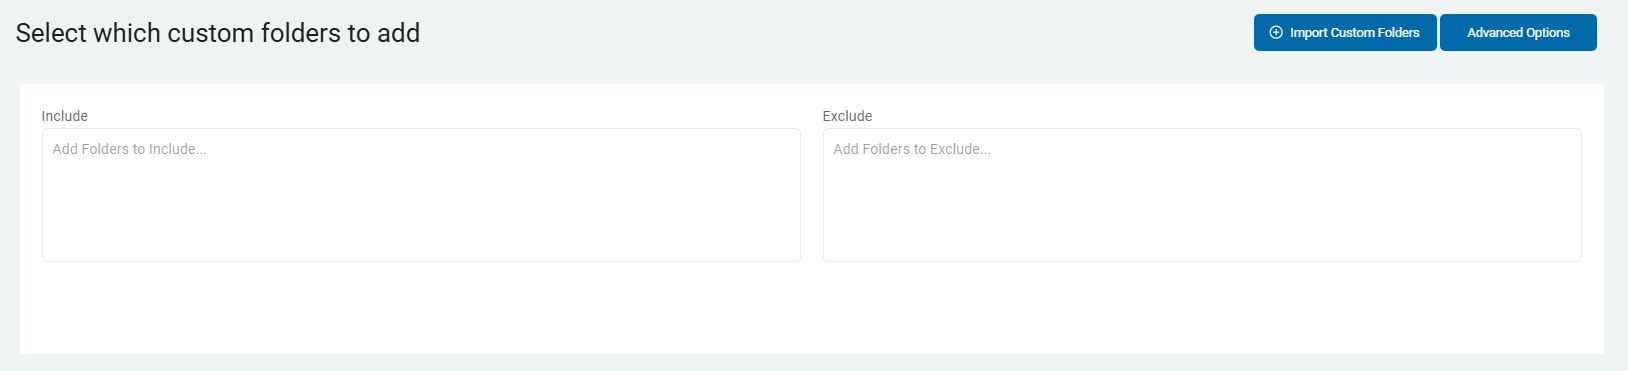
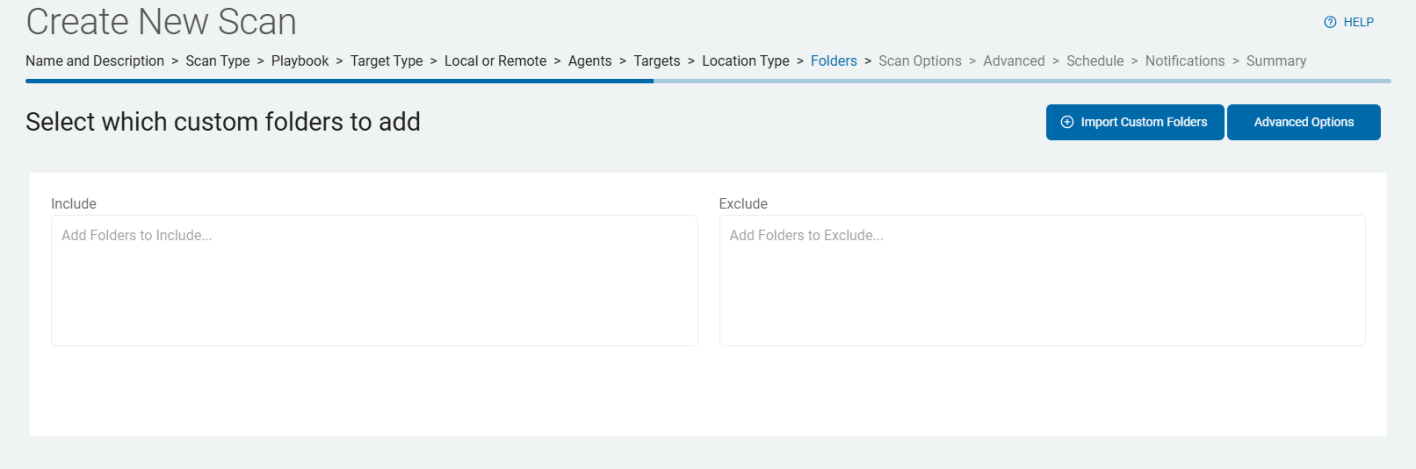
- On the Select which custom folders to add screen, enter the folders to include or exclude.
- Include: Type the folder(s) to include, one per line.
- Exclude: Type the folder(s) to exclude, one per line.
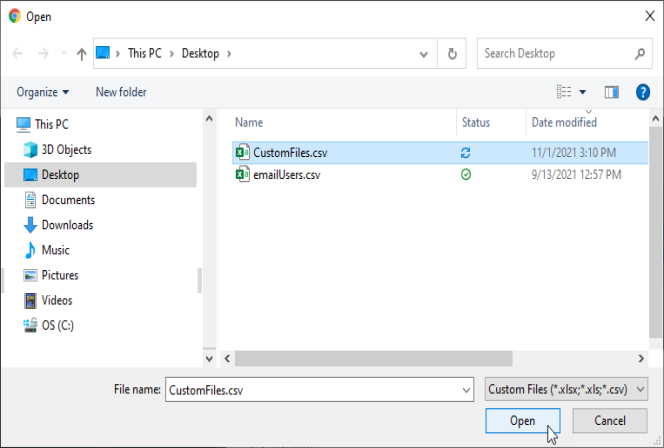
Note: You must include or exclude at least one folder. - Import Custom Folders: Upload a .csv file of custom folder types.
- Click Import Custom Folders. Navigate to the .csv folder to import from your computer.
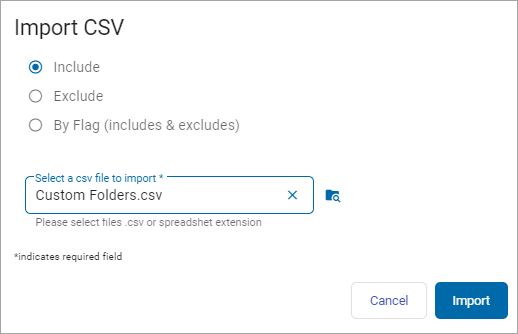
- In the Import CSV window, select:
- Include
- Exclude
- By Flag (includes & excludes)
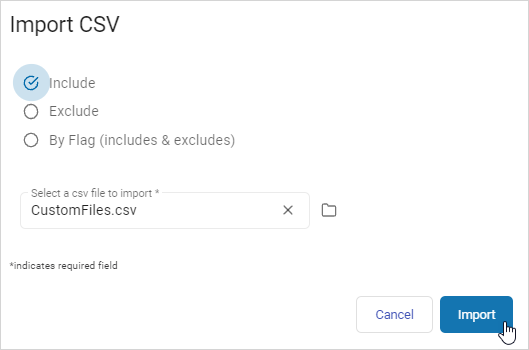
- Click Import to import the file or Cancel to discard.
Remote Target
Remote Targets are used for some sources, but not all.
Procedure:
- After selecting the Files & Folders tile, select the Remote Target target type.
- The next screen is the Select the agent(s) to perform the scan screen. Select from the All On-Prem Agents list.
- Click Finish & Save to add the new Scan, Previous to return to the previous screen, or Exit Without Saving to discard.
Custom Folder List
Procedure:
- Select the Custom Folder List location type. The Select which customer folders to add screen opens.
- To include folders, type the name(s) of the folders, one title per line, in the Include field.
- To exclude folders, type the name(s) of the folders, one title per line, in the Exclude field.
You must include or exclude at least one folder. - To import a custom folder list .csv file, click Import Customer Folders button in the upper, right of the screen. The Import CSV window opens.
- Select of the following options:
- Include
- Exclude
- By Flag (includes & excludes)
- The Select a csv file to import* entry field is required. Once your cursor is in this field, a folder on your computer opens.
- Enter or locate the folder to use. Click Open. Click the Import button to import the folder or Cancel to discard.
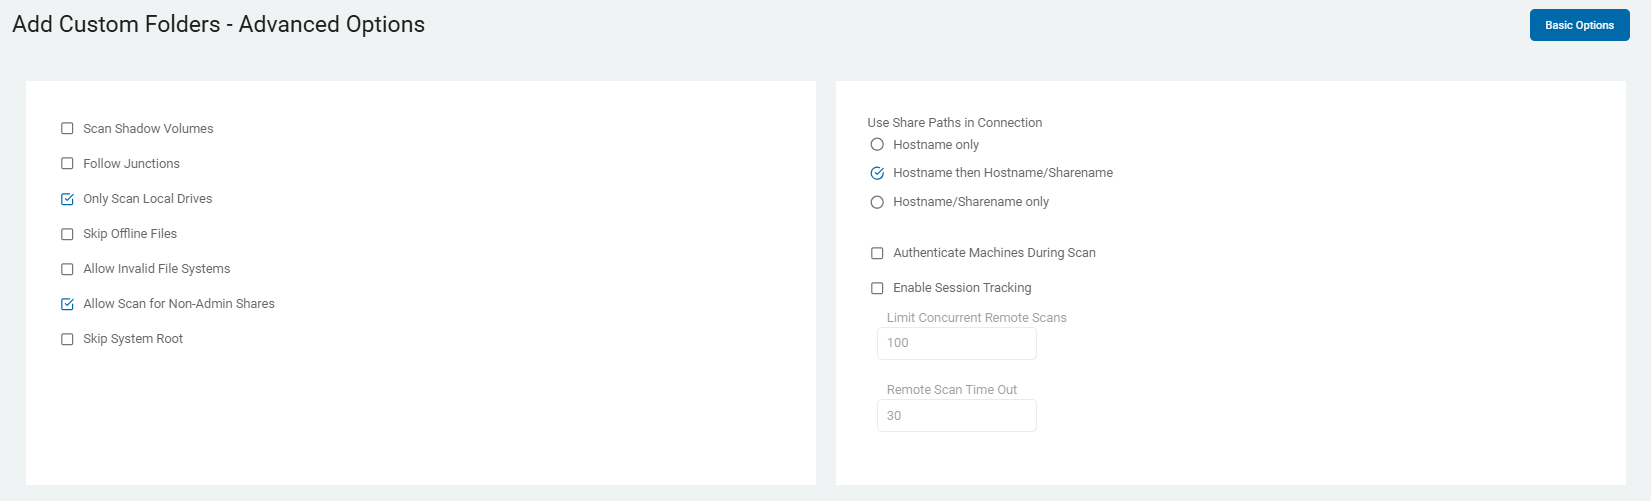
- You can also click the Advanced Options button on this screen.
- When selected the Add Custom Folders - Advanced Options screen opens.
- The button now says Basic Options.
- To return to the previous screen, click this button again.
- To continue, select Next.
Gmail and Exchange/Exchange Online E-mail Service Providers (Email Targets only)
This page appears for Email Targets only.
Procedure:
- On the Scan servers by account list? screen, upload or enter the accounts you want to include in your scan.
Microsoft Exchange On-premise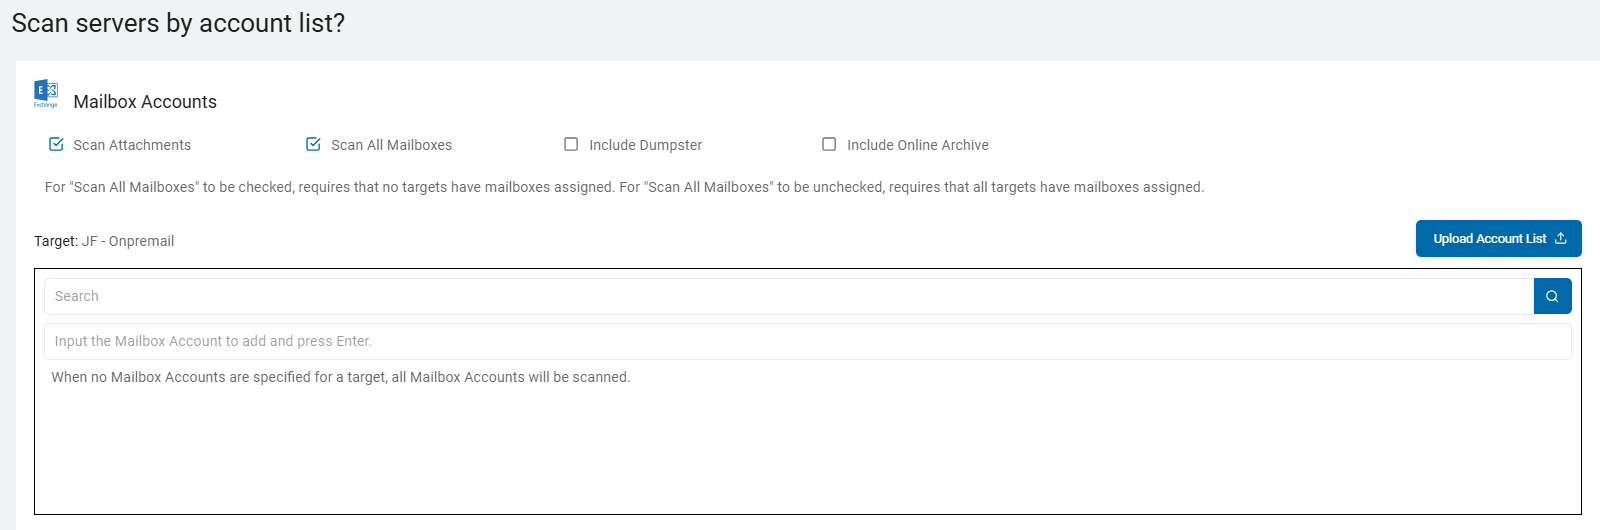
- You can select actions for the Mailbox Accounts:
- Scan Attachments - Supported by Gmail, Exchange Online and On-premise. Thi setting controls how the discovery engine handles files embedded within or attached to email messages.
- This setting is critical for modern data governance because sensitive data—such as spreadsheets containing PII or PDFs with financial records—often lives in attachments rather than the email body itself.
- When you are creating a new scan or configuring an Email Target (such as Exchange Online/M365 or Gmail):
- Mailbox Enumeration: The SDP engine first identifies the mailboxes and individual messages within the scope you have selected.
- Attachment Inspection: If "Scan Attachments" is enabled, the engine will not only scan the Subject line and Body text of each email but will also "look inside" every attached file.
- Reporting & Metadata: When a match is found in an attachment, the result in the SDP Console will identify the specific email (Sender, Recipient, Date) and clearly mark that the finding was located within an attachment rather than the message body.
- Scan All Mailboxes - Supported by Exchange On-premise. a global toggle on the "Select Accounts to Scan" screen that determines the breadth of your email discovery. Depending on whether you check or uncheck this box, the platform changes how it targets the email environment:
- When "Scan All Mailboxes" is ENABLED (checked):
- Automatic Enumeration: The platform will automatically discover every mailbox available via the authenticated Target (e.g., every mailbox in your Exchange Online tenant or Exchange On-Prem server).
- Dynamic Scope: If new mailboxes are added to your email system between scans, they are automatically included in the next run without you needing to update the scan configuration.
- Use Case: This is typically used for Global Compliance or Baseline Audits where you need to ensure no stone is left unturned across the entire organization.
- When "Scan All Mailboxes" is DISABLED (unchecked):
- Manual Targeting: The "Select Accounts" field becomes active, allowing you to input specific email addresses (e.g.,
ceo@company.com,hr-records@company.com). - Granular Control: The scan attempts to authenticate and search only the specific accounts you have listed.
- Use Case: This is ideal for Targeted Investigations, searching "High-Risk" users, or performing a pilot scan on a small subset of users.
- Manual Targeting: The "Select Accounts" field becomes active, allowing you to input specific email addresses (e.g.,
- Include Dumpster - Supported by Exchange On-premise. This setting controls whether the search engine inspects the hidden administrative folders of a mailbox. In the context of Microsoft Exchange, the "Dumpster" is technically known as the Recoverable Items folder.
- When "Include Dumpster" is ENABLED (checked):
- Extended Scoping: The scanner doesn't just look at the visible folders (Inbox, Sent Items, Drafts, etc.). it specifically targets the
Recoverable Itemssubtree. - Hidden Data Discovery: This allows the agent to find sensitive data that a user may have "deleted" (moved to the Trash) and then "emptied" from their Trash. These items stay in the "Dumpster" for a set retention period (typically 14 to 30 days by default in M365) before being permanently purged.
- Litigation Hold Awareness: If a mailbox is on Litigation Hold or Discovery Hold, the "Dumpster" can contain years of data that the user thinks is gone. Enabling this setting ensures that this "hidden" historical data is audited for sensitive information.
- Extended Scoping: The scanner doesn't just look at the visible folders (Inbox, Sent Items, Drafts, etc.). it specifically targets the
- The "Dumpster" consists of several sub-folders that Spirion inspects if this setting is on:
- Deletions: Items emptied from the "Deleted Items" folder.
- Versions: If Copy-on-Write is enabled, this stores the original copy of an item before it was modified.
- Purges: Items that have been "hard-deleted" but are still within the retention window.
- Key Considerations:
- Increased Scan Time: Enabling "Include Dumpster" can significantly increase the duration of a scan, especially for long-tenured employees or mailboxes with high volume, as the Recoverable Items folder can often be larger than the "live" mailbox itself.
- Compliance vs. Privacy: From a Governance perspective, including the Dumpster is often a requirement for PCI or HIPAA audits to ensure sensitive data isn't "hiding" in deleted folders. However, from a Privacy perspective, some organizations choose to exclude it to focus only on data currently in use.
- Permissions: For this setting to work, the Service Account or App Registration used by Spirion must have the appropriate Application Permissions (like
Mail.Read) that allow access to the full mailbox structure, including administrative folders.
- Include Online Archive - Supported by Exchange On-premise. This setting determines whether the discovery engine scans only the user's primary mailbox or also includes their associated In-Place Archive. In Microsoft 365, the Online Archive is a secondary mailbox provided to users to manage storage limits. It is separate from the "Live" primary mailbox and is often where older historical data is moved via retention policies.
- When you enable "Include Online Archive" on the "Select Accounts to Scan" screen:
- Dual-Mailbox Discovery: The SDP engine authenticates to the user's account and identifies both the Primary Mailbox and the Archive Mailbox (if one exists).
- Extended Search Scope: The scan iterates through the entire folder structure of the Online Archive (e.g., archived Sent Items, archived Inbox folders from previous years).
- Unified Results: Findings from the Online Archive are reported in the SDP Console alongside primary mailbox findings. The metadata will typically indicate the specific source path so you can distinguish between "Live" data and "Archived" data.
- Why This Setting is Critical
- Historical Risk: Users often move years of sensitive spreadsheets, PST imports, or old emails into their Online Archive to "clean up" their primary inbox. This archive can often contain a higher density of stale, sensitive data (PII, PCI, PHI) that has been forgotten.
- Compliance Coverage: For audits like GDPR or CCPA, you must be able to find and manage sensitive data across the entire user identity, not just their active inbox. Excluding the Online Archive can leave a massive "blind spot" in your data inventory.
- Litigation Hold: If a user is on Litigation Hold, their Online Archive can grow indefinitely. Searching it ensures that discoverable sensitive data is identified before it becomes a liability.
- Key Considerations
- Increased Scan Duration: Enabling this can effectively double (or more) the amount of data the Agent has to process per user. Online Archives often contain tens of gigabytes of historical data.
- Throttling & API Limits: Since SDP uses the Microsoft Graph API for these scans, scanning both primary and archive mailboxes simultaneously for a large number of users can trigger Microsoft 365 throttling.
- Tip: If you are scanning thousands of archives for the first time, consider a staged rollout or using Scan Configurations to manage the load.
- Licensing Awareness: This setting only functions if the user actually has an Online Archive enabled in M365 (e.g., users with E3 or E5 licenses). If a user does not have an archive, the setting is simply ignored for that specific account.
- Search History Performance: Once the initial "Deep Scan" of the archive is complete, SDP's Search History feature will ensure that subsequent scans only process new items moved into the archive, making recurring scans much faster.
- Summary
- Enabled: Scans both the active "Primary" mailbox and the "Online Archive" mailbox. Essential for complete data visibility and compliance.
- Disabled: Scans only the "Live" mailbox. Faster and uses fewer API resources, but misses historical sensitive data stored in the archive.
- If you select no Mailbox Accounts for a Target then all Exchange Mailbox Accounts are scanned.
- For Scan All Mailboxes to be checked, requires that no targets have mailboxes assigned.
- For Scan All Mailboxes to be unchecked, requires that all targets have mailboxes assigned.
- Click Next to proceed, Previous to return to the previous screen, or Exit Without Saving
to discard.
Select Accounts to Scan
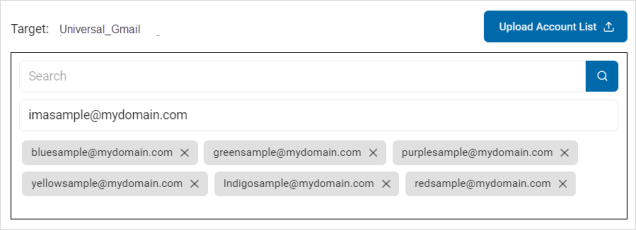
Regardless of your email provider, you must select which email user accounts to scan.
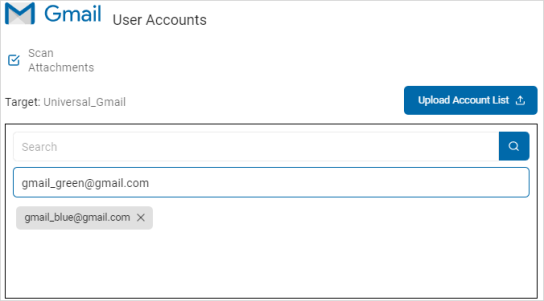
To add user accounts:
- Type the user account name in the entry field and click Enter.
- Search for the user account name.
- To upload multiple accounts, click Upload Account List.
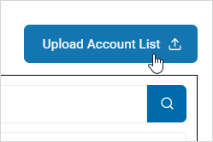
- Locate and select the .csv file with the accounts on your computer.
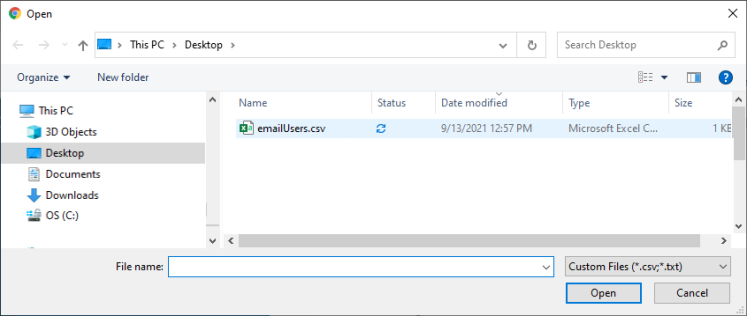
- The user accounts are displayed in the Target box.
- Click Next to proceed, Previous to return to the previous screen, or Exit Without Saving
to discard. - On the Select file type scan options screen, the Basic Options display.
- Additional are available on the Select advanced options screen.
SQL Advanced Options
See Create New Scan Wizard - Select SQL Advanced Options.
NoSQL Advanced Options
See Create New Scan Wizard - Select NoSQL Advanced Options.
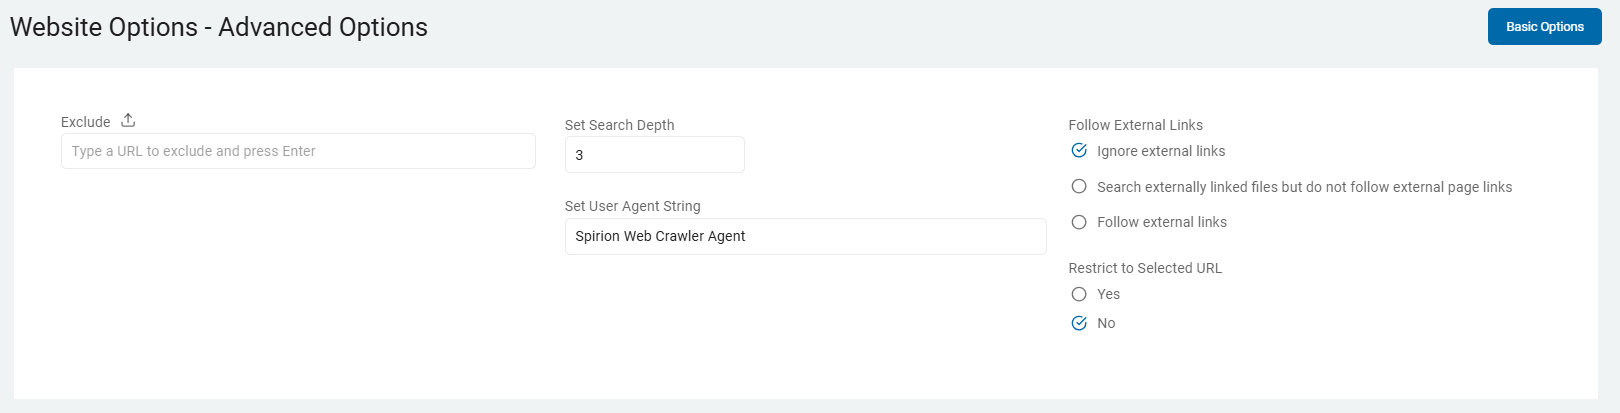
Search Linked Web Page Content
The "Select website options" page appears only when configuring Website Targets.
- Enter values on the Basic Options page as described here.
- Click the Advanced Options button if applicable.
- On the Website Options - Advanced Options screen, enter values, if applicable as described here.
- Click Next to proceed, Previous to return to the previous screen, or Exit Without Saving
to discard.
Summary
The "Summary" screen appears. This step applies to all Target types.
- On the Summary screen, select the chevron (>) to open and review your scan settings.
- Use the edit icon link to jump to a specific screen to edit a setting.
- Click the Finish & Save button to add the new scan, Previous button to return to the previous screen, or Exit Without Saving button to discard.