
How to Perform Location and Match Actions on Scan Results
Once your sensitive data scans are complete, you can open the locations (files) which contain sensitive data matches and perform various actions on the sensitive data matches contained within that location (file). These actions act to remediate or reduce the risk imposed by the sensitive data in your environment.
Overview
Actions such as redact, shred and actions such as classify, restricted access, script execution, quarantine, and ignore can be applied to the Locations or sensitive data matches discovered by your sensitive data scans.
- These actions act to remediate or reduce the risk imposed by the sensitive data in your environment.
- These actions are typically performed and automated using Scan Playbooks.
- Users can perform these actions using the "Location Details" pop-up window, available from the Scan Results page (Scans > Scan Results)
- Actions performed on Locations or Sensitive Data Matches within the Location Details window is considered User-Level Remediation (ULR)
- User-Level Remedation actions such as shred, redact, ignore, classify can also be performed by end users on sensitive data on their local laptops/workstations using the Spirion Agent GUI
- Logging - Actions triggered by ULR controls show up in the Audit log once completed, with an action history also available directly in the Scan Results table that can be viewed by clicking the 'i' icon in the corresponding column.
Location Details Pop-up Window
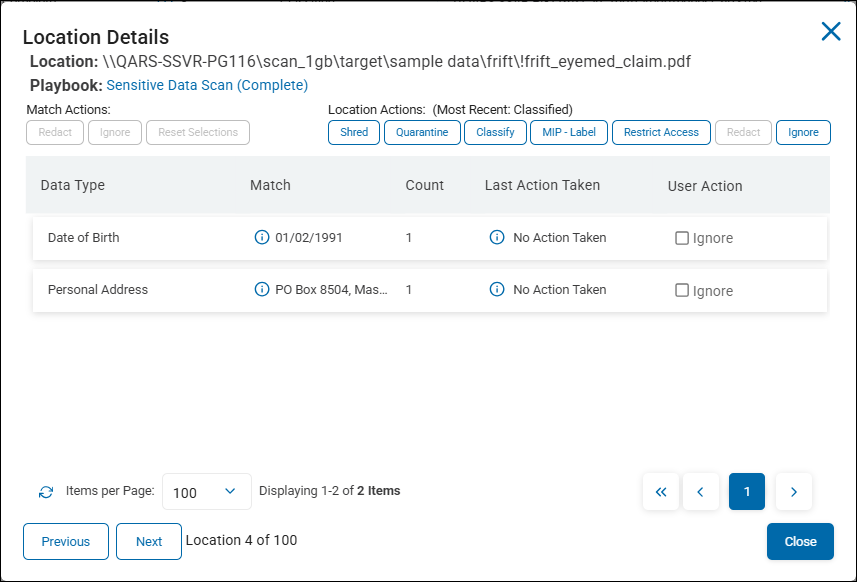
The "Location Details" pop-up window contains a table with the following columns:
- Data Type - The type of sensitive data match. Examples: Date of Birth, Personal Address, Social Security numbers, etc.
- Match - Specific Sensitive Data Matches are shown under the Match column.
- Count - The quantity of the sensitive data match is shown in the Count column
- Last Action Taken - The last action taken, if any, on the sensitive data matches shown.
- User Action - Available actions to perform on the sensitive data match for this location.
- Actions shown vary by location file type.
- For example, the location file in the screenshot below is a PDF.
- Redaction is not supported in PDF files, so the Redact buttons are greyed out.
User Level Remediation (ULR)
- Depending on the location and file type, unsupported actions are grayed out and cannot be selected.
- For example, you cannot redact sensitive data matches within a PDF, but you can ignore them
- Location: Actions are applied to the entire location (shred, quarantine, classify, restrict access, redact, ignore).
- Match: Actions are applied to specific matches (redact, ignore, etc.).
- Instant: Actions are resolved immediately (database-only classification, ignore).
- Agent Resolved: Actions are pushed to the agent to be completed (everything else).
- Actions triggered by ULR controls show up in the audit log once completed, with an action history also available directly in the Scan Results table that is viewed by clicking the 'i' icon in the corresponding column.
- ULR also introduces a centrally managed ignore list for agent-specific or global exclusions based on location or match result.
- The remaining ULR actions adhere to the values set globally in the console (quarantine/redact) or locally in an agent policy (shred).
Playbook Overrides
- Incomplete (manual action) playbook decisions are as follows:
- Scan results indicating User Action/Intervention Required resolve with a status of Overridden.
- Complete (automatic action) playbook decisions are as follows:
- Scan results indicating Complete resolve with a status of Complete, Overridden.
How to Perform Actions on Scanned Locations
Actions performed at the Location-level (file or email)
Use the following steps to perform remediation actions such as Shred, Quarantine, and Classify on the Locations (files or emails) discovered by your sensitive data scans:
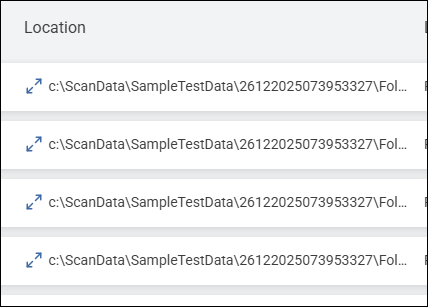
- Viewing results by location, select the bi-diagonal-arrow icon next to any location path.
- The Location Details window opens.
- Select any of the relevant actions next to "Location Actions" at the top right of the window:
- Shred, Quarantine, & Redact: If you select any of these actions a confirmation prompt displays indicating the action cannot be undone.
- Note: If you perform the Redact action at the Location level all applicable matches found in the file (file name and path is at the top of the window) are redacted; how to redact individual matches is explained in the following section.
- Classify & MIP Label: Displays pull-down menus with available classifications.
- Restrict Access: Displays a prompt for which built-in accounts should retain access.
- Ignore: Displays option to ignore the location for the agent that completed the scan (discovering Agent) or globally (all Agents).
- Shred, Quarantine, & Redact: If you select any of these actions a confirmation prompt displays indicating the action cannot be undone.
- Once applied in the console, the action is queued for execution.
Note: Agent resolved actions require the agent to be online to complete; instant actions are resolved immediately. See the description above for details. - When successful, actions move from Queued (received) to Processing (attempted) to Most Recent: <Action>.
- If the action fails, it is noted in the EPS logs.
How to Perform Actions on Scanned Sensitive Data Matches
Use the following steps to perform redact or ignore individual sensitive data matches such as Social Security numbers, Credit Card numbers, E-mail addresses, etc.:
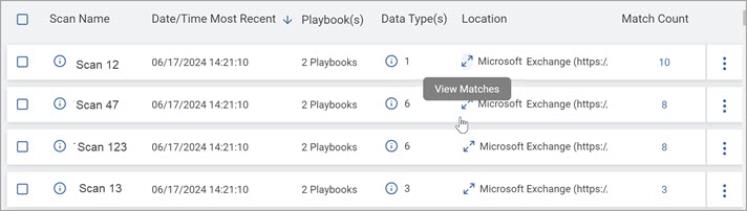
- On the Scan Results page, scroll horizontally to the right to view the Location column.
- To view scan results by Location, select the bi-directional diagonal-arrow icon next to any desired Location (file or email, including the full path).
- The Location Details window opens.
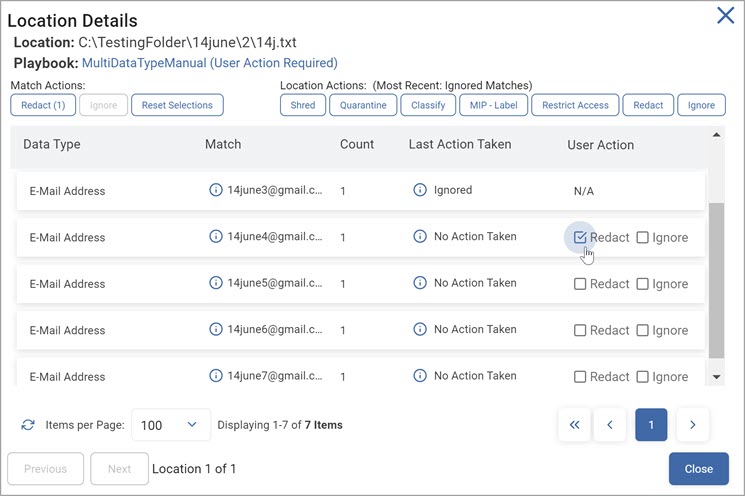
- Match Actions are shown in the top left corner of the window
- Location Actions are shown in the top middle of the window
- Select the desired remediation action from the User Action column, which populates with choices ("Redact" and/or "Ignore") dynamically, based on the Target location and Location file type.
- For example, if your selected Location is a ZIP file, you cannot perform any Match-level actions on the sensitive data matches shown. Redact and Ignore match action buttons appear greyed out to reflect this.
- If your selected Location is a PDF file you cannot redact sensitive data matches. The Redact button appears greyed out in the "Location Details" window for PDF files. Sensitive data matches, however, can be Ignored in PDF files.
- Once one or more selections are made in the User Action column for one or more matches, counts for each selected action populate in parenthesis within the buttons under "Match Actions" in the the top left corner of the window. For example, the buttons shown may be "Redact (4)," "Ignore (3)," and "Reset Selections."
- The action(s) trigger when the Match Action button is clicked:
- Ignore: Displays the option to ignore the selected match(es) for the agent that completed the scan (discovering Agent) or globally (all Agents).
- Redact: Displays a confirmation message to redact the selected match(es).
Once confirmed, the action(s) queue for execution:
- When successful, actions move from Queued (received) to Processing (attempted) to Most Recent: <Action>.
- Failed actions are reported in the Action History of Location Details for any given match.
- It is also noted in the EPS logs.
Note: Redacting sensitive data matches requires the Spirion Agent to be online to successfully complete; Ignore actions are resolved immediately. See the description for details.