
How to View the Playbooks that Act Upon Your Sensitive Data Locations
How to View Information about Sensitive Data Matches in Scan Results
To view detailed information of a scan result:
- From the blue navigation menu on the left side of the page, click Scans > Scan Results.
- Click the blue Find Scan Results buton.
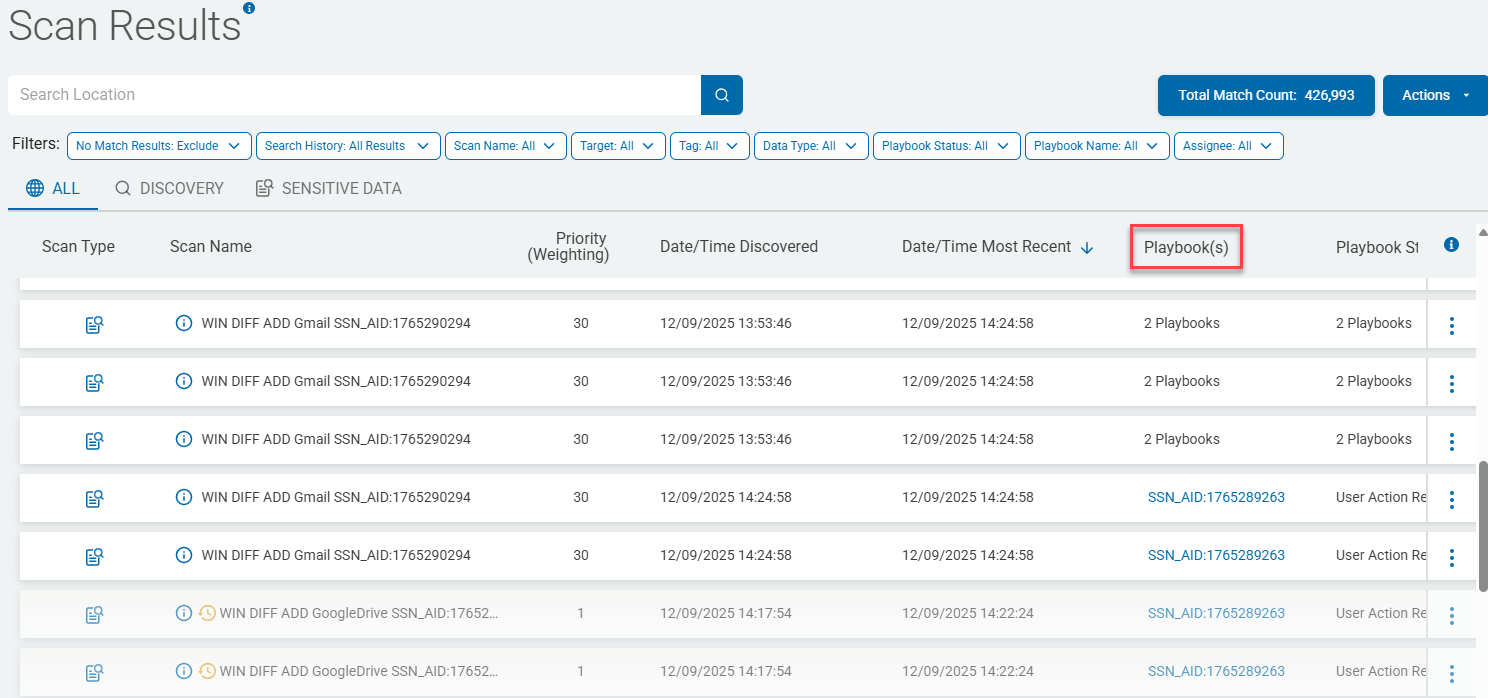
- The Scan Results table appears with the ALL tab selected, displaying the scan results of all scans that have been run in Spirion Sensitive Data Platform.
- Identify the scan, by name, you wish to investigate in the Scan Results table
- Under the Playbook(s) column click the playbook link. If multiple playbooks were executed during the scan, hover your mouse over the entry (2 Playbooks, for example) and select the playbook that has the sensitive data file information you are looking for.
For example, if you are looking for information about social security number data matches, your playbook name is mostly likely prepended with the characters "SSN" or something similar. - The Playbook Executor page opens with file locations (file name and path) at the top of the page. These files contain the sensitive data the scan was configured to search for.
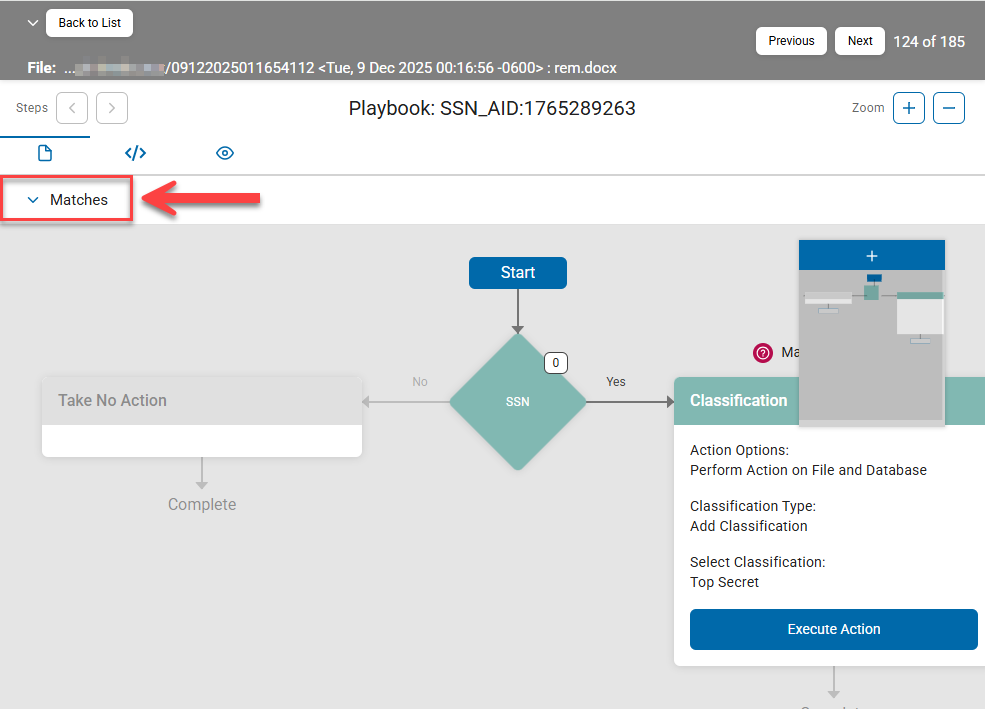
- The number of files discovered by the scan is shown at the right side of the header, to the right of the Next button.
- In the screenshot below, 185 files containing sensitive data were found, and the header is currently displaying file 124 out of a total of 185 files.
- Expand to view each file information section on the Playbook Executor page.
- Each section displays the playbook executor of the scan result until you click the down arrow at the far left, and then appears at the top of the section.
Playbook Executor
Page Heading: The playbook executor page heading is shown below:

Header Information
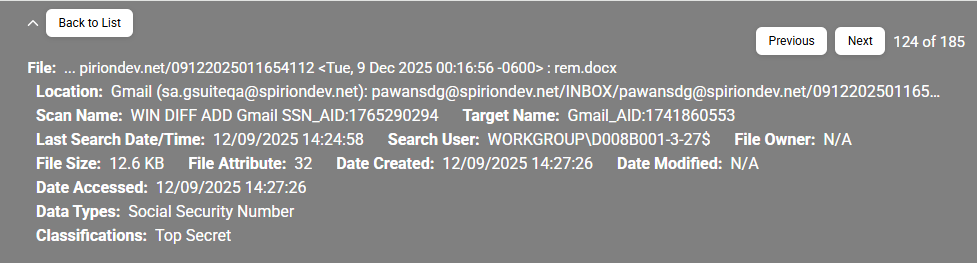
To expand the header, click the down arrow next to the "Back to List button" in the top left corner.
The header displays the following information:
- Previous button: Navigates to the previous result location. The button is disabled if you are on the first location.
- Next button: Navigates to the next result location. The button is disabled if you are on the last location.
- Back to List button: Navigates back to the Scan Results page.
- File: The path of the file where the scan results are found.
- Location: The path of the location where the scan results are found.
- Scan Name: The name of the scan performed on the scanned file.
- Last Search Date/Time: The date and time when the scan was last performed.
- Target Name: The Target of the scanned file.
- Date Created: The create date of the scanned file.
- Date Modified: The last modified date of the scanned file.
- Date Accessed: The access date of the scanned file.
- Classification: The classification applied to the scanned file.
How to View Information about Scanned Sensitive Data Matches
Information about sensitive data matches captured by a given scan is shown in the playbook executor segmented by icons, into the following three categories:
- Matches
- Meta Data
- Access Control List
Matches

Use the following steps to view detailed information about the data matches discovered by the scan playbook:
- In the Matches section, click the down arrow to expand the section and reveal information about the sensitive data matches discovered by your scan such as the data type (social security number, credit card number, date of birth, etc.), action taken on the data (classification, quarantine, etc.), total occurences, and a preview of the data match itself.
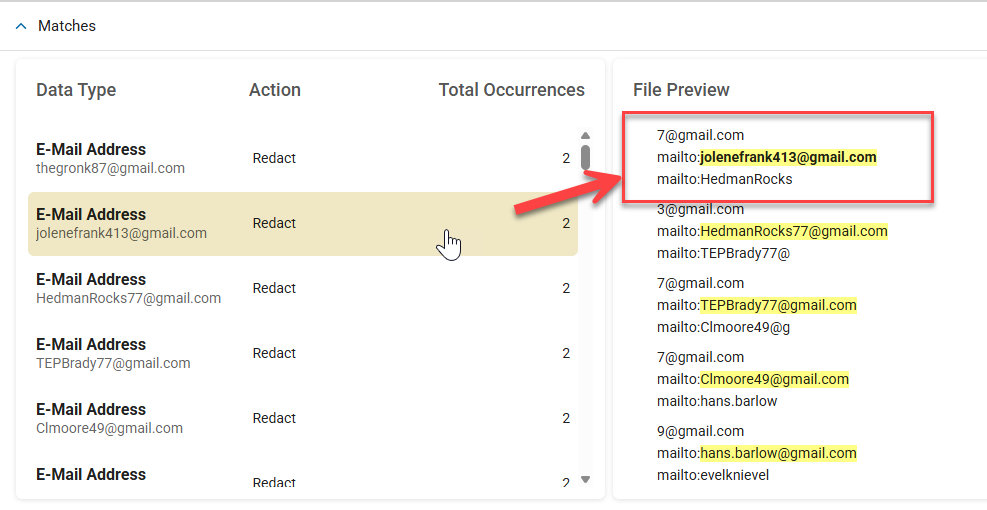
- Data Type: The data type that is found in the scan result such as Social Security number, credit card number, date of birth, etc.
- Action: The action that is performed on the data type. For example: Classification
- Total Occurrences: Total number of times a given data type, such as a was found in the file scanned.
- File Preview: Provides an unformatted list of the sensitive data matches from the file scanned. All sensitive data matches are highlighted in yellow. Select a specific data match under "Data Type" to see its corresponding entry, in bold, under "File Preview"
Meta Data
Meta data is shown under the middle, bracketed, forward slash icon.
A sample of the Meta Data view is shown below.
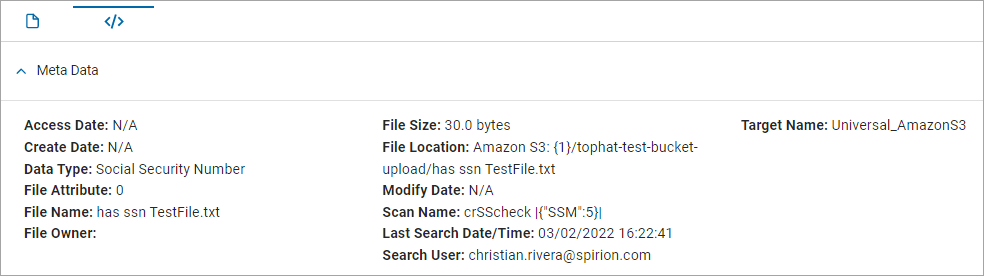 In the Meta Data section, click the down arrow to expand the section and display the following information:
- Access Date: The date when the scanned file was last accessed, such as "11/14/2025 11:50:28"
- Create Date: The date the scanned file was created, such as "10/23/2025 17:03:36"
- Data Type: The data type searched for in the scanned file, such as Social Security number, credit card number, Regular Expression, etc.
- File Attribute: The attribute of the scanned file.
- File Owner: The owner of the scanned file, such as "WIN11POV\jay.smith"
- File Name: The name of the file being scanned, such as "800px_smith_passport.jpg"
- File Size: The size of the scanned file, such as "190 KB"
- File Location: The location of the scanned file, such as "C:\screenshots\jsmith\800px_smith_passport.jpg"
- Modify Date: The date and time the scanned file was last changed. Example: "10/22/2025 16:28:22"
- Scan Name: The name of the scan which scanned the file, such as "SharePoint_March_Scan"
- Last Search Date/Time: The date and time when the file was last scanned such as "12/17/2025/ 20:35:07"
- Search User: The user account that performed a search on the file, such as "WIN11POV\jay.smith"
- Target Name: The endpoint that contains the scanned file, such as a cloud location named "GDRIVE_2025_26"
Access Control List
The Access Control List section of the playbook executor displays the permissions attached to a file and the users and system processes to which those permissions have been granted.

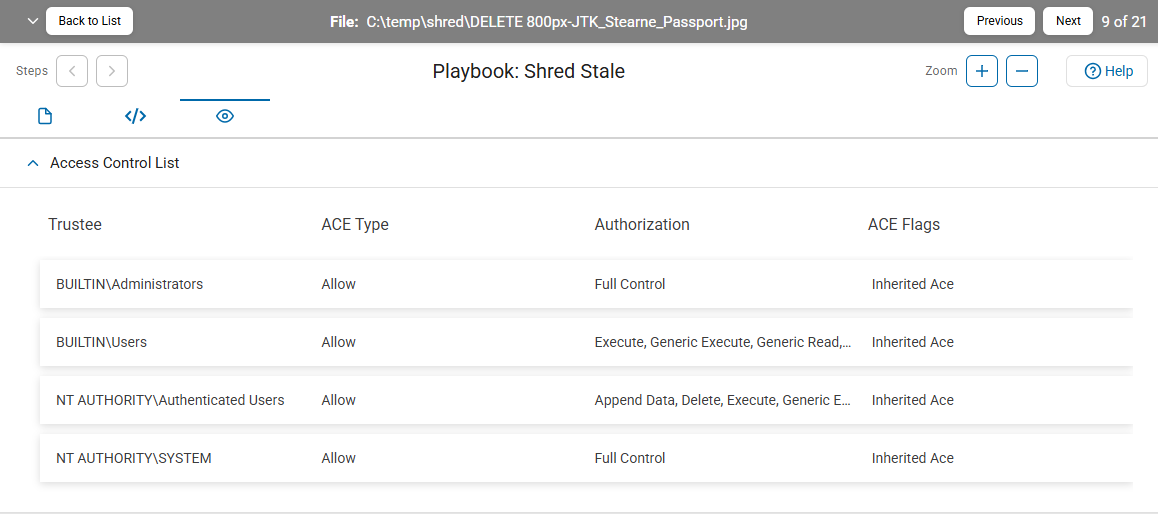
In the Access Control List section, click the down arrow to expand the section and display the following information:
- Trustee: The individual user or group to which the access rights in the table columns to the right (ACE Type, Authorization, and ACE Flags) apply.
- ACE Type: The ACE (Access Control Entry) type can be one of the following options:
- Allow: The authorizations (in the Authorization table column) specify rights that the trustee possesses.
- Deny: The authorizations (in the Authorization table column) specify rights that the trustee does not possess
- Authorization: The specific rights granted to the trustee such as the ability to read, write, or delete the file.
- ACE Flags: The inheritance type of the Access Control Entry which notes whether child containers or objects can inherit the access control entry from the primary object to which the Access Control List is attached. Each of the columns is resizable by clicking and dragging the column separator in the column header. For example: "Inherited Ace"
Note: Access Control List information is available for Windows and Linux clients only.