How To Search Exchange O365 E-mail with Modern Authentication
This guide walks you through how to search your O365 Exchange Tenant using Spirion Sensitive Data Platform.
Note: Exchange O365 email is also called Cloud Email.
Before You Start
- Set Up the Initial Authentication Account
- Start with a service account that has Global Admin privileges and Exchange Admin privileges.
- Use it to authenticate and perform your first search.
- After authentication, downgrade this account’s permission to Exchange Admin level.
- Important: This account must be Global Admin only for initial search then can be scaled back.
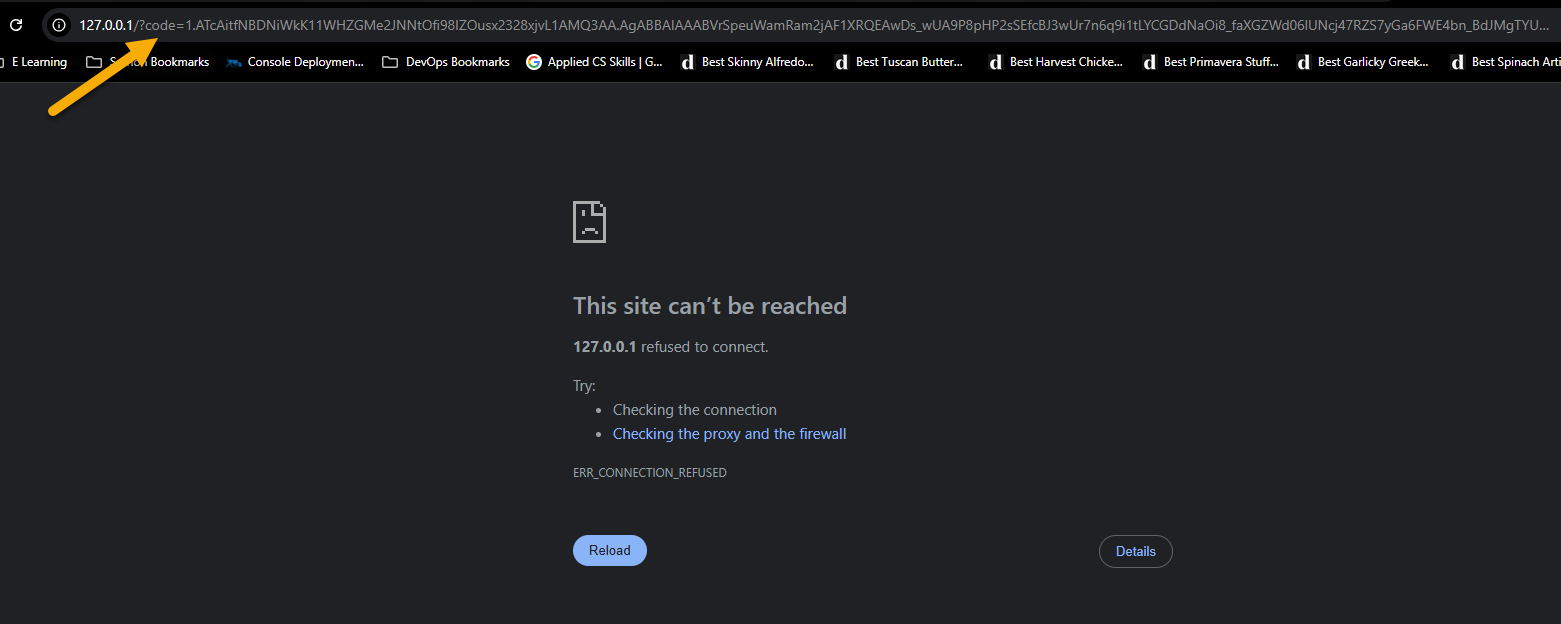
- When authenticating the admin account make sure to copy out the ENTIRE loopback URL into the authentication box. Do this even if the browser says the site cannot be reached.
- Assign the Search Account
- The account that runs the searches needs Exchange Admin rights.
- It no longer needs Global Admin after the first search.
- Perform Searches via the Spirion Console Only
- All Exchange Online searches in the cloud must be run from the Spirion console, not from the Agent GUI.
- Add Mailboxes to Search
- During setup if you want to search all mailboxes in your environment do not enter any specific mailbox to search.
- If you enter a specific user, you must then list every mailbox you want to include.
- Case Matters - Use lowercase
- Any manually entered mailbox addresses must be all lowercase.
- Mixed/upper-case entries result in an “Invalid file handle” error.
- Handle Microsoft Throttling
- Microsoft limits usage to 10,000 API calls every 10 minutes (an average of 1,000 requests per minute)
- Scope: The limit is applied per user (or group) per application ID. This means that requests made by the same application to different user mailboxes are counted separately, and requests to one user do not impact the limit for another user.
- Admin Accounts: Admin operations using a single admin account via an application are subject to these same limits. For example, using one admin account to access data from multiple mailboxes will count all those calls against that single admin account's limit.
- Concurrent Requests: There is also a limit on concurrent requests, which is typically four simultaneous requests at any given time for a single app accessing a tenant.
- Response: If an application exceeds the limit, the API will return an HTTP status code 429 ("Too Many Requests").
- If your tenant has 10,000+ mailboxes, split your searches into multiple batches to stay below the limit.
How to Create an Exchange Online Target
To search a cloud email account in Exchange, you create an Exchange Online Target.
Use the steps below to create the Target:
- Log in to Spirion Sensitive Data Platform.
- From the left side navigation menu select “Data Asset Inventory.”
- Select “Data Assets and Targets.”
- Click the “Add Target” button in the top right corner:
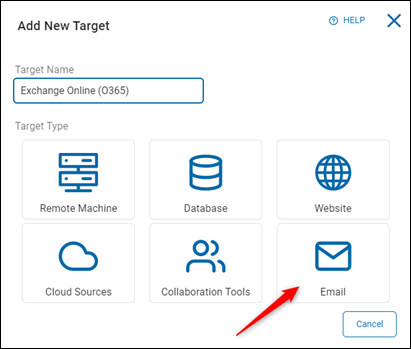
- Select the “Email” tile and give the Target a descriptive name that can be searched and filtered by later:
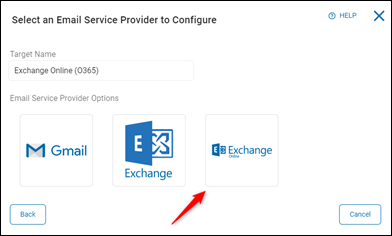
- Select the “Exchange Online” tile:
- In the “Account Name” field enter the Global Admin account you will use to authenticate.
- Select the checkbox labeled “Use On-Prem Agents” and click the blue Authenticate button.
- A new browser tab opens leading to a "Server Not Found Page" that uses a loopback URL (127.0.0.1/code=xxxx).
- Copy the entire URL and paste it into the Authentication code box. Do this even if the web site displays a message that the site cannot be reached.
- Copy the entire URL and paste it into the Authentication code box. Do this even if the web site displays a message that the site cannot be reached.
- Click the Save button.
- A message appears that the admin account is now authenticated.

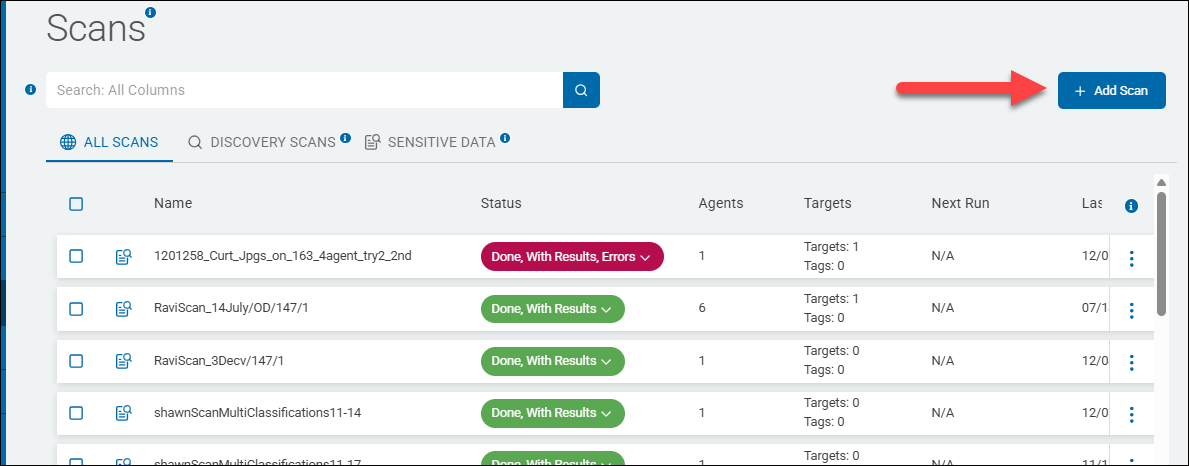
How to Create a Scan to Search Exchange Online
After the Admin account is authenticated, you create a scan to initialize the search of your Exchange Online Target.
Procedure:
- Login to Spirion Sensitive Data Platform.
- From the left side navigation menu select “Scans.”
- Click the blue Add Scan button in the top right corner:
- Enter a descriptive title for the scan (such as "Exchange Online") and then click “Next.”
- Select “Sensitive Data Scan”.
- Select an existing playbook, or create a new playbook.
- Select “Next.”
- Select the “Email” option.
- Select the “Exchange Online” option.
- Select the Agent Type you would like to facilitate the search of Exchange Online (On-prem or cloud), in addition to the agents for On-Prem or number of agents for cloud.
NOTE: If you are using cloud agents, you must craft a Service Principal Application with the Administration page within the O365 Tenant. The Client ID, Secret ID, and Tenant must all be specified. - Select “Next” to proceed to the next screen.
- Select the Exchange Online Target you created earlier and select the “Next” button to proceed to the next screen.
- Specify the user accounts you would like to search or upload a CSV containing such a list.
NOTE: When no User Accounts are specified for a target, all User Accounts will be scanned. - Continue to complete additional options in the screens following the account designation to tailor or adjust any of the behavior. The default options will suffice.
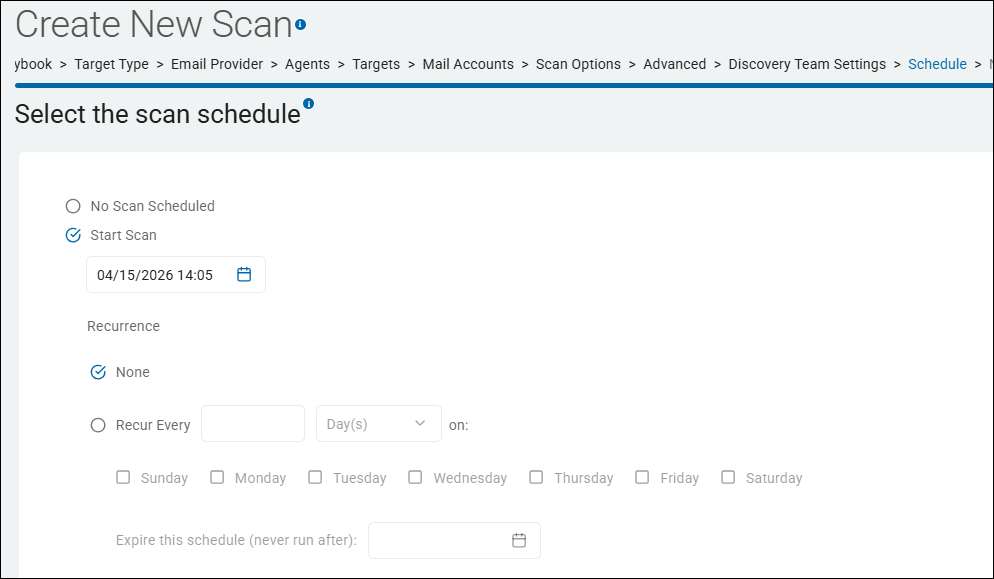
- Click the “Finish and Save” button to save and initiate the Exchange Online scan, per the schedule dictated on the “Schedule” page: