What is Differential Scanning and What is it Used for?
Why Use Differential Scanning?
Differential Scanning gives you the power to do the following:
- Drastically reduce reprocessing time by intelligently skipping unchanged files
- Ensure new policies or updated classifications trigger fresh analysis
- Detect subtle changes that modified timestamps can miss
- Rebuild trust in your scanning strategy with precision and transparency
What Platforms, Environments, and Sources are Supported?
Differential Scanning is engineered for scale and ready for multi-cloud—from Microsoft 365 to legacy network shares and employee laptops.
- Differential Scanning supports hybrid, on-premises, and endpoint environments
Sources which Support Differential Scanning
The following sources (targets) support the Differential Scanning feature:
- Amazon S3
- Box
- Dropbox
- Exchange
- Exchange Online
- Gmail
- Google Drive
- OneDrive
- Local files and folders
- Remote files and folders
- SharePoint On-Premise
- SharePoint Online
Sources which Do Not Support Differential Scanning
Note: If you are using an unsupported source (target), the option to select Differential Scanning ("Scan Only Changed Files" from the "Select advanced options" screen in the Create New Scan wizard or Edit Scan wizard) does NOT appear.
The following sources (targets) do NOT support the Differential Scanning feature:
- All databases
- BitBucket
- OLEDB
- ODBC
- Website
How Does it Work?
At the core of Spirion’s Differential Scanning is a contextual hashing engine that understands not just what was scanned, but how and why.
The platform calculates a unique hash for every scanned file using (but not limited to):
- Location (path or object reference)
- Playbook (scan logic and policy set)
- File Size
- Modified Date
- Detected Data Type
By embedding scan logic and data classification context directly into the hash, Spirion ensures a file is only rescanned when the content, workflow, or sensitivity classification (data type) truly changes.
Differential Scanning in the Spirion Sensitive Data Platform UI
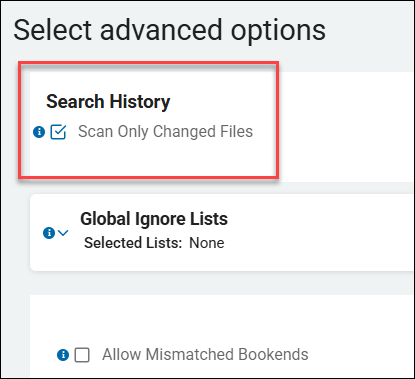
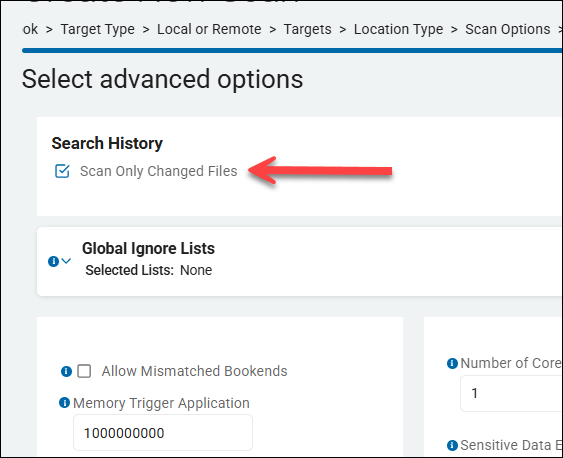
- When creating a new scan, approximately the 11th step in the step-by-step wizard is a Select advanced options page under Search History with the option Scan Only Changed Files
- This is the Differential Scanning setting. See the image below.
Differential Scanning has the following key characteristics:
- Enabled by default for new scans using Agents version 13.4 or later
- Scans only files that have changed since the last scan
- Scans all the files in your Target when the initial scan is performed
- When scans are complete, skipped (unscanned) files are marked with a yellow circular icon on the Scan Results screen. See the image "Scan Results with Skipped Locations" below. Spirion Sensitive Data Platform did not detect any changes to these locations since the last scan.
- Details of skipped locations: Open the skipped location from the "Scan Results" page (Scans > Scan Results) for additional details.
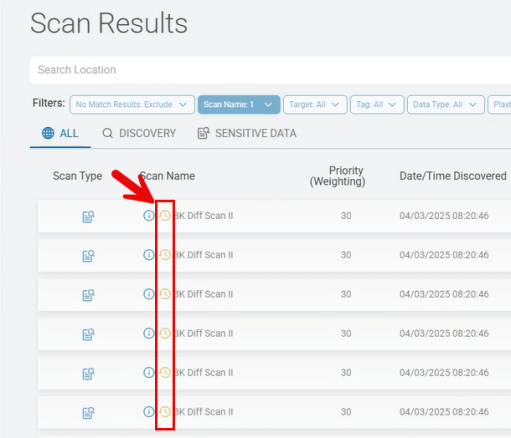
Scan Results with Skipped Locations
Skipped locations on the Scan Results page are noted with a yellow, circular icon.

This icon indicates Spirion Sensitive Data Platform did not detect any changes to these locations since the last scan and therefore skipped the location during the current scan.
Differential Scanning Feature
- New in version 13.4 is a feature called Differential Scanning.
- When creating a new scan, approximately the 11th step in the step-by-step wizard is the page "Select advanced options."
- In the Search History section is the option Scan Only Changed Files
- This is the Differential Scanning setting. See the image below.
- Differential Scanning
- Differential scanning is notable in the following ways:
- Enabled by default for new scans using Agents v13.4 or later
- Scans only files that have changed since the last scan
- Scans all the files in your Target when the initial scan is performed
- When scans are complete, skipped (unscanned) files are marked with an icon on the Scan Results screen. See the image "Scan Results with Skipped Locations" below.
- To see details of skipped locations open the skipped location from the "Scan Results" page for additional details. See the image "Skipped Location Details" below.

Email Drafts and Attachments
- With Differential Scanning enabled (it is enabled by default), when scanning either Exchange or Gmail locations, emails in draft form as well as attachments to such emails are always scanned, regardless of their state of change. The emails and attachments are never marked to be skipped.
Impact of Classification
- Important! Given that Differential Scanning is enabled (it is enabled by default), locations/files which are classified by Spirion Sensitive Data Platform during a scan are not marked for rescanning as the location/file has not been altered, and can therefore be skipped during the next scan, assuming no other changes are made.
Impact of Redaction
- Important! Given that Differential Scanning is enabled (it is enabled by default), and sensitive information in locations/files are redacted by Spirion Sensitive Data Platform, then the locations/files are still marked for rescanning regardless of any other changes being made. Marking redacted files to be skipped by subsequent scans would result in playbook rules being unenforced.
Impact of AnyFind Definition Change
- Important! If your Agent is updated and this includes a change to AnyFind logic (the AnyFind definition file changes) all existing Search History is invalidated.
How to View Scan Results with Skipped Locations
Skipped locations on the Scan Results page are noted with a yellow, circular icon.
This icon indicates Spirion Sensitive Data Platform did not detect any changes to these locations since the last scan and therefore skipped the location during the current scan.
- View locations (file, including full file path, or email) in the "Locations" column.

- View locations (file, including full file path, or email) in the "Locations" column.
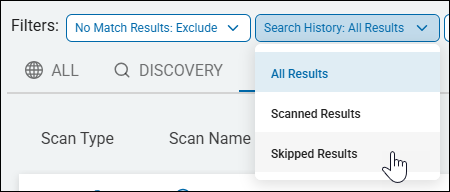
Use the following steps to filter your scan results for skipped locations:
- From the left side navigation menu navigate to the "Scan Results" page (Scans > Scan Results).
- Click the blue "Find Scan Results" button.
- Scan results, including scanned locations, sorted by the most recent (Date/Time Most Recent column) display in the table.
- Select the ALL, DISCOVERY, or SENSITIVE DATA tab to narrow the scans shown in the table, if desired. ALL is seleced by default.
- Next to "Filters" click the Search History drop-down menu and select Skipped Results.
- Only scanned locations that have been skipped display in the table. These scan locations display the icon circular yellow clock icon.
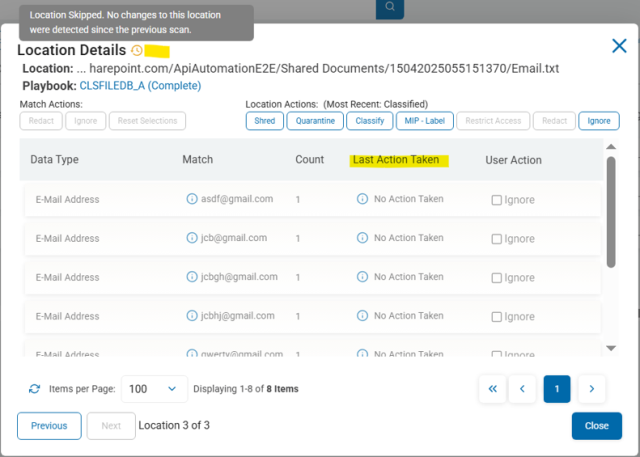
How to View Skipped Location Details
To view details about skipped locations (for example, the SharePoint location "https://acme.sharepoint.com/SecretsFolder/emailPasswords.txt"), use the following steps:
- Identify a scan location under the "Locations" column to investigate.
- For the identified scan location mouse over the more options (3 vertical dot) menu at far right and select "View Matches."
- The "Location Details" window opens and displays a table of information.
- Note the "Location Details" page in the screenshot below and the details under the column "Last Action Taken"
- The "Last Action Taken" column displays "No Action Taken" for each sensitive data match in the "Match" column.
- Mouse over the yellow circular clock icon to view the message "Location Skipped. No changes to this location were detected since the previous scan."
- For information about Ignoring sensitive data matches shown in this window see How to Ignore Sensitive Data Matches and Locations.