How do I set a Weekly Scan Schedule?
While you can schedule a scan daily, weekly, or monthly, this article gives instructions on scheduling a scan to repeat weekly. In Spirion Sensitive Data Platform you configure the recurrence within the Scan Wizard (which defines the Scan settings and options).
Step-by-Step: Setting a Weekly Schedule
- Open the Scan Definition:
- From the left-side navigation menu navigate to Scans > All scans.
- Select "Manage Scan" from the drop-down menu for the scan you want to automate or click Create Scan to start a new one.
- Locate the Scheduling section:
- Within the scan configuration wizard or editor, navigate to the Select the scan schedule tab (usually found toward the end of the configuration process, roughly the 13th page in the Scan wizard).
- Enable the Schedule:
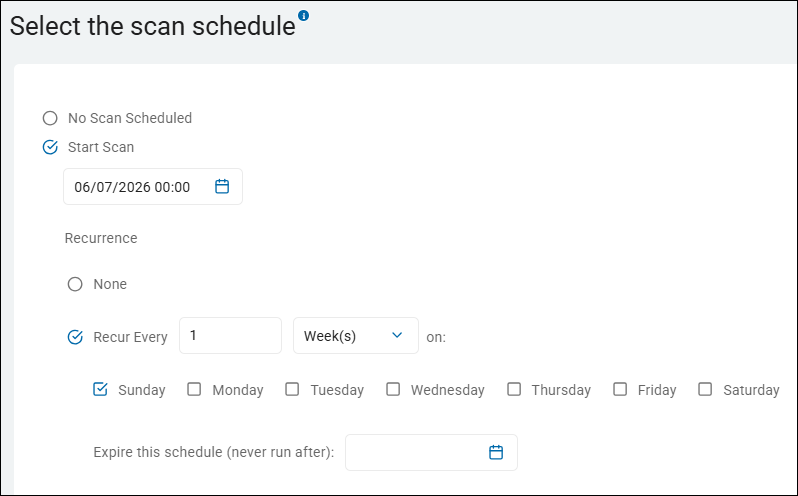
- Select the Start Scan radio button and enter the date/time to run the first instance of this scan.
- Select Weekly Recurrence:
- Under Recurrence, select the "Recur Every" radio button.
- To run the scan every week, enter a value of "1" in the next field and select Week(s) in the next drop-down menu. To run every other week, enter a value of "2." To run every 3 weeks, enter a value of "3," etc. To run your scan on a daily or monthly basis instead, select "Day(s)" or "Month(s)" from the drop-down menu.
- Select Specific Days: Check the box for the specific day(s) of the week you want the scan to run (for example, every Sunday).
- Start Time: The the time under "Start Scan" is the time the scan will run on the days set in the schedule. It is best practice to schedule these during maintenance windows or low-traffic hours.
- Save Changes:
- Click Save or Finish. The scan is now scheduled and runs automatically every week on the selected day(s).
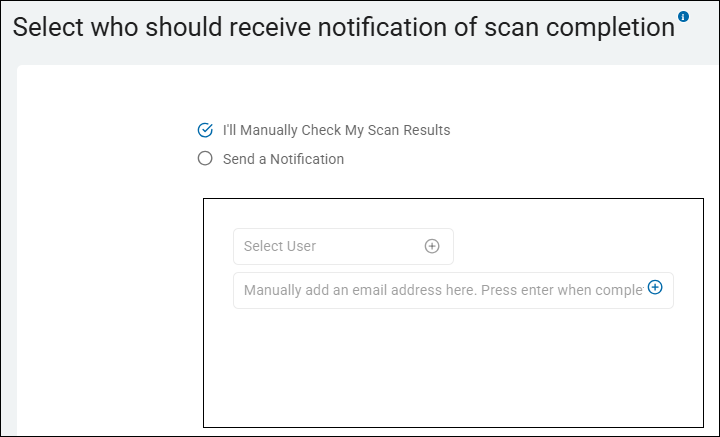
- To notify someone of the scan's completion, on the following screen select the "Send a Notification" radio button and select the appropriate user.
Operational Best Practices for Weekly Scans
- Stagger Your Schedules: If you have multiple weekly scans, avoid scheduling them all to start at the exact same time. Staggering your scans (for example, one at 12:00 AM, another at 2:00 AM) helps manage the load on your agents and the target systems.
- Monitor the First Run: After setting the schedule, check the Scan Results (Scans > Scan Results from the left side navigation menu) after the first scheduled interval to ensure the scan completed successfully and didn't encounter issues (like taking too long to finish before the next business day).
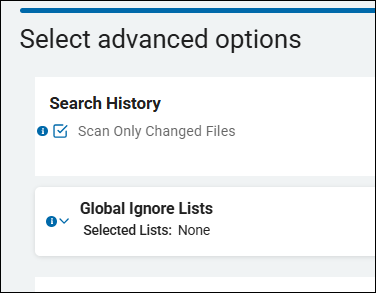
- Leverage Search History: Ensure "Scan Only Changed Files" under Search History is enabled (checked) for the scan. This enables the weekly run to be "incremental," meaning it spends time searching only new or modified files rather than re-scanning everything from scratch every week.